Today, many people are interested in the possibility of independent houses. Why...
|
|
Soft tiles are modern material for the device of the roof, its main ... |
It is difficult to overestimate the significance of the deep pump in the water supply system of suburban ... |
DIY Cesson-Pogreb.
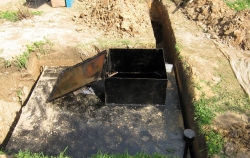
Almost every owner is concerned about the issue of preserving his crop, which is usually sent after collecting to the cellar. Previously, ordinary pits were used for this, which were covered with brick. But today there is another solution that is more convenient and profitable. This is a cellar cesson, which always maintains an optimum temperature that is suitable for both fresh products and for conservation, and there are also no prerequisites for flooding with water. Today we’ll talk about how to make a cesson for a cellar.
Content:
Characteristics and advantages of the caisson
Store fruits, vegetables and root crops, bottles of wine, as well as various pickles and canned foods prepared for the winter, it is customary to store in a warm shed or a separate storage, a cellar or a basement under the house. The most convenient and affordable place for these purposes is the basement under the house.
Previously, supplies of supplies were carried out in a pit made of concrete, brick or wood. But the fragility and leakage of these materials speak against them. Brick masonry and concrete spoil with time, and the tree is exposed to fungus, mold and rodents. In addition, in our climatic strip it is not easy to find a place with a low level of groundwater, so the cellar can pour water at any time, and the provision will not suffer.
However, now such buildings have found a worthy alternative, which allows you to abandon the cesson solution for the cellar. Kesson is a kind of dry camera that can form an air pocket in water -saturated soil or under water. Initially, this type of cellar was used only under water, but soon the sphere of its use expanded significantly.
Today, the cesson cellar has the form of a circle or parallelepiped, which has a hatch and neck. The thickness of the ceiling and walls can reach 16 millimeters, because they need to resist the pressure from the soil and groundwater. From the formation of dampness and an excess of moisture inside such structures, supply and exhaust ventilation is provided. So that the Cesson does not pop up under the pressure of soil water, there is a special survey.
Let's look at the advantages of the cesson for the cellar. The caissons for the cellar have proven themselves perfectly in any conditions, even in lowlands and on the site, which is characterized by high groundwater, as they are completely tight buildings. As you know, most of the cellars suffer from the fungus, but this does not threaten Kesson. You should also not be afraid that vegetables and products that you store in the caisson will purchase a specific smell.
The cesson -chamber can be mounted in any desired place, for example, in the house, garage, under the kitchen or shed, and sometimes at all in open areas. If you carry out all the necessary procedures for waterproofing the structure, you can protect the cellar from heavy rains, accidents on the water supply or large mass of groundwater. Also, Kesson is much more protected from the penetration of thieves, in comparison with classic cellars.
Classification of caissons
At the moment, there are several types of caissons for the cellar. Let's figure it out in more detail:
- Structures made of reinforced concrete. Reinforced concrete caissons are made of concrete rings. It is worth making a reservation that before the installation of a caisson for a cellar of concrete rings, it is necessary to prepare a good base. After placing all the rings, a strong cover is installed on top. If you plan to make a cellar of reinforced concrete, it is necessary to carry out high -quality waterproofing, which is carried out from the water side. The disadvantages of this option include too heavy weight, which significantly complicates the installation and conduct of waterproofing. In addition, reinforced concrete caissons are quite expensive. Therefore, from a financial point of view, it is better to choose another type. Owners of reinforced concrete caissons recommend choosing metal or plastic structures.
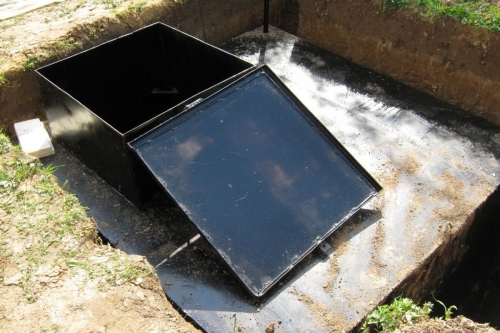
- Metal structures. Such cellars can be called the most popular. They are made of steel sheets about 20 millimeters thick, subsequently, a sealed cube with an inner staircase and a built -in hatch is welded from them, which is necessarily treated with a special anti -corrosion coating. Such a design helps to maintain the optimum temperature for storing vegetables and conservation inside the cellar. Perhaps groundwater will enter the pit, so it is necessary to make a special bypass valve.
- Plastic structures. The plastic cellar-cesson does not need anti-corrosion treatment. In addition, it has low weight, so when installing such a caisson you will not need additional equipment. You should also know that the plastic model is endowed with high tightness, so there is also no need to conduct waterproofing protection. A plastic caisson can work flawlessly for fifty or more years.
DIY cesson cellar
Recently, Kesson began to be widely used among summer residents and gardeners. Many owners of houses know that groundwater levels can often rise and spoil the stocks of fruits and vegetables. And the cesson cellar can provide provisions with reliable protection against water. With proper storage, vegetables and root crops will remain fresh all fall, spring and winter, and home conservation will be stored for many years.
Production of a metal caisson
When choosing a place for caisson, remember that it is recommended to build a cellar in the middle of the underground space so that its walls can constantly be blown with fresh air. Most often, the cellar is placed in the underground of the kitchen. In this case, it is better to make the entrance through the floor of the room, in advance, providing the passage with the steps. The hatch should be well closed with a lid, which should be placed at the same level with the floor. It is advisable to make a lid from the same boards as the floor.
Kesson must be installed even before the construction of the main premises. Carefully inspect the surface on which it is planned to install the cesson. If your site is located in a high and dry place, there should be no problems. But if the soil is swampy, you will have to work hard. Experts recommend choosing a welded metal caisson, as it is very reliable. But you can prefer a plastic model.
You can purchase a finished design in special stores or order a cellar by your own standards. But if you own certain skills and have suitable equipment, then you can try to make a cesson for a cellar with your own hands. The shape of the cellar can be round, square, hexagonal, elliptical, rectangular.
Remember that the seams of the caisson should boil well from the outside and inside, so that water could not penetrate inside. If you do not weld the seams poorly, corrosion destruction will come very quickly, and you will have to carry out expensive repairs. The floor and walls of the caisson are necessarily made of metal, but the upper part can be made of wood or concrete.
Arrangement of a pit and a water collector
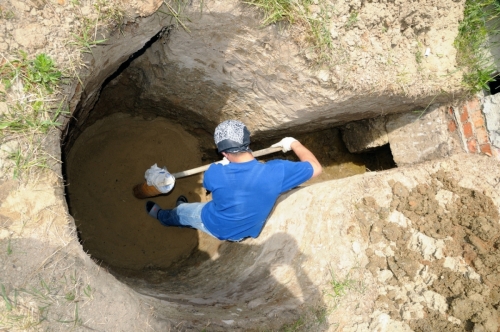
After that, you need to calculate the size of the future pit and mark the territory. For the arrangement of the caesson made of metal, it is necessary to dig a hole with a depth of at least 2.5 meters. The markup of the pit should be performed in such a way that there is a distance of half a meter between its walls and the walls of Kesson.
Such a gap must be done around the entire perimeter. At the same time, try to keep the turf so that the walls of the pit do not crumble. During digging a foundation pit for Kesson with your own hands, water problems may occur, which accumulated in the upper layer of peat. Peat propies clay, which does not allow water to go down. Therefore, when you remove the upper layer and see clay, there may be water.
To cope with this problem, in the center of the foundation the pit should be dug a hole approximately onto the bayonet of shovels. It should turn out something similar to the water collector. When you dug the pit of the necessary depth, pour the bottom with sand to get a certain pillow ten centimeters thick. For reliability, you can cover the walls and the bottom of the caisson.
Waterproofing of a cesson cellar
Before installing a metal caesson, its walls must be treated with a special anti -corrosion coating. You can also use paint waterproofing. To do this, buy a special composition. You can also cook the bitumen mastic in the boiler yourself. The bitumen should be loaded into the boiler for about the third part of its volume, put on fire and wait until all moisture disappears. This will happen when the mass stops foaming.
After that, it is necessary to pour the molten bitumen with a thin stream into an open dish with gasoline and mix the resulting composition. For the primer of the external walls of the metal cellar cellar, you should take bitumen and gasoline in a ratio of 1: 3, for the first layer of painting - 1: 1, and for the next layers - 3: 1. The coating with this composition should be continuous and reinforced in sharp places.
Cesson thermal insulation device
It is great that water does not penetrate the cellar, but on the other hand, the temperature in the caisson is very high. For this reason, water will drain from the metal walls, and the products will rot quickly. To cope with this problem, you should install good thermal insulation. Try to isolate the bottom of the cellar and its walls well.
It is advisable to install the caisson on a clay isolation layer with a thickness of 200-250 millimeters. The outer sides of the cellar are best isolated with fat thick clay with the same thickness. For greater reliability, it is recommended to plaster the internal walls of the cellar and the floor with a cement mortar with a layer of 20 millimeters.
In order to do this, it is necessary to pull on a steel frame made of wire, which has a thickness of 6 millimeters, a steel mesh with cells of no more than 30x30, tie the wire to the frame and plastered the walls. After that, the concrete composition should be made and put on the floor with a layer of 35 millimeters. When you dissolve and smooth it out, the plaster should dry well. The internal walls of the metal caisson for the cellar can be insulated with blankets or glass fabric with filling. Between the fabric canvases should be placed glass wool.
Cesson installation in the pit
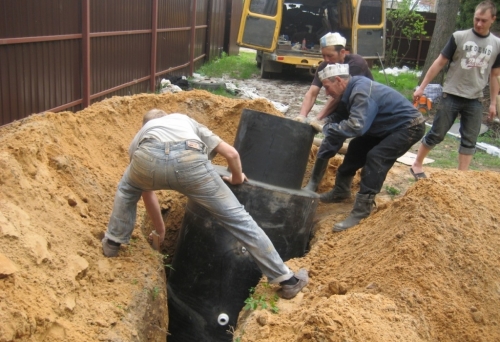
After that, you can lower the caisson into the pit. First, on both sides, the logs should be vertically lower. They will serve as guides and limiters, which will allow you to install the caisson exactly in the center. Cesson can be lowered with a winch, which is fixed for the stump left. It is necessary that one person constantly weaken the cable, while others - direct the frame with the help of VAG and hold it from swing.
At this stage, certain difficulties may also arise when Kesson plays the role of a floating ship. If water will constantly enter the dug pit, the caisson will come up. For this reason, it is necessary to install a water selection. To do this, fill with clay the distance between the walls of the cellar and the pit. Each layer should be triggered. It is better to arrange a hydraulic survey below the depth of freezing, to a depth of about one and a half meters.
No matter how qualitatively the water supply was made, it cannot give a complete guarantee from the flow of water to the bottom of the cellar. Therefore, the danger of surfacing remains. In order to exclude it, when the Cesson is arranged for the cellar, to be guided by the principle of the submarine: for this, water is typed in the ballast containers, the air is replaced and the boat receives negative buoyancy. At the bottom of the caisson, you need to make a hole with a welded pipe.
At first, it can not be drowned, but left open. When the first rain passes, there will be about half a meter of water in the cellar, which needs to be scooped up. After repeated rains, there will be very few water, and soon the cellar will not absorb it. Higher water itself will fill all the cracks with watery clay, firmly install the cellar and isolate it from itself. After that, the pipe can be drowned, but in the first year of using the caisson you can not do this.
The arrangement of a cesson cellar
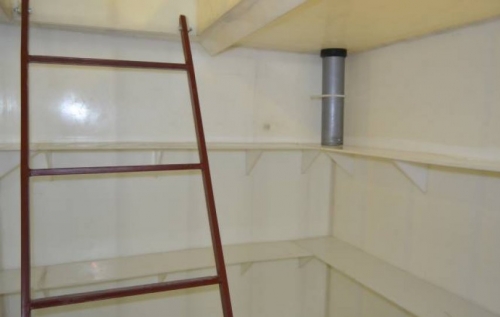
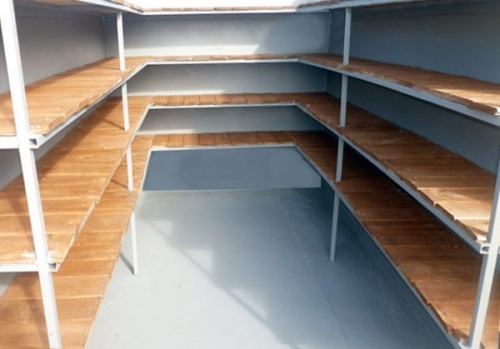
After installing Kesson with your own hands, it must be equipped. On the market there is a huge selection of boxes and shelves for storing products that can be installed around the perimeter of the caisson. Along one wall, you can make special fences with walls and a floor for storing root crops, for example, potatoes, beets, carrots, etc. The width of the fence should be equal to one meter.
You can also install special racks from boards with several tiers along the other wall, the distance between which should be approximately 0.4 meters. Rabbers must be based on wooden racks, which are made of bars. On such racks, it is convenient to store cabbage and other vegetables, as well as various pickles, juices, compotes and jams.
DIY cellar device is not only installing shelves and boxes, it is also a ventilation structure, electricity supply and, of course, fastening the stairs. Remember that a metal caisson should have pipes for ventilation, otherwise dampness will be present there. You can install a ventilation pipe with windwear. For ventilation of a small room, this should be enough. You can also put some absorbent materials that will absorb moisture.
So that you can go down into the cellar without problems, you need to install a convenient inclined staircase, at least half a meter wide, which is made of wood or metal corners. The staircase should be well fixed from both ends so that it does not move or stagger. It is advisable to fix the steps with nails with a wide hat or metal washer.
You can also make sure that you can get directly into the cellar from the house itself. To do this, cut a hole 0.7 by 0.7 meters into the floor of the hole. Subsequently, it is necessary to install a shield built from the boards on this hole. The approach to the hatch that the caisson closes should be noticeable and safe. On the lid of the laza, it is worth arranging a fabric rug, which should tightly enter the frame or box of the laza. The thickness of the rug should be at least 50 millimeters.
You can illuminate your cellar with an electric or kerosene lamp, lantern or candles. At the same time, remember the fire safety and that it is advisable not to leave kerosene in the caisson, since the products can be saturated with its smell. After filling the cellar with products, the top of the caisson is poured with thermal insulation material: peat, sawdust, moss, slag or expanded clay. The first three backfills, due to their combustibility, should be covered on top with a layer of earth, sand, slag or expanded clay.
Thus, after arranging a cesson cellar with your own hands, try to keep your cellar clean and ventilate it from time to time. Inside there should be a sufficient amount of oxygen and a minimum of toxic gases. In the summer it is recommended to dry the caisson. If you find cracks, it is necessary to coat them with clay and covered with lime plaster mixed with sand, smooth the coating, smooth it with a plaster spatula and dry it well. During this procedure, try not to wash the floor in the caisson - just wipe it with a damp cloth. And carefully make sure that the vegetables in your cellar do not begin to rot!

In the country, I drilled the well,
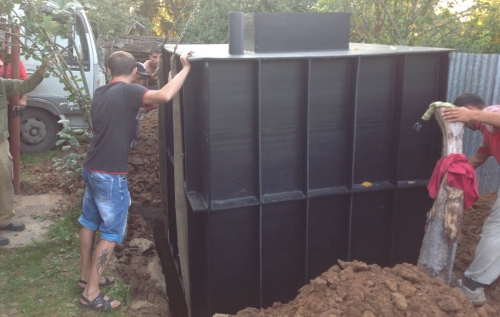
At the dacha drilled the well, the question arose of which caesson to put, weighed all the pros and cons, came to the conclusion that in terms of price quality, there was no alternative to prefabricated polymerpex caissons Tetto, installed rings, seized joints, made openings in production, everything turned out perfectly, everything turned out perfectly, everything turned out perfect I didn’t find water in the spring, I bought http://www.tetto.ru/kolodets-polimerpeschanyj here.