Parquet is one of the best, natural flooring and with ...
|
|
Mold is a dangerous toxic fungus with an unpleasant, musty smell ... |
Plastic windows are not such simple products as it might seem. Control... |
Building a shield house with your own hands
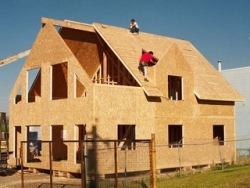
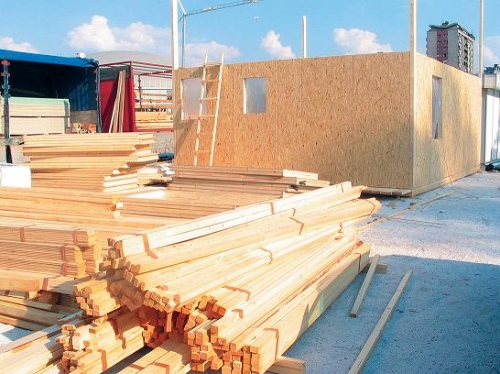
Today, many people are interested in the possibility of independent houses. Why build a house with your own hands? Firstly, it will not cost so inexpensively, and secondly, rare companies will be able to build a house as for themselves. In this situation, the technology for building a shield house will come to the rescue. Such a house requires a minimum of money, effort and time. Among the main advantages, the low cost, the ability to conduct work even in the winter season, environmental friendliness, high indicators of energy conservation, the possibility of architectural expressiveness, compressive construction periods, high operational indicators, fire safety, as well as the construction of a house without construction equipment.
Table of contents:
- The concept of shield construction
- Design
- Choosing a place
- Tools and materials
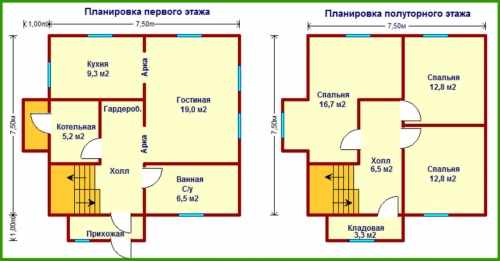
- Planning
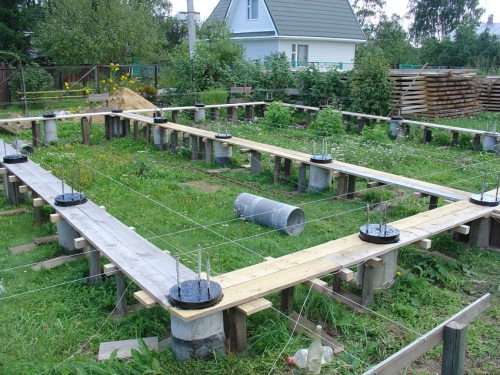
- The construction of the foundation
- Wall construction
- External work
- Internal work
- Roof installation
- Installation of engineering communications
The concept of shield construction
Shield construction is a construction of houses from flat components with a strengthening finish. For example, in Canada, people personally take part in the construction of their own home. This happens as follows: the family hires a specialist who controls all the stages of work and manages construction. All construction operations are carried out by future homeowners. The population of this country lives a settled life, so in the process of construction they try to convey a piece of the soul to their home.
The correct technology for the construction of shield houses is able to greatly facilitate work and minimize the requirements for the quantity and qualifications of builders. You can resort to the help of professionals, but now it is quite difficult to find a company that would have been operating for more than 50 years. If you decide to build a shield house with your own hands, you must clearly follow all the stages and construction technologies.
Design
The first thing you need is design. You can do this work yourself or entrust it to architects. You can easily cope with this task if you learn to own architectural programs. The most popular free program is Google Sketchup.
For this process, it is better to use all family members so that the house is as comfortable and convenient for everyone. It is extremely difficult to redo the project after construction, the price of building a shield house after a change in the project is high, so it is better to solve these issues at the beginning.
Think about neighboring houses in advance so that your house harmoniously fits into the world around you. Decide on the floors and sizes of the site. Be sure to think through all systems of power supply, ventilation, water supply, sewage and heating. The size and number of rooms will also depend on these factors. For example, you may need a separate room for the boiler room. Perhaps you will need sanitary systems http://www.ecosan.ru/
Choosing a place
When you choose a place to build a structure, be sure to take into account the structure of the soil, communication routes and groundwater. Shield houses have an advantage in the fact that during construction you can use weak soils (silty, addicted).
As a rule, projects of shield houses are designed for an even platform. But it rarely happens that the sites are fully consistent with all parameters. You can tie the project to the features of the area and, without changing the landscape, change the ground and basement of the house. Or you can change the terrain by creating a site or terracing.
Tools and materials
Before starting the construction of a shield house with your own hands, you need to get all the necessary materials and tools. Clearly determine how much material, and in what proportions you will need a roof, foundation, construction of walls and each subsequent stage of construction.
We list the main tools for effective and not too tiring work. You will need: a disk saw, an electric jigsaw, an ordinary or laser level, a metal square, a hammer of 500 grams and 1 kilogram, large ticks, a screwdriver with two batteries of 19V, a manual hacksaw, a tape, roulette for 3 and 7 meters, an average ax. And small light. You can purchase special books that will help you easily cope with the choice of tools and all stages of construction yourself.
Planning
The shield technology for the construction of houses is that first it is necessary to collect primary structures. As a rule, this is done in special workshops. In the carpentry workshop, the base for the frames of the required length is cut, after which it is fixed with brackets, screws or nails.
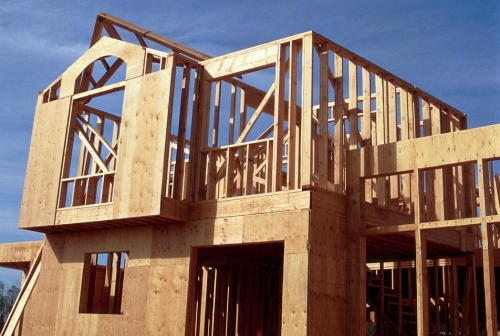
The basis for the frame is the upper and lower horizontal parts. Between them, vertical supports are installed in such a way that they are at a distance of 62.5 or 81.5 centimeters from each other. It turns out that in this way you can build walls of any length. The openings for windows and doors can be determined anywhere. The planning of the shield house does not depend on the interval between the vertical supports of the frame.
A wood frame will take on all vertical loads of structures that can occur due to its own weight and bound transverse loads. If you want to protect the walls from the exposure of the wind, you should watch a video about the construction of the shield house and strengthen the structure of the structure. This task may be performed by the separation of the frame throughout the area. At the same time, you can use a plywood, a stove with a special direction of shavings or a wood -steering plate. Thus, the external decoration of the walls will not only be strong, but also protected from external influences.
The construction of the foundation
Since the designs of shield houses are quite light, you can use not a very deep foundation. You can use the foundation in the form of a monolithic slab or strip. First you need to dig a trench of the required size to a depth of about 2 meters. The level of depth may depend on climatic conditions.
After aligning the trench, it is necessary to install the formwork, which is made of trimming boards according to the width of the trench, while the height should be at least forty centimeters above the upper edge of the trench. To prepare the formwork, you will need a trim 1 or 3 varieties with a length of 3.4-6 meters and a thickness of 20-25 millimeters, nails of 70-80 millimeters and a bar with a section of 50x50 millimeters.
When everything is ready, it is necessary to put a brick, broken slate, stones, etc. on the bottom of the trench. In this case, the thickness of the layer should not be more than 1/3 of the depth of the trench. Then the surface is covered with a layer of sand about 20 centimeters and all this is watered with water. When the water comes down, it is necessary to fill the sand again and pour everything with water.
This procedure can be performed about 3-5 times. This will depend on how the sand will clean. If its level practically does not change, this means that all spaces are filled, so you can proceed to the manufacture of the frame. To do this, you can use the reinforcement, channel, pipes, corner, etc. To prepare a solution of the foundation, the following components will be required: small gravel, water, M-500 cement and sand.
If you want to prepare a concrete solution, you will need a concrete mixer. Ideal proportions of the components will be as follows: sand - 75 kilograms, cement - 25 kilograms, gravel - 125 kilograms, water - 12-13 liters. If the mixer of concrete mixers is designed for a smaller volume, you can recalculate the components. The prepared mixture is poured into a trench and compacted. Try to correctly calculate the proportions of the composition, so as not to throw extra money down the wind.
Wall construction
After creating the foundation, you can proceed to the construction of the walls of the frame house and to the construction of the building. First of all, it is necessary to make an insulating substrate from roofing material. This material is the simplest and most inexpensive. The roofing material is neatly laid between the surfaces of the foundation from the mortgage beam. After the work on the waterproofing of the foundation, you can start laying the base of the walls.
A hole is drilled in the place of the future attachment, after which a pine of dry wood, which is called the nagel, is driven into the places of the beam. This is done for the rigidity of the beam. It is necessary to make sure that the nagel enters the right hole with an interference. A similar compound can be used as an angular or for the breakdown of the wall.
The base for the frame is built in height, which should be equal to the height of two bars. According to the technology for the construction of a frame-chip house after laying the laying beams, it is necessary to cut into about half the timber in the upper beam. Remember that the width of the sample should be equal to the width of the beam determined for the racks. Keep in mind that the number of seats should be equal to the number of racks.
Then the racks drank in size of the proper height are inserted into the holes and fixed with an inclined support - the bracket that connects the two nodes of the frame. When the installation of all the racks is completed, it is necessary to fix the upper beam with pre -cut holes. Next, the upper ends of the racks are inserted into the grooves.
Keep in mind that the distance between the grooves should be equal to the distances of holes made on the lower (embedded) beam. Be sure to check the absence of inclination and distortion, using the building level and plumb line. After that, the racks are attached with UKOSIN, and temporary bloomers are removed from the boards.
Next, it is necessary to fix the longitudinal jumpers from the beam according to the same method - the hole in the hole, but collecting them with each other by simple building nails with a length of at least 100 millimeters. Only after these actions can you start lining the outer wall without clutching the openings of windows and doors.
External work
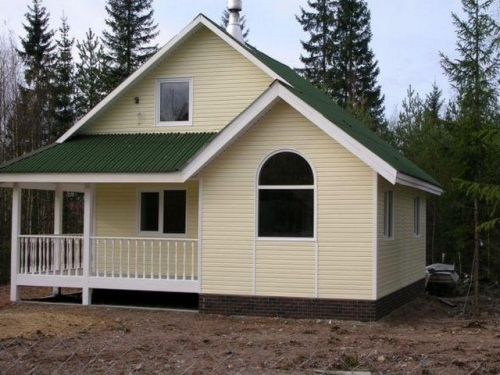
For shy houses, several options for the external wall decoration are provided. You can buy a metal or vinyl siding. Vinyl siding will not quickly heat up in the sun, and the metal can be covered with an anti -corrosion protective layer. Recently, thyroid houses are often finished by a block house. The walls of this material look like a looped log and are not blown.
Due to the castle connection, it will be very easy to make the installation of this material. After the installation of the panel is completed, they are covered with a protecting composition from a fire, thanks to which the material service will be longer. You can use the panels imitating the beam. As a rule, they are produced from high -quality, well -dried wood.
In the process of building a frame-chip house, you can use a decorative plaster, which is distinguished by an increased service life. Using a decorative coating, you can achieve a wide variety of results, even imitation of stone walls. Another method of finishing is an artificial stone.
Do not forget about the lining, the most affordable and simple option for decorating shield houses. But it is susceptible to humidity, so after a while it will be necessary to do a haul. You can use a combination of various types of finishes, which will look very beautiful. Despite the appearance, any exterior decoration will require care and update of the protective coating with a certain frequency.
When connecting the outer sheathing, it is necessary to be extremely neat, so that later it does not have to be redone all over again. To do this, fixing the sheets begins from the corner and continues in a circle. After that, you can lay the finishing floor and insert the windows and doors.
Internal work
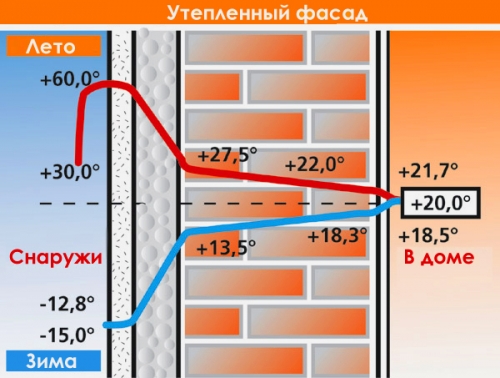
Various materials are used for wall insulation. You can use boiler slag, mineral wool, expanded clay or polystyrene. The highest quality insulation materials are mineral wool and foam. Slag and expanded clay are used at a winter temperature not lower than 20C. Before warming the walls, a waterproofing layer is laid, which is placed between the insulation material and the outer wall.
You can use the film, but it is best to take parchment paper according to the technology for the construction of shield houses. It should be cut into stripes of the desired size, fixed to the wall using the rails, and fix the sheet on the sheet so that there are no gaps. If you choose mineral wool for insulation, the work will go very quickly and efficiently.
Mineral wool is attached to the walls of the structure using bars with a cross section of 15x20 centimeters. At the same time, it is desirable to fill the bars vertically. It is recommended to fill the bars, which have a large width than those that attach mineral wool slabs in the middle, are recommended to the joints of the plates.
After the insulation procedure, you can proceed to the internal skin. As in the case of external trim, the internal also has a lot of options. You can finish walls with paint, drywall, smooth wood or artistic painting. You can finish the walls of a dodgy board, which is located horizontally when mounting to the backups of the frame.
The internal sheathing of the house should reach the hollow, so that when the floor is built under the wall, the board does not go. In this case, if necessary, it can be easily replaced. A wooden flooring or parquet is best suited as a floor for a shield house.
Roof installation
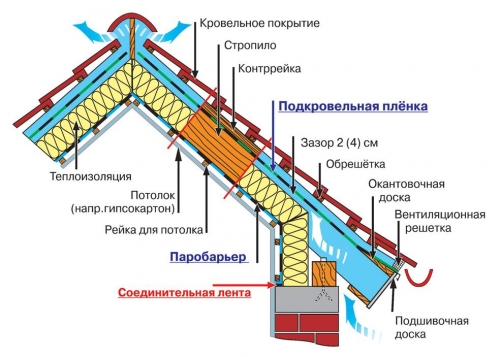
The roof of the shield house is installed by traditional methods. As a rule, a rafter system is installed, then a crate is made and waterproofing is carried out, after which the roofing is laid. If there is an attic, it is necessary to install a vapor barrier layer. The roof also needs to be insulated using the technology of frame-shackles.
Full roof installation includes a list of works on the installation of the roof frame, thermal insulation, waterproofing, vapor barrier, a crate and a counter -scheme, the device of other roofing accessories. The beginning of roofing work is determined by choosing a roofing and with a roof configuration. When choosing a roof, pay attention to the purpose of the building. If you make a roof of metal tiles, in this case the crate is not required, since the sheets of this material are quite rough and hard.
To fasten this type of roof, self-tapping screws are used. The sheets are applied to the base so that the edge of the sheet is 40 millimeters below the cornice. Thanks to this styling, the gap that is necessary for ventilation will form. Any roofing has its advantages, disadvantages and installation methods.
Installation of engineering communications
Installing engineering communications yourself is a rather difficult matter. It will not be easy for an ordinary person to cope with this, so we recommend resorting to the help of specialists. But if you decide to do it yourself, first you need to carefully watch a video about the construction of frame-chips and get acquainted with the rules for the installation of electrical installations.
In this vast set of documents, all the stages and features of the production of electrical work are described in detail. After that, it is necessary to contact the local energy supply authorities and get the technical conditions for connecting the house to the district’s energy system. Approximately the same must be done during the heating, water supply and sewage system. Nevertheless, it is better to engage in such work when monitoring the specialist.
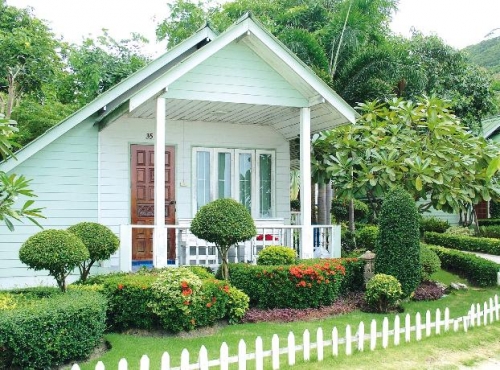
Thus, the construction of shield houses is becoming more popular every day. Such a house is beautiful, cozy and comfortable. At the same time, it can be used all year round, providing the necessary protection and insulation systems. Before you build a shield house, carefully study all the instructions. I wish you success!

2 meters depth of the trench under
2 meters depth of the trench under the foundation ????????????
2 meters? Moron.!
2 meters? Moron.!
Pussy
Pussy
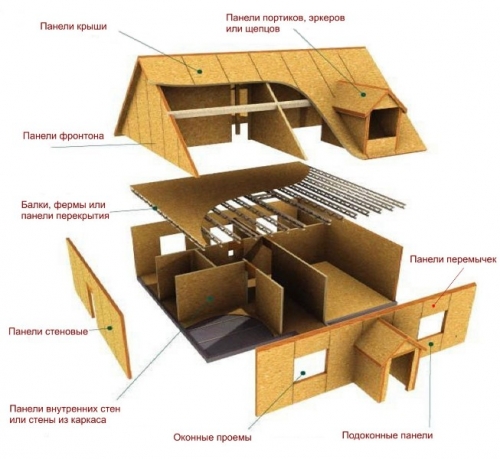
Houses from such SIP panels
Houses from such SIP panels are built very quickly, but it is better to entrust the construction of professionals. I am like this http://www.home-projects.ru/proekty_domov/sip/genuya/ The house was erected very quickly.