The process of building a log house is preceded by the laying of the foundation that should be ...
|
|
Laminate Popular floor covering that occupies a leading position in ... |
Modern architecture and design capabilities allow you to equip at home and ... |
How to make garage gates with your own hands

The garage is a mandatory building for the car owner. Those who live outside the city in private houses build garages near the house or even attach to the house. And those who live in the line of a large city have to store a car in a garage cooperative away from the house. But wherever the garage is, the safety of the car in it is provided by the gate, the design of which may vary depending on the preferences of the owner and the capabilities of the room, space and expediency. The easiest solution would be to buy the finished gate and install them in place, but you can perform garage gates with your own hands, be sure to take into account all the design features and adjusting them, as they say, for yourself. In this case, you will be sure of their quality and reliability.
- Types of garage gates: which is better
- Making garage gates with your own hands
- Some secrets of protecting the garage gate from hacking
- DIY garage gates: video
Types of garage gates: which is better
In total, there are several types of garage gates, most of which appeared recently, just when we began to focus on Western technologies. Largely thanks to Hollywood films, we learned about the gates that rise up and leave the ceiling from pressing the button on the remote control. Now such know-how is not uncommon even in our country.
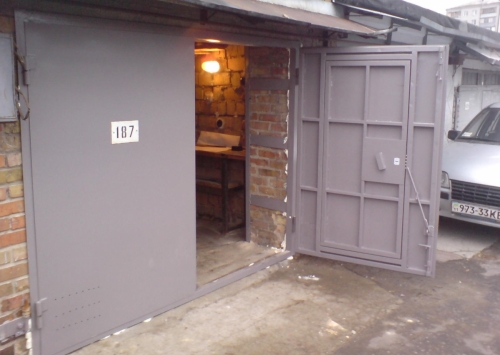
Swing gates The most ancient and most reliable version of the garage gate. However, such gates were used everywhere, not only for garages, and earned trust in many years of trouble -free practice, even in difficult operating conditions. The swing gates consist of two wings on the hinges and boxes in the doorway, the wings are closed tightly, without leaving the gaps. To make the garage gates with your own hands is quite easy, the mechanism is simple and reliable, for centuries.
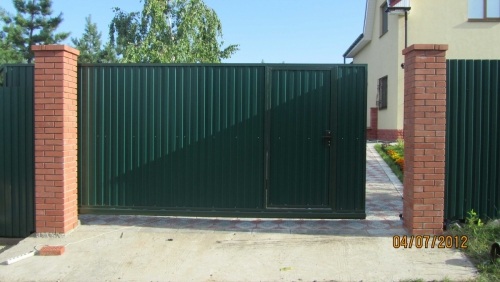
Sliding gates They began to use somewhere in the first half of the 20th century. They are one sash that drives away parallel to the front wall. Although there can actually be two sash, then they will drive in different directions, or even one, but folding in several sections. For the free course of such gates, it is necessary to have a lot of free space in the front wall of the garage. Therefore, sliding gates are used in hangars and industrial enterprises. In private construction, such gates are not installed in the garage buildings themselves, but for entering the site.
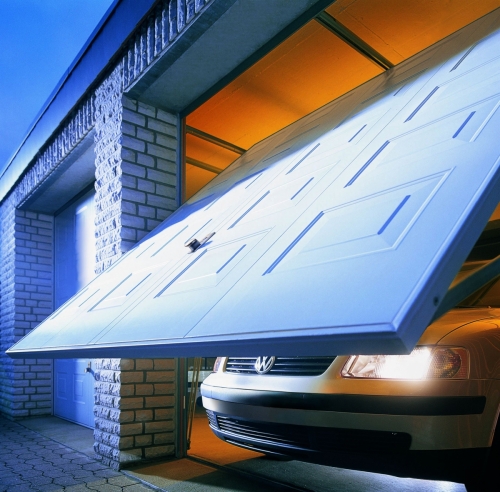
Lifting and housing gatesappeared relatively recently. They are one canvas (gate sash), which rises up to the ceiling when opening the gate and becomes parallel to the floor. The basis of such gates is the hinge-cheating mechanism and guides. The convenience of these gates is that they do not occupy free space before the garage or inside it. The lifting and dwelling gates can be considered as the gates of your garage, if it allow climatic conditions or if the garage is heated.
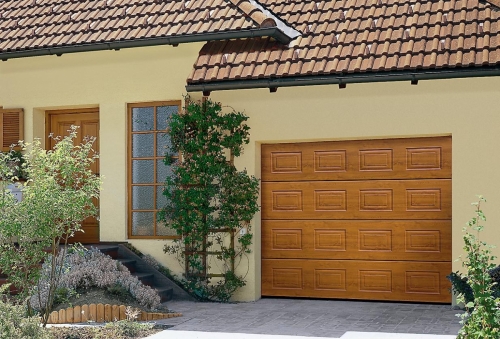
Lifting-sections gatesalso an innovation for our market. They are a canvas consisting of sections that are refracted and driven along the guides under the ceiling when opening the gate. It is based on a spring mechanism and guides with a chain gear. The advantage of such gates is the same saving of space.
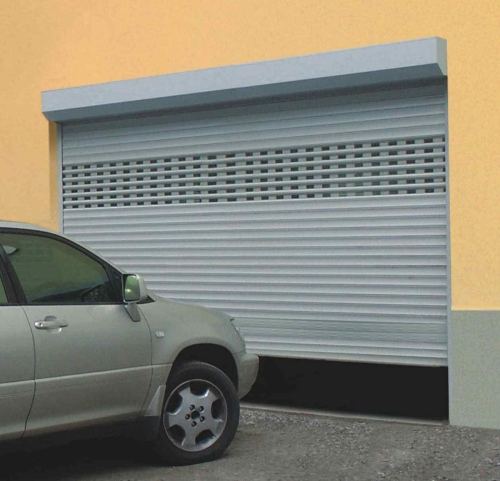
Rolling gates Used for garages quite rarely, as they do not provide the required reliability. They are aluminum plates, as in the roller shutters that are folded in a special box under the ceiling when opening the gate. It is advisable to install such gates only at objects with security and access system, as well as in a heated room.
Important! A any type of gate can be made automatically working with a keychain.
When choosing a garage gate, take into account not only the beauty, sophistication and laudatory reviews of advertisers, but also practicality, durability and adaptability to our climatic conditions and other operating conditions. The most reliable choice will be the swing gates, they will not even let you down in severe frost, well, maybe the maximum will have to warm the lock.
Before making the garage gates of lifting and lifting-and-sectors, think carefully. Firstly, all the advantages of these types of gate can only be felt in warm edges. If you really want just such a gate, remember that the garage should be heated. Remember our winters, and guides and lever mechanisms will freeze in the sophisticated gates, you will not be able to open the gate at all, you will have to leave an open -air car. In pursuit of the client, the manufacturer praises his goods so that sometimes his dresses are full of absurdity. As, for example, as the dignity of the lifting-sections gate is given that you do not have to clean the snow from the gate, because they open upward, and not out, like swinging. Where is the dignity here? If there is snow in front of the gate, then you just won’t call in them. And if you drop by, then in front of the car you swell a couple of tens of kilograms of snow inside the garage. So, do not flatter yourself. Snow will still have to be cleaned.
Making garage gates with your own hands
The easiest to manufacture are swing gates. They can be performed independently from beginning to end, having purchased the necessary material: steel corners, profiles and sheets. Accordingly, the sizes of the gate and their design features can be planned in advance and perform exactly the gates that they like.
You can try to make the lifting and dwelling gates, but for this it is necessary to have considerable engineering experience and knowledge for the correct choice of counterweight and the installation of mechanisms. In most cases, such gates simply buy ready -made ones and set according to the attached instructions.
It will not be possible to make lifting-sections gates independently, unjustifiably large expenses, temporary costs and no guarantee that all this will work correctly. Therefore, if you decide to install such gates in your garage, order them from the manufacturer.
Further in the article we will dwell in detail on how to make the garage gates with our own hands if the choice fell on the swing view of the gate.
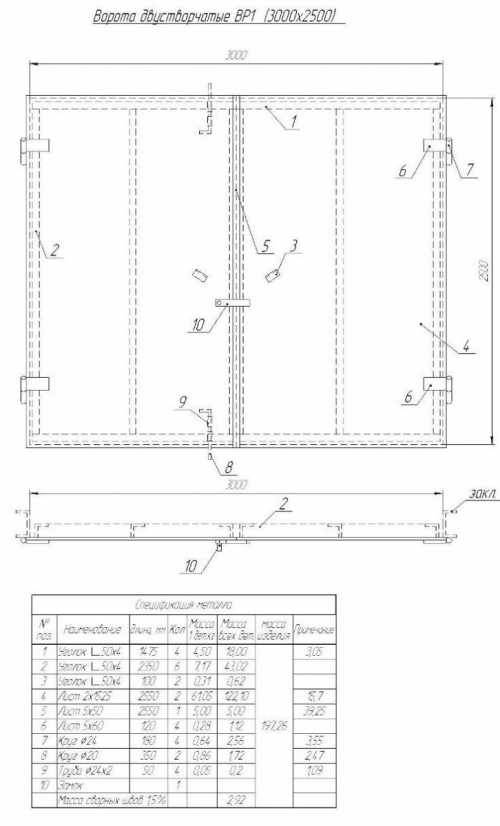
Drawing of garage gates
Like any responsible business, the garage gates begin with project documentation. It is not difficult to make the drawings of the garage gate with your own hands, it is enough to draw a sketch on a piece of paper, be sure to indicate all sizes and materials.
First you need to choose the right height and width of the gate. The minimum permissible width of the garage gate should be such that the distance from the car body from the right and left side to the gate frame is at least 30 cm. Of course, the larger this distance, the more convenient it is to go into the garage. The maximum appropriate width is 5 m. Most often, the garage gates are made with a width of 2.5 to 3 m.
Important! When choosing the width of the garage gate, keep in mind that the distance from the gate frame to the perpendicular wall should be at least 80 cm.
The height of the garage gate is selected depending on the size of the car and most often ranges from 2 to 2.2 m. But if you plan to park a minibus, it is better to immediately make a doorway of 2.5 m.
Our swing gates will consist of a frame that will frame the entrance, the opening of the garage, and from the two wings on the hinges. The frame is best made from a steel corner of at least 65 mm. For the manufacture of the frame, the wings can be used both a steel corner of 50 mm and a steel rectangular profile, then sheathe them with sheet iron from 2 to 3 mm thick. The loops will need reinforced external. Based on the drawn scheme of the garage gate and the sizes applied to it, we calculate the number of the required materials and purchase them.
Important! The drawing of the garage gate must be made at the stage of designing the entire garage.
Making a garage gate frame
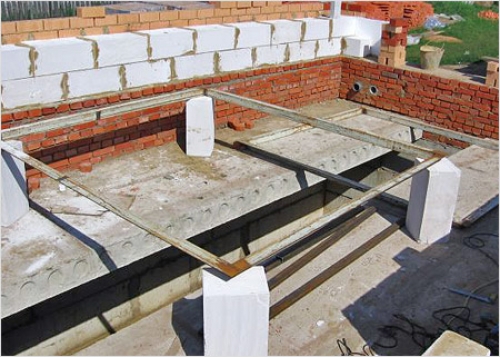
The manufacture of garage gates begins with a frame, which will frame the entrance to the garage. It is best to start doing it at the stage of the construction of the front wall. When no more than 50 cm of masonry is ready, it is necessary to suspend work on the construction of the wall and set the gate, and then continue the laying of the wall.
For the manufacture of the frame, we need steel corners 65 mm, steel stripes with a width of 20 30 mm and a thickness of 3 4 mm, as well as segments of a steel reinforcing rod to fix the frame in the gate opening. From the tool, a grinder, roulette, square, level and welding machine will come in handy.
The garage frame will consist of two parts: external and internal.
- We cut the corner with a grinder so that we get 4 segments, equal to the width of the opening of the gate, and 4 segments, a length equal to the height of the opening of the gate. At the same time, you can cut the corner evenly by measuring the required distance, or you can cut off with a margin of 10 cm, and then make it so: the side of the corner that will be inside the garage opening, cut it off equal to the size of the opening, and on the sides located outside and inside the wall, Leave strips 5 cm long from above and below or cut them off with an angle, so that in the future it is more convenient to weld them with each other.
- We lay out the segments of the corners on the flat surface, having previously checked this with a level. We carefully measure out all the corners, they should be strictly 90 degrees. We constantly control this with a square.
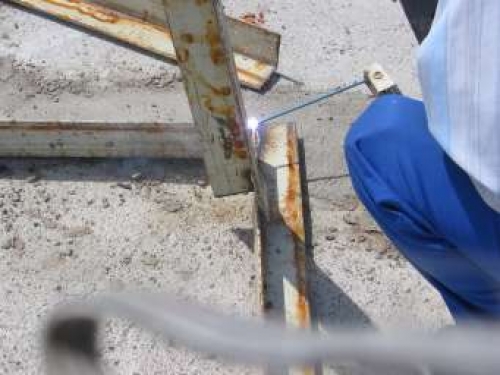
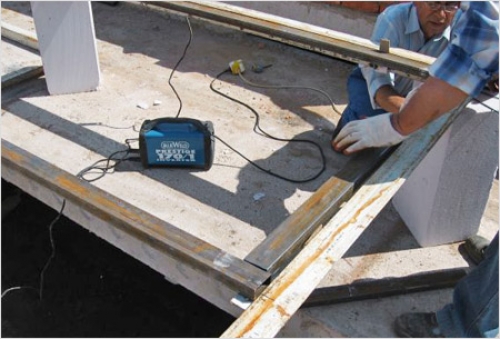
- We weld the corners among ourselves to make the frame. Welding may be the overlap of the edges of one corner to another and welding, or you can cut the edge with an angle, then welding will be strictly in one plane, but such a compound will be slightly less durable than with an overlap.
Important! If the corner has led the corner during welding, this can be corrected with the help of a coat welded to it from trimming corner, which will help to forcefully correct the geometry of the frame. Holding it in the required position, we weld the corners to it. On the depicting process of making garage gates with your own hands, you can see how this lever looks.
- On the outer side of the frame, carefully polish all the flash flaws, since the sash should fit the most tightly to this side.
Making the frame for the wings
The frame or frame for the wings should be slightly smaller in size of the garage gate frame so that it easily enters the opening and the sash tightly adjacent to the outer side of the frame.
For the manufacture of the frame for the wings, you can use a steel corner, as for the gate frame, or a rectangular profile can be. The difference will be only in the convenience of the work and the carrying capacity of the frame.
- We cut off 4 segments of the material, the length of the gate frame with a length of 10 15 mm. This gap is necessary so that the leaflets easily go into the opening. Since we will have two wings, we will need 4 more horizontal segments for their manufacture, which should be equal to the width of the gate frame divided in half, and minus 30 35 mm.
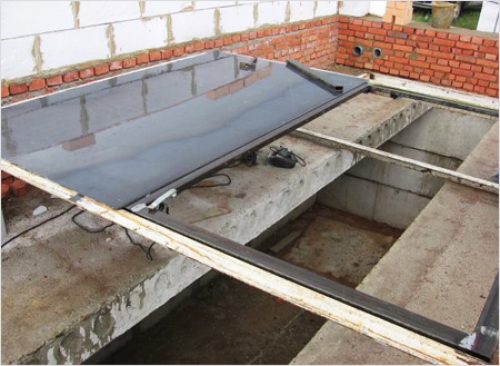
- We lay out the segments on the flat surface and carefully measure the corners. Ideally, it is best to lay them out inside the welded frame of the garage gate. So you can see the shortcomings. Strictly control the angles of 90 degrees.
- We weld the frame from segments. To strengthen the structure inside, you can weld another horizontal segment of the material, which will serve as a spacer and prevent a change in the geometry of the wings. It is best to place an enhancing element in the middle of the frame.
Making the gate samples
For the wings, you can use leaf material, the most reliable is the steel sheet with a thickness of 2 mm.
- We cut out two canvases with such dimensions from leaf material: 3 4 cm high more than the height of the garage opening, of different widths. One canvas should be 1 2 cm less than the width of the frame, and the second is 2 cm larger.
- We weld the canvases to the frame in this way: on top and below the canvases should protrude for the frame for 1 2 cm, on one of the wings (which you like it more, it will always open in the second turn) should not reach the edge of the frame in width, as if Leaving 1 cm free. This is necessary for a tight fit of the second sash. The canvas of the second sash, on the contrary, is welded so as to protrude 2 4 cm outside the frame.
Important! The sheet material easily conducts during welding, so first you should grab the angles with welding and in the middle of the canvas, and then weld the entire sheet with point movements with a distance of 10 15 cm. After completing the work, welding in the corners must be cut off so that the sheet does not deform in the future.
- We weld reinforced loops. The lower half is welded to the frame of the garage gate, and the upper to the opening sash. To strengthen fastening on the hinges, you can weld strips of metal and a reinforcement tab. We take a metal strip of 5 7 mm thick, bend it and weld it to the upper half of the loop and to the sash. We weld the reinforcement tab from the inside.
If the whole structure is on a flat surface, the wings lie on top of the frame, we can closely consider what happened, whether everything is right, whether the wings are easily walking, whether it clings to where. If everything is fine, you can start installing the gate in the garage.
Installation of garage gates
First of all, the gate frames are installed: internal and external. Even at the stage of the construction of the walls, when 50 cm of the wall is ready, it is necessary to put the gate in the opening.
Be sure to check the evenness of the location: horizontal and vertical.
Between themselves, the frames are connected by strips of metal 4 cm wide, which are welded to the frames with a step of 60 cm.
Next, you can continue the laying of the front wall of the garage so that the bricks occupy the entire space between the external and internal frames. In the course of the masonry, we make a frame in the masonry: for this, weld reinforcing rods to the frames at least 20 30 cm long and make them in the seam between bricks. Such rods in height should be at least 3 pieces.
Having reached the top of the frame, we install a beam of the ceiling on it: metal or concrete.
At the end of all the work, we check the functionality of the gate: how the wings open and close, whether the metal clings somewhere.
Installation of locks and constipation on the garage gate
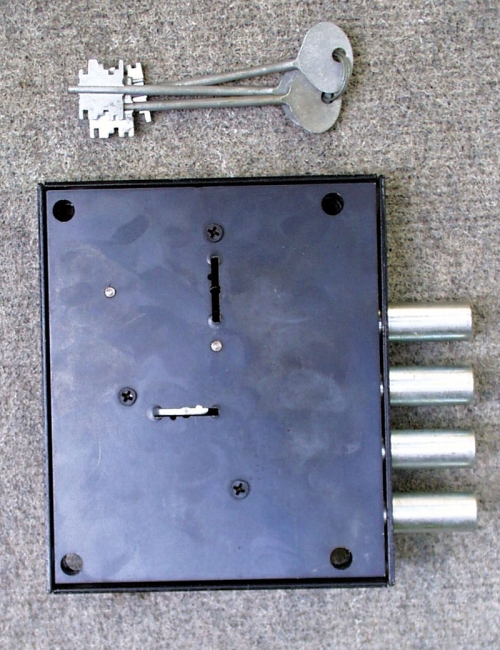
Installation of the garage gate ends with the installation of locks and constipation. The most common option is this type of constipation. One of the wings is closed on constipation from the inside of the garage, which enter the floor and ceiling. To do this, in the frame and floor/ceiling, it is necessary to drill holes with a depth of not more than 5 cm. And the second sash closes on the castle, the tongue of which is hooked behind the fixed sash or enters the hole specially cut for it in the cash frame. Outside, this design is strengthened by a hinged lock, which is spreading into the ears welded to the sample, and connects both sashes among themselves.
There are more complex options for locks and constipation for garage, but on this issue it is better to consult with a specialist.
Warming of the garage gate
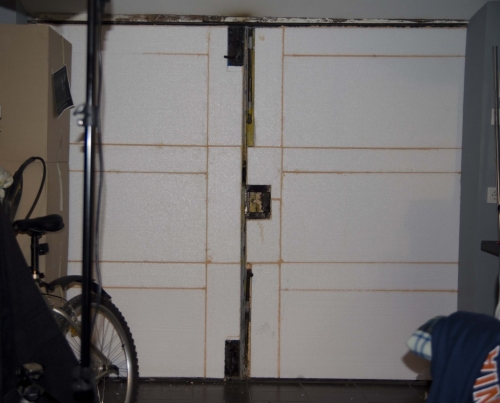
The most common material for insulation of garage gates is polystyrene, recently, extruded polystyrene foam is gaining more and more popularity. To fix the material on the gate sash, it is necessary to lay out the sheets of the material inside the frame of the wings, and then sheathe everything from the inside with a wooden lining or plywood. Use cotton heaters for insulation, as they quickly lose their properties.
Important! Having insulated the garage and gate, do not forget about high -quality ventilation.
Some secrets of protecting the garage gate from hacking
Even installing a good castle may not protect your car and not protect from robbery. After all, you can always cut the loop with a grinder and just remove the wings. That is how they did in the stormy nineties. What to do?
- From the inside of the frame, the wings in the area of \u200b\u200bthe same loops are welded to the frame of the corner. It should turn out like this: when closing the sash, the corner will enter the wall 1 2 cm (for this it is necessary to open a brick a little) and cling to the garage frame. Even having cut off the loops, the attackers will not be able to remove the wings, since they will firmly stay on the garage frame.
- Install a spider lock, whose pins will enter the walls, floor and garage ceiling. It is desirable that in addition to the spider itself, a fixing mechanism is installed, stopping the spider in a closed state until this mechanism is opened using a unique key.
Protecting your garage from hacking, the main thing is not to overdo it, so that in the case of loss of keys there is at least some chance to get into the garage without resorting to the removal of the walls.
The manufacture of garage gates with your own hands takes about 1 2 days of work. At the same time, your product will have unique sizes and design if you want something special.


Thank you for the article!
Thank you for the article!
i bought components for the gate
i bought components for the gate in Kazan from comfortable systems, prompted told everything, I advise you coolly and you
http://www.vorota.tt34.ru
http://www.vorota.tt34.ru Production of steel garage gates in Korolev.
8 (903) 715-91-15 queens garage gates for GSK.
Steel gates in Korolev Gate with trim under the lining.
8 (903) 715-91-15 Metal gates in Korolev Gate with castles of Gardian.
The city of Korolev Gate Garage Steel Gate in Bolshevo Korolev.
http://www.vorota.tt34.ru garage gates in Korolev 8 (903) 715-91-15.
http://www.vorota.tt34.ru
http://www.vorota.tt34.ru Production of steel garage gates in Pushkino.
8 (903) 715-91-15 Pushkino garage gates for GSK.
Steel gates at the Pushkin Gate with trim under the lining.
8 (903) 715-91-15 Metal gates in the Pushkin Gate with Castian Castles.
The city of Pushkino Gate Garage Steel Gate in Pushkino.
http://www.vorota.tt34.ru garage gates in Pushkino 8 (903) 715-91-15.
http://www.vorota.tt34.ru
http://www.vorota.tt34.ru Production of steel garage gates in Mytishchi. 8 (903) 715-91-15 Mytishchi garage gates for GSK. Steel gates in Mytishchi gates with finishing for lining. 8 (903) 715-91-15 Metal gates in Mytishchi gates with castles of Gardian. Mytishchi city gate garage steel gates in Mytishchi. http://www.vorota.tt34.ru garage gates in Mytishchi 8 (903) 715-91-15.
Source: http://www.glav-dacha.ru/cekcionnye-garazhnye-vorota/