Monolithic construction is a complex technology, but its principle ...
|
|
When arranging rapidly vested buildings, indispensable building material ... |
When the life of a wooden coating comes to an end, it needs ... |
How to score a nail correctly

How to score a nail?
This question, it would seem, should know the answer every self -respecting man.
But is everything really just in reality, if one and then you have to hear about broken boards, dumped plaster, bent nails and injured fingers? Maybe there are still some rules, nuances and secrets of this manipulation? Let's try to figure it out.
Table of contents
Each nail has his own hammer
The most ordinary carpentry hammers are four sizes:
- MST-1 (handle 25-28 centimeters, working part 9 centimeters, weight 250 grams) is intended for clogging packaging and wallpaper nails (up to 40 millimeters long);
- MST-2 (handle 30-32 centimeters, the working part is 11 centimeters, weight 500 grams) is intended for clogging larger fasteners. The most multi -purpose tool;
- MST-3 (handle 30-32 centimeters, the working part of 12 centimeters, weight 800 grams) will cope with the same tasks as MST-2, it is simply heavier;
- MST-4 (handle 35-37 centimeters, the working part is not more than 13 centimeters, weight of 1000 grams) is intended for clogging large (with a length of more than 80 millimeters) of nails, as well as dowel-grooves.
Of course, the wallpaper nail will fit well and with the help of the fourth hammer, but with adequate set goals the size of a shock tool is much more comfortable to work.
The main secrets of clogging nails
- Start injecting with slight movements, go to sharp blows only after making sure that the nail enters correctly. Keep the hammer at the end of the handle, making blows, try to concentrate your gaze on the product’s hat. Remember, the fewer strokes gets the nail, the better and more reliable it will hold. Three or four cystic and two-thorough ulnar should be enough.
- If you work with wood, make sure that the diameter of the nail does not exceed a quarter of the thickness of the board. For a thin plank, it will not be superfluous to lick the product to bite the tip with nippers. The fibers will doubt and explode, but the wood will not split later.
- For a durable connection of two boards, you need to choose nails so that they can completely permeate the first and at least a third to enter the second. If you drive the fasteners at an angle to each other, the strength of the structure will increase even more.
- If necessary, lubricate the tip of the nail with wax or soap, the work will go like clockwork.
- It is not recommended to beat a large number of nails on the same line in the immediate vicinity of each other. The board will split.
- For places of connection of weights, a massive hammer can be used as a support.
- So that a long nail driven into the wood of solid species does not bend, it should be kept closer to the hat.
- If there is a need to install fasteners close to the edge of the board, you must definitely compact this place with the help of a punch and a hammer.
- The punch can help well deepen the nail into almost any surface under plastering, just put it on the product’s hat and hit with a hammer. If only a hammer for these purposes is used, dents on the site will not be able to avoid.
- Before scoring a nail into the wall pushed by the wallpaper, make a cross with a cross on the coating with a blade. Gently dilute the corners to the sides, install the fastener, glue the corners.
- Before nailing, you must first pierce with nails in the middle, neatly, so that they do not touch the veins.
- Many people's craftsmen are often interested in how to score a nail with a hand. In wood or concrete, it will not work out to drive the fastener manually this is obvious for any sane person. But in the sand, earth or clay very even. The main thing to observe caution and perform manipulations confidently.
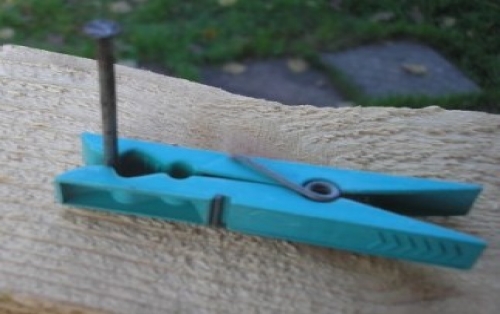
- An ordinary linen clothespin can help a beginner to help a beginner with a hammer.
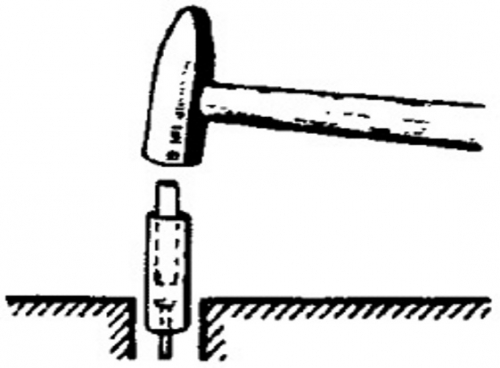
Most often, the question of how to correctly score a nail arises when working with hard -to -reach areas of the surface. For example, when you need to install fasteners in a recess. But it is enough just to arm yourself with a steel core and a metal tube as a problem comes to naught. Take a look at the picture and see for yourself.
You can install the fastener in some insidious nozzle using a nut and a bolt:
- wind a little nut to the bolt;
- put this device on a nail hat;
- find the nail with blows on the bolt hat.
When engaged in the manufacture of crafts or the repair of wooden furniture, you often have to contact the nades of large wooden nails. It’s as simple as steel, to score them, of course, is unacceptable. First, the hole is drilled, glue is dripped there, and only then they drive the wax.
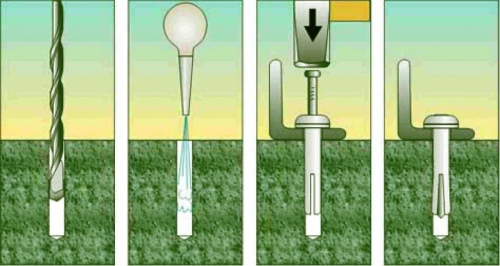
How to score the dowel of a nail?
In concrete:
- out a place under the hole with a hammer and a coreer;
- with the help of a perforator, break the hole of the desired depth with a drill. Please note: on the surface of the drill there is a marking indicating the diameter, it must necessarily coincide with the labeling of dowels. The depth of the hole should exceed the length of the dowel by about 5 millimeters;
A shock drill for working with concrete can only be used if it is not possible to get a perforator.
- remove the remnants of dust with a vacuum cleaner;
- with the help of a hammer, deepen the cartridge of dowels;
- find a nail from the kit to the desired depth, leaving several millimeters from the suspension head.
In brick:
- determine the best location of the dowel, taking into account the fact that it should be the center of brick. The fact is that the solution for the cargo is completely unreliable, so it’s better not to take risks;
- it is advisable to drill a brick with a shock drill. Start carefully and slowly, so as not to split the masonry. After overcoming the centimeter barrier, the speed of rotation of the drill can be increased to the norm;
- remove dust and brick crumbs from the hole;
- know the cartridge and a nail.
In tiles/ceramic tiles:
- determine the place of dowel with a marker. It can be both the surface of the tile and the seam;
- sove the surface with a screw for metal. Perform very light tapping, while passing no more than 0.5 millimeters of enamel;
- shock drill with a drill for metal (diameter - 3 millimeters) drill the tile for the entire thickness;
- bring the hole to the desired size;
- drill the wall under the tile according to the instructions for concrete or brick;
- carefully install a nail nail.
In drywall:
- before you score a nail into a drywall, you should think carefully if you are thereby the surface. If the cargo is planned to be placed heavy, then this material is not the best choice for support;
- for light objects, Molly's fasteners, designed specifically for bases with low bearing capacity;
- make a hole of the desired diameter in the surface;
- taping, enter the fasteners into the hole until it stops;
- with a screwdriver or manually twist the screw.
That's all. Now you know how to score the dowel of a nail and an ordinary nail correctly. Reliable designs! And take care of your fingers!

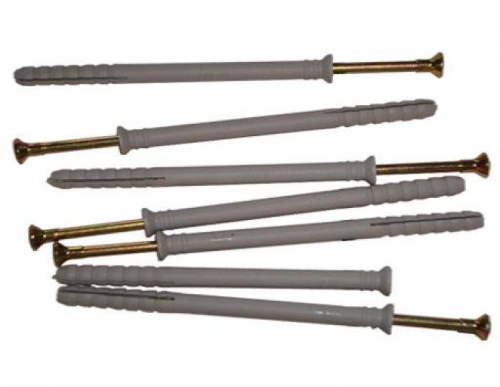
He was tormented with dowel-bones
He was tormented with dowel-claws for several hours, tried to beat a wooden block to the concrete wall. I did everything as it should. Result: about half the d-bvysteans managed to score normally. The D-Gvo has only the last 3-4 cm. (For D-Gvoles 120 cm long), the nail enters normally to this place, and then begins: either the nail is bent and the hat is clamped "to the side" (which means the dowel did not blame inside and " It does not work ”), or the plastic dowel is poured inside the hole in the bar under the influence of strokes along the nail - which means it also did not blame in concrete. And the beam ruined, When he then knocked out the drowned dowels, he crackled. Second: everyone says different tips on the method of clogging - on this site you supposedly need to be clogged with a hammer, and on other sites it is supposedly impossible, you need to wrap (then what is the difference from ordinary dowels?), In stores - the same, every seller - , full mess. By the way, I was not able to tighten the nail in the dowel at all, because. The carving on the nail is special, for impact. Very dissatisfied with these D-GV.