The windows in the form of arches have firmly taken root in the architecture of different styles and dominated ...
|
|
Plastic windows can be installed in any kind of design: stone, concrete, wood ... |
In its structure, the stretch ceiling has many advantages: no dust, disguise ... |
How to make a light ceiling
Until recently, a chandelier, proudly located in the center of the ceiling, modest sconces and majestically towering a floor lamp near the chair, was used to light the room. Today, people appreciated the advantages of modern lighting devices. With their help, you can not only correctly equip the lighting, emphasize the advantages and leave some disadvantages of the geometry of the premises in the shade, but also set a certain mood for the space. The article will talk about various installations of the ceiling lighting.
Content:
- The requirement for the ceiling
- Types of ceiling lighting
- Tips for arranging a two -level ceiling with illumination
- Spots and built -in lamps for illumination of the ceiling
- Neon tubes
- How to make LED ceiling backlight
- How to make a ceiling with a durantite light
- Recommendations of specialists
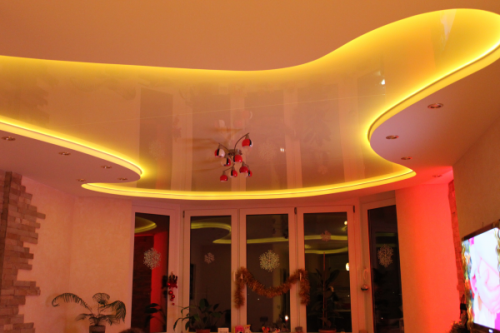
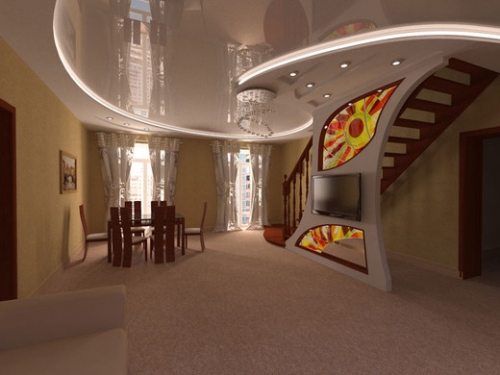
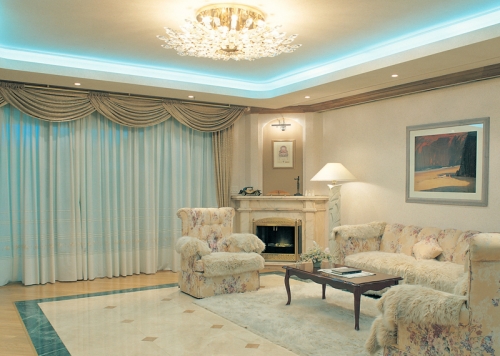
Numerous varieties of mini-lamps, spots, and ribbons provide an opportunity to arrange original backlight in accordance with their wishes. The miracle of technology on stretch and drywall ceilings of complex shapes looks especially beneficial. By the way, there are practically no restrictions on the intricacy of the design.
The ceiling lighting photo
The requirement for the ceiling
- The ceiling illumination organization is engaged in the repair of the premises. This allows you to hide the electrical wiring, aesthetically applied transformers, dimmers and other related devices.
- Stretch, suspended (rack, panel) and plasterboard ceilings can be created by complex configurations. This is exactly the case when complete freedom is given to realize the fantasies of the client. Which material to choose for the arrangement of the ceiling the choice remains with the owner of real estate.
Tip: grandiose design will show themselves in all its glory in spacious rooms with high ceilings. In small rooms, it is appropriate to use simpler solutions.
- However, an important drawback of stretch structures is the restriction on the power of the installed lamps. Therefore, before giving preference to PVC film, it is necessary to consult with specialists regarding lighting devices.
Tip: In any case, the placement of the backlight is already negotiated at the stage of development of the project of any ceiling. Since the electric wires, working holes, protrusions for lighting products are performed before the installation of the ceiling structure.
- It is worth saying that the owners should not be upset about the unremarkable ceiling. A simple ingenuity will help here. To arrange the backlight along the perimeter of the room, an ordinary ceiling plinth or cornice made of polystyrene, glue and LED tape is taken.
- The skirting board is glued to the ceiling (wall) around the perimeter of the room at a distance of 10-15 cm from the adjacent walls (or ceiling). A strip of LEDs is attached to the inside of the filter (the protective film is removed and the sticky side is applied to the installation site). In such a straightforward way, it would seem, an ordinary ceiling.
Types of ceiling lighting
The backlight is an auxiliary lighting. Here, lighting technology serves more to decorate and create an environment that promotes rest. In this connection, the functions of full lighting should not be assigned to such equipment.
Today, a huge number of lighting devices are offered, which will radically change not only the type of ceiling, but also affect the interior of the room. The list includes:
- spotlights, including devices with rotary mechanisms (spots);
- neon tubes;
- lED ribbons;
- duralite stripes.
Tips for arranging a two -level ceiling with illumination
- When choosing lamps, specify a number of parameters that must correspond to the material of the ceiling (the presence of a thermocolar, the weight of the products, etc.).
- Installation of lamps is carried out before installing the structure. Therefore, the necessary consumables are prepared in advance, markings are made, wiring is performed, etc.
- The aesthetics of the ceiling will completely depend on the acquired lighting devices and the method of their location. Using lighting, you can visually change the geometry of the room (narrow the length of the room, expand the cramped room, raise or lower the ceiling).
- Independent installation of lighting equipment is performed in the presence of at least basic knowledge about electricity. It will not be superfluous to read additional information or watch the video.
- The choice of lighting products for the design of the ceiling should be based not only on the basis of personal preferences, but also taking into account the material of the suspended (stretch) structure. Important parameters here are the weight of the product and the power of the lamps.
Spots and built -in lamps for illumination of the ceiling
- When designing, it should be noted that the space between the main and stretch ceiling can be at least 5 cm. In this case, some spot lighting devices have a base (seating) about 15-20 cm high.
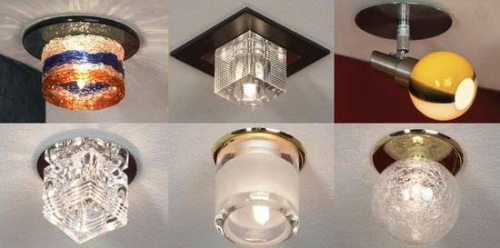
- Compact lamps can act both auxiliary and main source of light. It all depends on the competent location, selection of lamp power. Technological holes corresponding to the diameter of the fixtures are performed in advance. By type of fastening, 2 types of point devices are distinguished.
- Built -in. The basements with lamps are hidden in the inter -ground space through spring mounts, only the decorative part of the device remains visible. They are perfect for organizing directed lighting of a certain zone (lunch, working, etc.). As a rule, 1 device is able to cover with bright light up to 2 m2 of area, which should be taken into account when calculating their number and location.
- Models designed for installation in suspended ceilings are equipped with special thermal rings, which prevent the heating of the material, and also protect it from deformation and fading. For such lamps, incandescent lamps, halogen, fluorescent or LED lamps are used.
- For suspended ceilings with backlight, lamps with lower heat transfer (energy -saving or LED) should be given preference. When using incandescent lamps, their power should not exceed 60 watts, for halogen analogues, this indicator is 35 watts.
- External. Here, the lamp, along with the plafon, are located directly on the ceiling. Thus, outgoing heat cannot harm the ceiling structure. Spots attract special attention, their rotary mechanism allows you to regulate the direction of light.
- Ceiling lamps with an overhead type of fastening, especially with several lamp spots, often have an impressive weight, so before acquisition, this moment should be clarified by professionals. In any case, this will not become a contraindication for installing the newly you like, but will cause the installation of additional structural elements when installing the ceiling.
DIY lighting ceiling
- First of all, the ceiling is marking the future location of lighting products. To the marked points, wiring is passed, which is recommended to isolate into corrugated tubes.
- The ends of the wires for connecting point lamps to the terminals should be left with a margin (at least 20 cm). When working with halogen lamps, use gloves.
- Next, additional equipment is connected: transformers, light brightness regulators, switches, etc.
- It is necessary to check the performance (serviceability) of each electric link.
- For lamps under the stretch ceiling, racks, brackets, and thermo -insulating rings are installed in advance.
- All elements of the system are connected and once again checked for serviceability. With a positive result, the wires are isolated, the site is de -energized, and the ceiling is installed.
Neon tubes
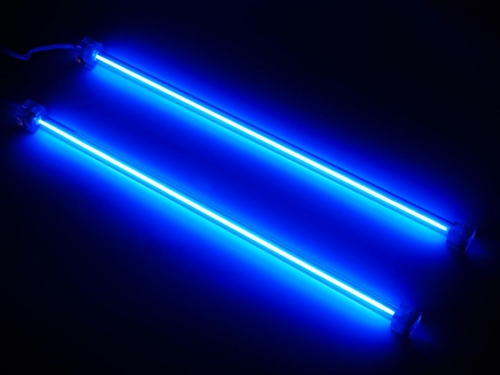
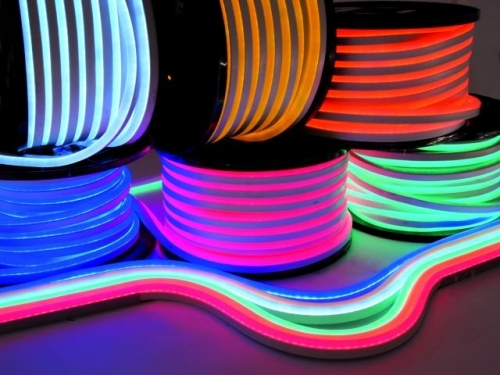
- This kind of lamps are used only as the decoration of the ceiling due to their low brightness and high energy intensity. They perfectly complement the design of the room due to the wide range of shades. The backlight can be plain, rainbow or contrast.
- The service life of quality products is 10-15 years. Basically, lamps are produced 1.5 m long and up to 1.5 cm in diameter. The maximum temperature during the operation of the lamps does not exceed 40, during operation, practically no noise is emitted.
- In the places of joint of the lamps, dark spots are not formed, thus, a uniform and continuous glow is obtained. If desired, you can order tubes of various diameters and configuration.
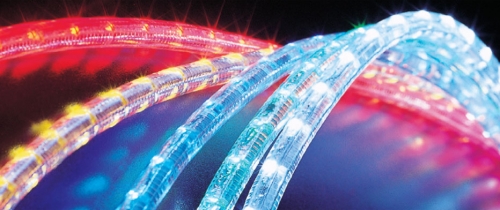
- An excellent alternative to individual dimensions will be a neon cord. Due to its flexibility, its installation is easily and simple. Its glow is similar to lamp radiation, but the intensity is noticeably lower. As for the cost, the cord will cost a little more than the tubes.
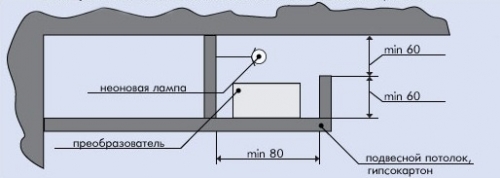
- To create a drywall ceiling with backlight, separate niches in the structure will be required. For the operation of neon products, a converter is required, which increases the frequency of electric current. You should know that one transformer serves up to 7 m tubes.
Installation of the ceiling from neon tubes
- Installation of lighting equipment is performed on any base. So for plastered surfaces, polystyrene plinths are used, niches are equipped in drywall, suspended and tension bases, the optimal size of which is: 20x50x70 mm. In calculations, it is important to consider the dimensions of the voltage converter.
- Depending on taste preferences, a luminous flow can be directed at the walls or to the center of the ceiling. The intensity of the glow is regulated by means of the side of the structure, and the higher the side, the brighter and clearly the strip of light is obtained. The absence of the side provides a multiple glow. For brightness, the diameter of the tube is also responsible for the lighting products of a large diameter, you can get scattered lighting. And vice versa, a small diameter is allowed to obtain more sharp boundaries of the light flow.
- The calculation of the points of connection of the transformers, and therefore their number, is based from a power of 1 meter of the lamp (about 10 watts). The converters are installed every 6-7 m tubes.
- The stores offer neon lamps in a complete set, which includes everything you need (mounts, cords, connection scheme), so there will be no difficulties during the installation process.
How to make LED ceiling backlight
- Excellent operational characteristics are flexible ribbons with diode bulbs. Serious manufacturers guarantee their impeccable work for 70 thousand hours.
- Typically, the tape is available in a length of 5 m, it can be increased or cut into smaller segments. Such free use makes it possible to equip the backlight of structures of any geometric shapes. LEDs can be monochrome or multicolor.
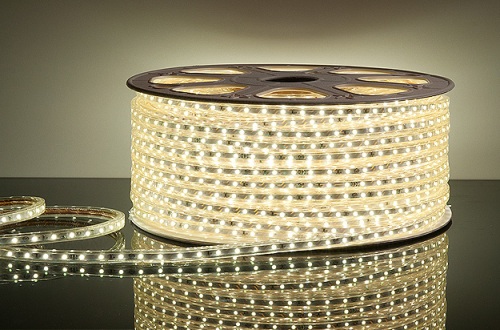
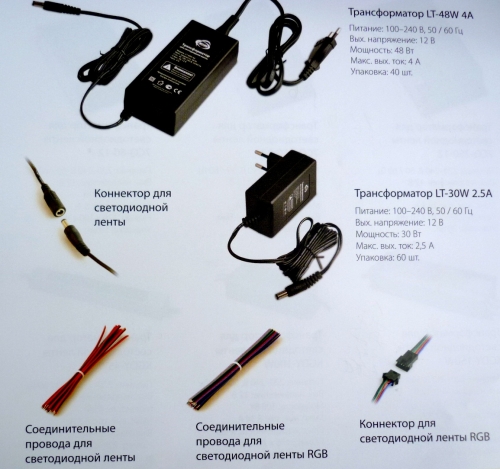
- The intensity of the glow of LED light lighting depends on the number of diodes located on a meter of tape. As a rule, this indicator for 12 V lighting equipment is in the range of 30-120 pieces, 24 V up to 240 pieces, where the lamps are placed in 2 rows. The more diode lamps on the section of the tape, the more powerful the power supply should be. The power of the transformer should be calculated with a 20% margin.
- The shade and brightness of the glow is regulated by means of a remote control or a special switch through a dimmer. Thus, the owner has the opportunity to create an environment to the mood.
- Ready -made sets greatly facilitate the mounting of LED backlight. Before making a gypsum plating ceiling with backlight, you will need to prepare all the necessary elements, and these are: a power supply, controller and control panel. The installation process consists in the sequential connection of all elements of the system.
Installation
If the backlight is assembled from separately acquired parts, then the installation process will consist of the following stages:
- It is not recommended to connect the tape with more than 3 meter segments, the paths may not withstand the passing current. The incision is carried out along the cutting line indicated by the manufacturer with sharp scissors in one movement. It is worth noting that moisture -resistant tapes are not subject to cutting to avoid sealing products.
- The wires are soldered neatly at a melting temperature not exceeding 160 in compliance with polarity. Contacts in the places of fastening to the board are protected by heat -musted tubes and special tips. Special clips allow you to connect contacts without soldering.
- When connecting single -color products, 2 veins are soldered, multi -colored tapes 4, where it lived in a black shell corresponds to the terminal +.
- The whole scheme is assembled without installation in place, this will make it possible to check the working condition and conduct a replacement (fix the defects of the system) in convenient conditions without dismantling.
- A large illumination area involves the use of a powerful block with considerable dimensions. In this case, it makes sense to replace one powerful block with several devices with indicators similar to the total power.
- To fix the tape on the surface, it is enough to remove the protective tape and apply with the sticky side to the base. It is important here to consider that it will stick to the polystyrene cornice tightly, but it will lag behind from the plastered surfaces over time.
Highlighting ceilings video
How to make a ceiling with a durantite light
- This type of backlight is a flexible cord of plastic with a diameter of 10-16 mm, in which miniature incandescent lamps are sequentially connected. Unusual brightness, elasticity of the cord (freely accepts any form) and small energy consumption makes the product in demand when organizing decorated lighting.
- The cord is cut into segments at special risks. The connection of several parts is carried out by means of a connecting coupling. Any transformers or converters are not used to connect to the mains.
- The product is presented both in one -color form (fixing) and a multi -color palette (chase). The latter option when connecting to the light regulator works in a different dynamic order, for example, in the form of flicker or running lights of the same color. In the Chameleon series, the lamps of two shades alternate. Multi-chasing is 4 color products. If desired, multi -colored cords can be combined according to design solutions.
- One of the disadvantages of this lighting product is the high cost of repairs. So, when one of the light bulb, a whole segment of the cord will have to be replaced.
Installation
- Installation work of the tube tube practically does not differ from the installation of LED tape. The only difference is in the absence of a transformer. The assembly of all elements is carried out first on the table or on the floor.
- The cut section is made according to the manufacturer's marks. So for fixing, the frequency of the cut is 1 m, chaising and chameleon 2 m, multicasing 4 m.
- When connecting segments of different lengths, a transition coupling is used. The end of the cord should end with a special tip (cap).
- A cable with a fork for connecting a product into a power grid usually has a length of 1 m, so it is important to take into account this factor when installing both an additional outlet and the location of the holy cord itself.
- After assembly, the system’s performance is checked. With a positive result, the duralite cord is installed for the planned place. Clips, brackets or rubber suction cups act as fasteners.
Recommendations of specialists
- When arranging backlighting, it is important to remember that no one has canceled the main sources of light: chandeliers, suspended lamps, sconces, floor lamps. The backlight performs only a decorative role.
- Before creating the scenery, pay attention to the numerous photos presented on the Internet. An illiterately selected contour can lead to bulky, weighting of any suspended (stretch) structures, especially for multi -level ceilings.
- In natural light with the backlight, the structure may look very depressing. Therefore, the organizational process should take into account this nuance.
- The backlight should carry the target task: to emphasize the character and style direction of the interior or the structurality of the structure.
- With particular caution, it should be used in rooms decorated in retro style, empire, etc. The modern solution does not harmonize with furniture from an array of wood; A chandelier with candles and a table covered with a tablecloth.
Well, in order not to regret spent means and spoiled interior, contact highly professional designers who will take into account all the wishes and offer the best option for creating and decorating ceiling structures.

