Thermal insulation and sound insulation of the room in which it ... depends on the quality of the insulation.
|
|
Without a high -quality foundation, it is impossible to build a country house, summer kitchen ... |
The rapid development of building technologies and the lightning -fast filling of the market is large ... |
DIY two -level ceiling
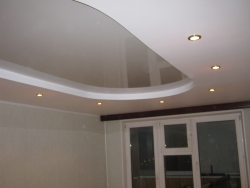
Today, suspended and suspended ceilings are at the top of their popularity. The simplicity of design, modern technologies in the construction and imagination of designers provided almost unlimited opportunities for their use. Most often, you can find the usual single -level structure into which lighting devices are mounted. But in order to create a really unusual ceiling, you need to pay attention to two -level ceilings. Of course, their creation will require good skills of a builder and designer, but a two -level ceiling with their own hands will be fulfilled for anyone who knows how to handle the tool.
Preparatory work
First of all, it is necessary to provide free access and movement in the room. To do this, you will either have to take out all the furniture from the room, or arrange it so that it does not interfere. Secondly, you should pay attention to the surface of the ceiling. After all, it is on how even and solid that it will be even that the number of efforts applied during installation of the structure and the reliability of its fastening will depend. Thirdly, it is necessary to calculate the required materials, and for this you will have to create a design scheme of the two-level ceiling. The fourth important point in the preparation is the electrical wiring, the wiring scheme and laying of the wires which must be considered in advance.
Preparation of the surface of the ceiling
Before making a two -level ceiling, we carry out a thorough inspection of the surface of the ceiling for integrity. To do this, completely remove the old finish until the very ceiling or old plaster. If there are no cracks and exfolved areas on the plastered surface, you can start finishing with putty. In the case when deep cracks are noticeable on the ceiling, and when tapping is a dull sound, you will have to completely clear the damaged area until the very ceiling. Then apply a primer of deep penetration and regain again with a plaster mixture. In case of damage to more than 30% of the total surface of the ceiling, it is better to reduce the ceiling again. It also makes sense to do full -fledged plaster in the case of large changes and irregularities. But if the level of differences does not exceed 10 mm, for alignment it will be quite simple to swap the ceiling in several layers using a painting grid. After the freshly consistent and scanned ceiling is completely dry, it will be possible to begin further work.
Calculation and scheme of the two -level ceiling
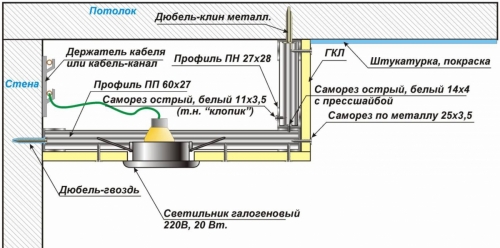
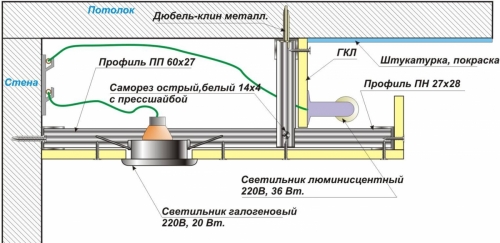
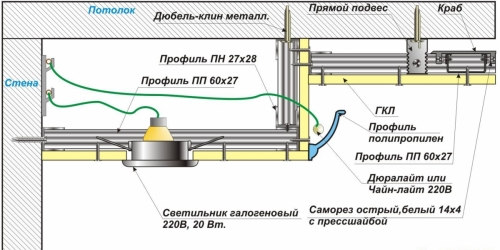
This stage of preparatory work is the most difficult and requires a master of engineering and design skills. Firstly, it is necessary to draw at least approximately what the two-level ceiling will be, where there will be hidden niches and protruding structural elements, as well as the location of lighting devices. If it is difficult to draw such a project yourself, then you can use one of the finished options for two -level ceilings:
When a design project is ready, you can start creating a design scheme and calculating the necessary materials. This can be done as follows:
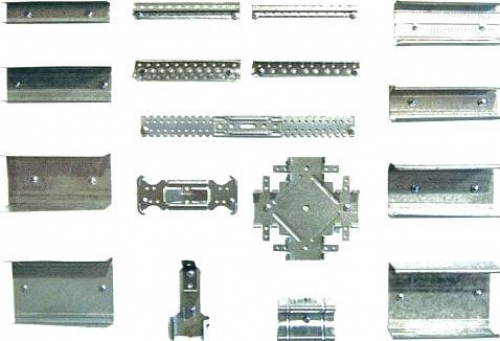
- We measure the width and length of the room and calculate the perimeter. For example, take a room with a length of 5 m and a width of 3 m. P \u200b\u200b\u003d (5+3)*2 \u003d 16 meters linear. The result is the length of the guide profile (UD). For a two -level ceiling, the length of the guide profile will have to be doubled, since you will have to make a second guide circuit for the second level.
Important! If you measure the room, you will find that the walls located opposite each other have a different length, it is necessary to use more for calculations.
- Now we calculate the required amount of frame profile (CD). The frame profile itself will be mounted in a step of 600 mm, and its length of the planks will be equal to the width of the room. 5000/600 \u003d 8.3, round to the whole and we get 8 planks of the frame profile of 3 m each.
Important! The step of the frame profile of 600 mm is selected based on the standard sizes of GKL. The sheets are produced by a width of 600 and 1200 mm, and when they are installed, it is necessary to ensure that the edges of the sheets lie clearly on the profile. The length of the GCL is also standardized, but a 2500 mm long sheet is perfect for suspended ceilings.
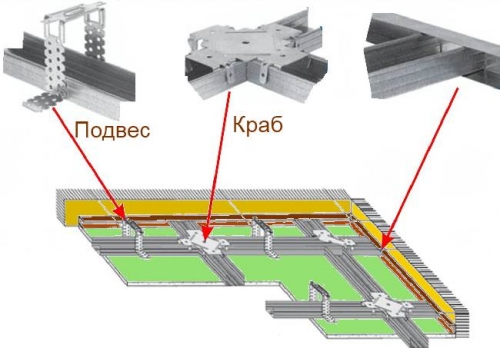
- Knowing the number of frame planks, you can start calculating straight suspensions, on which the strips will be attached. The mounting step of the suspensions is 600 mm, but the first suspensions from the walls along the guide are attached at a distance of 300 mm. Based on this, we get (3000/600)*8 \u003d 40 pieces of suspensions for fastening the frame profile.
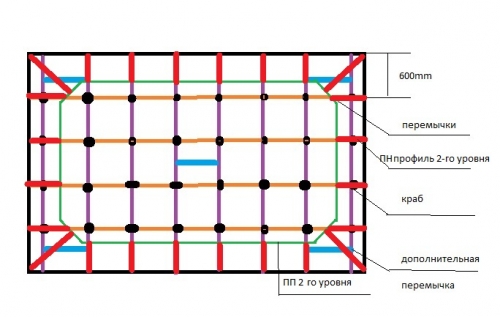
- In order for the design of the two -level ceiling to be more durable, it is necessary to additionally install jumpers between the main frame profiles and the connectors for them (crabs). First of all, we calculate the number of crabs. The step of their fastening is 600 650 mm. (3000/600)*8 \u003d 40 pcs. Krabov. Based on this, we get 5 rows of jumpers, each length will be 5000 mm.
Important! The indentation from the walls for jumpers and crabs should be selected based on the size of the second level. For example, if the width of the second level is 500 mm and hidden backlight is planned, then the first and last jumper will be mounted at a distance of 400 mm from the wall.
- Having completed all the calculations for the first level, we proceed to the second. At this stage, everything is somewhat simpler. So for jumpers of the second level, 18 pieces of the CD profile are required at 400 mm and another 4 at 1000 mm for angular joints. Also, to attach these jumpers, suspensions will be required in the amount of 22 pcs.
Important! Direct suspensions can be used if the height of the two -level ceiling is no more than 120 mm.
- To give the design of the strength and so that there is where to attach vertical drywall sheets that hide the skeleton of the structures, racks from the CD profile will be required. The number of racks is equal to the number of jumpers for the second level 22 pcs. The size is selected based on the features of the ceiling. The fact is that the second level can be mounted both to the main supporting structure and directly to the ceiling.
- It remains to calculate the number of sheets of drywall. Everything is extremely simple here. All sheets have standard sizes, and it is most convenient to use a sheet of 2500x1200 or 2500x600 for installation in residential premises. Therefore, we measure the area of \u200b\u200bthe first level of the ceiling along the edges of the profile and divide into the area of \u200b\u200bone sheet, the result is the required number of sheets. For the second level, the calculation is carried out in a similar way, only the protruding land and vertical strips that hide the structure should be taken into account. When choosing sheets of drywall, stop your choice on sheets with a thickness of 9.5 mm. They are optimally suitable for weight and strength for suspended ceilings.
Important! For some options, a two -level ceiling create a structure only around the perimeter of the room, and the middle is left free. Such two-level ceilings allow you to save on materials, and also make it possible to mount a stretch ceiling or somehow decorate the surface of the ceiling.
Electric wiring scheme
To begin with, you will need to outline the location of all lighting devices, and then make calculations of the consumption of the power of all devices and the length of the wires. Based on the data obtained, a wire of the required cross section is acquired. In addition to the wires, corrugation, mounting box or cable channel will also be required. The corrugation is good in that it can be transferred directly through the entire ceiling design, while the cable channel and the box will have to be attached to the wall around the perimeter.
All of the above materials will need to be reliably and firmly fixed to each other, to the ceiling and walls. To do this, you will have to buy a large number of different screws, anchors and dowels. From the whole variety of fasteners, it is recommended to use the following screws and dowels:
- for attaching to the wall and ceiling of the dowel and self -tapping screws 6x40 mm or 6x60 mm, mounting step 300 mm;
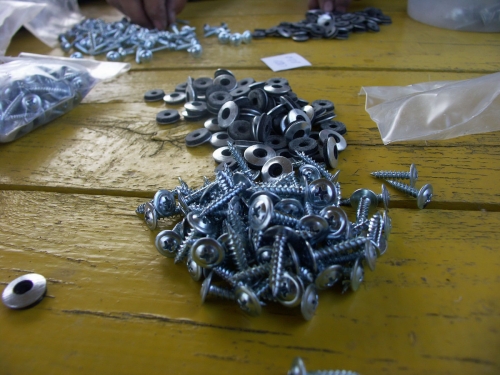
- to connect suspensions and profiles, crabs and profiles, a self -cutting screw LN 9, LN 11 or LB 9, LB 11 is used;
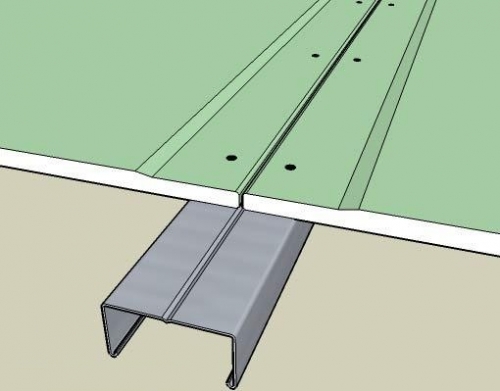
- the fasteners of drywall sheets are carried out by MN 25 and MN 30 screws with a step of 250 mm.
Important! For mounting a crab, 4 screws are used to connect the suspension and profile 2 screws. All installation work is best done with two partners.
DIY two -level suspended ceiling
About how to make two -level ceilings, you can write a whole scientific report with the listing of all kinds of structures and options for their fastening. Within the framework of this article, one of the common options for a two -level suspended ceiling is considered with your own hands. If there is a need to create a more complex design, you will have to contact specialists or more professional literature. So, in order to realize a previously drawn project of a two -level ceiling, it is necessary to do the following:
- After the surface of the ceiling has been leveled, we take a ruler or roulette and measure the height of a two -level ceiling without a thickness of a drywall sheet. We put 3 4 marks on one wall and connect them using a painting thread, after which we pull and release the thread, we get a clear line of the basic level of the future ceiling.
- We mark the ceiling for the frame profile CD. We use the same marking for suspensions, to which the profile will be attached. We measure the required distance from the walls, put 3 4 marks and connect them using a painting thread. Then, with a step of 600 mm, put marks for other profile planks.
- Now we take the guide of the UD profile, plunge in it for fasteners with a step of 300 mm. We attach the profile to the wall so that its lower edge is strictly along the intended line, and with the help of the chipper we plan places under the dowel. After that, take the perforator and drill holes, drive into the dowels. Again we apply the profile and fasten it to the wall.
Important! The volume of work on twisting various screws and screws is quite large, so we strongly recommend using a screwdriver.
- We put the suspension to the ceiling and pierce the place for fasteners. You can make one or two holes. Here it all depends on the desire to make the structure more reliable. Holding the holes for each suspension, drive into the dowels and fasten the suspensions.
Important! The sparkling holes for suspensions, it is necessary to ensure that the planned line is strictly perpendicular to the suspension and passes clearly in the center.
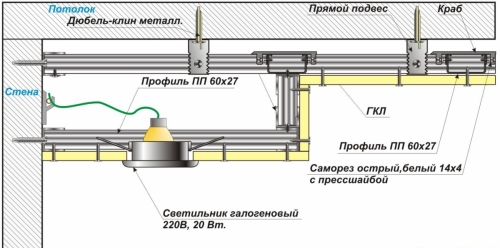
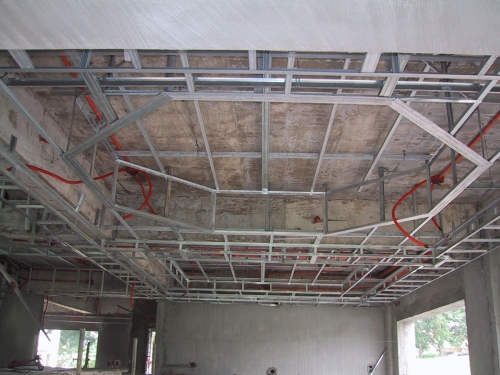
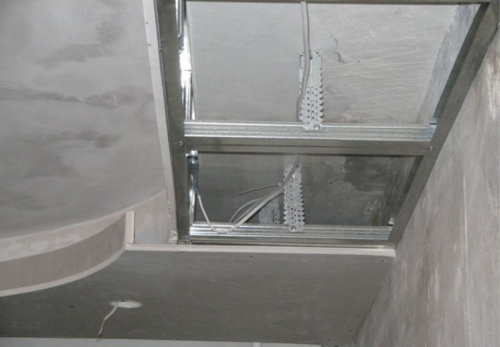
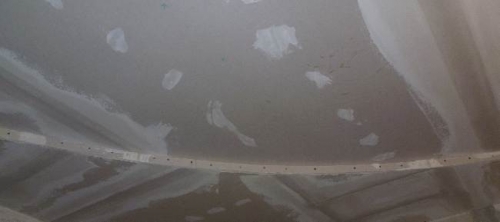
- It was the turn to fix the cd frame profile for the first level of the ceiling. We bend the ends of the suspensions like the letter P so that the profile along the width freely passes inside. There are holes on the suspensions that allow you to adjust the height of the ceiling, so you should determine in advance what holes the screws will be screwed in to get the necessary height of the first level. For a reliable connecting of the suspension with the profile, 2 screws are enough, one on each side.
- As soon as the framework of the frame profile is fixed, we take a roulette and mark on the ceiling the installation site of the crabs to connect the transverse strips of the profile. After that, install the crabs themselves. They start over the profile with antennae down and under the force firmly snap inside the profile, and then fixed to the profile with screws.
- It remains to install jumpers for the frame. But first, you will have to pick up a grinder or scissors for metal and cut the required number of jumpers from the CD profile of a certain size. Having done this, put the jumper in place. To do this, we start it from the bottom under the crab and, pressing it to it, snap, after which we fix the crab and jumper 2 screws.
Now we proceed to the installation of the frame for the second level. In fact, all work is similar to the fact that for the first -level frame. The difference is as follows:
- first, the CD profile is turned inside the UD guides and fixed to the suspension. Then it is also fixed to the guide profile 2 screws;
- to give the rigidity of the design, all the second -level CD profile strings are connected to each other around the perimeter by the UD profile and are fixed with 1 screw;
- to fix the vertically standing pieces of drywall, the profile of the second and first level is connected vertically with a jumper from the CD profile. They are installed over each of the horizontal strips of the second -level CD profile;
- after completing the installation of the frame, you can proceed to the installation of the wiring. To do this, either lay the wire in the corrugation directly from the installation site of the lighting device to the location of the network, or fasten the cable channel to the wall and lay the wire on it. When installing the wire, the main thing is to make a supply of 10 15 cm for its withdrawal outside the ceiling design and convenient connection of lighting;
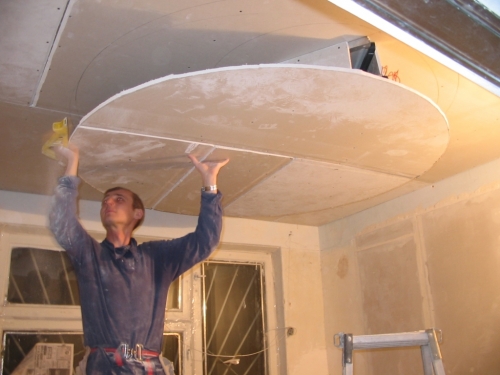
- now fix the drywall sheets. We start their installation from the first level. To give reliability to the ceiling, we attach them to the scope and fix them to the profile, which is screwed to the ceiling with suspensions. For fasteners we use special screws, which we screw in a step of 250 mm;
- having finished with the first level, we proceed to the second. Here you will have to carefully cut the sheets so that they definitely coincide with the length with profiles. The cutting process itself is quite simple to cut out the cardboard on one side of the sheet under the line, then gently open it and cut the second side. If necessary, trim it with a special shirt, and then fasten to the profile;
- to hide the internal structures, we fix the vertical pieces of drywall between the second and first levels, screwing them to the vertical stands of the profile. If the second level has a broken or curved circuit, then a strip is cut out of a sheet of drywall, then soaked in water, drywall will become soft and supple. Bending it under the shape of the clearance, apply and fix it.
At the end of the installation of a two -level ceiling, we drill holes for lighting in the designated places. On the edge of the protruding part of the sheet we glue a small border made of drywall, behind which the backlight will be hidden, then we primer and put off all the joints between the sheets. As soon as the surface of the ceiling dries, you can apply the finish and connect lighting devices.
Video: how to make a two -level ceiling
DIY two -level stretch ceiling
The creation of such a ceiling will be slightly easier than the above version of the two -level ceiling. First of all, this will touch the type of supporting design and the number of materials for its creation. Otherwise, the installation is almost identical to the usual suspended ceiling. But before making a two-level stretch ceiling, you will have to make a new design project and recalculate the materials. The key difference of the two -level stretch ceiling is that the suspended structure of drywall sheets is located around the perimeter of the room. And the center of the room is diverted for tensioning the canvas. To mount a two -level stretch ceiling, it is necessary to do the following:
- mark and mount a plasterboard structure into one level around the perimeter of the room. All works are similar to the previously described in the installation of a two -level suspended ceiling;
- to the design at a certain height, we fix the special profile for tensioning the canvas;
- using a heat gun, heat the room and canvas. Then we proceed to its tension;
- first of all, we fix the two opposite ones diagonally, then fix the third angle and the fourth. The ceiling canvas around the perimeter is pulled first on one side, then on the opposite;
- at the end, connect lighting devices.
DIY tickle two -level ceiling: Video
The creation of multi -level structures for the ceiling is quite laborious work, which requires increased attention and understanding of the process. The complexity of the execution lies in the consistency of the actions of two or three partners. But for a coordinated team, creating a two -level ceiling will not be difficult.

