In the system of life support, sewage plays an important role. But if in the city line ...
|
|
Laminate coating is particularly wear -resistant. However, when exposed to ... |
Despite the fact that the laminate floor has long lost the status of the new construction market, ... |
We make an electric warm floor in the garage. DIY installation technology for a warm floor
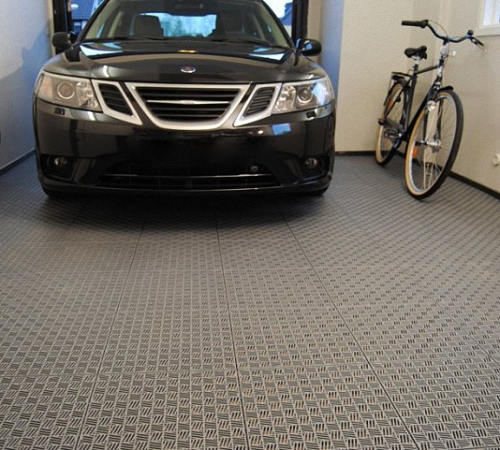
Each motorist simply dreams of his warm garage. He represents how in the cold season you could immediately get into your car and go without wasting time to warm up. Warm floors would provide the necessary microclimate for storing a car. In addition, the problem with the repair of minor damage in frost and constant catching the back would be decided by itself. That is why an increasing number of motorists are thinking about installing a underfloor system.
Table of contents:
- Requirements for the design of the warm floor for the garage
- Heating the garage using an electric warm floor and its features
- Varieties of electric warm floors
- Calculation of the required length of cables
- Preparatory work before the start of installation
- Safety regulations
- Step -by -step instructions for installing an electric warm floor
- Features of laying other types of heaters
- Tips for the installation of electric warm floors
Requirements for the design of the warm floor for the garage
In order for the heating of the garage to be as practical as possible, the warm floors must meet the following criteria:
- ensuring uniform heating of the garage (heat should move from bottom to top);
- automatically stop the heating of the room;
- ease of installation and use;
- should not occupy spaces that can be used more efficiently;
- comply with safety regulations.
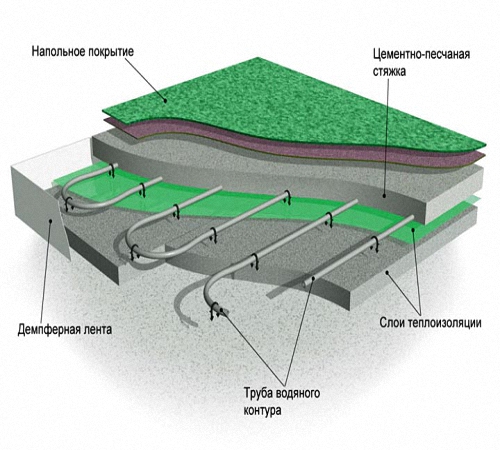
There are two types of warm floor systems: water and electric. A more reliable option is the water floors, but its huge minus is high -cost. Especially if the installation is planned to be carried out in a separate garage. Indeed, in addition to supplying pipes, you will need the purchase of additional equipment (various boilers and pumps). For good operation, regular prevention will also be needed. In addition, this kind of installation is occupied by a large amount of space that could be intended for more rational use.
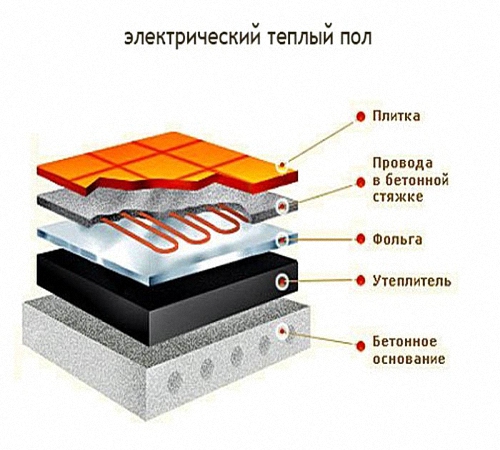
Due to all of the above, we can conclude that the best option for the garage will be to connect an electric warm floor. For this type, you do not need to bring pipes. Its design consists of heating cables, which are located in the screed itself. Of the additional installations, only a thermostat will be required, but it will not take up too much space (in size, the thermostat is approximately like a conventional switch). The heater does not need special service.
Electric warm floors have a long period of use (over 50 years). These structures have a high degree of security (special heat sensors are installed in them and when overheating, the system is automatically turned off). The advantages of electric warm floor are also in the simplicity of their installation. You can even install yourself without special tools. The only disadvantages are electricity consumption and the ban on their installation in buildings with an inflated percentage of humidity.
Heating the garage using an electric warm floor and its features
Unlike buildings of people intended for housing, a temperature of 16 degrees will be enough for the garage (and ideal conditions for storing the garage, and the person will feel comfortable, if there is appropriate clothing). If you begin to heat the garage to high temperatures, the consumption of electricity will increase strongly, and it will be inappropriate economically.
Before making a decision to install warm floors, you need to worry about the thermal insulation of the room. If the thinnest walls in the garage, as well as cracks, heat the room even to 16 degrees will be a difficult task. The walls can be insulated using any insulation (for example, foam). The main thing in this matter, do not try to choose a cheaper material. After all, all costs will soon pay off, due to the savings of electricity.
Also, a feature of the garage is the exposure of floors to high loads. This is the weight of the car itself, and the fall of heavy tools or parts, in some cases, etc. Due to these loads when installing warm floors, a thick layer of screed is required, which will be directly above the heater. The thickness of this screed will be approximately 50-90 mm. As a result, the use of the infrared heating film is impractical (with a large thickness, the heating temperature will be completely small).
Varieties of electric warm floors
Prior to the start of installation, it is also worth considering the types of warm floor and choose the best option:
1. Cable floor:
- cable (installation is carried out in a meager, in a cement screed for coverage of ceramic tiles, porcelain tile, natural stone);
- smart cable (the only difference from a regular cable is a large number of coatings under which it can be installed);
- a cable with heat-insulating slabs (installation is carried out in aisily, for any coating).
2. Film floor:
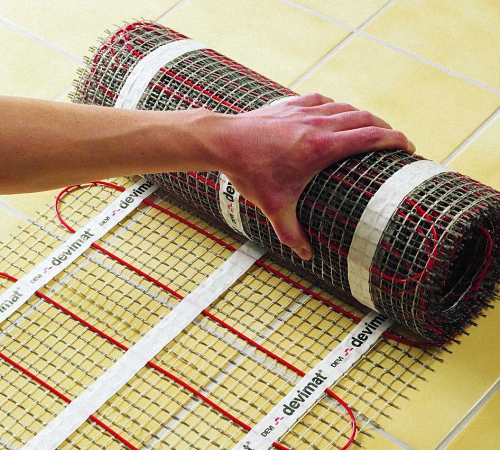
- heating mats (installation is carried out in a musical glue in tile);
- carbon film floor (installation is carried out in aispe only for wooden coatings).
3. Strezhnev (installation is carried out at a time, both in tile glue and in the screed).
Despite your choice, the calculation of warm floors will occur according to the same formula.
Calculation of the required length of cables
To understand what the length of the cables will be needed, you do not need to look for the drawings of a warm floor in the garage, only knowledge of the area will need. Next, just look at the table.
|
|
|
||||||
| Up to 1.5 | 0.16 kW | 11 m | ||||||
| 1.5-2.5 | 0.25 kW | 17 m | ||||||
| 2.5-3.5 | 0.44 kW | 29 m | ||||||
| 3.5-4.3 | 0.67 kW | 45 m | ||||||
| 4.3-5 | 0.83 kW | 55 m | ||||||
| 5-6 | 1.05 kW | 71 m | ||||||
| 6-7 | 1.25 kW | 83 m | ||||||
| 7-8 | 1.40 kW | 95 m | ||||||
| 8-9 | 1.75 kW | 117 m | ||||||
| 9-10 | 2.08 kW | 140 m |
Preparatory work before the start of installation
Most often, a raw earth is under the garage, which means that you need to take care of good insulation of the floor. If you skip this stage, then heat loss for heating the Earth will be approximately 30%.
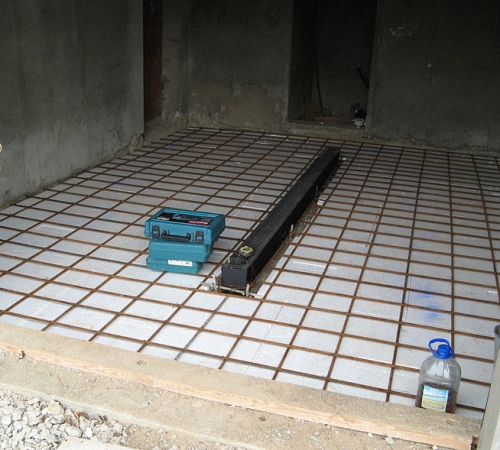
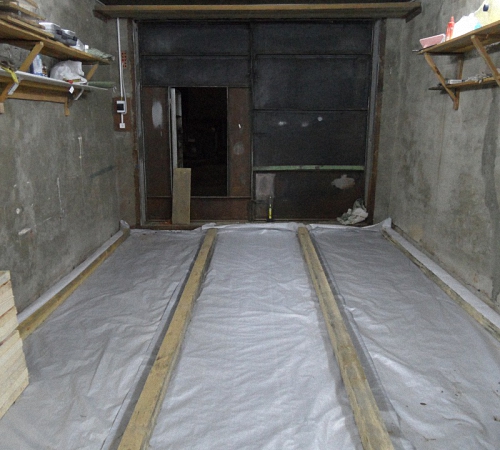
First of all, we fall asleep the soil with a layer of gravel (about 25 cm). We level and compact it. Next, you need to pour sand, which we also compact well (7 cm). We knead the cement mortar and pour it on top of the sand-gravel pillow. From the reinforcement we create a frame. We lay a plastic film and lay the thermal insulation material. It can be the most diverse, but it is better to choose a foam or polystyrene for the garage. The thickness of the material is from 40 to 90 mm (depending on temperatures in the cold season in your region). At a temperature of at least -16 degrees, 40 mm will be enough.
On top of the insulating material, we again lay the film. The last step of floor insulation will be pouring a layer of a black concrete screed. The screed should have a flat surface without sharp height drops. On this, the thermal insulation of the floor is completed.
Safety regulations
Before starting work, you should get acquainted with some safety rules:
- it is forbidden to deform or mechanical exposure to the wire;
- it is forbidden to change the design of the thermostat;
- before the installation, de -energize the room, lay the warm floor, when the power supply is strictly prohibited;
- installation is carried out only at a temperature above 0 degrees per Celsius;
- in the area of \u200b\u200bthe heating section, screwing screws and drilling holes are prohibited.
Failure to comply with these rules leads to very deplorable consequences.

Step -by -step instructions for installing an electric warm floor
The technology for installing an electric warm floor is so simple that even a newcomer in construction can cope with it.
1. We put marks in places in places where it is planned to place racks or workbench for storage of tools.
2. We mark the distance from the walls 4-9 cm.
3. We make a mark in the place where we will subsequently install the thermostat (30 cm from the floor) and from it we drive a vertically located line.
4. On the previously drawn line, we cut out the so -called strobe (30x25 mm) and a seizure under the very top box itself.
5. We fix the box with alabastr and bring the power wire to it.
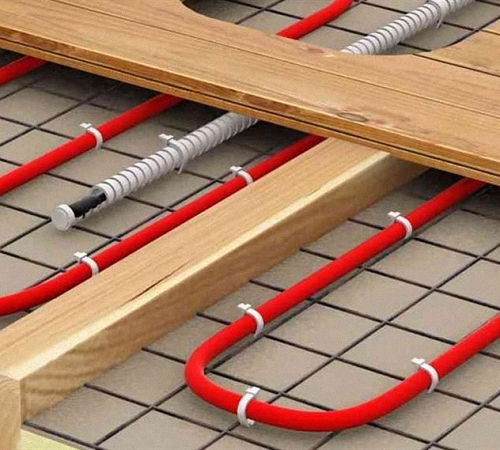
6. We proceed to fix the mesh made of metal rods on the surface of the foam. To do this, use dowels with washers (the length is the double thickness of the foam).
7. The next case we calculate the step of laying the wire. To do this, use the following formula: step \u003d (100 * p) / d (cm), where:
- N area of \u200b\u200bthe heated surface;
- D length of wire.
8. The wires need to be laid by the so -called snake.
9. It is necessary to avoid bending cables at an acute angle or damage.
10. We fix the cables with plastic screeds.
11. The cooled end of the section is brought to the mounting box (the coupling is required to be located on the floor surface, and not in the wall).
12. From the box of the thermostat in the opening, we lay a corrugated pipe with a diameter of about 17 mm and bring it to the heating area by at least 45 cm, we do it as close to the center, between the formed coils of cables.
13. We wrap up the end of this tube with electrical tape or close with a plug in order to avoid the solution of the solution into it.
14. A very important point is the lack of sharp bends in a corrugated pipe.
15. Turn the floor temperature sensor inside the pipe almost the entire length, then pull it out and start again.
16. We cover the stroob using the plaster mixture.
17. We connect a system of warm floors, at this stage it is recommended to use the services of a professional;
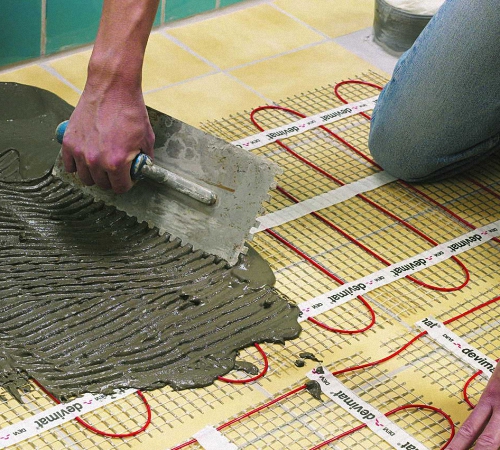
18. It is necessary to fill in the screed. The layer should be uniform at least 5 cm. For filling, we use the solution for 3 parts consisting of sand and one part of cement. Add the plasticizer to this mixture. If you are afraid to knead the solution incorrectly, use the services of construction stores in which ready -made screeds are sold. For greater strength, you can add fiber fiber.
19. After completely drying the screed, lay the tile using special glue for warm floors.
As you can see, during installation, we did not have to use some special tool for an electric warm floor.
Features of laying other types of heaters
The above installation is designed for a cable type of electric warm floors. The installation of other types practically does not differ, but still has its own characteristics:
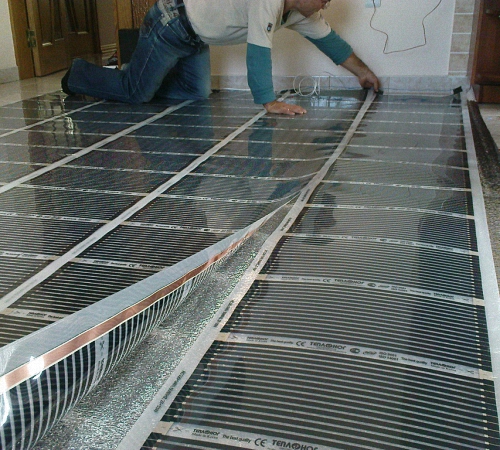
1. Film floor. The name speaks for itself. It is due to the fact that the heater is represented by a thin film with heating elements, it is necessary to carry out installation carefully and with the executions of the additional rules indicated on the packaging. With improper treatment, deformations or damage to the chain may occur, which will disable the entire heating system.
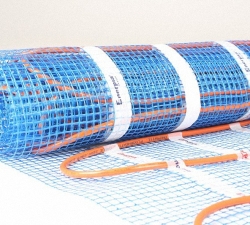
2. If a steady warm floor was purchased, represented by a flexible thermomat, then its installation is many times easier. First of all, we put a thermal mat on a black concrete base. We connect the wire to the thermostat and using a tape with an adhesive surface, glue the structure to the floor. We apply a layer of special glue and after it dries, lay the tile itself directly. It is also worth noting that elements of this type of warm floor are not afraid of transmission.
We recommend that you see how to install an electric warm floor of the video that is at the end of the article.
Tips for the installation of electric warm floors
Lastly, we will share several useful tips when laying a warm floor in the garage with our own hands:
- Despite the fact that you will use warm floors in the winter, it is recommended to install in the warm season.
- When choosing the length of the cable, it should be borne in mind that it is impossible to change, to more accurately reduce it, it is impossible. Heating cables in the warm floor system is strictly prohibited.
- During installation, try not to step on the wires, as this may damage their integrity.
- Do not turn on the system until the screed is completely dry.
After reading this article, each person who owns the machine will install an electric warm floor in his garage. Why do you ask? Firstly, it is very profitable. The warm garage is not only comfortable for the motorist, but also extends the service life of the car. And secondly, the article describes in detail how to install an electric warm floor with your own hands, thereby saving. Follow the operating rules and enjoy the microclimate you have created in the garage.
