When changing the old flooring or when arranging a new floor, a floorboard ...
|
|
Over the past 10 years, the number of roofing materials has increased significantly, however ... |
One of the most ancient building structures arch does not lose its ... |
We change the broken tile with our own hands. Tile repair recommendations
Starting the repair in the bathroom, first evaluate its general condition. Sometimes you have to resort to capital work to replace water pipes and finishing material. But if the general condition is satisfied, then cosmetic repairs are required, which in most cases is limited to updating the grouting seams or individual tile elements. The article will give detailed instructions for the restoration of broken tiles with your own hands.
Content:
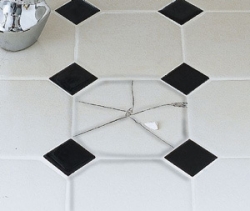
There is ceramic tiles in almost every house. It spread walls and floors in bathrooms and bathrooms, as well as floors in the corridor and in the kitchen. If wall tiles can serve for decades, as it is rarely subjected to mechanical exposure, then floor elements often crack and chips are formed on them. Even if you glue the damaged area, the crack will still remain noticeable and will spoil the general view of the room.

Initially, laying a new tile, it is bought with a margin and left in case of repair work. If this was not done, or too much time has passed and it was lost, then using a partial replacement of the new tile you can beat a new design. But in this case, you will have to change more than one element, but several at once. But, in any case, it is much less costly than changing the floor completely.
But it happens that due to a violation of the technological process during installation, wall tiles also departs over time.
The nuances that may arise with a partial replacement of broken tiles:
- poor stripping of old glue will cause an uneven surface;
- improper consistency of the adhesive composition and a decrease in the strength of the coating;
- rough removal of broken tiles, which leads to damage to neighboring elements.
Tip: Timely preventive tile care, which consists in cleaning the grouting seams, especially when signs of mold, will help to avoid repairs. Floor tiles can be protected with carpets especially in the countertop zone, on which glass or ceramic jars with soap or creams are often exposed. When falling, they are often causal chips.
DIY stitches update
- In most cases, the need to replace the grouting seams occurs when they are found neither mold or cracking. Even the most beautiful and expensive tiles will lose its beauty if the seams are of poor quality.
- If the grout is light, then it can also spoil its appearance, which will inevitably form in the shower or bath area due to the hit on the wall of foam and water. It is easy to remove with ordinary detergents and brushes.

When these measures are not enough, you have to resort to repair work.
- First, all washcloths, cosmetics and interior items are removed, since a lot of dust and dirt will form in the process.
- If it is not possible to choose the color of the grout exactly from the old one, then you will have to clean all the seams. This is a long and laborious process. It is more convenient to clean it with a knife or any other hard and sharp object.
Tip: there are special compositions on sale, when applying for an old grout, she begins to soften. Removing it is much easier and dust is not formed.
- Then the entire surface is wiped with a damp cloth for cleansing of dust.
- The grout is diluted with water in a small amount to a pasty consistency. Work should be quickly, as the composition is quickly grasped, especially when applied to the surface being repaired.

This is a simple type of work that is easy to do independently.
Types of repairing tiles with your own hands
These types include:
- repair when forming cracks or chips;
- replacement of whole tile elements;
- repair work of floor tiles;
- repair work of wall tiles.
Tile repair on the wall
Damaged tiles is not always possible to repair. Even a thin crack will be noticeable and spoil the appearance of the entire cladding. To replace the tiles, the following tool and material will be required: a hammer, a chisel, a perforator, glue, a toothed and rubber spatulas, a grout.
Stages of work
- Before proceeding with the removal of the tile itself, the seams around it are cleaned.
- Next, the perforator is drilled in the center. And from it they begin to carefully remove the tile in pieces using a chisel and a hammer. The main thing is that the tools do not break and damage the neighboring elements. It is advisable to put on glasses or a protective mask, since when chopping off, pieces can fly into the face.

- It is most convenient to clean with a spatula, but if the glue is too hard and can not manually remove it, then it is recommended to use a chisel and a hammer. It is very important at the same time inadvertently not to break other tiles.
- If there were holes on the repaired area for fastening the shelf, mirrors or a hole for the circuit breaker, then they need to be transferred to a new tile and pre -inhabit. Do this with a special nozzle on a screwdriver. At the same time, they are drilled at low speeds so that the split does not work out.

- Then the surface is moistened. Glue is applied to the tile itself and tightly pressed to the wall. The gaps with neighboring tiles should be even and in width correspond to the existing ones. To do this, you can not buy a package of special crosses, but use matches.
- As an adhesive composition, it is allowed to use liquid nails, silicone sealant or special tile glue.

- After a day, the seams are covered with grout and smoothed with a finger.
- If the tile is restored, which adjacent to the bath or the shower pallet, then immediately the joints must be sealed with a special putty, which has water -repellent properties. On top you can lay a decorative corner of plastic or ceramics.
Replacing broken tile video
Repair of chips and cracks on tiles
If there were no elements for repair from the old tile, and it was not possible to choose the right option in the store, then it remains only to restore the damaged area with your own hands.
- Cement milk. It is easy to make it, it is enough to mix cement with water in a very liquid consistency. It is applied to the surface of cracks and chips with a sponge. After drying, it remains to disguise the renovated section of the paint suitable in color or a thin layer of grout.
- Epoxy adhesive. If the chip or crack is too large, then you will have to make more efforts for repair. First you need to remove the grout around the tile. Then, with the help of a spatula and a hammer, carefully separate the broken element. All fragments are cleaned of glue and dirt. It is easier to do this if you put them for several hours in hot water. Then dried, glued with epoxy glue and left to dry. Then they glue it back to the wall and, waiting for the composition to grab, grind the seams with grout. Thus, it turns out to fasten the tile and not be afraid that it will fall off the wall over time. But its appearance remains non -casual. To complete the work, the entire surface needs to be covered with alebastr, which is literally flared up instantly and on top already painted with special waterproof paint for ceramics.
Repair of tiles on the floor
- Floor tiles are most susceptible to mechanical damage, so there is more often the need for repair. All work begins by removing the grout around the problem area.
- To remove the tile, first a hole is made in the center with a perforator or screwdriver with a special nozzle for ceramics. If there are no such tools, then you can simply strike and remove the resulting fragments with a bite and hammer.

- Before you start further repairs, it is important to properly prepare the coating for the replacement of the tiles. There are all large pieces, begin to clean all the bumps that formed from the old adhesive composition. Then they vacuum all dust and wipe with a damp cloth.
- Since the tile on the floor is laid in rooms with high humidity, after removing the old coating, a waterproofing layer could be damaged. So, first of all, you need to smear the cleaned area with a primer or any other liquid waterproofing.
- Next, everything is done as usual, glue is applied with a gear spatula and the tile is laid with the entire surface. The size of the seams is also very accurately measured. During the day, it is impossible to step on the renovated area.
- In conclusion, the seams are grouted.
Repair of mosaic tiles with a pattern
- Thanks to the drawing, small cracks may not be so clearly striking, so it makes sense to try glue them. To do this, the tiles are neatly separated from the wall. To pick up the edge, you need to remove the grout. In addition, the grouting seam additionally fixes the element and complicates its separation from the wall. The remnants of the glue are thoroughly cleaned with a knife and washed it. Then glue with epoxy glue and bandaged to firmly fix for the time of setting. The renovated tile is attached back to the wall.
- If it did not work out beautifully and the seam remained noticeable, or there is a more obvious defect in the form of a chip, then it will come to the rescue color photo printing. In this case, you just need to choose the tile of the right size in the store and bring it and broken tiles to any store where they make photo printing on a mug, clothes, etc. The designer will transfer the drawing to the computer and restore it, after which he will be applied to the tile. Thus, it will turn out inexpensive, but high -quality repair, which does not require replacing artistic cladding.

- In addition to photo printing, you can use self -adhesive film. The glued tile is treated with a skin to increase adhesion, wiped and glued a film, smoothing with rubber plastic for a denser fit. Modern films are not only moisture resistant, but also resistant to chemical components. They can be washed with sponges with cleaning products. In addition, such a film is sold in a huge design assortment.
- You can do even easier, but whether such a repair method will be injected with durability. The chip or crack is filled and aligned with grout, and glued on top decorative film.
Choosing glue for tiles
Even if the plot is small, you still can not do without special tile glue. There are several types of them, we will consider the main differences and characteristics.
Properties:
- cement glue. The most common today. This is due to its low price and versatility. It has good adhesive abilities, and thanks to the consistency it is allowed to work even on uneven surfaces;
- epoxy adhesive. Having a two -component base, it makes it possible to glue the tiles on plastic, wood, metal and a number of other surfaces. Available in the form of a paste or liquid. For fixing 1 2 tiles The most preferred option;
- dispersion glue. On it you can glue the tile directly to the drywall, without additional surface treatment with concrete contact. The glue is based on various resins and acrylic. It is on sale already in a ready -made form.

The glue for tiles differs in binding properties, it is divided into products made of porcelain tiles, standard ceramic tiles and mosaic. But regardless of its characteristics, latex components and quartz sand should contain the composition.
- For small and light mosaic tiles Polymer or cement glue is suitable. In addition, there is a special mosaic glue.
- Porcelain tile Not only heavy material, but also with very high moisture resistant qualities. Therefore, a special glue is used to fix it, on the package of which they write, which is suitable for porcelain tiles. It has increased stickiness and elasticity.
- Universal glue Good in that it is equally suitable for work both indoors and outside. But it is suitable only for standard tiles of 20 x 30 cm or mosaic, since it is not able to withstand heavy loads.
![]()
StrPort construction portal 2011-2018. Articles about repair, construction, building materials.
Copying information from the site is possible only with permission of the editorial office Or indicating a direct link to the source. Legal justification