The roof is the most important part of the house, on the quality of which the comfort of living depends ...
|
|
Many of us neglect new building materials, and do it in vain! Bright ... |
To dig a trench under the foundation only at first glance it seems that there is nothing ... |
Installation of keramaplastic roof with your own hands. Choose pormoplastics for the roof

Nowadays, the field of building materials is rapidly expanding the range of roofing coatings. Each new material is more reliable, high -quality and environmentally friendly. They are made of various compositions. One of these innovations is pormoplasty.
Table of contents:
- What is keramoplasty
- Technical characteristics of keramoplast
- Pros and cons
- Types of keramoplasty for roofs
- Calculation of keramoplasty for roofs
- DIY roof installation
- Ceramaplastic roof care advice
What is keramoplasty
For the first time in the market, porcelastic was demonstrated in 2000. He began to gain popularity from the day of appearance. Natural minerals are used to create a keramoplast and at the same time synthetic components:
- Titanus dioxide acts as blocking the destructive effect of ultraviolet rays. It is necessary to create conditions for painting the material. Before starting to give the ceramoplast the color of interest to the buyer, everyone else except a white shade will neutralize.
- Clay powder is needed to resist the material during mechanical loads.
- The components of the lubricant and stabilizers - without them, there were an impossible extrusion of sheets (the same thickness over the entire surface).
- The strength modifier provides the plasticity of the material, which allows it to be immune to temperatures in frosts.
- Pigments are used in the composition in order to give the final color over the entire surface of the keramoplasty.
- Other additives - lower the combustibility, do not allow changes in the structure that may occur as a consequence of sudden changes in temperature.
This composition makes the material strong, persistent. It was the high technical characteristics that pacified porcelastics among other roofing materials in the first place.

Technical characteristics of keramoplast
Roof Kramoplast is the best option, because this material includes the following characteristics:
- wave -like shape of sheets;
- smooth (200x90 cm) or texture (170x85 cm) surface;
- sheets with a thickness of 3 to 4 mm;
- has uniform painting;
- easily served to process by cutting;
- in order to give shape, the porcelast is sufficiently heat;
- high strength (with a thickness of 3 mm and having a weight of 9 kg, the strength will be 1500 kg/m cubic meter);
- high waterproofing indicators;
- high thermal insulation indicators;
- high soundproofing indicators;
- opposes the wind and snow;
- immune to temperature changes;
- immune to corrosion and decay;
- it is possible to use in any climatic conditions;
- ecological;
- there are no toxic inclusions in the composition;
- intended for multiple use;
- economical (cheap in service).
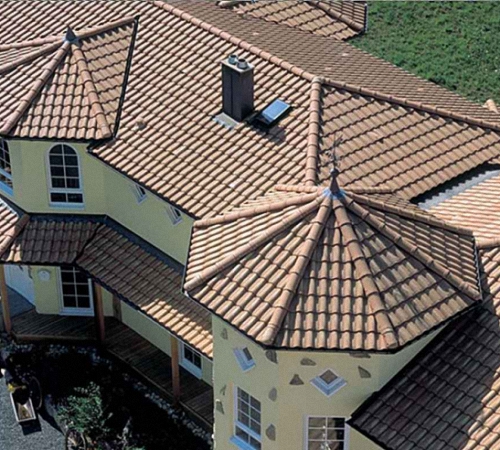
Pros and cons
Like other species, the porcelastic roofs have advantages and disadvantages. The main advantages can be highlighted as follows:
- the color saturation remains throughout the entire life, the same as the new material was the same, since the color pigment stains not only the surface of the sheet, but also all the material throughout its thickness;
- when walking along the roof from porcelast, the sheets will only bend slightly, but not break;
- practically does not miss the sound;
- absolutely does not accumulate static electricity;
- absolutely not subject to corrosion;
- low installation cost;
- a wide palette of color scheme;
- repairs.
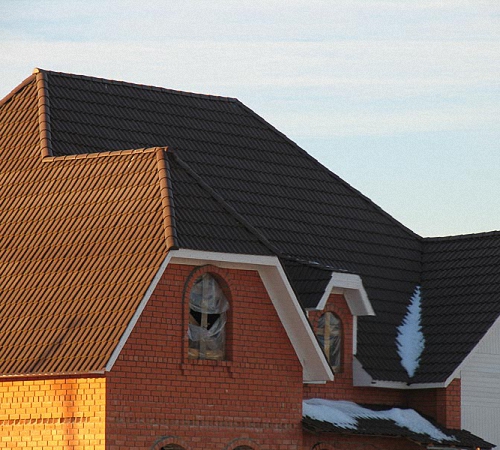
The disadvantages of this type of roof include:
- this type of roof is fire hazard, therefore, in places where the sheets are adjacent, it is necessary to perform aprons from non -combustible materials;
- it is difficult to distinguish the original pormoplastic roof from a fake (fake after some time will begin to lose its color);
- often during transportation or installation, scratches are formed (they are easily eliminated by a soldering lamp or an ordinary hairdryer);
- the appearance of cracks with improper installation.
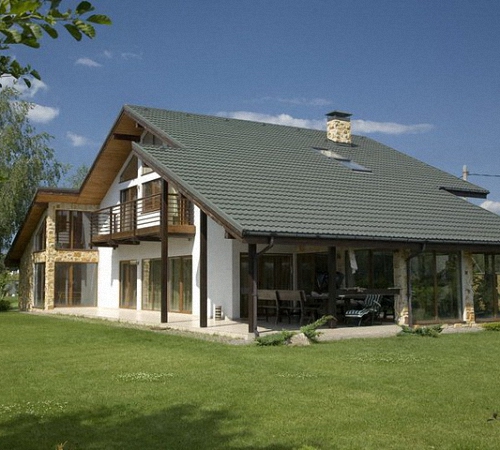
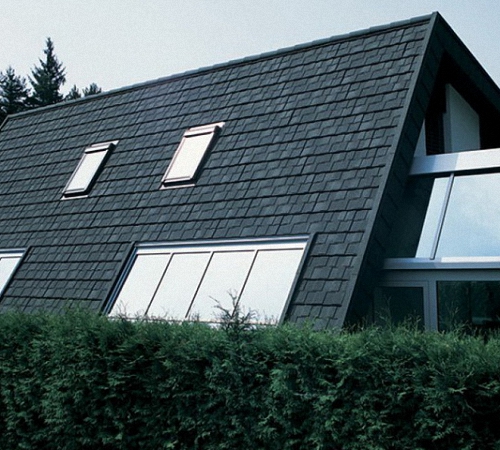
As you can see, the advantages of such a roof are much more than disadvantages. If you were satisfied with the characteristics, but you are worried about how the keramoplastic roof of photos of houses with this coating will look at the end of the article.

Types of keramoplasty for roofs
The choice of pormoplasty for the roof depends on its use and personal tastes. The following types are distinguished:
1. Liszt Keramoplast.
- surface: smooth or wavy (wave height is 2.7 cm);
- dimensions (in centimeters): 200x90x0.45 (0.3);
- weight (in kilograms): 12 (9);
- application: most often used on roofs of housing or administrative premises. The same species from all angles and the lack of sagging allow it to be used in roofs-canes.
2. Teton sheet.
- surface: triangular wavyness, textured;
- dimensions (in centimeters): 170x85x0.45;
- weight (in kilograms): 11;
- application: Name and hinged roofs. This type of keramoplast looks great on the roofs of cottages.
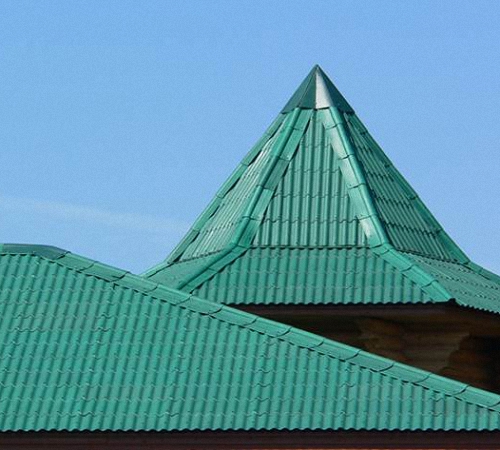
3. Tiles of keramoplast.
- surface: wavy classic (wave height 2.7 cm), smooth;
- dimensions (in centimeters): 90x50x0.45;
- weight (in kilograms): 3;
- application: outwardly similar to French tiles, so most often used for the roof of cottages and arbors.
4. Teton tiles.
- surface: textured;
- dimensions (in centimeters): 56x87x0.45;
- weight (in kilograms): 3.7;
- application: pitched roofs of cottages, awnings. A fairly original tile, will make the roof unique and refined.

Calculation of keramoplasty for roofs
After the type of pormoplasty is chosen, we proceed to the next stage of the calculation. One of the most important stages. The calculation of porcelastic for the roof is carried out on special online calculators. To do this, you need to know the length of the skate and slopes. Next, indicate the type of roof (single -shield, gable, broken) and the program will consider the right amount of material. If there are difficulties with dimensions of the length, you can call the measurer.
DIY roof installation
Installation of pormoplasty on the roof process is quite laborious, but it is quite possible to perform it yourself.
Step -by -step instructions for installing roofs:
1. Remove the old tile. If she is in good condition, there is the opportunity to sell it, thereby partially paying off the costs.
2. We check the overcrowded insulation. If damage is detected, it will be necessary to replace.
Closed isolation is one of the most important designs in the house. In addition to the fact that the entire load from the tiles falls on it, it opposes the wind and moisture. There are two varieties of sub -sobs: breathing and sealed. When replacing, you can choose the type that you consider more necessary for your home.
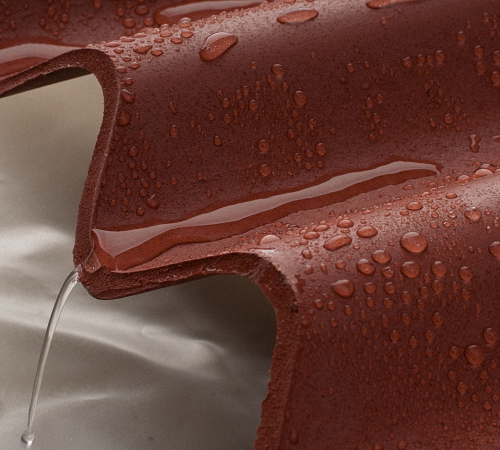
3. We perform a crate.
Chatter is a design of vertical and horizontal bars made of wood, tiles will be installed on it. Professional builders at this stage create drawings of the roof from keramoplast, how the crate and sheets will be located, but you can skip this process. Vertical bars are needed for the cultivation of the room, and horizontal to support the rafters. The thickness of the boards selected for the crate should be more than 3 cm, and their width is 10 cm. Regardless of the corner, under the angle of which the roof is located, the step of the crate should be more than 38 cm, and the distance between the first 2 bars is 28 cm. Prior to the start of installation, all wood structures require antiseptic treatment and a fire -retardant mixture (antipyren).
4. Install the porcelast.
You can set the sheets of keramoplast yourself, since this does not represent great complexity, the only thing, it must be borne in mind that this stage requires accuracy and accuracy. The laying of sheets or tiles is overlapped (the overlap of the sheet is 10 cm, and the side overlap is 5 cm). Also, we perform this process in a horizontal direction against the wind.
There are several ways to lay keramoplast. Consider them all:
- Laying in a standard way. The sheets are bedtime in this way: a row to a row. At the same time, the overlap of four sheets comes out. To reduce the thickness of the overlap and prevent the material deformation, we cut the corners in 2 sheets that are on the same horizontal.
- Laying zigzags. It is used to avoid overpluging 4 sheets. This styling involves the placement of each 2nd row with a displacement (half the previous row). You can navigate at the junction (it should be in the middle of the upper sheet).
- Laying with a large roof area. In this case, the installation is simplified in this way: we lay the lower row, then the side rows to the skate (the angle of laying is 90 degrees). We lay all other sheets on horizontal.
5. Installation of pormoplasty on the roof.
At first installation, fix the sheets partially. This is necessary in order to verify the correct installation of the final and side overlaps. If everything is in order, we can fix the sheets with screws completely (instead of screws can be used instead of screws, with protective polymer caps, roof colors). For the correctness of fasteners, we use a thread. Having pulled it, we fix the screws along the bar line. In no case, it is not necessary to pull the crest of the wave with screws, this can lead to a distortion of sheets.
To prevent bloating, do as follows: drill a comb 3 mm larger than the diameter of the fasteners. The mounting details in the initial sheets are used in the amount of 30, for the next 20. After the installation of keramoplasty is completed, we proceed to the mounting of the skate. If you want to see in detail how the ceramoplastic roof is installed correctly about step -by -step instructions at the end of the article.
6. Installation of the skate.
We mount all the elements of the skate through the lock. Before fixing the horse, you need to make sure that the 1st row of fasteners (self-tapping screws) is covered with a skate. Net the parts with fasteners (three pieces on each side). In the case when the internal joint is made in the form of the valleys, then before the start of the installation, we set up the flooring with a waterproofing layer. Films, roofing or isospins are suitable for replacement. Next, lay the skate. The gaps that formed in the middle of internal joints and sheets are sealing with the help of a seal.
7. Installation of wind corners.
In order to avoid getting water, in the so -called end parts of the roof, we use wind corners. We mount them in the places of the end parts of the end of 10 cm. We put the first wing on the sheets of porcelastic, and we attach the second to the end beam. On each wing we make 3 mounts.
8. Installation of additional equipment.
Additional equipment is an important part when installing a roof. These elements include snowminds, stairs, bridges for chimney sweeps. All this equipment will extend the life of the roof.
On this, the installation of a porumoplastic roof is completed. Now your roof looks sophisticated and at the same time it is very strong, capable of withstanding any load.

Ceramaplastic roof care advice
1. Moving along the roof use special flooring with a width of more than 30 cm (to distribute evenly the load created by your weight). This will help to avoid deformations or breakdowns of keramoplast sheets.
2. In the winter, in the case of a large accumulation of snow, remove it exclusively using a wood shovel.
3. If in no case do not use sharp objects on the roof and remove it very carefully so as not to damage the surface.
Many people are afraid to use new types of materials in the repair of houses. And this is a huge mistake. Proof is a keramoplast. Such material will last a very long time, it looks beautiful, and the cost does not make it horror. In addition, the installation of a keramaplastic roof can be done alone, without any problems, using the recommendations specified in the article. Also remember the rules of operation and care for this surface. Follow them and your roof will always be attractive and serviceable.
