Khrushchevs are small apartments, which in the last century were actively built and ...
|
|
One of the most ancient building structures arch does not lose its ... |
When choosing the front door, each consumer is guided by three main criteria ... |
How to make a ventilation pass and chimney through a roof with your own hands

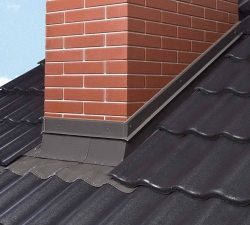
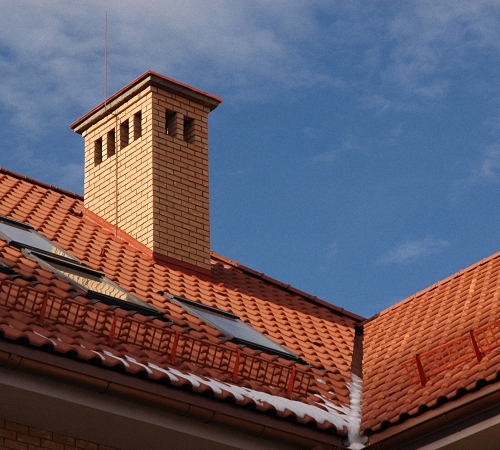
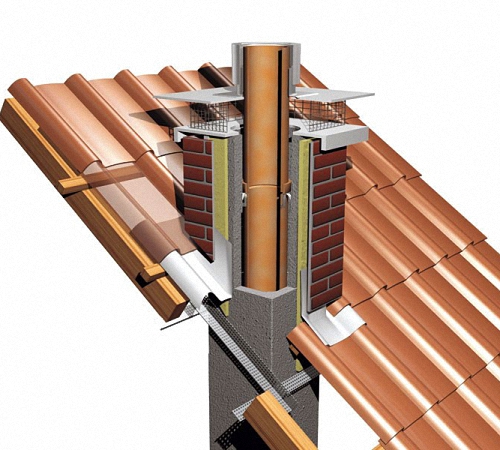
One of the most problematic stages of the organization of ventilation or chimney is their passage through the surface of the roof. In this matter, there are individual features of the installation of a chimney or ventilation pipe, which depend primarily on the material from which the overlap and the roof itself are made. We learn about how to make ventilation with our own hands and how to conduct a chimney through the roof.
Table of contents:
- Do -it -yourself ventilation with your own hands - characteristics and features
- Hand ventilation release: Settlement work on passage planning
- DIY ventilation in a private house with your own hands scheme
- DIY ventilation organization
- Hand ventilation with the installation scheme of air ducts
- DIY ventilation installation technology
Do -it -yourself ventilation with your own hands - characteristics and features
At the stage of designing a private house made of brick, ventilation is equipped directly in the walls. At the same time, the ventilation output is executed through the roof. Thus, fresh air is always present in the room, and there is no fungus and mold on the walls.

If natural ventilation in the room does not work well enough, then forced hood is used to add it. However, it is not required, when arranging a competent ventilation hole on the roof. The level of ventilation in the room directly depends on the height of the pipe installed in the house. Incorrectly equipped risers in ventilation mines above the roof lead to the emergence of such unpleasant situations:
- Since the ventilation ducts are unevenly combined, the smell from the bathroom and the kitchen enters the bedroom;
- An insufficiently long pipe leads to a decrease in the performance of the ventilation system;
- the wrong place of installation of the pipe on the roof leads to the opposite and incorrect mode of operation of the hood;
- The lack of proper insulation of the ventilation pipe leads to freezing of the channels.
Modern types of roofs have a complex configuration and design in the form of a roof pie. Therefore, in order to draw a ventilation pipe through the roof, you need to work hard. With poor performance of installation work, damage to the rafters and crate may occur. At the place of installation of the cover on the ventilation hole, gaps often appear through which rain water enters the attic. Therefore, in order to maintain the tightness of the roof, in the process of installation work, it is necessary to use special elements of the passage purpose.

Hand ventilation release: Settlement work on passage planning
It is necessary to start work on the ventilation system of the house with the preparation of a project or drawing, which describes in detail all the passages of ventilation mines. It is recommended from all the premises in which hoods are located, to remove ventilation pipes and connect them together. The central pipe takes the air out through the roof. However, in this case, it is necessary to put special valves that prevent reverse traction. Otherwise, the air from the kitchen will enter through the ventilation holes into the bedroom.
Monting the ventilation ducts on a new roof, it is much easier to install the pipe than on a roof that is already equipped. Ventilation passages are installed on the roof to perform such functions:
- for ventilation of rooms inside the house;
- as a fan pipes of sewage purposes;
- For ventilation of the undercut space in the attic.
In addition, in some cases, tendents and chimney pipes are carried out through the roof. The final upper element in the air duct has the shape of a previously constructed pipe section, which is called the release of ventilation purposes.

A technologically correctly installed ventilation pipe is the key to a high -quality air exit from the room outward, while the leaks of water under the roof in this case are unacceptable.
There are ready -made sets for the output of ventilation moves through the roof. They are particularly tight. There are two options for such sets in relation to the materials from which the roof is made. They allow you to quickly and efficiently remove the ventilation pipe through the roof, without losing its attractiveness. In addition, these sets have a function of preventing dust and dirt from the street into the ventilation duct.
The dimensions of the ventilation passage are determined strictly individually and depend on the individual characteristics of the house, the number of premises, the material from which the roof is made, etc. The cross section of the pipes for organizing hoods is both round and rectangular or square.

DIY ventilation in a private house with your own hands scheme
The simplest ventilation passing mechanisms consist of a steel pipe, which is installed in a ventilation hole and is fixed using a reinforced concrete or metal glass. At the same time, the roofing passage has a valve for closing the hole and the ring, inside which condensate is collected.
The lower part of the pipe is connected to the outlet type air duct, a deflector or a simple protective umbrella is installed on the upper part of the node. In some cases, mineral wool is used to warm pipes, in this case, it is necessary to ensure its high -quality waterproofing, since this material is instructed before moisture.
The previous option for arranging your own ventilation is outdated. Modern sets for the installation of ventilation passages are universality of use, aesthetically attractive appearance and ease of installation. Among the advantages of installing ventilation passage from the manufacturer, we select:
- For the manufacture of the pipe, two options for materials are used - galvanized steel inside, and light polypropylene outside;
- To fix the output elements, a reliable conductor is used, exactly repeating the shape of the pipe;

- The height of the pipe is determined individually, depending on the optimal length of the ventilation duct;
- In order to prevent ice traffic jams, the heat -insulating material is installed on the pipe;
- In some cases, the electric fan is installed on the pipe;
- The presence of a cap prevents garbage and moisture in ventilation pipes.
Some manufacturers do not include passing elements in the kit, they need to be purchased separately. Keep in mind that the passage part should coincide in form with the opening previously equipped under it.
Using passing elements, it is possible to quickly install a ventilation pipe. These works are carried out both at the stage of the roof construction, and on the finished roof. These elements provide high -quality sealing and stable ventilation of a private house with your own hands scheme. At the same time, ready -made sets accelerate the installation work at least twice.

DIY ventilation organization
In addition to the main ventilation pipe, an additional aerator is installed on the roof. Its main function is to prevent the formation of condensate under the roof in the winter season. This ventilation part is simple of the simplicity of work. The air in a natural direction moves through it. Through a special hole, air is supplied to the cornice, and the aerator provides its output. A special lid provides the aerator from snow or rain.
Particular attention in the process of organizing ventilation in a private house with your own hands, you need to devote the place of fastening of the ventilation pipe on the roof. It is recommended to equip the pipe directly above the riser, thus, the ventilation operation will be the most effective. If the bends in the system are still present, then their corrugation adapter is used to arrange them. On the roofs of a pitched type, it is recommended to install a ventilation duct next to the skate. This method of mounting the pipe allows you to install most of the pipe under the roof, and the short part of it will easily resist the wind.
In addition, pay special attention to ventilation mines located above the roof. If they are located low in relation to the roof, then this leads to a decrease in traction. The minimum value of the pipe in relation to the roof is half a meter. For a flat roof, this value increases three times.

A properly installed ventilation pipe should be in the optimal ratio with the wind load. Otherwise, the wind support will block the ventilation operation.
Hand ventilation with the installation scheme of air ducts
We offer to familiarize yourself with the instructions for the installation of a ventilation canal on the roof trimmed with metal tiles. This technology is also used for other roof options, however, with some adjustments.
INFORMATION ORGENTION instructions:
1. Decide on the installation site of the ventilation hole. To do this, it is recommended to make a drawing of the ventilation system in advance.
2. At the top of the roof, make a drawing according to the template that goes in the instructions for the kit. If there is no template, then the diameter of the drawing should exactly coincide with the diameter of the pipe that passes through it.
3. Cutting holes is performed using a chisel or scissors for metal. The same thing is done in the lower parts of the roof pie in the form of heat and waterproofing materials.
4. In the ratio with the template, you need to drill holes for installing screws. Remove water and dirt on the surface of the metal tile, degrease that part of the roof that is near the installation of the pipe.

5. A sealant is applied to the lower part of the sealing laying. The gasket is laid at the place of its installation. On the gasket, the passage part of the ventilation system is fixed; use self -tapping screws to fix it. Most often, they go in configuration to the main set.
6. The pipe is installed inside the passage element, without fail, its verticality is checked using the level. Follow the tightness of the installation of the passage element both in the attic and on the roof.
The passage pipe should fit so hard to the gasket that the sealant is squeezed out of it. To protect the pipe from precipitation and garbage, a special protective cover is installed on it.

DIY ventilation installation technology
The presence of properly organized ventilation in the cellar provides comfortable conditions for storing various food products in it. There are ready -made sets for organizing a ventilation system. However, it is much cheaper to build ventilation with your own hands.
In order to equip the simplest ventilation hood in the basement, two pipes are required. One of them will perform the function of the hood, and the second - the element for the influx of fresh air. Thus, it is possible to organize optimal natural air exchange.
Two options for organizing ventilation are distinguished - forced and natural. The second method is cheaper, but less effective. To forced ventilation on the pipes I mount additional fans and hoods that improve air circulation.
In order to ensure high -quality circulation, it is necessary to correctly calculate the cross section of the pipes, and determine the place of their installation. A pipe of exhaust type is located in the lower part of the room, next to the products. A supply type pipe is installed closer to the ceiling of the cellar. At the same time, both pipes are displayed. An exhaust pipe needs mandatory insulation.

To increase the efficiency of the hood, various types of deflectors are used. These devices not only protect the device from precipitation, but also improve their thrust. The supply pipe is equipped with a grate that protects it from rodents and insects. Polyethylene or asbestos -cement varieties are used as pipes for the organization of ventilation. The first option is distinguished by a long service life, easily tolerates temperature and moisture changes, is quickly installed and has a low weight. Asbestos pipes are used less often, due to their severity, duration of installation and instability before atmospheric precipitation.
In order to improve ventilation in the cellar, it is especially relevant for large rooms. Explaps and fans are installed on the pipes. The channel options for fans are installed directly inside the pipe. Ospass fans are mounted on the final part of the pipe. The choice of one or another option should be justified by operational characteristics, power and productivity of devices.

Expitable pipe
"A pipe of the exhaust type is located in the lower part of the room. A supply type of supply is installed closer to the ceiling of the cellar." - You didn't confuse anything? Or maybe the other way around?
Asbestos pipes are used
"Asbestos pipes are used less often, because of ........ instability to atmospheric precipitation."
well, I don’t know .... 15 years old, normal is normal