The prototype of modern piece material for lining of buildings of any purpose was ...
|
|
The modular parquet appeared on the domestic construction market relatively recently ... |
Many residents of apartment buildings are faced with the problem of lack of square ... |
How to build a barn with your own hands
Sarai is a very important element of any land plot, because it is in this building that instrument and inventory are stored for working in the house and in the garden. In addition, firewood is often harvested in the barn for the winter. This room is a multifunctional design, the construction of which should be treated with special seriousness. We will consider how to build a barn with your own hands.
Table of contents:
Building a frame barn with your own hands
Before starting work, you should decide on the location of the future building. It is preferable if the barn is far from the entrance part of the house. The interval between the barn and the house depends on its functional purpose. If coal or firewood is located in the barn, then it is best to build it next to the house. When stored in the barn inventory, place it near the land or garden.
When choosing a place under the barn, we recommend that you stop at a little lit area, since it is the least suitable for planting plants or trees. In addition, the place of its location also depends on the external decoration of the barn. If you plan to somehow decorate or finish the room of the barn, then you can not hide it from prying eyes.
At this stage, the type of structure, its shape, size of the structure are also determined. These factors directly depend on the individual characteristics of the site and the functional purpose of the room. Decide whether you need windows in the shed, what role they will play. Remember that the presence of additional windows and doors helps to increase heat loss in the room.
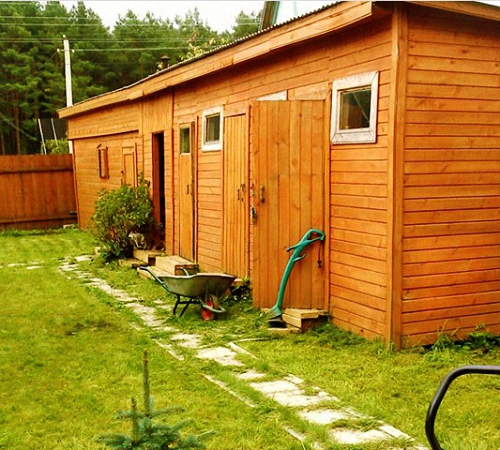
For the construction of the simplest barn, a trimming board is used. At the same time, the main advantages of the construction of this design are:
- The speed of work, such a shed is built for two, three days;
- affordable cost of construction work;
- Optimal appearance.
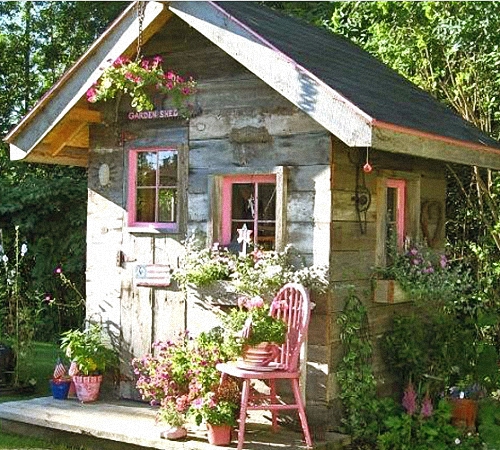
To improve the appearance of the barn, various plants are planted around the perimeter or additional flower beds are built.
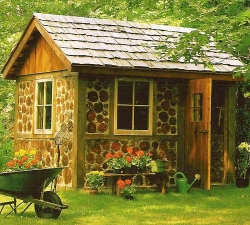
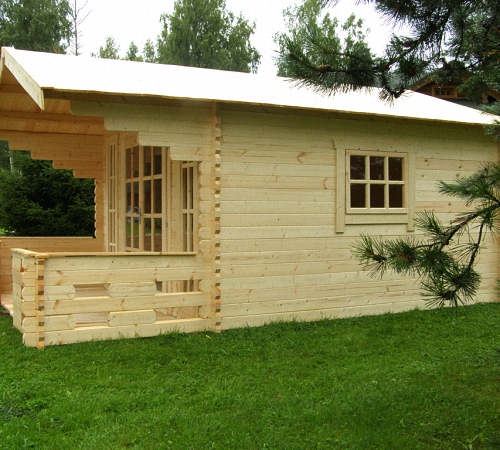
The construction of a gable barn is a more complex process, but the appearance of such a structure is attractive. Quite often, owners of houses, to finish the roof of such a barn use the same material as in the process of decoration of the roof of the house.
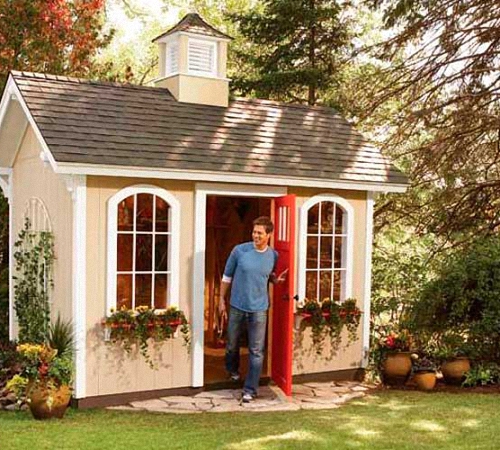
Siding is also used to finish the barn, with it, it is possible to choose the desired color or shade of the building, which fully fits into the overall exterior.
Some owners of country houses prefer the construction of combined structures, one part of which is a place for storing equipment, and the second - a greenhouse or greenhouse.
The choice of a particular material for the manufacture of shed depends on many factors, such as:
- The main purpose of the construction;
- material capabilities of the owners of the site;
- The material from which the house was erected.
The simplest and most affordable material for the construction of a bar is a tree. With its help, it is possible to build a design, the duration of operation of which exceeds fifteen years. However, it should be remembered that the tree needs high -quality processing before installation and periodically the shed requires staining with varnish or paint.
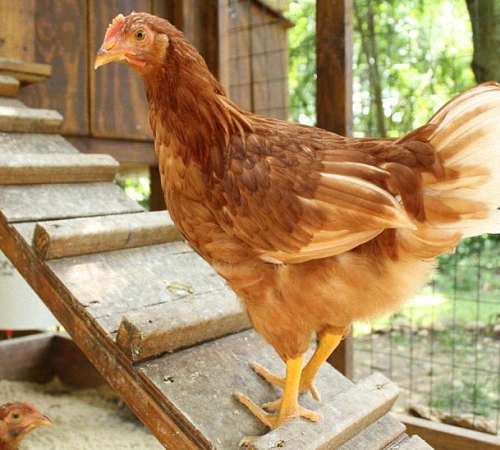
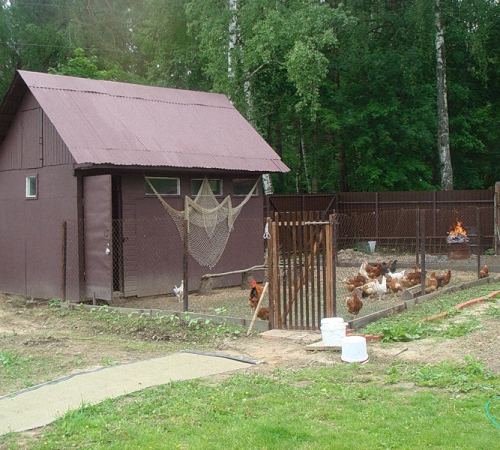
Do -it -yourself shed for chickens is made of brick or stone. However, for their manufacture, it will be necessary to additionally build a fine -loaded foundation.
If you want to build a barn with your own hands cheaply, then we offer to familiarize yourself with the instructions below:
1. You should start work with the installation of the base for the barn. To do this, in the relationship with the size of the future building, it is necessary to measure the site and prepare for work. The construction site should be even, cleaned of garbage, it is desirable if the upper layer of soil is removed.
2. Next, using roulette and peg, make the location of the barn on the site. Measure not only vertical and horizontal sides, but also a diagonal.
3. For the construction of the barn, slab, strip, column or pile types of foundations are built. Each of them has its own advantages and disadvantages. If the soil does not differ in special heaving, and the level of groundwater is low, then it is enough to use the column -type foundation.
4. Depending on the perimeter of the barn, set in the corners and places of intersection of the load-bearing walls, it is preferable to install columns with an interval of 150 cm. At the same time, the depth of laying the poles is from 70 cm.
5. At the bottom of the trenches, sand is poured, the thickness of the layer is about fifteen centimeters. The sand should be thoroughly compacted and watered with water. In order for the pillars to serve as long as possible, they should ensure their proper waterproofing. For these purposes, a fabric on a bitumen basis is suitable.
6. After the installation of the foundation, it is necessary to install the frame, which are based on wooden bars. Wooden areas must be processed using special compositions. An excellent option will be the use of impregnation, which contains a kner.
7. The size of the timber used in the process of installation of the crate should exactly coincide with the size of the beam from which the building is built. Boards should be laid on the frame that will help to form the base in the form of a floor. Keep in mind that the boards should be located at a distance of 1-2 mm from each other. Thus, with moisture differences, it is possible to compensate for their expansion and prevent the deformation of the flooring.
8. If in the future the floor is leveled with a rubank, then during the laying of the boards a secret method should be used. The support racks are installed in the corners of the barn. In the presence of windows and doors, racks should also be installed in the places of their installation.
9. To set the racks in an even position, use additional racks. If the frame is built on the basis of brick, then first it is necessary to lay out several layers of brick, and then the wooden beams are already installed on them.
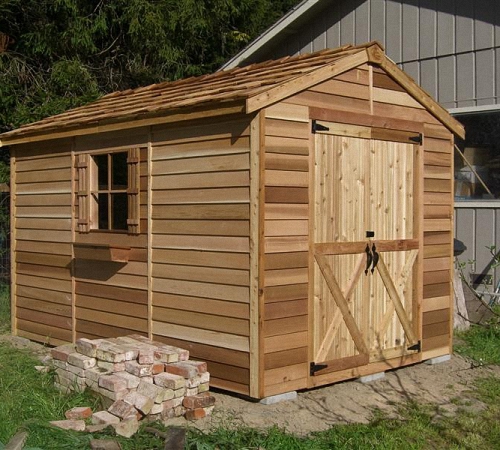
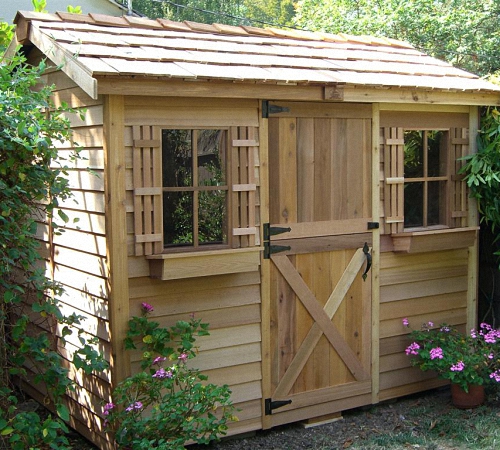
Do -it -yourself shed photo:
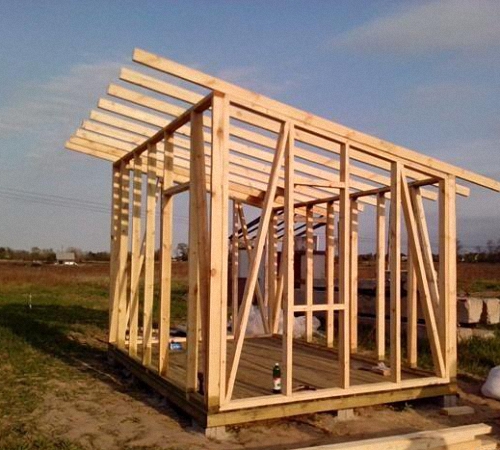
Further work on the construction of a dock with your own hands involves the installation of a rafter system. To do this, on the surface of previously exhibited racks, a frame from a beam is fixed, on the central part of which we cuts. To fix the details, self -tapping screws or steel corners are used.
DIY cunning shed involves the presence of racks, which, on the one hand, rise above the building. Thus, it will be possible to provide optimal drain from the roof. On the surface of the rafters, elements should be built in the form of cutting down. This is followed by the process of their laying on the surface of the roof and fixation using self -tapping screws. The crate is installed directly on the frame.
In order to perform walls of walls or roof, use boards, the optimal size of which will be 2.5x10 cm. Building the roof, you should take care of its waterproofing. For these purposes, roofing material is used. In order for the roof to differ in a presentable appearance, we recommend that you finish it using flexible tiles, slate or corrugated board. First, the front of the bar is finished, and then the rest.
After facing walls, an electric plane is used to align them. The smooth surface of the walls will help prevent water delay on their surface during rain. In order for the barn to look more attractive and served you longer, we recommend painting it using an oil or emulsion -based paint.
How to build a shed from foam blocks with your own hands
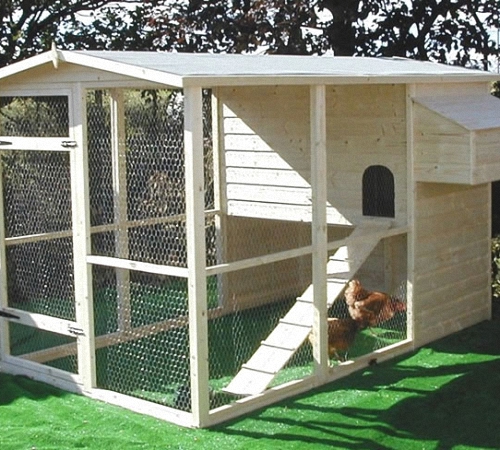
I am a fairly popular material for the construction of Sarai, I am foam blocks. Especially if this room is intended not only for storing inventory, but also for living in homemade living creatures, such as chickens.
If we consider the advantages of foam blocks compared to other materials, then it should be noted:
- The ease of material provides the simplicity of their laying and transportation;
- The speed of construction of buildings, compared with brick, increases three, four times;
- excellent thermal insulation characteristics, which is especially important for home -made living creatures, low thermal conductivity helps to reduce heat loss in the winter season;
- A high level of vapor permeability can prevent the development of mold or fungus inside the building;
- The ease of processing of the material also helps to increase the speed of building buildings from it;
- Foam concrete is not burned, and therefore the level of fire safety remains at a high level.
Despite this, the shed of their foam blocks needs additional decoration, since the material itself is inclined to absorb moisture, and under its influence it is quickly destroyed. Before building a barn with your own hands, the material is required for work. In addition, the functions of this room, its size, the presence of windows and the number of doors should be determined. It is, using the drawing, you will be able to calculate the materials necessary for the construction of the building. After that, the process of choosing the place of construction of the building follows.
The site should be prepared for the construction of the foundation on it. For a barn from foam blocks, the foundation of the tape type is best suited. Although the barn does not differ in great weight and load, however, it is the strip type of foundation that will give it the necessary resistance.
In relation to the size of the future building, you should clear the site and remove the upper soil layer. Under the foundation, it is necessary to equip a trench, its depth will be about 60 cm, and the width is half a meter. The following is the leveling of the bottom of the trench and filling it with sand. The thickness of the sand layer is up to 15 cm, while every 2 cm of the sand should be thoroughly compacted. In order to facilitate the process of rammed sand, moisten it with water.
After that, the formwork is installed inside the foundation, a frame of reinforcement is placed in it. The diameter of reinforcing bars used in the construction of the frame is about one centimeter. In order to interconnect several parts of the reinforcing frame, a knitting type wire is used.
The frame is not installed on the ground, pre -trench is waterproofed with a polyethylene film or roofing material. Next, small pieces of brick or stone are substituted under the frame. On the sides of the trench, the frame should also not in contact with the soil.
A concrete solution of high quality is used to fill the foundation. The filling process is carried out simultaneously and quickly. After that, the concrete vibrator should be used, it will be possible to improve the quality of concrete and reinforcement adhesion. The time for exposing the finished foundation is about 4 weeks. After this time, you should continue to work.
The installation of foam blocks is similar to the process of laying brick. The walls should be absolutely vertical, and the blocks are installed strictly horizontally. Therefore, after laying each row of foam blocks, the correct masonry should be measured using level and plumbing.
Before starting the laying of foam blocks, the roofing material should be installed on the surface of the foundation. First, foam blocks should be installed in the corners. Next, you need to pull the cord with which masonry will be controlled. The connection between the foam blocks is carried out using special glue or sand-cement mortar.
The use of glue differs in that the seams between the blocks will be minimal, and therefore thermal losses in the room will decrease several times. However, this option is more expensive than a traditional solution.
In the process of laying foam blocks, dressing is mandatory. That is, above each of the two halves of the block, a whole foam block is installed in the upper row. In the presence of protruding glue or solution, it should be removed from the wall both inside and outside the building.
To install the unit, use a special kiyanka made of rubber or a steel hammer. To connect internal partitions with external walls, a steel mesh or anchor is used. After laying the walls, the process of installing the rafter system and the roof finish follows.
During the construction of a barn with a single -sided roof, one of the walls is located above the second. A more convenient option is a gable roof. Since it will also be possible to store things in the attic of the barn. When choosing a roof finish, try to harm it with the general style of the interior and the main building on the site. Do not forget to perform heat and waterproofing of the roof. Thus, it will be possible to extend the service life of the barn several times. Next, the process of installing doors and windows follows, if any.
Do -it -yourself shed video:
![]()
StrPort construction portal 2011-2018. Articles about repair, construction, building materials.
Copying information from the site is possible only with permission of the editorial office Or indicating a direct link to the source. Legal justification