An additional living area is never superfluous, so if you live in ...
|
|
The main advantage of porcelain tile is its high quality and duration ... |
The foundation of blocks has all the advantages of reinforced concrete, but it is built much more ... |
How to build a cottage from a profiled beam
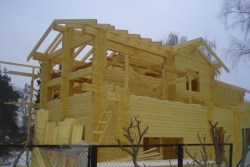
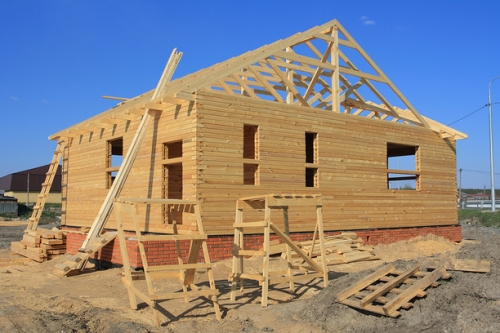
In connection with the return of the popularity of wooden houses in suburban construction, woodcs and construction companies come up with more and more new opportunities and technologies that allow us to simplify and speed up the process of erecting such houses. The bars that are fully prepared and dried at the factory easily fit, and profiles allow you to avoid large gaps between the crowns. A cottage from a profiled timber is relatively warm, breathable and environmentally friendly housing. A box of timber is built for 2 months and does not require insulation if the cottage is not intended for constant winter residence. Material for construction can be ordered at the manufacturer at the factory, where all elements will be made strictly according to the project, it will only remain correctly and carefully collect and fasten.
- Construction of cottages from a profiled timber: advantages and disadvantages
- Projects of cottages from profiled timber
- Foundation for a cottage from a profiled timber
- Laying the Cottage Council of the Cottage Crown
- Floor arrangement in a cottage
- The construction of the walls of the cottage from a profiled beam
- Installation of the roof of the cottage from a profiled timber
- Installing windows and doors in a cottage from a profiled timber
Construction of cottages from a profiled timber: advantages and disadvantages
There is always a choice between an apartment in a new building, for example, all new buildings of Sochi, or its own house. When making a decision to build a cottage from a profiled beam, it will not hurt to know not only its advantages, which are vied with the manufacturers, but also disadvantages. For a country house, where they will live only in the warm season, this is and, however, one of the best building materials. It is absolutely natural, does not require additional external and interior decoration, light and inexpensive.
Advantages of a profiled beam:
- The profile in the beam is completely performed in the production, so the need for improvements at the construction site is excluded.
- The cost of a profiled beam is less than the cost of glued beams or logs.
- A small shrinkage of the structure, about 1 2 %. This is much less than that of a log or a non -core beam.
- The profile in the beam allows you to build a wall without cracks, into which the water of atmospheric precipitation can fall.
- Thanks to the connection of the bars through the spike-pas system, the wall is more warm and less blown.
- Cottages with a wall thickness of more than 200 mm do not require insulation. This allows you to leave the house without finishing. The facade is authentic and beautiful.
- Buildings from a profiled beam are erected easily and quickly.
The disadvantages of the profiled beam:
- The material is subject to the negative effects of atmospheric phenomena, therefore, it requires antiseptic treatment.
- The tree burns, so the material is impregnated with antipyrens.
- Subject to crack formation.
- It is impossible to redraw, finish or rebuild the house if it has already been erected.
- The thickness of the walls from a profiled beam is not enough for year -round living in such a cottage.
- Due to the uneven leaf, unsightly gaps between the crowns may form, and the spike/groove will not fall into each other.
- Forms of wood, such as internal rot, foci of damage by pests and fungus, bitch, will become noticeable only after the completion of construction.
- During the installation process, dirty spots inevitably remain on the surface of the bars, which are difficult to get rid of.
Despite the fact that cottages from a profiled beam are positioned as one of the most affordable in price, easily and quickly built, etc., you should still not treat construction not serious and hire unverified brigades. In the future, error correction can do much more expensive than if you order a cottage from the beginning from the very beginning from the beginning to the end in one proven construction company.
Projects of cottages from profiled timber
Profiled timber material is capricious. He imposes a lot of restrictions on the cottage project and introduces its special constructive elements. All this should be taken into account and carefully calculated, so do not carry out the project of the cottage from the profiled timber on your own. Moreover, you will still order the beam itself in a construction organization, and most of them provide free projects, provided that they order a cottage from them. At the same time, the basic projects take into account materials of the average cost. If you want to change anything, it will not be difficult, only the total cost of construction will increase.
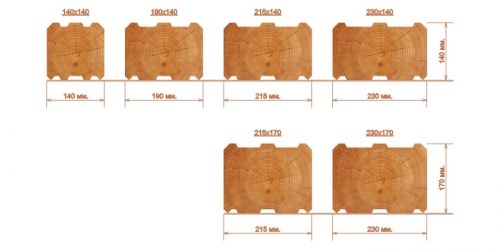
For a cottage from a profiled beam, the price depends on the size of the beam and the cottage itself. In the domestic market, a profiled beam is available in such sizes: 95x95 mm, 95x145 mm, 145x145 mm, 195x145 mm, 195x195 mm. For the construction of the external walls of the cottage, a beam is used, starting with 145x145 mm, but only 195x195 mm allows you not to insulate the structure. Brus smaller can be used for internal walls and partitions, but this is not necessary.
After the cottage project is ready, you can order material for its construction and start building the foundation. The profiled beam made and fitted according to the project will be neatly numbered, so it will be enough to assemble it as a designer and fix it.
Foundation for a cottage from a profiled timber
Due to the fact that the cottage from the beam is light, then the foundation for it can be made lightweight. It can be columnar, column-lent, small-banded strip or slab foundation. But which one is suitable specifically in your case, depends on the structure of the soil on the site, the level of groundwater, mobility of the soil and other factors.
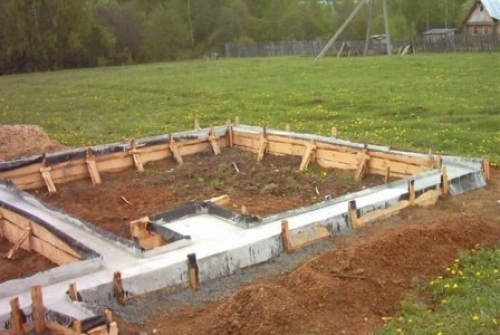
Consider the example of the creation of a fine -chained strip foundation:
- We mark the site under the foundation, strictly verifying the corners.
- We remove the soil to a depth of 20 cm and carefully compact the bottom of the trench.
- We fall asleep with a layer of sand (5 cm) and crushed stone (5cm), each layer is leveled and compacted.
- We install the formwork of wooden boards, its height above the ground should be 50 cm.
- We connect the reinforcing frame and lower it into the formwork.
- In the formwork we perform holes and insert pipes into them. This is necessary for the formation of purges so that underground is well ventilated. Then the floor will not be drew.
- Prepare a concrete solution or order a mixer and pour concrete into the formwork.
All further work on arranging a cottage can be continued only after the foundation concrete completely dried, i.e. After 28 30 days. About 5 7 days after pouring, you can remove the formwork.
Laying the Cottage Council of the Cottage Crown
An extremely important task is the waterproofing of the foundation. Before laying wooden beams on it, it is necessary to lay on the surface of the foundation in 2 3 layers of roofing material or similar material and smear with mastic.
To build a cottage from a profiled beam, you will need a beam itself, wooden or metal heels, nails 50 and 100 mm, a drill, a hemp (Lnovatin, jute fiber, ribbon insulation, bag or moss), as well as boards.
The construction of the walls of the cottage begins with the laying of the lining board.
Important! You can use the board 50x150 mm (if the dimensions of the profiled timber 145x145 mm) or 100x200 mm (if the size of the beam is 195x195 mm). If it is impossible to choose boards of the required size, you can use two boards fastened together.
We lay the lining boards approximately in the middle of the foundation, strictly receipting the corners and the horizontal of their location. It will depend on these actions whether we will manage to build an even cottage without distortions. In the corners, we carry out the connection in the half -term. We attach liners to the foundation using anchors. To do this, drill holes with a diameter of 10 mm in a pitch of 1.5 m in the boards and insert an anchor into them. Be sure to fasten in the corners either with anchors or nails.
Important! Before laying the laying of the cottage from a profiled beam, it is necessary to carefully hang the horizontal of the resulting structure from the boards, their even location, as well as the necessary angles.
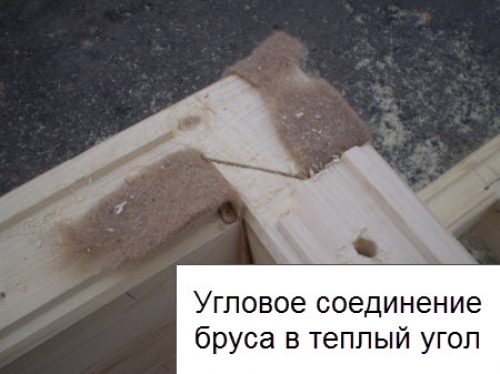
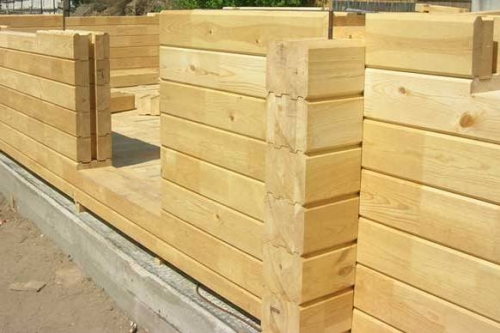
We lay the bars of the embedded crown on the lining board, the corner joints can be performed in different ways, as shown in the photo. You can choose the one that is more convenient for you. The warmest of them is a handkerchief in the overlaine.
We fix the beam of the embedded crown to the lining board using anchors or wooden bumps.
Floor arrangement in a cottage
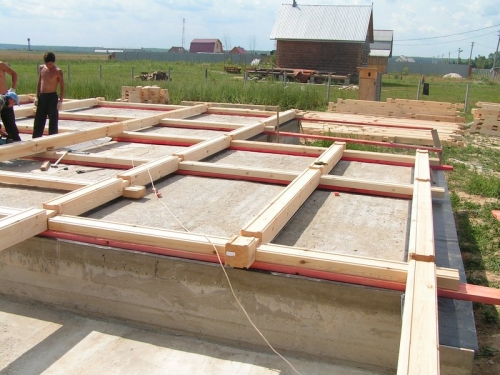
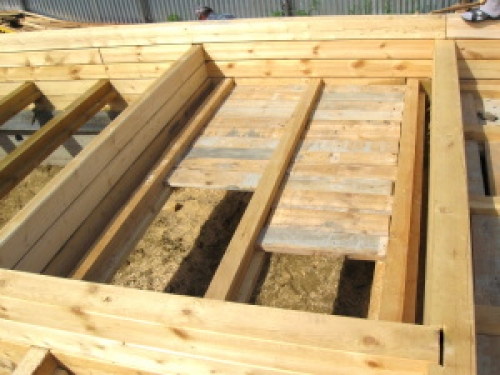
Even before the construction of the walls, it is necessary to equip the floor. To do this, in the bars of the embedded crown, deforestation is made to a depth of 2/3 of their thickness at a distance of 60 cm from each other. Based on these make -ups in the bars, Paul Lag beams are laid. You can use the beams with a cross section of 50x150 mm or 100x150 mm, respectively, the width of the rubbish will be 50 mm or 100 mm.
Important! At this stage, it is necessary to treat with antiseptics a lining board, a embedded crown and floor lags, since they will be most affected by moisture.
Then, on the bottom of the floor, we stuff thin rums so that it is convenient to lay out the roll on them. Reiki can be fixed with nails, lay across the roll boards on top, 15x45mm or 25x100 mm in size. On top of the roll, we spread a waterproofing film capable of passing steam. Then we lay out the insulation, for example, mineral or basalt cotton wool in the plates. On top we cover the vapor barrier membrane. The thickness of the insulation must be selected so that after laying it to the top of the lag there is another 2 3 mm.
Now you can lay the finishing floor. It can be a massive board, parquet board, parquet or other material. In order not to injure the finishing floor in the process of assembling the cottage, it is best to temporarily lay black ramps on the lags, and finish the rest of the floor later on the creation of the floor.
The construction of the walls of the cottage from a profiled beam
Since the beam is profiled, the work on its styling is greatly simplified, especially since all the elements are numbered.
We take the beam of the second crown and put it on the first, we try to get into the groove into the spike, as if putting the beam on the beam. Carefully align the beam vertically and horizontally. We temporarily fasten with the previous crown nails driven into the end. This is necessary so that the beam does not shift until we drill holes for the naga.
Clothing of crowns with nagels
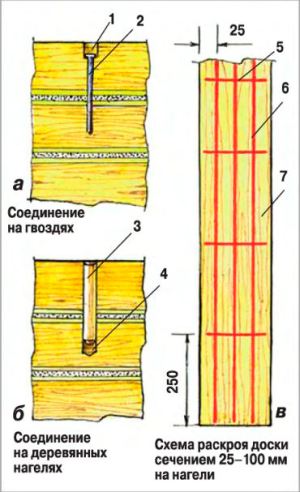
Many sources telling about how to build a cottage from a profiled beam, it is said that wooden bar, rods of reinforcement or nails 150 200 mm can be used as bastards. The option with nails and reinforcement is not the best, since in the process of shrinkage the beam becomes thinner, and you can often observe the picture as a whole crown literally hangs in the air on a steel rod. Although there are technologies that allow you to avoid this. You can initially deepen the bar or a nail 2 cm inside the beam. Then, when it shrink, the probability of freezing is reduced. But metal parts have another drawback, which is not possible to fight. Metal corrodes from moisture that the tree accumulates. As a result, this can lead to the appearance of mold and putrid processes inside the beam.
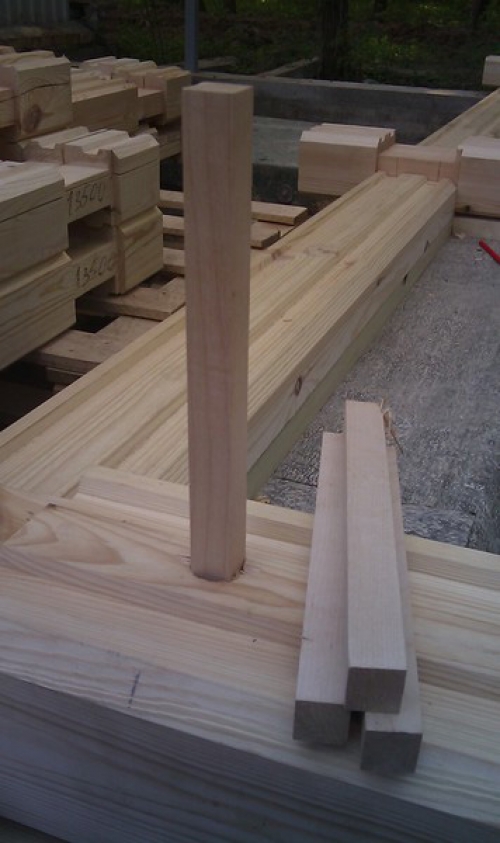
Wooden baches The most successful option. They can be made independently from scraps of boards or unsifty beams. It is only desirable that the wood is more durable or dense in comparison with the wood of the walls. For example, if a profiled beam is made of pine, then we can make birch or linden birch. The dimensions of the bastards should be 25x25 mm, and the length should be 1.5 of the thickness of the beam so that the nagel can connect two crowns and enter the second to half. If the beam is 145 mm, then the length of the nagel is 230 250 mm.
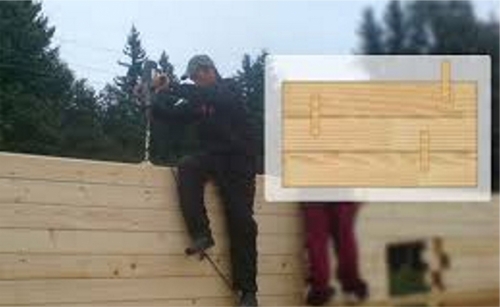
After the beam of the second crown was laid on the first and everything was verified, it is necessary to drill holes under the heaves. For this, a drill and a drill 24 mm is used. So that the drill does not get stuck in a beam filled with chips, in the process of drilling it must be taken out from time to time so that the chips fly out. The step between the holes is made 1.5 m.
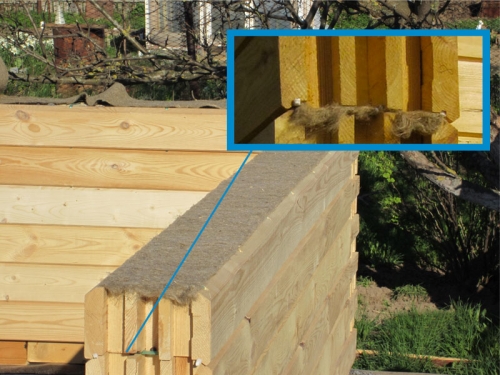
When the holes are ready, remove the upper beam. On the surface of the lower beam we lay the intervention insulation: Lnovatin or jute. At the site of the holes under the heavers, we make cuts with a knife, first cross -shaped, and then the corners are turned and cut off.
Important! Why can't you drill holes under the nagel through the beam and insulation? Because the structure of the interventional insulation is such that it is wound on a drill drill. It’s also impossible to score it inside, the fibers are pulled behind the whole tape.
Now you can lay the upper beam again in place. We check the evenness of the styling and drive the bumber into the holes. We try to finish off the nagel so that its apex is buried by 1 cm inward. This must be done neatly, otherwise the wax may crack or split.
Corner compounds and conjugation of walls
The rest of the crown bars are laid in the same way, only the corner compounds must be thoroughly verified.
Important! For the simplicity of monitoring the verticality of walls/angles, it is necessary to make a mark on each timber. At the same distance from the edge of the beam, we make a notch or a pencil mark. In the process of laying subsequent crowns, a straight vertical line should be obtained.
All other crowns of the cottage fit by analogy, the main thing is not to forget that the corner compounds must also be insulated. And the connection of the crowns is carried out in each row/crown in a checkerboard pattern.
We perform the internal walls and partitions from the same beam as the outer walls, from a smaller beam or make them frame. In the first case, you can perform compounds of the external walls and internal as well as corner, i.e. Drinking half a berel or in the overf. But you can also mow the walls in another way. For example, at the junction of the walls in the outer wall, perform a groove to the full height, and in the bars of the inner wall the spike. If you insert a spike into the groove, the design will turn out to be strong enough so as not to shift and at the same time warm. This compound must also be insulated by lnovatin, jute or packley.
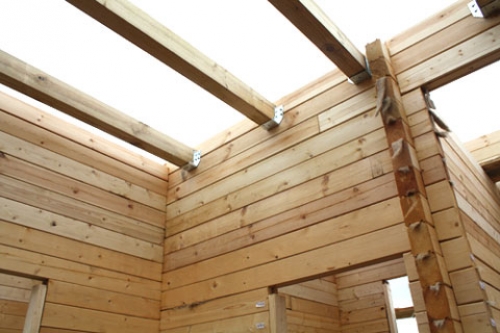
At an altitude of 3 m, it is necessary to mount the beams of the floor in the crown, which will actually not differ in the design from the floor of the first floor. Beams are fixed using corners or brackets.
To arrange the roof of the cottage, after a crown with the beams of the ceilings, there must be another full -fledged crown, which will be Mauerlat to fix the rafter structure. This is necessary in order not to make additional holes in the beam, to which the beams of the ceiling are also fixed.
Installation of the roof of the cottage from a profiled timber
Since the cottage from a profiled beam is subject to shrinkage, the roof must be mounted in a special way. It is impossible to rigidly fix the rafters with Mauerlat and pediment, otherwise the roof can be distorted.
For ease of installation, you can use ready -made rafter farms, which are an isosceles triangle. Based on the bottom of the Mauerlat, they will not create stresses on squeezing out. But the roof will settle with the house. Do not forget to use crossbars, racks and braces.
The pediments are sealed with a beam of 150x150 mm or a 25x150 mm board. On top of the rafters we fill the crate, and we lay the roofing material on it. It can be tiles, metal tiles, ondulin, corrugated board, soft tiles.
In this state, the cottage must be left for a year for a full shrinkage. Only after that can you start installing windows and doors.
Installing windows and doors in a cottage from a profiled timber
First of all, it is necessary to cut out perfectly even openings. To do this, beat the board/rail to the edge of the opening. She will serve as a guide where to saw. It’s not enough to draw a line with a pencil, since in the process of washing the chips clogs the marking line, and it is not possible to perform an even cut.
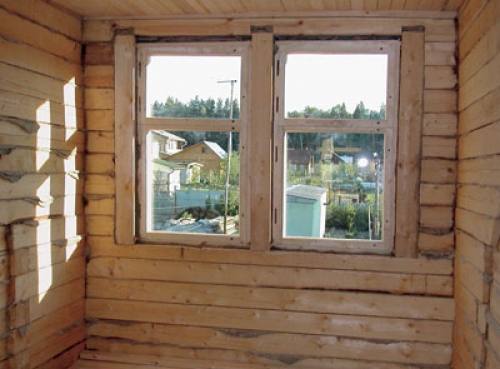
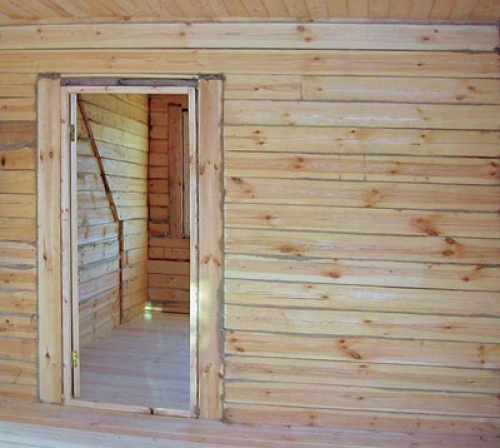
Then, in the vertical bars of the window opening, we cut out the spike (you can vice versa - the groove). We plant another beam/deck with a groove on it, just to the size of this spike. The connection must be compacted with intervention insulation. We fix the beam/deck to the spike with nails driven at an angle so as not to prevent the shrinkage of the cottage. On the demonstrating cottage from a profiled timber photo, the installation of a window unit in the opening is clearly visible.
In the prepared opening, insert the window box and attach it with self -tapping screws. On top of the box it is necessary to leave the gap for shrinkage, at least 7 10 cm. We fill the space with a soft insulation.
In the doorway, unlike the window, it is necessary to make a spike in the bars from all four sides and insert a door box.
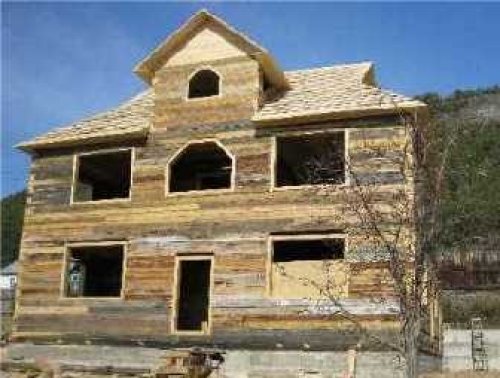
After the shrinkage of the cottage from the profiled timber is completed, it must be examined for the presence of cracks, cracks and other defects. If somewhere the beam led, and the gap has formed, it must be filled with insulation, just to cord like any wooden house. To protect the wood about the effects of atmospheric phenomena, the outer side of the beam can be painted or opened with varnish (if insulation is not planned). By the way, keep in mind that the insulation of a timber house is carried out only outside and only using the technology of a hinged facade using mineral or basalt wool as a heater. This is dictated by the properties of a tree to breathe, gaining and giving moisture.

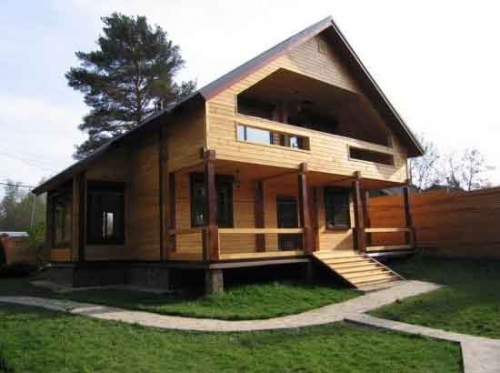

Honestly, construction
Honestly, the construction of a house is a very time -consuming process, and it should be built independently only with a construction formation and experience. I am not a builder, so I contacted a company that built me \u200b\u200bsuch a spacious house http://www.home-projects.ru/proekty_domov/brus/tepik-2/ in just a couple of months.