Question " How to install input metal doors? " Surely tormenting ...
|
|
You were told that the house from the beam is not necessary to hemp, they say, everything is perfect there ... |
In the middle of the 20th century, shaky building forests were used in construction, and ... |
Do-it-yourself block container
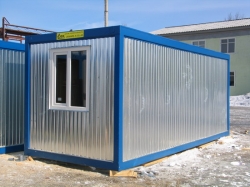
For the duration of construction or just for temporary residence in the country, quite often you need easy to build and unpretentious construction. As they say, to cheaply and angry. Often, such temporary temporaries are erected from wood and have minimal functionality. But today, a new type of temporary buildings of the block container is widely used. It can serve as temporary housing for builders and quite permanent for summer residents. It is quite easy to build a block container with your own hands, and its functionality will fully enjoy the fruits of civilization outside the city.
Types of block containers
When planning to build a block container on the site, it is necessary to determine in advance what it will be. It depends on how much money and effort will be spent on its installation. The fact is that the block containers according to the assembly method can be divided into three types: a block container of their own assembly, converted from a transport container and a collapsible block container. Each of these types of block containers has its advantages and disadvantages. Which of them will be preferred depends only on the wishes and financial capabilities of the owners.
Block container of its own assembly
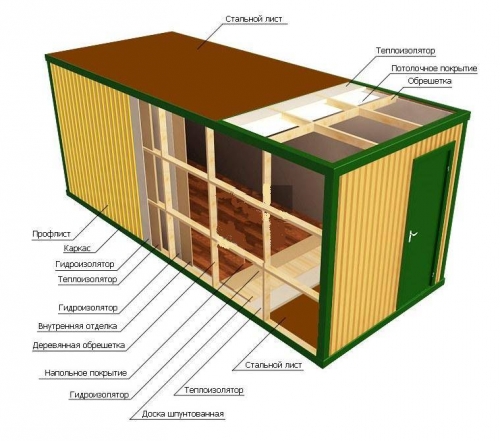
Such designs for the most part are built with their own hands from scratch and in their own drawing. For their frame, metal corners are used, for external walls of corrugated board, the interior decoration is performed by lining with lining or plywood, stone or mineral wool is used as insulation. A distinctive feature of such block containers are non-standard sizes. In fact, such a block container can be made with your own hands of any size and shape. To build the entire structure, a welding machine and the skill of working with it will be required, which can become a decisive factor in favor of a container of its own assembly.
Block container converted from a transport container
Today, block containers converted from transport are especially popular. They have many advantages, but there are also enough minuses. The main advantage of such a container is the already finished design, which remains only to finalize a little. But such a drawback as standard sizes, when choosing, can not play in favor of a transport container. Of course, as temporary housing for workers, it is quite suitable, but as a seasonal country house it can be very uncomfortable.
Block container collapsible
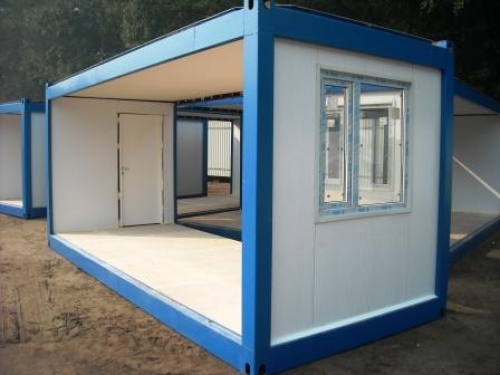
With the development of the market and technology, block containers began to appear in construction, which are easily mounted and also easily versed. Collected containers are very popular among construction companies. They can be disassembled and stored in a warehouse, since they occupy a little place, and if necessary, quickly erecting cabins for workers on a construction site. Specialized companies are engaged in the production of such block containers. The very design itself is similar to a homemade block container, but the use of sandwich stamps as walls, floor and ceiling clearly release a collapsible block container. If there is no desire to mess with welding, then if there is a certain amount, you can purchase a ready-made block container and simply collect it as a constructor. In a prefabricated block container, the price ranges from 2,000 cu Up to 5,000 cu And depends on the inner area.
Installation of a block container
Having decided on the type of block container, you can proceed to its installation. As already noted, each type of block containers requires certain labor costs. The most time -consuming is homemade. To create it, you will first have to make a drawing, purchase materials, then assemble the frame and sheathe it. The easiest and least labor-intensive prefabricated container. But the total cost may be higher. Consider how to assemble each of these types of block containers with your own hands.
Block container from scratch
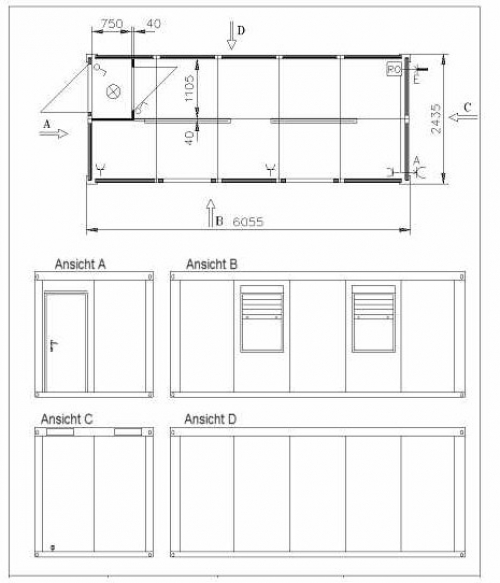
Starting work on creating a home-made block container, the first thing to do is its drawing. To do this, you can use the computer program, such as Archicad, or you can just draw a simple drawing on a sheet of paper. In the drawing, it is necessary to indicate all the sizes of the future block container with the display of the installation site of the door and windows. For your own block container, you can choose almost any size convenient for you. But there is one important point. If in the future it is necessary to transport such a container, then its width should not exceed 2.5 m. To create a block container, the drawing must contain a description of all materials and sizes. Particular attention should be paid to the frame, namely the place of installation of the door and windows. For the doorway and windows, you need to install additional racks. Finally, indicate the material for walls and insulation. From materials The following will be required:
- for the frame, bent channel 100 mm;
- metal sheets 2 mm thick for the black floor;
- galvanized corrugated board for external sheathing;
- wooden bar 40x100 mm for lag and internal frame;
- boards 25x200 mm for the floor, as well as flooring, for example, linoleum;
- superdiffusion membrane for vaporous protection;
- insulation (mineral or stone cotton wool) for walls, floor and ceiling;
- plywood or plastic lining for internal casing;
- windows and door.
The tool is required Bulgarian, welding apparatus, roulette, drill, manual circular, a hammer, squad. As for the fasteners for wood, here you can opt for self -tapping screws or nails.
Getting everything necessary, we proceed to the construction of a block container. Begin from the preparation of the site for installing a block container. To do this, leverage the Earth and carefully compact it. So that the container does not stand on bare ground, it is necessary to create a simple foundation for it. To do this, you can build brick columns, put concrete slabs or create a pile foundation.
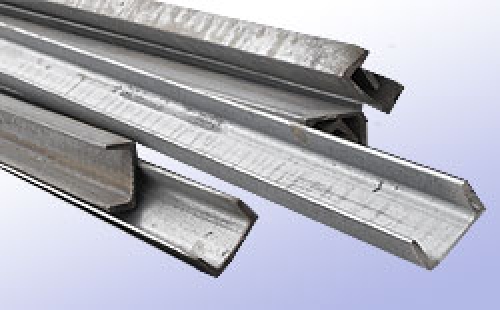
Next, go to the cutting of pieces of the channel for the frame using a grinder. Having received the required number of pieces of the desired size, we proceed to their welding. at first create the lower strapping. To do this, take the channel, corresponding to the length and width of the block container, we lay out on the previously prepared surface and weld together into one solid frame. In the process of welding, the corners can lead, so that this does not happen, it is necessary to grab the angle at several points, then check and, if everything is fine, then boil completely the entire seam to the end.
Important! To make a simple single -tocate roof, it is enough to cut a few racks of a larger length. Typically long, the door racks are made longer. But this approach is justified, if it is not planned to create another type of roof.

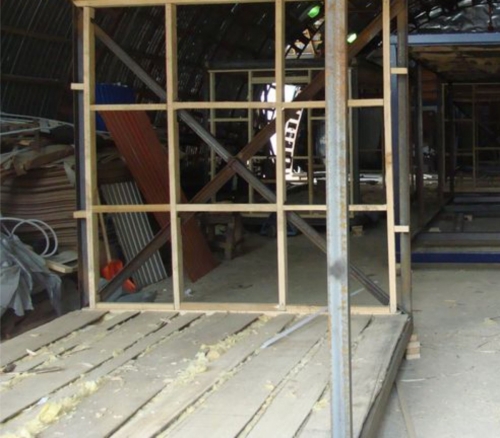
Having weld the lower strapping, we go to the racks. They will be located in the corners of the strapping, one or two from the back wall, as well as in the area of \u200b\u200bthe doorway and windows. We start with the corners. After the stand is installed, it is necessary that the partner holds it strictly in an upright position, while the welder grabs the rack in several places. And if it turned out to be made without tilt, then we welcome the rack finally. For additional stability at the bottom of the rack, you can weld triangular spacers. Similarly, weld all other racks.
Important! The distance between the racks of the doorway should be equal to the width of the door. Also, for the reliability between them, a jumper is welded at the top. The height from the jumper to the corner should be equal to the height of the door. The same goes for window openings. But in them, in addition to the upper one, the lower jumper should also be present.
The next step will be welding of the upper strapping. Everything is quite simple here. On top of the already welded racks along the perimeter, corners for the upper strapping are laid and welded.
After the frame was created, we start the floor arrangementfor a block container. To do this, at first, a black floor of metal sheets is created. This is done with the aim of protecting the wooden finishing floor from the effects of moisture and the penetration of rodents into the block container. Sheets are laid out inside the frame. Their edges should be placed inside the bent channel, as well as rely on the foundation. When the sheets are laid out and their edges are fitted close to each other, we welcome the sheets to each other pointarily. Then we lay several narrow pieces of metal on top of the seam so that they are placed perpendicular to the main seam, and weld them. In conclusion, we weld the sheets along the seam.
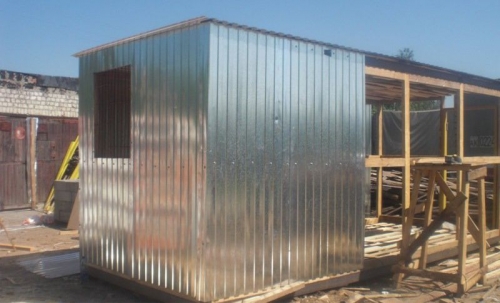
Further we proceed to the sheathing of the block container galvanized corrugated board. Everything is quite simple here. The sheets of corrugated board are starting from the inside of the frame. If the height of the sheets is slightly larger, then they can be cut without much difficulties with a grinder. The corrugated board is fixed to the frame in several ways. You can use short metal screws with a wide hat, or can be fixed using tear -off rivets.
Important! When installing sheets in the window openings, a sheet of 3 4 cm per window opening should be made. This is necessary that after installing the windows, hide the cracks and places blew out by foam.
Having finished with the walls, we go to the roof of the block container. For the roof itself, we use the same corrugated board. The only thing you need to do is to weld a few more jumpers between the walls for reliable consolidation of corrugated board. Next, we lay the corrugated board itself and fix it to the metal frame.
The next step will be creation of a wooden frame, its insulation and casing. The frame itself is needed to lay the insulation so that the latter does not fall out and crumble. To do this, use a wooden beam. First, install the racks, then make jumpers between them. The internal dimensions between racks and jumpers must correspond to the size of the insulation, minus 5 10 mm for reliable fixing inside. Now, on top of the frame, we lay a superdiffusion membrane and fix it with a stapler to a wooden frame. In conclusion, the insulation is laid inside the frame and a superdiffusion membrane is again covered on top of it. It remains only to sheathe the walls with plywood or lining. Similarly, we also sheathe the ceiling.
As for the floor, it will be on wooden logs laid on metal sheets. Its creation is similar to the skin of the walls. First we lay the lags. We choose a step between them so that the insulation is placed there. Then we lay the insulation and lay the membrane on top. It remains to lay and fix the boards for the floor itself. The boards themselves need to be sharpened, fit closely and fixed with nails or self -tapping screws, and lay the finish flooring on top of them.
Now we go to the windows and doors. Since such a block container is designed for temporary residence, it will not be superfluous to take care of a strong and reliable door. It will be best to make it on its own from steel sheets. But the creation of such a door requires a lot of experience, so it’s easier to buy or make on order. The door itself is installed on metal loops, which are welded to the strokes of the bent channel. When installing loops, it is necessary to strictly ensure that they are on the same line. Three loops are installed for the metal door. Two from above, at a distance of 20 and 50 cm from the edge of the door and one from below, at a distance of 30 cm from the threshold. Then the doors are hung in place.
As for the windows, there is one important point. The windows are a vulnerable place when hacking, so they will need to be protected by gratings. The lattice itself is welded to the steel channel, which plays the role of a window opening. The windows themselves can be either wooden or metal -plastic. When installing, it is necessary to check the vertical of the window so that it does not fall. The gaps between the window frame and the steady channel can be discouraged. This is where the creation of a home-made block container is completed. If desired, additional finishing work can be carried out inside.
Alteration of a ready -made sea container
Fashion for all West also affected block containers. Today it has become popular to use block containers converted from sea transport containers as everyday life or even permanent housing. The cost of a block container, converted from transport, may be slightly higher in comparison with home-made, but also an order of an order of magnitude less.
To make a metal container metal, converted from transport, the first thing to do is choose and purchase a used container itself. Ads for the sale of transport containers can be found without problems. Such containers are produced in several sizes: Standard and NS (High Cube). Respectively, 20 and 40 feet in length (6 and 12 meters), 2.35 m wide and 2.4 m high and 2.7 m. A standard container can be found an average of 1200 cu, and NS of 2100 U. e. Such standard dimensions impose certain restrictions, especially this is unpleasant in relation to the width of the container. But the release of their this situation can be a docking of two or more containers. To create a suitable block container from transport, it is necessary to do the following:
- purchase one or more containers and deliver them to the site;
- while the containers are on the way, prepare and smooth the site for its installation;
- as in the case of home -made, a simple light foundation is created under the transport container;
- after delivery, the container is installed in place. To do this, you need to order a crane in advance;
- if the containers are associated, then after installing them we cut off the contacting walls with a grinder;
- at the site of the docking, where the lower and upper strands, as well as vertical racks, is held, we weld them among themselves;
- if there is only one container, then we proceed to cutting openings for windows and doors. We do this with an autogen or grinder;
- for the reliability of the door in the doorway, you can install two vertical racks from a metal corner;
- further work will consist in the decoration of the block container. They are identical to the work described for a home-made block container. The only important difference will be the need for external decoration, namely painting or cladding of metal walls.
Installation of a collapsible block container
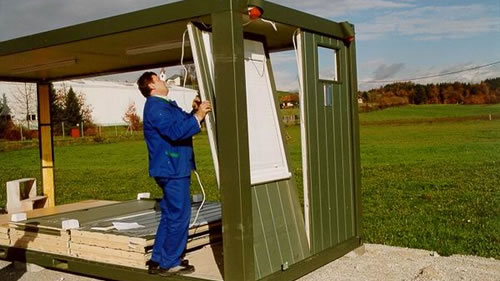
Of all block containers, the most expensive and at the same time the simplest in the assembly is a collapsible block container. Such containers are made to order at a specialized enterprise. The collapse block has a standard width of 2.5 m, and its length can range from 2.5 m to 6 m. The option of creating a block container of a larger length is also possible. The assembly of such a container is performed by two installers and resembles an ordinary designer, assembly time from 4 to 6 hours. Such high assembly indicators are due to the use of sandwich panels and pre-adjusted details to each other. When performing the assembly with your own hands, for the first time, the company can provide its specialist and a complete set of assembly documentation.
Collective containers are mounted in several stages. On the first, the frame is assembled, which is connected using bolts. On the second, the floor is laid and the roof is mounted. At the third stage, walls are installed. In conclusion, windows and doors are installed. On the demonstrating collection and disclosure block container, you can see how easily and simply such containers are mounted.
There are no special secrets or difficulties in creating block containers. The main thing that is necessary is the ability to handle the tool. Since it depends on this whether you can collect the entire structure with your own hands. Those who are not used to or do not know how to work with their own hands can be recommended to hire specialists and purchase a ready-made block container.






Great article, only
An excellent article is the only thing that it is not entirely clear how to weld the floor, because if the external sheathing is tucked inside, then during the rain there will be all the test on the floor.
It can be seen that the author is far from
It can be seen that the author is far from the topic. Very far away
Do not forget the external ones from the bottom
Do not forget to make spill over the bottom of the external walls. These are the same strips from a profiled sheet in one profile. Fixed with self -tapping screws so that their upper part is placed under the sheet of the profiled sheet, and the lower part goes beyond the edge of the lower channel. Then the rainwater, flowing down the walls will not fall under the channel, but will merge out to the ground. In the same way, the roof should have a protruding part of several cm and a little bent along the channel.
About TB (safety precautions)
Have you heard about TB (safety precautions)? Fingers under the load