When the installation of the roofing is completed, work begins on the sheathing of the overhang of the roof ...
|
|
The urgent question that torments everyone to live in private country houses ... |
One of the most original architectural additions that attract their ability ... |
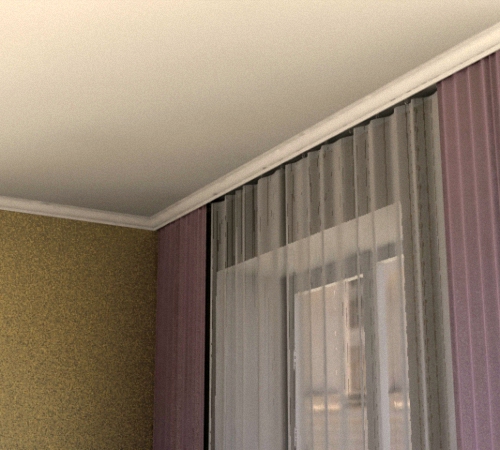
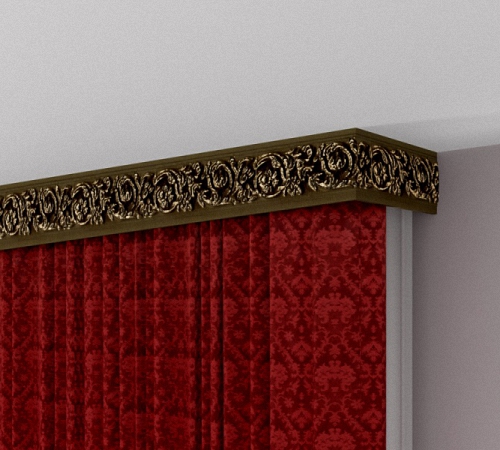
Installation of a ceiling cornice
Using a ceiling cornice, it is possible to divide the space between the wall and the ceiling. There are several of its varieties that differ both in composition, materials, and in the method of fastening. We will consider how to hang a ceiling cornice.
Table of contents:
- Ceiling cornice: varieties and characteristics
- Cornice ceiling price and choice
- How to install a ceiling cornice: features of installation of a plastic cornice
- How to hang a ceiling cornice made of wood
- How to fix the ceiling cornice: installation features
Ceiling cornice: varieties and characteristics
The cornice is the protruding part of the finish, for the manufacture of which they use:
- wood;
- plastic;
- metal.

The type of cornice and the material from which it is made is selected in the ratio with the features of the interior and the type of curtains that will be installed on the cornice. In relation to the load on the cornices, they are:
- for light fabric;
- average load;
- For heavy curtains.
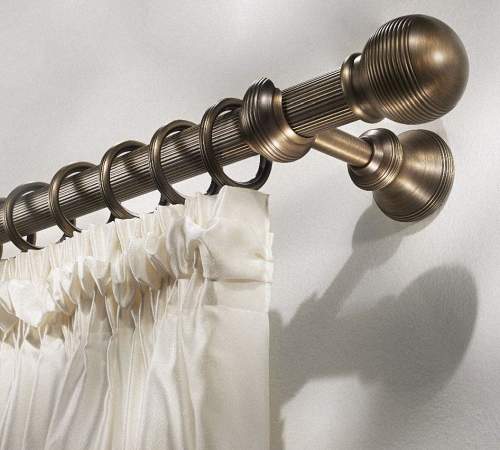
If a chintz or tulle is used as curtains, then a string cornice is enough, which is characterized by lightness and practicality. With the help of wooden or steel cornices, it is possible to install curtains that are more heavy in weight than the previous option.
If you plan to install the average curtains in weight, then the use of the cornice of the ceiling plastic is the best solution. The cornices in specialized theaters are characterized by the presence of a special electric motor, which is responsible for the movement of curtains.
In addition, on ceiling consoles there are mounts that differ in the number of rows: one, two or three. If the cornice has three rows, then it is designed to fix curtains, curtains and lambrequin.
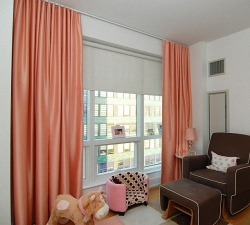
The cornices are great for rooms that have quite low ceilings. In this case, it is possible to visually increase the length of the walls. Also, using the installation of cornices, it is possible to get rid of defects or irregularities on the walls, hiding them behind dense curtains.
If you live in the northern region with a cold climate, then with the help of a cornice and dense curtains installed on it, it is possible to additionally heat insulate the space. In hot weather, curtains are protected from direct sunlight.
Cornice ceiling price and choice
The type and material for the manufacture of the cornice should be selected based on the individual characteristics of the interior. The cornices can be the simplest and most completely invisible, but can look at themselves due to the presence of additional decorative decoration.
The simplest consoles differ in the presence of only fasteners on which the curtains are fixed. The simplest decorative strip will fit into any interior. In the process of its choice, it is enough to only take into account the color of the curtains. If there is a large number of wooden elements in the room, then the cornice can be made of wood.
Some of the plastic cornice models can also be made under wood or metal. In the process of choosing a wooden cornice, pay attention to its quality.
Ceiling cornice photo:
Among the advantages of this cornice, we note:
- high level of strength, such cornices will easily withstand the most severe curtains;
- Environmental safety - the absence of toxic substances in the tree;
- The duration of the operation of a wooden cornice is about ten years, with moderate humidity in the room;
- Most often, wooden cornices are made of oak, coniferous wood, ash, nut, larch or cherries;
- The tree is very easy to process, if you have experience working with it, this interior element can be made independently;
- There are many options for making such a cornice, it can have a simple shape or various kinds of decorative elements.
Plastic cornices are cheaper than wooden, this is due to the availability of this material. These cornices are durable and aesthetically attractive in appearance. At the same time, plastic is not subject to high humidity, temperature difference, rather antiseptic, does not accumulate dust and serves its owners for a very long time.
Various kinds of decorative coatings that are glued to plastic cornices are able to imitate various kinds of natural materials.

A less popular version of the cornice is metal consoles. They are most often installed if this requires the style of the room. Stainless steel and brass are used for the manufacture of these cornices. Among the advantages of steel cornices we note:
- high strength level;
- the ability to preserve the appearance for a long time;
- stability before high temperature;
- Steel cornices can withstand the largest load, they are very part used to install curtains in the theater.
Steel curtains are an excellent addition to the High-Tex interior. Easy and more resistant to corrosion are cornices made of aluminum. In addition, it is enough to wipe them with a damp rag to care for the cornices.
Tip: If you do not want to attract attention to the cornice, then it is enough to purchase the easiest option - the cornices of the string type. Their main function is to hold the curtains, but not decorating the room.
In any case, the cornices should be selected not only taking into account the curtains or curtains that are installed on them, then in relation to the individual characteristics of the room.

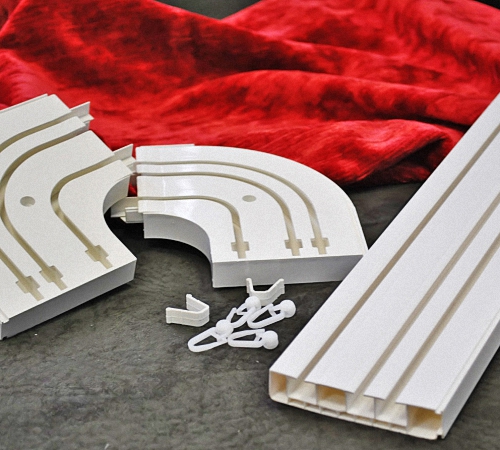
How to install a ceiling cornice: features of installation of a plastic cornice
The installation of a plastic cornice is characterized by the following advantages:
- The possibility of hiding in the ceiling space, thus, the appearance of the room becomes more attractive;
- affordable cost;
- resistance before moisture and temperature changes;
- the possibility of installation on the balcony, above the bed, in the loggia and other inaccessible places;
- The ease and ease of carnial care provides a long service life.
In addition, plastic cornice is able to withstand weight more than 50 kg. The cornices are installed both vertically and horizontally. Plastic cornice is installed on any kind of surface. It can have any shape, even worried or zigzag.
The ceiling cornice made of plastic consists of a whole profile structure. The lower part of it occurs for installing hooks. In addition, elements in the form of:
- plugs and locking mechanisms;
- mounting fasteners;
- Turners.
With the help of various kinds of plugs, it is possible to limit the movement of the curtains along the cornice. Plastic fasteners are needed in order to mount the cornice on the ceiling and fix it on it. There are two types of fasteners:
- visible;
- Invisible.
The first option is relevant for the cornice, which have decorative elements, and the second is installed if the cornice is invisible against the general background of the room.
Using rotary elements, it is possible to form an angle of inclination of the cornice in one direction or another. On the front of the cornice, if necessary, install elements in the form of rails and blends.
The color palette of plastic cornices is almost unlimited. They can be black, white, golden, silver, green, etc. Some cornices involve gluing a film on their surface that simulates stone, wood or metal.
Plastic cornices differ in simplicity of installation, before starting work, you should familiarize yourself with the instructions that describe in detail the entire process of attaching the cornice to the ceiling.
Before installing the ceiling cornice, it should be assembled. It consists of side plugs, hooks and plastic circles. The carnise is fixed quite quickly and does not take much time. In the ratio with the number of rows, divide the hooks on which the curtains will hang. In order to avoid sliding hooks from the cornice, we recommend using plugs. In order to reliably fix the plug, use glue. If necessary, in replacing hooks, you can remove them without using plugs. The beginning of the installation of the cornice should be carried out by marking, this will require the presence:
- pencil;
- ruler;
- construction level.
Draw a line according to which the cornice will be installed. According to the previously carried out marking, install the cornice and fasten it using self -tapping screws. At the same time, it is advisable to take advantage of the help of another person in order to avoid the shift of the cornice during his fixation.
Plastic self -tapping screws will help to install a cornice on the ceiling, trimmed with putty, and steel screws will be relevant on concrete surfaces.
Fixation of the screw on the concrete floor is carried out by a perforator or electric drill. Initially, dowels should be installed, and then screws.
If the ceiling is made of drywall, then the cornice should be installed in a different method. For work, the availability of:
- fasteners;
- screwdriver;
- Self -tapping screws that have wide hats.
A standard set for fixing plastic cornices includes the presence of special fasteners. They consist of traffic jam and self -tapping screw, however, special forceps are required to work them. In their absence, a hammer and a screwdriver will come to the rescue. To close the sites of self -tapping screws, use special plastic plugs suitable for the color of the cornice.
How to hang a ceiling cornice made of wood
Wooden cornices differ primarily by strength and reliability in use. For attaching ceiling cornices made of wood, you will need the presence:
- level;
- screwdriver or drill;
- roulette;
- fasteners;
- Self -tapping and dowels, in an amount corresponding to the number of holes on the cornice.
Instructions on how to install a ceiling cornice:
1. First of all, mark the installation site of the cornice. This will require at least two people. Determine the height of its fixation.
2. Mark the vertical axes of the editing of the cornice. Crohstyne fixation is carried out by two dowels.
3. To install a small dimensions of the cornice, two fasteners will be enough.
4. Otherwise, it should be additionally strengthened by the design with a third self -tapping screw installed in the center.
5. After the marking is performed, the installation of the cornice is carried out. For these purposes, a perforator will be required if the cornice is installed on the concrete base.
6. Work with a perforator quite slowly so that the holes turn out in an exact ratio with dowels.
7. Next, using the hammer, install the dowels and fix them with brackets. Keep in mind that in the presence of an additional third fastener, which is located in the middle of the cornice, its installation is carried out after the continuous jumper is extended.
8. In the process of fixing the brackets, it will be useful to install cadmed screws, which differ in resistance to corrosion and do not change their color during operation.
9. For additional decoration of a wooden cornice, bugnets, also made of wood, are used.
10. A option of additional jumper on the surface of the cornice is possible. Most often they are made of steel structures.
How to fix the ceiling cornice: installation features
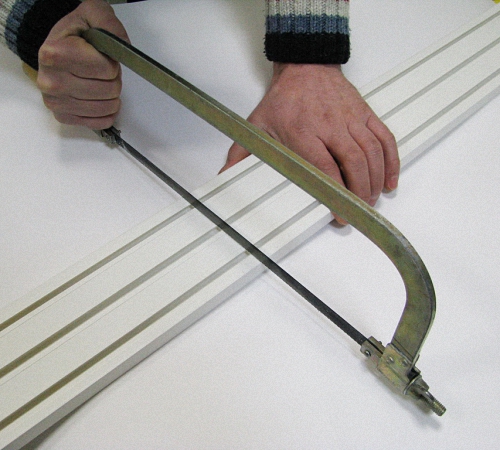
We offer to familiarize yourself with the recommendations for the installation of a metal cornice. Installation work is carried out by preliminary marking of the base for the cornice. At the same time, if there is a need for pruning the cornice, use a hacksaw.
The brackets should be recorded symmetrically. If an oval cornice is installed, on which there are rings, on each side to the bracket is installed along the ring. Rings should be located symmetrically in relation to a friend and have the same interval. If the cornice is quite long, you should take care of the presence of an additional central mount that will give it stiffness.
To move the curtains, use a special pointer, which will avoid further deformation of the cornice. The start of the work involves the performance of marking under the cornice. Next, you should make holes for mounting fasteners. If the cornice is installed near the window, then certain recommendations should be followed:
1. The cornice should be large in length by the window opening at least twenty centimeters.
2. The interval between the cornice and the upper part of the window is at least five centimeters.
3. The distance between the wall and the curtain is about ten centimeters.
4. The interval between the cornice and the radiator is about five centimeters.
After the holes are made in them, dowels are installed, then the cornice is installed and its fixation with self -tapping screws.
![]()
StrPort construction portal 2011-2018. Articles about repair, construction, building materials.
Copying information from the site is possible only with permission of the editorial office Or indicating a direct link to the source. Legal justification
Interestingly described, but no
Interestingly described, but no details