If you started a grand repair in your apartment, then it is first of all ...
|
|
Each developer wants a building of any purpose to please his long term ... |
The final stage in the repair of the premises is the installation of a floor skirting board. Skirting boat from ... |
Old ceiling: repair tips
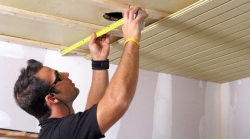
The need to repair old ceilings may occur for several reasons. The leading positions occupy emergency situations when the ceiling flooded with neighbors from above, banal wear of the cracker of the paint, the release of the old decorative coating from the base, the appearance of yellow spots. The ceiling repair in the old house is made in the case when there was a common desire to simply update the appearance and decorative coating. In this case, problems with the surface of the ceiling are often absent. Updating the ceiling will be necessary when the internal repair of the apartment or private house is carried out, which experts recommend starting on top, and then move on to other types of work. This is due to the fact that the ceiling is the most important detail of the interior, which is the first to catch the eye at the entrance to the room. There are many options for repairing the ceiling, and the choice of the most preferred of them should be carried out individually, taking into account the characteristics of the interior. Before starting the repair of the ceiling, it is necessary to evaluate its initial state, and only then draw conclusions about the need for cosmetic or major repairs.
Content
- Cosmetic repair of the ceiling: basic principles
- Painting the ceiling: step -by -step guide
- The simplest design options for a painted ceiling: Specialists' tips
- How to repair a flat ceiling: finishing options
- Common problems leading to the repair of the ceiling
Cosmetic repair of the ceiling: basic principles
If you want to update only the appearance of the ceiling, most likely you have no serious problems with its surface. In this case, your main task is to refresh the decorative coating. Despite the fact that, at first glance, this task seems quite simple, it is often complicated by many factors accompanying the repair.
First of all, the task is complicated by the lack of the opportunity to free the room from furniture and bulky things, especially if the repair is carried out in a one -room apartment. In this regard, you constantly have to move the furniture and cover it.

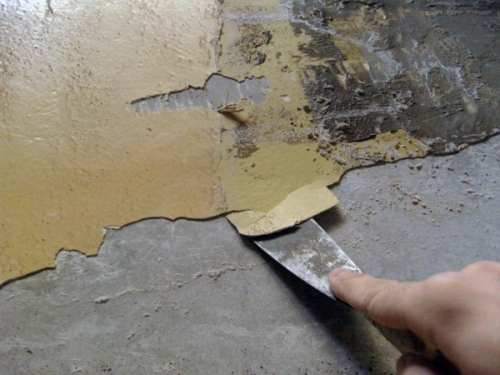
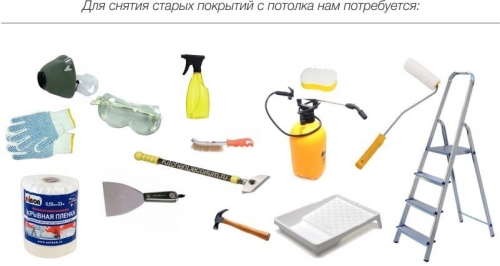
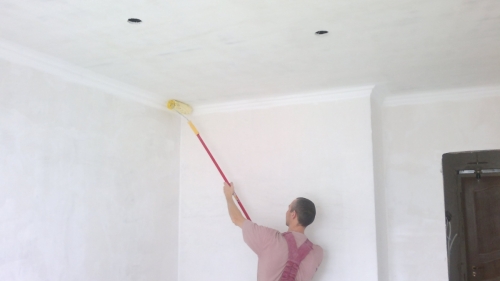
Today it is almost impossible to meet those who want to lead the old ceiling opposite, they try to get rid of whitewashing. It is not surprising that one of the dirtiest stages of ceiling repair is considered to be removed from its surface of the old whitewash or other ceiling coating. This operation is quite laborious, and the further quality of the ceiling coating depends on the thoroughness of its implementation. The removal of lime, water -based or chalk whitewashing is carried out using a roller on a long handle, which must be moistened with water and carried out on the ceiling, which is necessary to moisturize the whitewashing. After that, it is necessary to remove the old ceiling for this moisturized whitewashing is cleaned with a spatula. All other types of paint are cleaned with a special cleaner.
The algorithm of further actions depends on the chosen method of finishing the ceiling. If you plan to paint the ceiling or paste it with wallpaper or ceiling tiles, you should know that all types of adhesive and paint work should be carried out only after preliminary priming the surface, which will increase the adhesion of the decorative layer and the main surface. In the case of installation of drywall or stretch ceilings, the base is not required.
Important! Replacing the old electrical wiring in the ceiling and the installation of the withdrawals for built -in lamps is also carried out at the preparatory stage.
At the next stage of the preparatory work, the surface is aligned and the priming of the base. The grout of the seams between the slabs and the elimination of large irregularities is carried out using gypsum plaster, which is applied in several layers. The plaster of the old ceiling will eliminate defects in the ceiling surface.
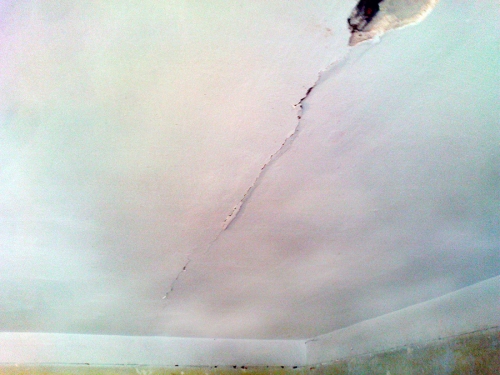
Inspect the finished surface for the presence of irregularities, cracks between plates or small potholes. In case of detection of those, smear them with cement or gypsum plaster, the application of which is carried out by a spatula used to clean the whitewashing. When eliminating the gaps and irregularities of the ceiling surface, make sure that they do not protrude beyond the plane of the ceiling and, at the same time, do not fail too deeply. To make sure that the surface of the ceiling is perfectly flat, use the laser level. Based on the results of the measurements, the value of the detected deviations should not exceed 5-7 mm.
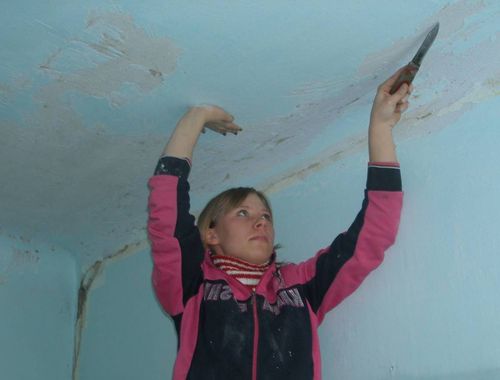
The final stage of the cosmetic repair is finishing the ceiling, the complexity of which depends on the selected materials and the complexity of the installation. The modern level of development of building technologies dictates its own rules, and today stretch ceilings are especially popular, the installation of which is recommended to entrust specialists. However, it can be carried out independently. Despite this, for independent implementation, experts recommend choosing simpler installation options for the ceiling surface: painting, ceiling tiles or drywall.
Painting the ceiling: step -by -step guide
If you have carried out all the above stages of preparatory work, you can begin to finish the ceiling and its subsequent decoration. Consider how to paint the old ceiling correctly, while fitting at the same time in the shortest period of time.
Painting the ceiling is a multi -stage process that includes many stages:
- First of all, remove the layer of old paint from the ceiling. This must be done in order to increase the strength of the new coating, as well as ensure the ease of application. Removing paint from the surface of the ceiling can be done in several ways:
- A mechanical method that implies the use of a metal spatula, brush or angle grinding machine;
2. The thermal method, the principle of which is based on the use of a construction hair dryer;
3. A chemical method that implies the use of a special solution for removing the paint, after applying which it will be easy to leave.
- The next step is to align the ceiling surface with a putty, after applying which it is necessarily primed for painting;
- The final stage is the application of paint with a roller. Experts do not recommend painting the ceiling on the old paint, as this will negatively affect both the appearance and the quality of the ceiling coating. Depending on the room in which you repair, you can paint the old ceiling with water -based paint, as well as choose acrylic or latex paint.
The simplest design options for a painted ceiling: Specialists' tips
If you are puzzled by the design of the painted ceiling, having familiarized yourself with the material of the article, you can adopt several options.
- One of them is a polyurethane socket decorated with an original relief. It can be in harmony with a tone of paint or make it contrast. The ceiling will acquire a special chic if the voluminous relief on stucco elements is covered with gilding, in harmony with gilded elements of the chandelier;
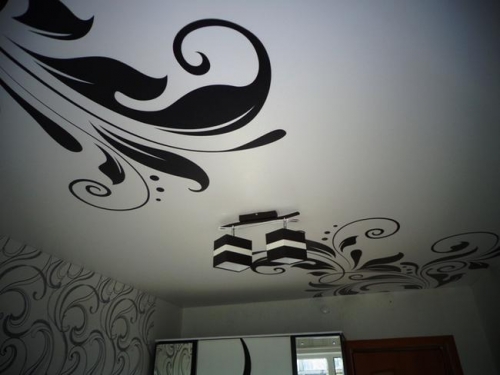
- However, this is far from the only way to decorate the surface of the painted ceiling. Another option for decorating the ceiling involves the use of a stencil, which is fixed in the right place using painting tape. After that, a drawing is applied to the surface of the ceiling, which can be in harmony with the color of home textiles or wall coating. To finish the ceiling in this way, experts propose to use fluorescent paint, which can be applied along the perimeter of the ceiling or along the contour of the picture, so it will be released in the dark;
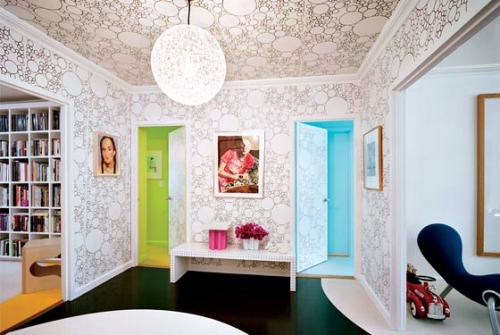
- Another option for finishing the ceiling using wallpaper for painting, the use of which will create a relief on the surface of the ceiling. This method of decoration can be skillfully combined with other materials. An example presented below illustrates this situation. In the photo you can see how ceiling wallpaper are glued only in the central part of the ceiling in the form of a kind of carpet. In the center he is framed by a frieze, the shade of which harmonizes with wall decoration. Using this technique, you can visually adjust the configuration of the room. For example, by placing a contrasting carpet in a longitudinal or transverse direction, you can make the room more spacious or, conversely, compact.
How to repair a flat ceiling: finishing options
Consider the main options for repairing an old wooden ceiling, which is characterized by a fairly even base without obvious height changes.
Pashing with ceiling wallpaper
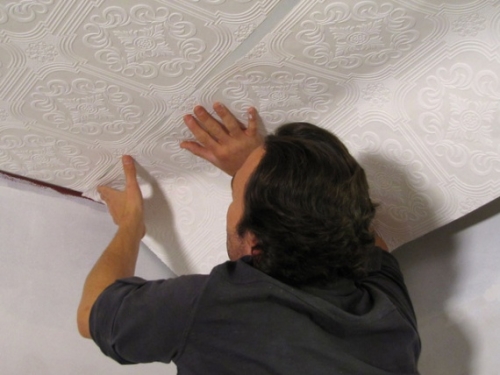
One of the easiest repair options is to glue the ceiling with wallpaper. This method is most acceptable for apartments than for private houses, since the apartment building is practically not subject to shrinkage, and therefore, it can be safely argued that the finish will not be peeled off from the surface of the ceiling. If your ceiling is not an ideal plane, give preference to wallpaper with a large embossed pattern that will hide small irregularities and make the ceiling visually more even. Such varieties include wallpaper with complex geometric patterns.
To facilitate the process of gluing wallpaper, try not to do the work alone invite a partner who will support the second end of the wallpaper moistened with glue. This will avoid ruptures of the canvas.
Technological nuances of wallpaper sticking:
- It is recommended to stick wallpaper on the ceiling from the window to the opposite wall, which will make the seams less noticeable;
- The wallpaper must be cut with canvases, the length of which is equal to the length (width) of the room + 4 cm (2 cm for allowances). In the process, check whether the neighboring canvases are able to dock, and numb each section with a pencil so as not to confuse the priority of gluing paintings;
- Having cut the required number of paintings, dilute the glue and lubricate it with the back of the paintings, paying special attention to the edges. If the accompanying instruction requires, add the wallpaper by the accordion so that the glue is better saturated, and proceed to apply the glue to the next canvas;
- If the instruction says that the wallpaper gluing is carried out immediately after applying the glue, prepare a roller and dry rag, thanks to which you can remove excess glue and air bubbles, and proceed to the installation of ceiling walls;
- By laying the wallpaper on the surface of the ceiling, let the edge on the wall, which is necessary in order to subsequently fix the edge of the wallpaper using a ceiling skirting board;
- Next, degre up the canvas with a roller and a dry rag in the direction from the middle to the edges;
- If the walls in the room are uneven, draw a line on the ceiling before gluing the wallpaper, focusing on which you will lay the edge of the wallpaper. If the width of the wallpaper is 50 cm, the line should be applied at a distance of 50 cm from the window. If the wallpaper is wide at a distance of 1 m from the window;
- After gluing the wallpaper to their final drying, refrain from opening the windows and ventilation of the premises, which will prevent uneven drying of the glue and the rupture of the paintings in the seams.
Tile ceiling finishing
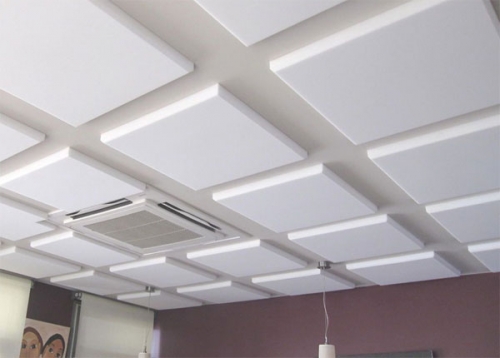
If the ceiling surface in the repair room is characterized by a height difference visible by eye, and due to financial problems you cannot make complete plastering of the surface, prefer ceiling polystyrene tiles, which still does not lose its popularity due to ease of installation and democratic value.
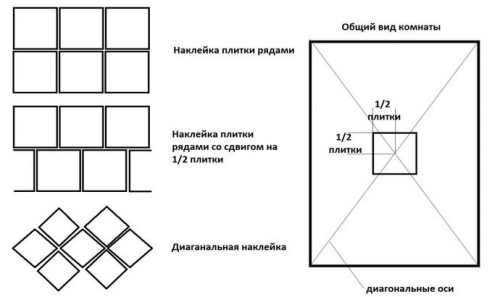
The tile is mounted on the ceiling, using super -strength glue, which will firmly hold the coating on the ceiling surface even in the presence of irregularities. To make the ceiling more original, experts recommend mounting tiles diagonally.
Technological nuances of installing ceiling tiles:
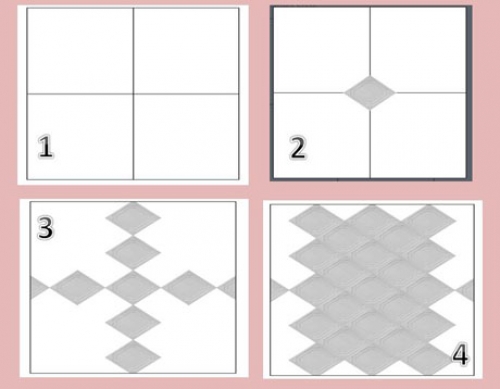
- Draw two perpendicular lines on the ceiling, which connect the centers of opposite walls. To do this, divide each wall into two halves and draw the lines to the opposite wall from the points received. As a result of such markings on the ceiling, a cross should be drawn, the middle of which is located exactly in the center of the ceiling;
- The first tile must be laid in the center so that its angles are projected exactly onto the drawn lines. It is necessary not to apply glue to the entire back of the tile, but pointily, only in the corners and in the middle;
- The second and subsequent tiles are laid exactly along the drawn axes, gradually moving from the center to the periphery. Two opposite angles of the tiles should be located strictly on the line;
- Completely sealing all the axes, proceed to fill the spaces that remained empty;
- Approaching the decoration of space near the walls, be prepared for the fact that it will have to be filled with slices of tiles and prepare a stationery knife, which is perfect for cutting polystyrene;
- By fully filling the ceiling space with tiles, make the installation of skirting boards, and then soak all the joints with putty.
Common problems leading to the repair of the ceiling
How not to delete the old whitewashing layer?
If the whitewashing holds quite firmly, experts do not always recommend removing the lime layer. The variety of building materials presented on the market allows it to be primed and painted. This can be done only with the help of modern primers, which can be applied directly to the lime layer. Usually it writes about this on the package. One of these brands is the primer -strengthening primer, strengthening.
Large irregularities are found on the ceiling surface. How to fix it?
- To eliminate noticeable height changes, experts recommend using a universal gypsum plaster in KNAUF ROTBAND, which is applied to the ceiling surface with a layer of no more than 5 cm. The primer layer is applied several times;
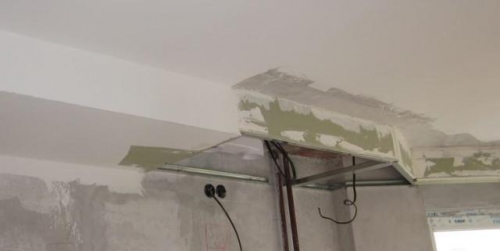
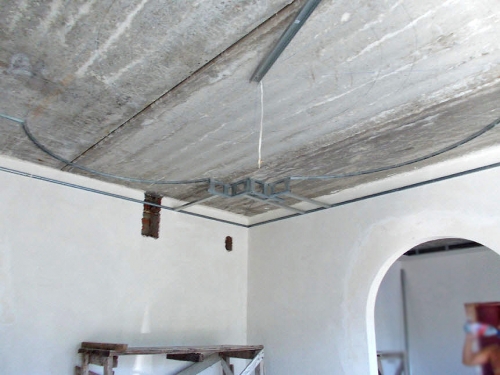
- There is another option for aligning the ceiling, which involves the use of drywall. To do this, prepare a frame from metal profiles, which is fixed on the old ceiling and sheathed with a sheet of drywall. The resulting seams are sealed with putty, as a result of which a perfectly flat surface is obtained;
- Minor height drops can be masked with a stretch ceiling, which is not only a stylish and modern, but also practical way to organize ceiling space.
How to close the cracks between the plates?
- In order to close the joints on the ceiling or holes formed near the pipes, it is necessary to clean them thoroughly, and then smear the seams with a primer penetration;
- Fill the space in the cracks with mounting foam. If the seams are initially narrow, they must be expanded with a perforator;
- After 30 minutes, cut the protruding pieces of foam with a knife;
- In conclusion, put the surface of the surface with the construction mixture of the UNIFLOTT KNAUF, which is applied in 2 layers with an interval of 40 minutes.
What to do if you flood the ceiling?
- You can talk about the repair of a flooded ceiling only after its final drying. In most cases, this happens no earlier than the third day from the day of leakage. Having made sure of the final drying of the ceiling, you can start repairing it.
- How to visually determine the place of leaks? It is not hard. Typically, a wet brown spot is formed in this place, which stands out greatly against the background of the white lime layer. If the stain is small, the ceiling surface does not need full repairs, since it is possible to cope with the problem, in this case, you can locally. If more than a third of the ceiling surface is flooded, you can not do without full finish.
- The sequence of actions in case of repair after leakage is similar to any other repair, the algorithm of which was described above. It also involves the removal of the old finishing layer, leveling the surface, if necessary, with its subsequent priming. In this case, the primer is recommended to be applied in two layers, while the second layer is applied after 30 minutes from the date of application of the first;
- Then it is necessary to put the place of the leakage. After the putty dries, make sure that there are no spots. In the case of their repeated detection, cover the problem space with matte paint. It is possible that the paint will have to be applied more than once, but remember that each subsequent layer is applied after the previous one dries;
- After you seized the spots, paint the ceiling in the projection of the spots with a roller and only then apply the final layer of paint over the entire area of \u200b\u200bthe ceiling.

Important!When painting the ceiling, hold the roller in one direction, since only in this case the painted surface will be perfectly smooth after the paint dries.
Dranka on the ceiling: why prepare?
Dranka is wooden rails, nailed crosswise to the ceiling for applying plaster on them. One of the most frequent problems that you can face in old houses. The plaster begins to fall off directly onto the head. How to deal with this?
There are several options:
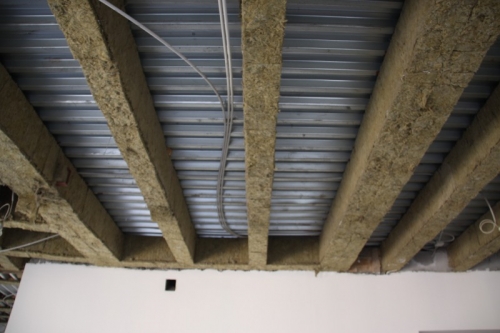
Option No. 1: Beat the plaster with a pickle, and install the frame of metal profiles, which is overtaken by drywall. The formed space between the base and a sheet of drywall, if necessary, can be filled with insulation;
Option No. 2: Remove the shingle and put the ceiling in the usual way;
Option No. 3: If the plaster collaps are insignificant, try to process your fight with glue (this can even be PVA) and fill the irregularities with a mixture of KNAUF ROTBAND;
Option No. 4: If the defects have touched the fight itself, they need to be eliminated by removing part of the plaster around it and filling them with drywall patch, which is screwed with self -tapping screws with the ceiling. The joints are sealed with a reinforcing ribbon and put down.

thanks for the info
thanks for the info