When the life of a wooden coating comes to an end, it needs ...
|
|
Vetonit (Vetonit) is a trademark that produces powder building ... |
In modern interiors of the rooms, the door from the glass appeared quite recently, and ... |
Installation of plastic floor skirting boards with your own hands
The final stage in the repair of the premises is the installation of a floor skirting board. Plastic skirting boards are widely popular in operation due to their wear resistance, mechanical and temperature strength, attractive appearance and a wide variety. We learn about how to perform the installation of skirting boards with our own hands.
Table of contents:
- Installation of plastic skirting boards with your own hands
- Installation of a warm skirting board with your own hands
- Installation of ceiling skirting boards with your own hands
- Features of the installation of a wooden skirting board with your own hands
Installation of plastic skirting boards with your own hands
Floor skirting boards are made from various materials. Plastic products are especially popular. MDF skirting boards, steel, ceramic and stone models are used. It is easiest to create the illusion of even walls with plastic skirting boards. They fit perfectly on the surface, differ in affordable cost and are diverse in color and texture solutions.

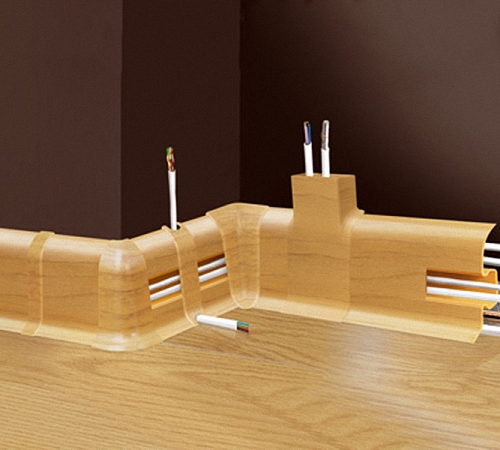
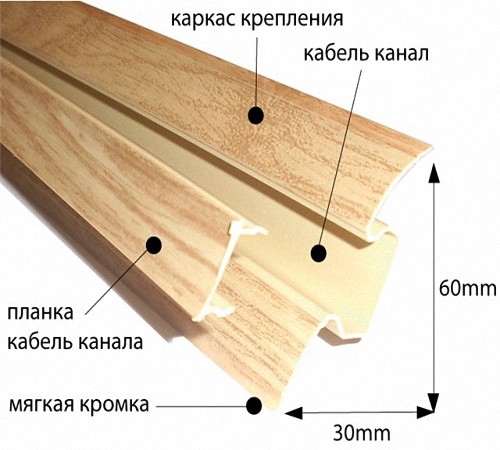
PVC -based skirting boards are suitable for both wood floors and for coating made of laminate or linoleum. The skirting board is moisture resistant, easy to install, differs in the presence of the channel cable inside which there are wires.
Before starting the installation of skirting boards, you should decide on the number of consumables. The optimal length of the floor for the floor is about 250 cm. Based on this, the number of skirting boards is calculated. Do not forget to add 10-15% of compensation for joints and other errors to the received value.
There are special online calculators that will help calculate the number of skirting boards. Although it is quite possible to perform this process yourself. It is enough to add the length of the room to its width and multiply this value by two. Divide the result by 250 cm or 2.5 m, depending on what units the previous calculations were performed in.
The next stage is the choice of the optimal color of the skirting board, which perfectly combines with the interior of the room. In the process of choosing a skirting board, we recommend taking a small piece of wallpaper with you to compare it in color.
Plastic skirting boards are joined using special accessories. When performing their sawing, it is not necessary to observe the high accuracy of the junction of the elements. The design of the plinth itself allows you to ultimately get the perfect appearance of the coating. Furniture elements for plastic skirting boards contain two plugs - the right and left, elements for docking, internal and external corners. Try to choose accessories as accurately as possible close to color to the plinth itself.
Do not confuse the number of plugs - right and left parts are exactly the same only have a mirror reflection of each other. When calculating the number of plugs, keep this fact. The docking parts are mounted for overlapping the joints between two skirting boards. Self -tapping screws are not needed to fix the internal corners, they automatically snap after installation. Install this element with the same press, thus improves the appearance of the baseboard. External corners are distinguished by the presence of two paws that hold them on the wall. Their use in the process of performing installation work is not particularly relevant.
Installation of plastic skirting boards with your own hands video:
The implementation of installation work on fixing the skirting board involves a constant change of workplace, so it is recommended to add all equipment and accessories in one box, which you will move in relation to the place of work.
Installation of plastic skirting boards begins with their cut into elements of the required length. At the same time, try that the seams between the plinth be located in a less prominent place. It is recommended to start installation work with the internal corners or from the doorway. Install the two previously prepared skirting boards and make a mark on one of them so that the baseboard comes inside the corner by 0.5 cm.
Initially, install the slotus slats that cannot be cut. Install the elements for connecting the baseboard only if the length of the baseboard was not enough to overlap the wall of the room. When cutting the baseboard, always observe a supply of several millimeters so that the baseboard completely bloces the wall.
Sprinking a plinth made of plastic is much easier than wooden. In this case, there is no need to hold special corners. For a quick and high -quality cut of the skirting board, use a hacksaw for metal. At the same time, the baseboard is placed in a special knock. Thus, it is possible to achieve perfectly even corners, in a short time. Next, after the cut, with the help of a knife, remove the burrs of plastic.
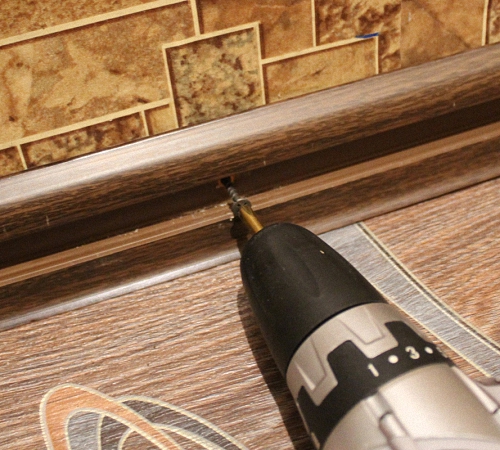
The next step is the construction of holes for fasteners for skirting boards. The holes should be made as accurately as possible, for this should be applied to the wall of the baseboard, mark it, and then drill the hole. To perform drilling, a drill with functional nozzles for perforation is enough. To ensure the accuracy of drilling, a special device called the conductor will be required. If the walls in the room are perfectly smooth, then the distance between the fasteners for installing the baseboard is about half a meter. Otherwise, this value is reduced. To remove the dust formed after drilling, use the vacuum cleaner.
If drywall is used for the manufacture of walls in the room, then the plinth installation process is slightly modified. If, when performing the construction of holes for the baseboard, it was possible to get into the profile on which the drywall is fixed, then only screws are used to fix the skirting board. Otherwise, the baseboard is fixed using dowels called a butterfly.
For the installation of such dowels, the hole in the wall is initially made, the dowel must be closely installed in it. For drilling, use any drill, as well as a conductor. Next, the pressing parts of the dowel are pressed against it and the element is installed in the hole. For a faster fixation of dowels, it is allowed to use a hammer. Keep in mind that the self -tapping screw should be slightly smaller than the dowel hat.
The second method of installation of floor skirting boards with your own hands involves preliminary drilling of the hole in the skirting board itself, and in the ratio with these holes - the drilling of the wall. For these purposes, we recommend using dowels that have hats. This installation method is less reliable and in the course of its implementation quite often it is not possible to avoid the appearance of cracks between the wall and the baseboard.

In addition, dismantling a skirting board, established in this way is more difficult. If the skirting board is fixed with screws, then the hole on the plastic is recommended to be made with a awl or screwdriver. Rotating the awl, gradually move the skirting board, thus it will be possible to obtain a hole with a high level of density. Install the self -tapping screw into the previously made hole, fix the baseboard on the wall.
The process of fixing the external corners is quite responsible, since these elements are under constant operational movement. Since the place of fixation of the corners is twenty millimeters from the place of installation of self -tapping screws, there is a possibility in their damage. To do this, in order to avoid the appearance of this unpleasant process, even during repair work, try to ensure that the external corners are perfectly aligned.
External corners are fixed in the same way as internal. Special decorative plugs are installed on the cable channels. On this, the installation of plastic skirting boards ends. If the seams appear between the wall and the skirting board, it is recommended to increase the number of fasteners necessary for fixing the skirting board.
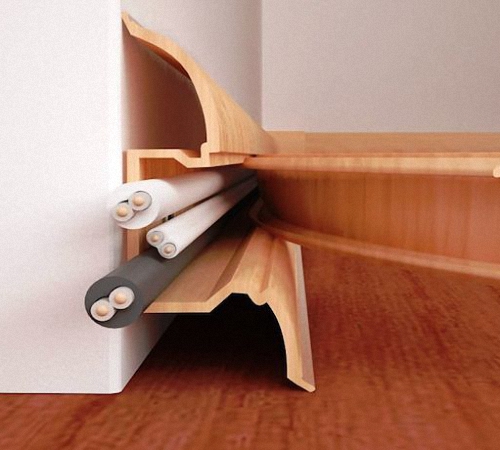
Installation of a warm skirting board with your own hands
Warm skirting boards are an excellent alternative to a modern heating system. Under these small interior items is a system of wires that provide the main or additional heating.
Among the main elements of warm skirting boards, we note the presence:
- boxes and brackets that fix the heaters;
- tubular converter;
- elements of the rotary system.
All details are collected in a single design. Among the advantages of this system we note:
- Uniform and rapid heating of the walls - prevention of the development of fungus and mold;
- uniform temperature distribution of both next to the floor and on the ceiling;
- attractive appearance;
- Since the case of the skirting board is closed, it is possible to achieve the efficiency of the use of this system.
There are two options for warm skirting boards - water and electric. The effectiveness of these systems is the same, the main difference is in the principle of heating the heat carrier.
In order to install an electric warm skirting board, a powerful power supply system will be required. For the efficiency of using the system, it is recommended to additionally set the heating temperature controller.
In order to carry out the heating of a water plinth, a heating boiler is used. This version of the plinth is characterized by greater efficiency of its use.
To perform the installation of a skirting board with your own hands, follow the instructions below:
1. The wall bar is installed. Self -tapping or dowels are used to fix it.
2. Installation of convectors and their connection to the system. To connect the convectors, compensation fittings are used.
3. The connection of the heating system with the heating mains - electric or water. In order to connect the skirting board to the system, the presence of a camshaft is required.
4. Upon completion of installation work, check the performance of the device. Install the outer decorative panel of the previously selected color.
Installation of ceiling skirting boards with your own hands
Installing a ceiling baseboard is a little more difficult than flooring. First of all, due to the fact that work is carried out on top. The most popular material for the manufacture of ceiling skirting boards is plastic. Such products are characterized by attractive appearance, moisture resistance and mechanical strength.
In the process, the availability of:
- hacksaw with a stupid;
- stationery knife with a rubber spatula;
- putty with painting tape.
Additional materials and tools are selected in relation to the individual characteristics of the room. The skirting board is installed on the wall until it is fined or after. It is preferable to perform work after gluing wallpaper or staining walls.
The most difficult moment is the performance of the pruning of skirting boards in compliance with certain angles for their docking. To facilitate this process, you can purchase special elements for connecting angles, however, their cost is comparable to the cost of one plinth level. Therefore, it is cheaper to perform the correct pruning of the baseboard, after which the angle will turn out perfect.
For pruning the skirting booth at an angle, use a knock. Minimize joints on the segments of the skirting board, which are visible at the entrance in the room. Place the butt areas behind high cabinets, curtains or in inconspicuous places. Pruning of the skirting board for the external and inner angle varies. First, thoroughly measure and mark the baseboard, only after that proceed to its pruning.
To fix skirting boards, use special glue or putty. After installing the baseboard on the wall, tightly press it to it and hold it for a few seconds. After gluing the baseboard on the ceiling, fill the joints with putty, and paint the skirting board using water -based paint.
Installation of ceiling skirting boards with your own hands video:
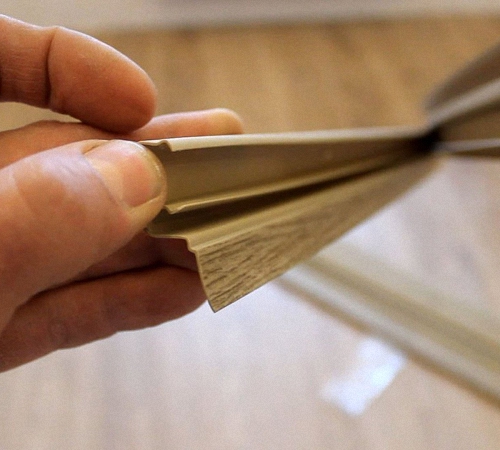
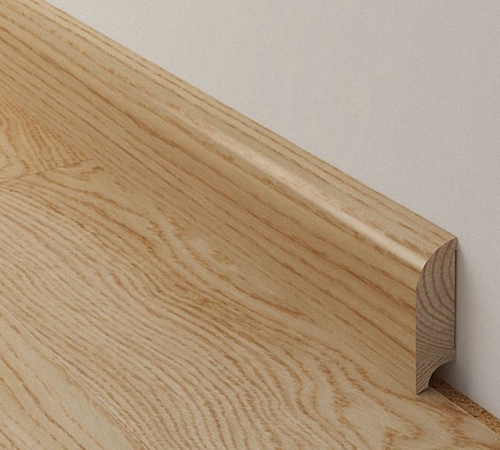
Features of the installation of a wooden skirting board with your own hands
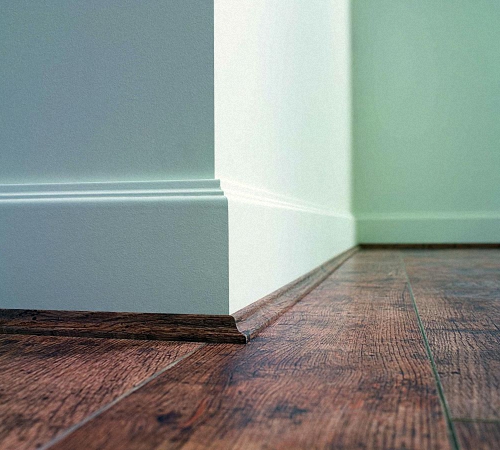
Wooden skirting boards are the most difficult in installation. They need primarily the presence of perfectly even walls, the slightest irregularities, after the completion of installation work, they become visible.
There are several options for wooden skirting boards - a material made directly from wood or from MDF. Installation of MDF skirting boards with your own hands is easier to perform.
First of all, you should choose a high -quality skirting board with an optimal level of wood moisture. If you choose too wet wood, then after drying, the coating is possible.
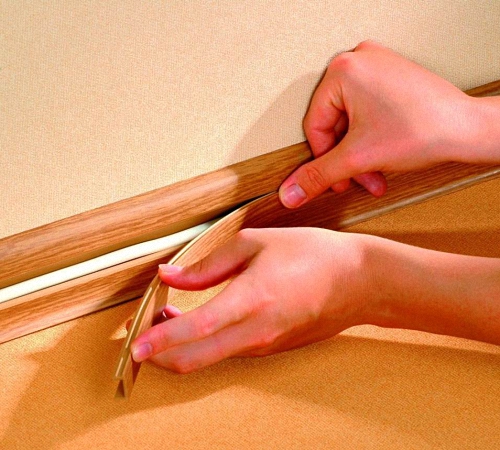
Comparing a wooden baseboard with plastic, the first does not have special accessories that facilitate the installation process. Therefore, all compounds are produced efficiently, and all angles should be perfectly even.
For pruning skirting boards, use a hacksaw with a stupid. At the same time, two skirting boards are installed at right angles and markings are performed for the formation of an external or inner angle between them.
The interval between the installation of fasteners of skirting boards is about 65 cm. The location of the skirting board is performed by self -tapping screws. Subsequently, a special grout or putty on wood of the corresponding color is used to fix the hats from self -tapping screws.
The option of fixing the skirting boards using finish or liquid nails is possible. The second option is relevant if the walls in the house are absolutely even.
DIY plinth installation video:
![]()
StrPort construction portal 2011-2018. Articles about repair, construction, building materials.
Copying information from the site is possible only with permission of the editorial office Or indicating a direct link to the source. Legal justification
heh
heh