For a long time, experts have been practicing the use of ceramic tiles as ...
|
|
The roof is an important element of the construction, from the correct installation and high -quality ... |
In the event of a fire, the greatest danger to human life is not a fire ... |
Do -it -yourself putty
If the goals of your repairs are reduced to that it withstand not a year or a second, but at least a dozen years, you should choose the right and apply a putty on the ceiling, which is considered a reliable protection from the flow of merciless time. Putting the ceiling is an important stage before pasting wallpaper, applying paint or painting. The main thing is to be responsible for the assignment, start work correctly and follow the instructions! Then the result will be the same as your expectations!
Content:
The purpose of the putty
The putty is powder compounds or pasty mixtures designed to align and prepare surfaces before the primer, finishing or painting. Specialists in finishing work with confidence claim that the color and texture of the final ceiling canvas will depend on the quality of the putty. Very often, using a putty, you can eliminate changes in the height of the ceiling within the room.
For the manufacture of putty, film -forming substances are used, for example, flour glue, ordinary household soap, such fillers as a barite, chalk, sifted gypsum, talc and ocher pigments or zinc white. The film -forming substances are used much larger (5 - 12 times) than filler and pigments combined.
If the ceiling is rough before finishing, then in any case it will affect its appearance after painting. The irregularities on the ceiling will even be visible after pasting the wallpaper - through a layer of paper. The main difference between the putty for painting the ceiling from the plaster lies in the fact that the latter is applied with a thicker layer and used in cases where there are too large defects on the ceiling that need to be aligned.
The putty is chosen, depending on the alleged work. There are putty for applying to drywall ceilings. When choosing a putty, it is customary to take into account factors such as a type of building material on which you will put their putty, the coating of this material, the air temperature at the facility where it is planned to carry out work, the nature of the defects.
There are special puttys that are intended for applying a tree, for example, for hiding flaws on decorative beams. To fill in deep irregularities on the ceiling, it is recommended to purchase a coarse -grained putty, which can be applied with thick layers without risks of cracks or racing of the material. To remove small scratches, select a fine -grained putty. To perform a large volume of work on the ceiling, you should give preference to putty with the lowest specific gravity.
The classification of putty
The construction market is oversaturated with various building materials, including putty. The putty is divided into types, depending on the readiness of the material, the composition of the mixture - used filler or base, as well as the purpose and cost of putting the ceiling. Let's figure out in more detail what each of them is.
The readiness of putty
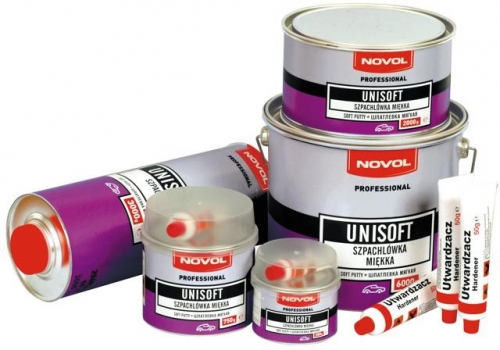
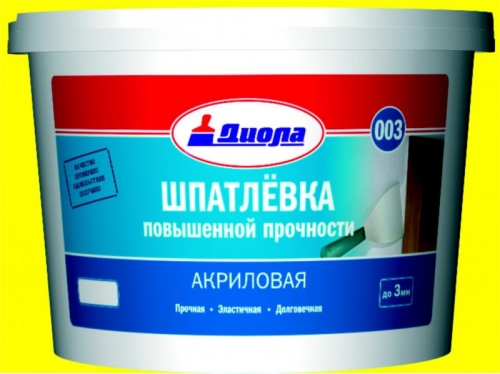
First of all, putty can be divided into ready -made for use (sold in small buckets) and dry putty. Depending on the appearance of the material, ready for use, putty in tubes is also called pasty, and dry putty powder.
The finished putty can be bought if you have no desire to cook it with your own hands, and dry is prepared before use. Such a putty, of course, has many advantages: they, as a rule, are inexpensive and high -quality, and they are also suitable for different works with the ceiling, even the thinnest and most finish. Such a putty can maintain its properties for a long time, because all its components are already divorced in the correct proportions, and you do not need to worry about the correct preparation of pasta.
Ready -made mixtures are not recommended for preliminary leveling of the ceiling requiring thick putty layers (more than 0.5 centimeters), since the solvents that are in their composition are capable of evaporating when it enters the surface, and this provokes a quick drying and small shrinkage.
Dry putty mixture is a multicomponent complex composition, which in its composition contains all the necessary components. A similar mixture should be diluted with a certain amount of cold water before use. When buying a putty in a dry form, remember that the finished mixture is usually not stored, but you can choose the one that has a long shelf life in the finished composition. Dry putty is more expensive than ready. Such a putty is not used when creating thin layers.
Filler of putty
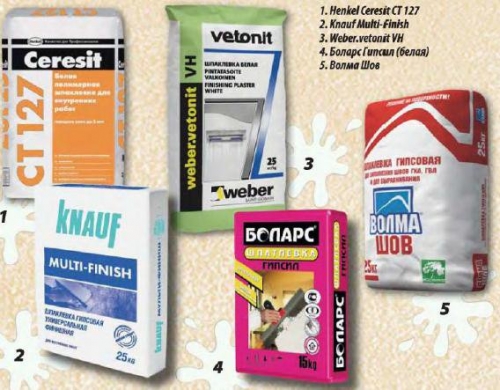
Depending on the filler (basic binder), putty is divided into: cement, gypsum and polymer.
Gypsum putty is used mainly to eliminate cracks, they breathe and in this way the humidity mode is regulated in the room. However, it is not recommended to use them in rooms with high humidity. In addition, such a putty will not withstand temperature drops. That is why the scope of its use is quite limited. But if work is carried out in normal conditions, it is still worth purchasing the composition on the plaster.
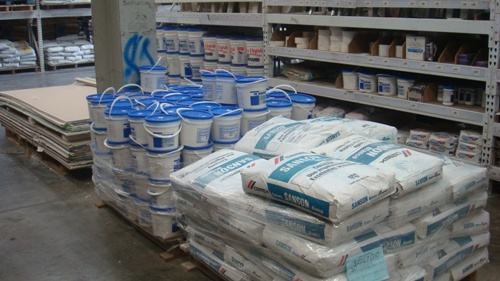
The cement putty is waterproof. It is recommended to be applied in several layers. It also has a tendency to shrink. If the work is carried out not at low temperature and high humidity, it is better to buy precisely cement putties that are able to withstand large temperature fluctuations and do not swell from moisture.
Polymer putty is the most optimal option, because its composition contains polymer binders, which makes it very plastic. Such a putty is more expensive than the rest, but when eliminating cracks, it is consumed more slowly than gypsum or cement. Remember that such a putty is very often faked.
The basis of putty
Depending on the basis of the material, putty can be: acrylic, oil, lacquer, adhesive, oil-cell and latex. Let's take a closer look at each of them.
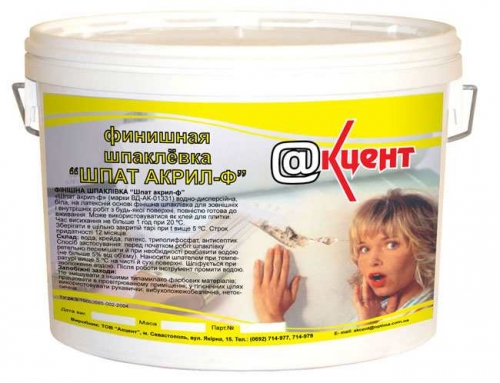
Acrylic putty (universal) contains safe ingredients, has aligning properties and has a fine -grained structure. It levels the surfaces of different types of wooden, concrete and drywall and is used to repair the plaster, which is already damaged. It is applied with both thick and thin layers. Such a putty is a great option if you do not have time to select a separate type of putty.
Acrylic one -component putty is used to seal small cracks and is not suitable for surfaces that are large behind the scale. Squeezed from the tube, dries quickly. Shpakril is a special type of putty, which is used in the operation of surfaces previously plastered for alignment. In addition, such a putty can be used to glue ceramic tiles, and if it is diluted with water, then the ceilings can even be flooded with liquid.
Oil putty contains natural olifa, chalk and sequacacy, they slowly dry, but at the same time quite viscous and durable. It is used for internal work in order to align different defects of the ceiling, which later must be painted or pushed by wallpaper. This putty is characterized by increased strength, used in wet and dry rooms.
Oil fine-grained putty is used before painting the ceiling with different paints of oil and water-disposable. The oil-red putty contains plasticizers, acrylates, additives, olifa, chalk and water, it levels the walls and ceilings and is used as a finish. The luxury of the oil-glue putty aligns the surface well and can serve as a finish putty.
The adhesive putty in its composition contains a 10 percent solution of glue, olifa and chalk, which allows you to increase the strength of the putty and the ease of the process of applying to the ceiling. PVA putting on the basis of PVA is used to prevent the appearance of fungus and mold, because it is filled with aseptic additives, as well as to align asbestos -cement, plasterboard and plastered surfaces. It is very viscous, so there is no problem using, in addition, it dries quickly.
Latex putty is used for internal work, similar to oil-red, but its composition contains styrene-acrylate latex, dolomite, bactericide and more functional additives. Latex putty is designed to process the plastered surface for all types of finishes. Latex putty is distinguished by a number of advantages before traditional putty. It does not crack when drying, it is inherent in high adhesion and plasticity, it is conveniently applied to the ceiling and does not emit harmful substances.
The purpose of the putty
Depending on its purpose, putty can be divided into leveling, finished, specialized and universal. Let's talk more about each variety of putty for the ceiling.
The leveling putty is called puttying the first layer, which is used for rough processing, that is, preliminary. Such a putty must be carefully selected: remember that it should have great strength when solidified, high levels of adhesion with the base and correspond to the basis. In addition, it is applied with a layer of 0-25 millimeters thick.
In the conditions of domestic housing construction, the self -leveling putty should correspond to such an important parameter - the possibility of applying a variable thickness. The use of plaster in this case is not always effective, and self -leveling mixtures easily solve the problem, do not shrink and do not allow the appearance of detachments and cracks, despite the difference in thickness.
The finish putty is used in front of the thin decorative ceiling finish therefore, it is also called putty of the second layer. It levels defects, but choosing such a putty, you need to take into account the decorative surface coating. If the ceiling is prepared for painting, the main condition becomes perfect smoothness of the surface, which is achieved thanks to the fine mineral filler, and in this case it is worth using gypsum finish putty with a grain thickness of not more than 100 microns.
A universal putty in itself combines the properties of all types of putty. It is widely used and convenient in use on any surfaces, while you can not take into account the features of the base of the surface. At the same time, its quality is slightly worse than the quality of putty of a certain type, the price of putting the ceiling of this type is quite high, since any universal material is a multicomponent composition.
Specialized putty. This type of putty is used to seal joints in the gypsum panel, removing breathable cracks, and urgent repair. The purpose of a certain specialized putty can be found by reading the information on the packaging. It can also be specialized expanding.
Do -it -yourself putty
Come to the case seriously, consider all the details, consider all the features of your housing and your own preferences. Pay attention to the selection of the necessary materials and preparing the mixture. Before starting work, do not forget to check how clean the ceiling.
Preparation of tools and materials
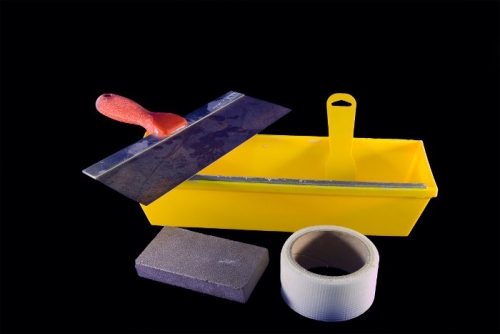
The ceiling should be preceded by preparatory work. It is important to protect the elements of the room from construction debris. Then evaluate the condition of the ceiling and on the basis of the output made by the purchase of the required materials: starting and finish putty, a painting bandage, a metal mesh with fixing components (nails, dowels, hooks) and a primer. As a working tool, you need a mixer for the production of a working composition or a whisk with an electric drill, scrapers, a construction skin and a fly brush.
For putting the ceiling, it is customary to use several spatulas of different sizes. A small spatula is designed to apply putty on a large one, and then with the help of a large putty, putty is applied to the ceiling. The putty for putty is selected by 15-20 liters, with straight walls, which allow you to pick up the solution without a residue, and with high sides that protect against excessive spray when mixed.
When choosing a putty, carefully read what is written on its packaging there is all the necessary information what properties possesses, where it is used, for which it is used most often, and what is part of it. The packaging should also indicate on which surfaces this type of putty should be used. Buy materials in specialized stores, because there you can get the competent advice of sellers and not make a mistake in your choice.
If you are dealing with the old ceiling in poor condition, which was painted more than once, you will need a primer that is deeply absorbed into the surface. Check these points when buying everything you need. Do not give preference to cheap, dubious mixtures, if you do not want to soon make repairs again. Go to business seriously.
Surface preparation
After preparing the necessary tools, they begin to prepare the surface of the ceiling for putty. To do this, it is recommended to remove from the ceiling base all the elements that easily exfoliate - old wallpapers, finishing materials, whitewashing, and evaluate the level of mechanical damage.
Clean ceiling is well cleaned of various contaminants. Pay special attention to mold or other fungal spots, which should be treated with a special disinfectant solution, for example, copper sulfate or a German Pufas drug. If the fungus occupied large areas on the ceiling, make a struggle with it using open fire - a soldering lamp or plasma welding.
If there are chips, cracks and potholes, measures need to be taken to restore them, and only then you can go to the scaling of the ceiling. First, expand the cracks with any metal scraper and grind the recesses. After drying, fill out all the recesses with a plaster composition.
When putting the ceiling is carried out on the surface with small defects, reinforcement of the damage sites with the help of a Serpi is considered an acceptable event. To do this, cover the sections of the ceiling surface with the finished composition, and then glue the reinforcing material. Start the subsequent work only after the surface dries.
Preparation of the mixture
If you manage to prepare the putty correctly, as in the video of the ceiling putty, it will be of very good quality, over time, cracks will not appear on the ceiling, it will not disappear and will not fade. Use better compounds on a gypsum basis, they are easier to apply than plaster on a cement basis, and they are less frequent and pollution. When choosing dry mixtures, take into account the place where you will use them if you live in an apartment where a low level of humidity prevails, then you need a mixture marked KR, if the humidity level is high, buy a mixture, marked LR.
In order to prepare the mixture, take a container with water (preferably plastic) and pour putty there, then mix everything to the desired density (manually or a construction mixer). Water should have the desired temperature (it is indicated on the package). Use three quarters of a dry mixture per quarter of water. Let the mixture stand for about fifteen minutes after preparation.
If you do not want to buy ready -made mixtures in buckets, then you can make them yourself without any problems. Prepare gypsum and chalk. To prepare a putty with your own hands, you need a kilogram of gypsum, two or three kilograms of chalk and a solution of carpentry glue (2-5%), as well as a gauze bandage (to protect against dust), a mixture container, drill. First you need to sift the powder of gypsum and chalk, then add them into the glue solution and mix until a monotonous mass is obtained.
If you want to paint the ceiling with oil paints in the future, you can prepare exclusive oil putty. To do this, you need to take a kilogram of olifa, two kilograms of chalk powder and a hundred grams of a sequcase (for quick drying). Such a putty will be an excellent option for rooms where increased humidity and frequent temperature changes are observed.
It is also not difficult to cook adhesive putty. Take a kilogram of a 10 percent solution of glue, 2-5 kilograms of chalk (previously sifted) and about 25 grams of olifa. The glue needs to be heated and mixed with the Oliph. Then stir the mixture, adding chalk for a density. Also add a little chips of laundry soap so that the putty spreads well when used.
The main thing is that the mixture is not very liquid, because you will not be able to take it on the tool, and even more so, apply it to the ceiling. The solution should not drain your hands and spatula, but you should not be too thick. If the putty nevertheless came out too liquid, you can add to the mixture of slightly thick paint, which, in turn, helps to increase the strength of the putty. For the same purpose, PVA glue is used, which is also added to the mixture, but it can not interfere with any putty. In this case, the ceiling can not be primed.
Putting the ceiling
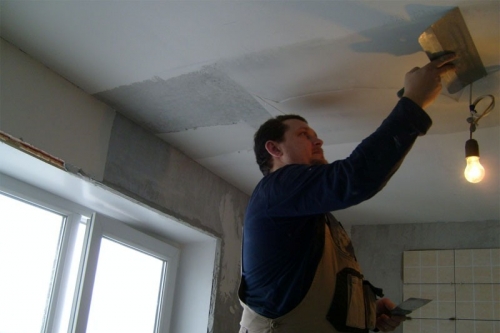
For putting the ceiling with your own hands, you will need to buy a narrow and wide spatulas, use them at the same time: first apply the material to a narrow spatula, and then transfer it to a wide one, to then put the ceiling itself with putty. Take the mixture a little, trying to distribute it in the center of the working spatula.
Apply it so that it falls on the surface of the ceiling. This first layer will not be the main one, only after a few hours you can calmly apply a ball to the starting putty, which should be somewhat lucky than the first, much more evenly and more accurately. Further, all layers should dry much longer - about a day for each layer.
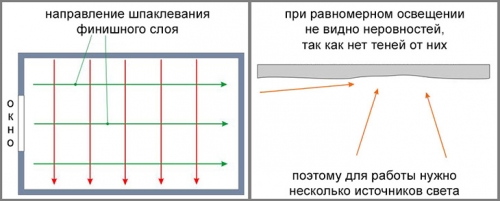
It is best to start work with an adjacent wall, where the windows, this will help you visually determine how even the ceiling is obtained. Keep the spatula at an angle of about 20-30 degrees so that there are no strips on the surface and problems with the application of the material. Having applied one layer, the next must be pulled towards the previous one. Move so that the surface turns out to be smooth and even, you can’t redo the finished areas and you can’t go back. So you will be able to avoid very noticeable transitions.
If your ceiling consists of many noticeable irregularities, process them separately. Pulling the necessary places, wait until everything dries again. Only then you can take over the entire surface at once. If the pothole is very large, you do not need to take a lot of material at once, it will still fall on the floor! Do everything carefully and eliminate irregularities slowly. For more serious protection against cracks, use reinforcing material a reinforcing mesh or polyester, which is glued using special glue (as well as glass and chip).
Basically, all oil and adhesive putty should be applied in thin layers, because otherwise they will not hold on, even if they dry out well. Also remember that according to the technology of putting the ceiling, the thickness of the layer should not exceed 5 millimeters, because otherwise the putty does not dry! Or over time, it will crack or fall off at all. All layers should dry to the end. After an hour of drying the ceiling, you can remove excess material.
If you left small traces at the same time, do the following procedure: use a primer again, better water or additional primer with olifa, only it will need to be diluted with white spirit. Remember that the remainder of the mixture that you no longer need can not be poured into the sewer! This will lead to clogging.
Surface grinding
For about twelve hours, the putty should dry before you will grind the ceiling. After drying the last layer, you can proceed to the next stage. On a grater, fix the grouting grid for maximum convenience, but you can use, if possible, a special holder. Do not forget to cover the furniture and floors, because the grinding procedure is so dusty that there will be nothing to breathe, so get ready to protect yourself from frequent inhalation of dust.
Having polished the surface as it should, you need to clean it of the dust that gathered on it. Then, a weightless layer of soil should be applied to the ceiling, after which the surface dries is covered with another layer of putty for the ceiling made of drywall. Align the already applied layers, do not build up what has already dried up, but simply improve the ceiling. This layer also grinds after drying.
If, after the work done, you have not achieved the desired result of the ceilings are not even even, you can apply another layer of putty and wait until it dries. Remember that the surface is primed at the end of all the work with the ceiling, and then you can proceed to the no less complex stage of painting the ceiling, if you have such plans.
Thus, putty is a mixture with which you can eliminate irregularities and various ceiling defects. It can be used on solid and clean ceilings. If you decide to do everything yourself, be sure to follow all the rules, because you are unlikely to want to redo such a complex and long work. Pay maximum attention to all details now, so that later you have the opportunity to admire the work done and not worry that the repair will soon need to be done again.

