If you are a beginner master and do not have sufficient experience in construction ...
|
|
The finishing of the basement of the building requires special attention, since it is this site ... |
Frequent blockages in sewage systems are one of the most common problems, with ... |
DIY ceiling painting
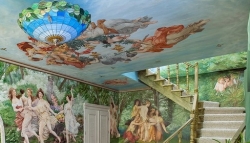
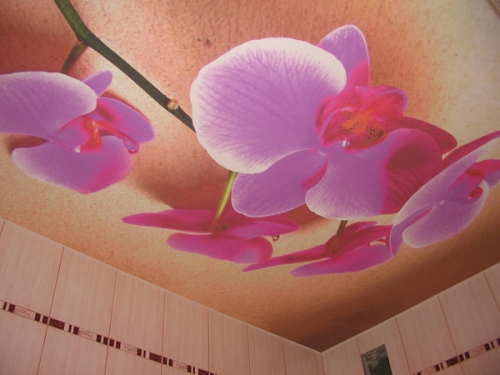
If your house, like a palace, has spacious large rooms with ceilings four meters and burdens to the classics, then you should pay attention to such a technological technique as an artistic painting of ceilings. But even if you are the owner of a standard Khrushchev in the city jungle, you can make a painted ceiling with your own hands, as in the dwelling of Salvador Dali. To do this, it is enough to familiarize yourself with the information set forth on our website, and strictly follow our recommendations.
Content:
The story of a painted ceiling
The origins of the painting relate to the times of the Paleolithic. The first people adorned their shelters with rock drawings that have been preserved so far. The images were dedicated to the forces of nature, it was often the silhouettes of plants, animals, and human hands.
In 78 A.D. Greek cities of Herculanum and Pompey died from the eruption of Vesuvius, and during excavations on the walls and ceilings of their buildings, unusually beautiful drawings were found that were preserved under a layer of ash. The murals were performed by plant pigments and waxed with wax, which protected them from destruction. The Hellenes decorated the ceilings of rich villas, terms, temples, libraries and tolerance houses with drawings. When Pompeiic paintings saw the light, they immediately became a fashion trend in the world of decor.
During the Middle Ages, they were not fond of painting of ceilings, stained glass and carving dominated culture. Medieval European castles were spent decorated. And in Byzantium and in the east, the mosaic and ceramics ball ruled. The painting of residential interiors was represented mainly by small ornamental fragments. Raw plaster painting was popular mainly in Russia.
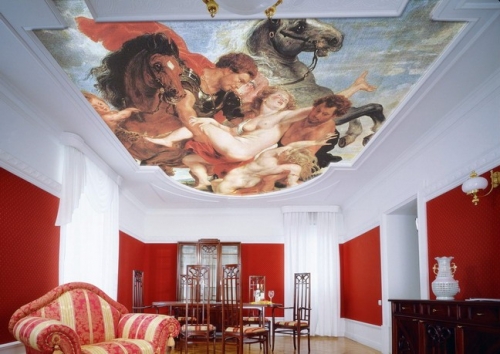
During the revival, there was a return to the ideals of antiquity, and secular artists, such as Raphael and Michelangelo, worked on the paintings of basil and temples, as well as residential interiors. The paintings, along with dynamic stucco molding, came to the fore in the 18-19th century, large cryphones, saturated panels, ceiling with a complex composition of a painted ceiling were welcomed in the lush baroque era.
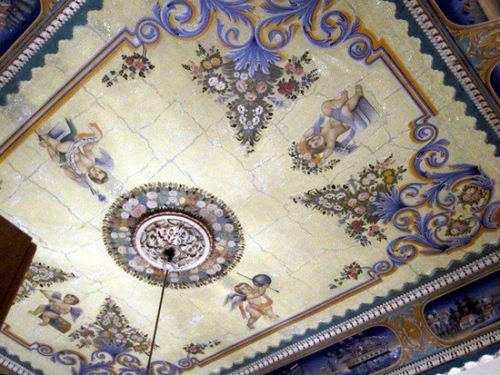
In the era of education, there was a rethinking of the artistic heritage of the past. The paintings are very popular, which depicted non-existing volumes in reality on the ceiling. Rococo style brought a pronounced female theme (garlands, flowers, angels) to interior painting.
The era of Art Nouveau contributed to the combination of the traditions of the West and the East, to use the ceilings of oriental motifs in the painting of the ceilings borrowed from Japanese and Chinese silk. The history of the painting on raw plaster with its roots goes deep into the history of the ancient eastern kingdoms, where it was very common to depict various storylines on the ceilings and walls, creating a whole ensemble of events with the help of meaningful drawings. People believed that wall drawings and stories on the ceiling are able to bring happiness to the house and protect its inhabitants.
In Russia, the painting of the ceilings had rich traditions, but was forgotten for a long time. And today the ceiling painting has become popular again. Such a ceiling is a great replacement for those ceilings that we are used to! The painting will not only make the ceiling varied, but set it a special mood. Regardless of the plot, this unique handmade will make the interior fabulous, and the ceiling is very unusual!
The painting on the ceiling allows you to hide some irregularities of the surface or divert attention from the shortcomings of cosmetic repairs. A bright exciting plot is hidden by the fact that the ceilings in the apartment are low, and architectural bloopers are found too often. Volumetric beautiful drawings create a charitable atmosphere for creative personalities, romantic and impressionable, which daily need inspiration and positive emotions.
DIY ceiling painting
The surface painting, which is a parallel floor, is an incredibly difficult work if you are not confident. Training plays a large role here, otherwise you can be disappointed, even drawing a simple twig.
Choosing a plot for the ceiling
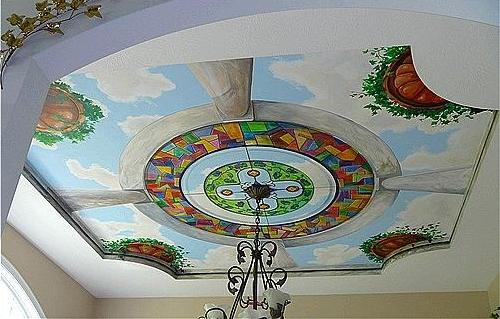
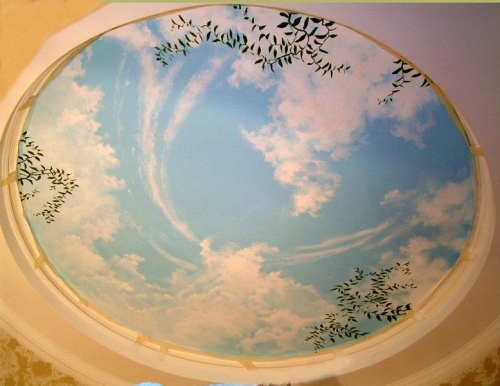
The choice of the plot is a very important stage in the painting of the ceiling. To begin with, it is worth talking about fashion trends in the field of painting ceilings. The main motives painting the ceilings sky - an image on the ceiling of heaven with clouds, birds or stars or a repetition of elements of the main ornament, prevailing on furniture, walls or textile decoration of the room.
But, despite this, for your home you can choose any drawing. Just remember that interior painting is closely related to the art of decoration and the design of the premises. The painting must necessarily comply with the purpose of the interior, as well as be identical in style. Unlike a picture or ikebana, which can be replaced at any time or removed, a painted ceiling will decorate the room until the next repair.
Pay attention when choosing an image to what function the room performs, the ceiling in which you decided to transform. If this is a bedroom, let the drawing be calm and inspiring, because you will see it before and after sleep. If the place of experiments is the living room, the plot should be solemn, rich, rich and slightly pompous, because here you will receive guests, communicate with your family and relax with friends.
If you decide to make an original children's room, you can choose a cartoon plot, the main thing is that it is funny and bright. And for the kitchen, stories that will catch up with your appetite are suitable, create a mood when you prepare dinner for people dear to you, and just delight your heart when you sit down to drink hot mulled wine with a long winter evening, watching a fierce blizzard outside the window.
The choice of painting technique
As you know, every big job begins with a small one with an idea. Only when you decide on the style and color scheme, can you begin preparation for work. To date, a large selection of techniques and methods for applying a painting will help you create an exclusive ceiling: stencil painting, painting by acrylic, painting with frescoes, volumetric image, fluorescent ceiling, temporal and oil painting.
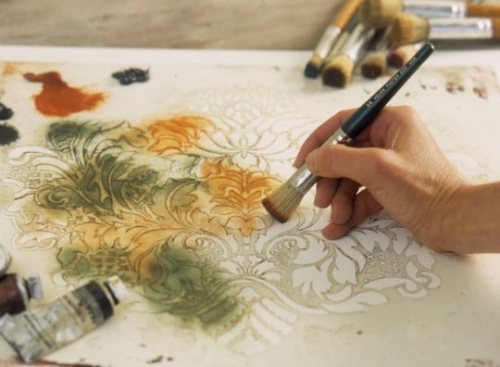
If you do not have special artistic abilities, then this is not yet an occasion to abandon the idea of \u200b\u200ba painted ceiling. The jewelry will be done using a stencil, which can be purchased in an art store or manufactured independently by printing your favorite photo for painting the ceiling on the printer and carefully cut it out.
Glue it on the ceiling with tape, and apply the paint with a special stencil brush with a small bristle or sponge. Apply paint from the edge to the center of the ending methodology. If you plan to decorate the ceiling with an image of repeating parts, it is recommended to stock up on several stencils, because they quickly become unfit and begin to get the ceiling.
If you want to make your home look like a magical country, you can use the painting-explosion, which imitates the entrance to another reality in the green meadow or into a non-existent window that opens the view of the sea or mountains. The volume painting of the ceiling is the technique of applying the image, so that the drawing receives the type of three -dimensional image and completely imitates the real object using the laws of prospects and visual illusions. The main task of such a ceiling painting is to change the representation of a person about the boundaries of space. A trick in the interior is used mainly if it is necessary to expand space.
Frescoes are one of the types of painting on the walls. Creating a fresco, the artist uses a special powder that mixes with water in order to get a certain color. Then this mixture must be applied to the surface, before that covering it with plaster, the layer of which is not yet enough. The fresco technique is also relevant today and is used daily in the creation of extraordinary masterpieces on the ceiling. It can resemble ancient painting and modern. It is very practical, because moisture and light do not affect it, and it is applied to all types of ceilings. When the plaster dries, the pattern will become a particle of the ceiling coating and will last for a long time. The advantages of this technique are that the image will not change color and cracks will not appear on it, there is also no characteristic smell.
Fluorescent painting is widely used in creating the interior of night clubs and restaurants. If you are a lover of nightlife, glamorous parties and discos, pay attention to this method of painting the ceiling. Under the influence of ultraviolet radiation, individual parts of the drawing will glow, creating absolutely incredible compositions. With the help of this technique, you can also create unusually-acute lights of the night city, the light of a full mystical moon or dazzling reflections of the magic forest, which is drowning in the snow.
Acryl has been used a couple of decades in painting ceilings. As for the colors, they are quite practical, because they do not have a specific smell, do not need special care, resistant to moisture and durable. Acrylic -based paints have excellent hiding capacity. They can be used when working with any surfaces not only on plaster, but also on the skin, wood, glass and even metal. A large selection of color schemes allows not to limit your imagination, but, unfortunately, the finished drawing is slightly worse than the one that was painted with oil. These colors dry quickly. In half an hour you can continue to work and apply other layers.
Oil paints very accurately convey the saturation of halftones, the strength of color schemes, because their composition adds olifa, which contributes to the transmission of depth and originality of color. For many years, they do not lose their brightness and do not crack. But, unfortunately, they dry slowly. It is necessary to dilute oil paints with a solvent, and it has a pungent odor, because of which you cannot normally complete your work. The paint can dry about a week (it depends on how warm the room is and, of course, on the ingredients that are part of it).
There are also paints lost on egg yolks (as well as on glue solution). They are customary to call them temporary. In terms of durability, the applied tempera image will be better than that which is made using oil paint.
Such paints do not smell and dry much faster than oil paints: the drying rate of polyvinyl acetate temperatures 12 hours for thin layers and 34 hours for pasty. But it is difficult to cook the tempera paint yourself, and over time it can crack.
Preparation of tools and materials
Before starting work, we prepare all the necessary materials, as well as tools. So, you will need: a brush on a long handle, fine -grained sandpaper, a bucket, water, a large and small metal spatulas, putty (finish and basic), acrylic primer (as well as a primer penetration), a building level and, possibly, plaster.
For painting ceilings, such devices as airbrush and spray gun are also used, in addition to familiar brushes and rollers. With the help of brushes, we can create thin contours and draw small pieces of drawing. Creating a painting on a stencil, we can use a roller to paint some fragments. We also use it when applying paint to the ceiling, because then it to go to bed smoothly and the possibility of getting, as a result, is reduced.
Airgraph tool, which is a small spray gun. With its help, you can easily spray the paint. The spray gun is slightly larger than the size than the airbrush and it is used, most often, in order to paint over the large elements of the image, as well as to draw the background. Do not forget to cover surfaces before starting work that can go bad floors and walls.
Preparation of the surface of the ceiling
After you have found all the materials, it is permissible to start working on the first stage, because if you are all the time to be distracted by the missing materials, you will quickly get tired and you will not be able to complete the process with qualitatively. Remember that the ceiling should be well prepared for work and cleaned of the old material, with the exception of the situation, if you plan a painting of the stretch ceiling. The more perfect it will be, the better. If you are a happy owner of a drywall ceiling, which is completely thrown out, then it will be simple and easy to work.
Step -by -step instructions for preparing the ceiling for painting:
- Rinse all the old plaster with a large spatula from the ceiling and wash it with a brush on a long handle so that no dust is left.
- Apply a primer penetration with a brush or roller to the ceiling surface. Next, you need to check the evenness of the ceiling using the building level.
- Then evaluate the condition of the ceiling. It cannot be left with defects or irregularities. Having discovered those, gently align them with plaster. Small irregularities can be hidden using the basic putty.
- When the plaster or the basic putty dried, you need to walk along the surface with sandpaper.
- Only now, apply a finish putty with a thin layer that will help you create a smooth perfect surface.
- Expect, while the finish putty is completely dry, then paint the ceiling itself in one color with paint. The tone must coincide with the background of future work, which will greatly simplify the task. For such work, it is recommended to use soft pastel colors, on which it is much easier to make a pencil.
Application of the picture
So you have reached the most interesting point when you need to show your work and your own vision of the painted ceiling in the room. Your ceiling is ready for complete transformation. Well, let's start! To begin with, you must create your drawing on a piece of paper. It is desirable that the drawing is immediately full -color, because this is an opportunity to practice before applying it to the ceiling.
You can do your drawing, selected on a journal or Internet, and transferred to paper, you can do much more than it really is. To do this, draw its parts on separate leaves. Divide the picture into the same squares and numbered, then paint each of them. Look at the original.
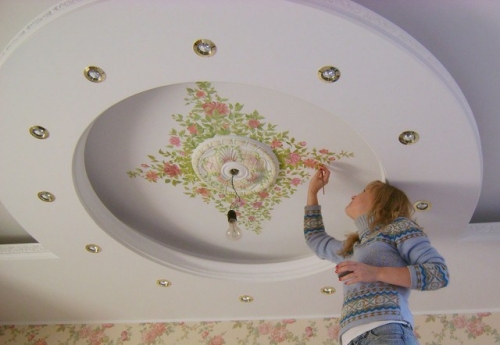
Having completed this difficult, but fascinating task, you can start directly with your own hands painting. To do this, you will need: a palette, paints, a pencil, brushes (with natural bristles), sponge (in order to remove errors), dishes with water and, of course, a staircase. Prepare everything you need in advance so as not to be distracted during the process of painting the ceiling.
After that, install the stairs in the right place so that the picture begins and ends where you planned in advance. Let it stand even and not staggering so that you can freely create clear lines. In two ways, you can transfer a sketch from paper to the ceiling. The drawing of a natural size can be displayed as follows: the reverse side is shaken with a soft pencil, putting on the surface of the ceiling the previously shaved side, then squeeze the drawing lines with a pencil.
If you are not fully sure that you can repeat the image of the precision of the sketch yourself, try to help yourself. A reduced copy can be designed using a dialector. To do this, connect the dialector, put the sheet and direct the light to the ceiling. In this case, you will receive an accurate drawing, but proportionally increased. Transfer everything to the last line.
You need to decorate the picture from the largest details and from the background design. Before that, mix paints on the palette. Having made a mistake, quickly eliminate it with a wet sponge. Having worked out the main large details, and creating a beautiful background we need, we proceed to small elements.
The painting of the ceiling visually raises it and creates the impression of the volume, and the room becomes bright and bright. Therefore, working with details, it is important to remember the accuracy. Make small details bright, but not obsessive, creating even and clear contours. Work carefully each component. If you ignore this rule, you will most likely receive a regular flat image.
Coating with a protective layer
Here the drawing is applied to the ceiling, and the interior was transformed beyond recognition. But in order for the painted ceiling to impress friends and acquaintances for many years, you need to protect the drawing from the effects of negative factors and apply a protective layer that will provide the plot with realism and brilliance. From the occurrence of damage and cracks, the painting will protect acrylic varnish, because the paint, although durable, but expressiveness will not hurt the plot.
Only when you wait for the pattern to completely dry, you can apply a varnish with a thin layer. It is best to use a sprayer, or a brush with a short bristle for uniform application. After applying the protective layer, it is necessary to stuff it with a dry brush and leave to dry. At the end of the work, do cleaning in the room, and you can safely admire romantic clouds or fiery hmarces.
So, the picture is ready. Such a ceiling is able to serve you for 10-15 years, regardless of the price of the ceiling painting. But do not forget to take care of the canvas. The ceiling first protect the ceiling from dust, tobacco smoke and light, because the paint actively absorbs microparticles, from which the pattern can lose its richness and realism. In the future, it is only necessary to update the layer of varnish periodically so that it remains beautiful and bright, as immediately after application.



oPRSHOSHOSH
oPRSHOSHOSH