Bezramic glazing attracts with airiness and simplicity of design ...
|
|
Surely, you have repeatedly noticed that many private houses are covered with flexible tiles ... |
Laying tiles ends with grouting seams that have an attractive appearance and ... |
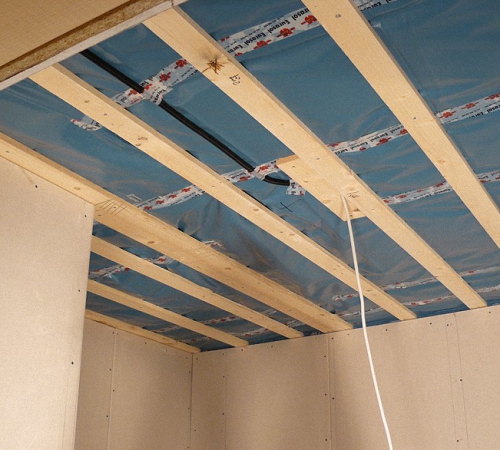
Do -it -yourself crate
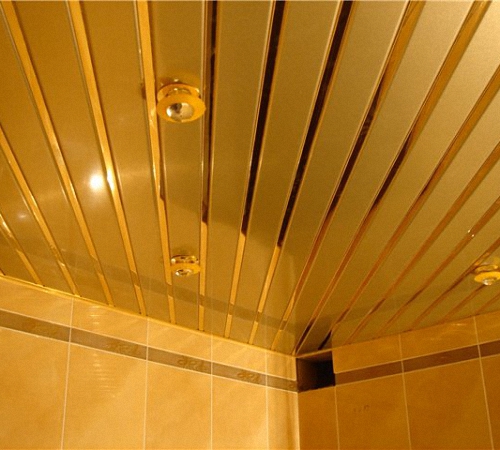
The lining is a rather popular finishing material, the service life of which directly depends on the technology of its installation. Before installing the lining, it is necessary to build a crate on which it will be fixed. We learn about how to install a crate under the lining with our own hands.
Table of contents:
- Lining - advantages of application and varieties of material
- Do -it -yourself crate for lining: Creation and tool technology
- How to make a crate for a lining right correctly
- How to install a crate for a lining: technology and recommendations
- Colenutus of walls for lining: technology for mounting the lining
Lining - advantages of application and varieties of material
The lining is a convenient finishing coating that allows you to hide all the irregularities of the walls and ceilings, without preliminary leveling them. In addition, the material is characterized by an attractive appearance and has a variety of forms, textures and colors.
There is a large amount of lining in relation to the material from which it is made, thick, texture, color, etc. There are two options for the lining in the ratio with the materials from which it is made:
- natural;
- synthetic.
The first option implies the use of wood for the manufacture of a lining. Synthetic options are made of plastic. Keep in mind that a plastic lining is recommended for use outside the building, in the premises of the warehouse, basement, and attic.
In addition, the plastic is perfectly opposed to moisture, therefore it is also used in the bathroom. Due to insufficient strength of plastic, it should not be subjected to mechanical influences. Otherwise, the surface will be covered with cracks and chips, which will spoil the appearance of the coating.
For the manufacture of lining from natural materials, they use:
- oak or ash boards;
- linden or alder;
- Pine, spruce.

When choosing a profile, it is necessary to take into account the functional purpose of the lining. If the walls should be high -strength, then it is necessary to give preference to thicker boards. Decorative wall decoration involves the creation of an attractive coating.
In addition, the lining is divided by quality into several types. The highest quality material - extra -variety, is characterized by a perfectly smooth texture, has no defects, chips, deformations, has a clearly expressed wood structure.
Category A and B implies the presence of small knots that do not affect the strength characteristics of the material. Low quality lining is used to decorate industrial or warehouse premises.
There are varieties of the lining in the ratio with the profile on which it is installed:
- The European version of the lining - has a smooth front side and grooves with recesses;
- The American version is an imitation of overlap;
- The panel version of the lining has the shape of a beam;
- Block House - has a rounded shape resembling the surface of the beam.
Please note that the lining is fixed on the ceiling quite easily. The main thing is to have the necessary carpentry tool and experience with it.
Do -it -yourself crate for lining: Creation and tool technology
In the process of working on the crate, the presence will be required:
- hacksaws for cutting a wooden beam;
- water or bubble level to check the evenness of the crate;
- construction lace;
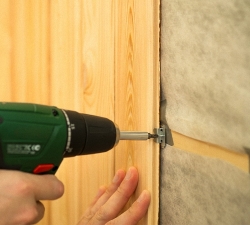
- electric drill with a set of drills on wood of various diameters;
- hammer, screwdriver knife;
- screwdriver, for fixing fasteners.
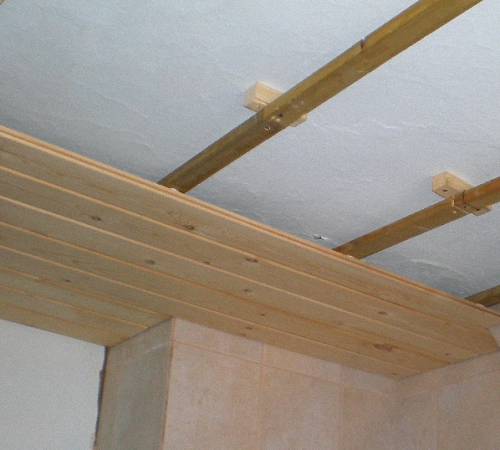
In order to fix the lining on the ceiling, it is necessary to create the basis on which it will be held. The correct crate for the lining is built in this way:
- Brushes of rectilinear purposes are fixed around the perimeter of the room, the average value of their cross section is 4x4 cm, this indicator varies depending on the load on the surface;
- To control the indicators, use the level;
- In order to adjust the correct installation of the crate on the ceiling, use special plates, they are installed in the places of fixing the bar on the load -bearing panels;
- The bars are fixed on the ceiling using screws, as a result, a strong coating should be obtained, which is limited to bars.
If there is a concrete ceiling on the ceiling, the crate under the lining on the ceiling is installed in the way:
1. On the ceiling, a dowel is mounted with a size of 0.8 by 4 cm. For their installation, it is necessary to build holes with a carbide drill, the depth of which is about 5 cm. Next, the dowels are mounted inside the holes, and holes with the same are built in the bars with the same diameter.
2. Using the cord, make markings on the ceiling, along the perimeter of which there will be fixed bars to create a crate. The interval between the bars is about 60 cm.
3. To check the evenness of the installation of bars, use the fishing line. The inside of the crate is more complicated, so at least two people will require work.
4. The bar is installed on the ceiling in a ratio with a previously stretched fishing line, if necessary, special plates are installed, aligning the crate horizontally. To fix the bars on the surface, use screws and screwdrivers.
After installing the crate for the lining, the finishing material itself is installed. If additional insulation of the ceiling is necessary, then thermal insulation material is installed between the bars. Keep in mind that if mineral wool acts as a heat insulator, then additionally you need to take care of its protection against moisture.
How to make a crate for a lining right correctly
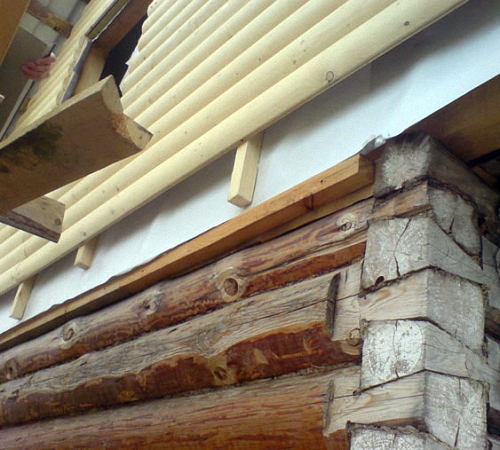
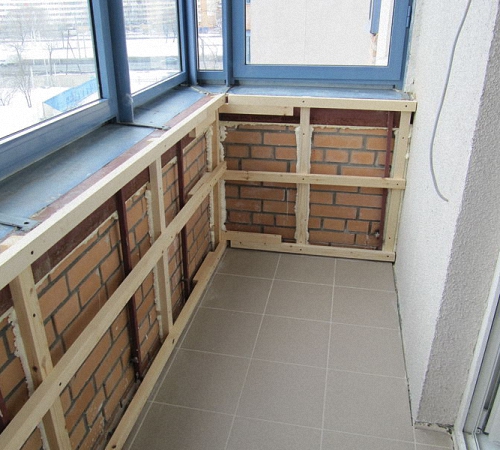
There are two ways to install the lining on the ceiling. Its fix it directly on the walls or on the ceiling or installation on a crate. According to the first method, to install the lining, it is necessary to prepare a perfectly even base. The second method is less time -consuming, however, it implies the creation of a crate of the crate for a lining.
In the ratio with the material from which the ceiling is made, self -tapping screws or dowels are used to fix the beam on the ceiling. The beam on the crate is located in a perpendicular position on the relations of the lining panels. Installing the lining in a horizontal position allows you to increase the room. Vertically recorded boards lining are able to visually increase the ceiling in height.
As a material for the manufacture of a crate, a beam from larch or pine is used. Keep in mind that the second option is not suitable for decoration of the bath, as the pine is highlighted by tarry compositions under the influence of high temperature. In this case, it is better to use linden or larch.
In some cases, a profile of aluminum is used to create a crate for the lining. If the bath is performed, we recommend that you stop at the galvanized version of the profile, which is resistant to moisture and corrosion.
As a basis on which the lining will be mounted, use a wide board. Thus, it will be possible to achieve maximum strength and durability of the coating. Keep in mind that the material should not be too moist, the optimal value of moisture in wood is 16.5%. Before buying a timber, carefully examine it for the presence of cracks, resinous discharge and excessive humidity. If there are at least one of these indicators, it is better to refuse to buy such material.
Before starting work, determine the size of the crate for the lining. In a ratio with this indicator, determine the amount of material necessary to create a crate.
In order to determine the amount of material necessary for work, consider the following recommendations:
- Determine the type of crate with the location of the guides in one plane or in the form of a grid;
- the thickness of the lining in the ratio with which the size of the bar for the crate is determined;
- the presence or absence of insulation under the lining, its thickness;
- The presence of additional communication systems for lining, for example, electric wiring, ventilation system.
In some cases, if there is a ventilation system under the lining, it is necessary to form a counter -scheme. Thus, two layers of structure are located in relation to a friend perpendicular.
Before fixing wooden rails on the ceiling, it is necessary to treat them with antiseptic solutions and antipyrens. Before the installation, the boards should be in the room for two days. The tree should adapt to the temperature and moisture of the room, so the crate will not give shrinkage.
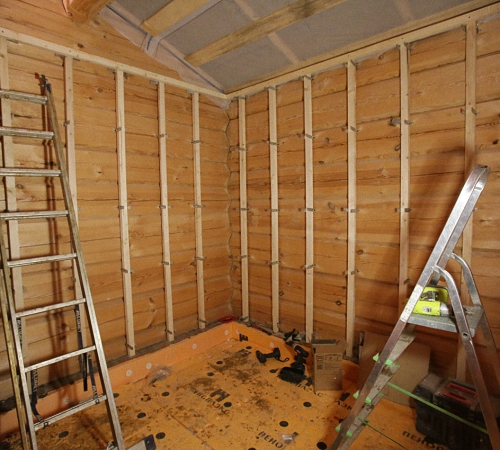
How to install a crate for a lining: technology and recommendations
In relation to the size of the ceiling, it is necessary to create a sketch of the arrangement of the beam on the ceiling. Further, the material is cut depending on the size. If there are irregularities under the bars, the plates are substituted.
With the help of a plumb line, the evenness of the installed crate is regulated. Initially, it is necessary to create a crate around the perimeter of the ceiling. Next, the intermediate ribs are installed. In order to qualitatively install the intermediate parts of the crate, first pull the fishing line in these places.
To drill holes through the beam, use a wood drill, the diameter of which is determined by the diameter of the screws. The step of the crate for the lining is determined by many factors such as the size of the ceiling, the load on its surface, the presence of insulation, the thickness of the lining, etc.
Fasteners are installed with an interval of a maximum of half a meter. In the ratio with the resulting rectangle, the other elements of the crate are installed. Without fail, additional bars are installed near doors and windows.
Keep in mind that the main function of the installation of the crate is to ensure rigid fixation of the boards, the prevention of their bending.
Between the intermediate bars and the frame it is necessary to leave a small gap of several millimeters. It provides temperature expansion of wood. After installing the crate, if necessary, thermal insulation is fixed on the ceiling. Next, the installation of the lining is performed.
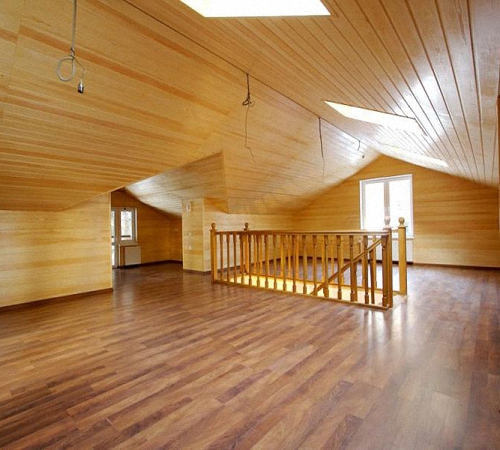
Colenutus of walls for lining: technology for mounting the lining
The quality and life of the coating from the lining is determined by the correctness of the installation technology of this finishing material. After installing the crate, check it again for horizontal and vertical.
A wooden lining is cut into strips, the length of which is 50 mm less than the ceiling. Thus, it is possible to form a compensation gap. If this is not done, there is a risk of coating after its first contact with moisture.
The first strip of lining is fixed on the wall on each side. It is a guide, the installation of subsequent stripes implies their installation into the grooves, connecting tightly to it. For a more reliable connection between the stripes, use a rubber hammer. The second side is screwed on the lower border. For these purposes, use self -tapping screws or nails.
Using self -tapping screws to fix the boards, pre -build holes under them with a drill. Otherwise, chips may appear. Using nails, do not knock on the lining with a hammer, but apply dobe.
When installing the lining, take care in advance about the withdrawal of all communication openings of the electrical wiring, ventilation, etc. Install the stripes to the end of the ceiling in the same way. In order to install the last strip, between the wall and it, install pegs that will help connect it to the previous board.

To cut a plastic or MDF lining, use a knife. On each side, cut the lining, and then just break it. To cut a conventional tree, it is recommended to use a hacksaw or an electric jigsaw. Additional gluing the lining is not required, since in this case it begins to creak and cracks.
After installing the lining, it is necessary to paint it or varnish the desired tone. If you want to keep the color and texture of the tree, then paint the lining with colorless varnish. In some cases, the lining before painting is covered with an antiseptic and other protective compounds that provide it with protection against moisture, fire, mold and fungus. The lining in the bath is covered with special compounds that prevent its decay.
The installation of a plastic lining involves in compliance with the same gaps as wooden. Since the plastic also expands with temperature changes. Before the start of installation work, the P-shaped guide is not fixed, on which all end connections between the stripes are hidden. To dock the panels of the lining, connecting strips are used together.
The first plastic panel must be installed by the comb part forward. For the placement of the end parts of the panel into the inside of the molding, it is necessary to bend them and trample at point blank. To fix the lining on the wall, self -tapping screws with sharp ends are used. This is necessary so that the screws do not slide along the plastic surface and are fixed in the position intended for this.
![]()
StrPort construction portal 2011-2018. Articles about repair, construction, building materials.
Copying information from the site is possible only with permission of the editorial office Or indicating a direct link to the source. Legal justification