By purchasing an interior door, it is impossible not to face the problem of choosing a door ...
|
|
There are several varieties of the roof depending on the form: single -tocate, ... |
After completing the installation of the ceiling, you should begin to warm it. ... |
How to make a ceiling with your own hands in the interior?
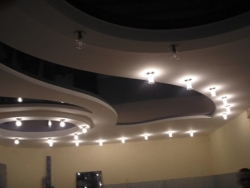
Building materials stores amaze with an abundance of assortment. Recently, many home craftsmen decide to update the interior of the ceiling with their own hands. The types of decor, the features of the material, the rules and stages of the performance of work will be discussed.
- Whitewash
- Painting
- Grassing with wallpaper
- Adhesive ceilings
- Dropped ceilings
- Gypsum plasterboard ceiling
- Cassette ceilings
- Raise ceilings
- Stretch ceiling
- Sockets, borders, skirting boards and other embossed elements
- The interior of the ceiling of the bedroom
- Ceiling in the kitchen
- Ceiling interior in the living room
Whitewash
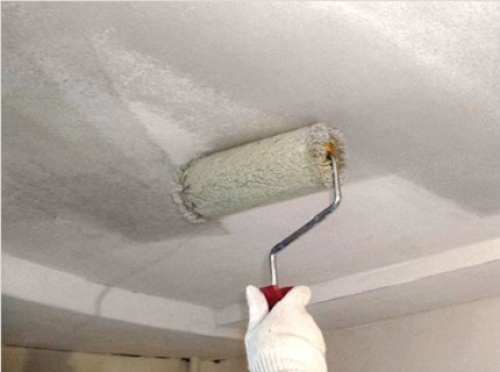
The whitewashing of the ceiling is one of the most budget types of coatings. In the post -Soviet space, both living quarters and the interior of the kitchen are often refreshed in this way. The ceiling in this case looks modest, but neatly. Driving is carried out with a roller or spray gun.
Work begins with the preparation of the base. It is necessary to carry out rather painstaking work: plaster the floor, put the surface of the surface. The finish state of the ceiling after whitewashing depends on the quality of alignment.
Of the shortcomings of the method, the fragmentation of the coating should be distinguished. On average, the ceiling after whitewashing retains the initial view of only 2-3 years. After that, you have to again cover the surface with a lime solution. The slightest contact with moisture leads to exfoliation and the surface begins to bubble. Therefore, in rooms with regular temperature fluctuations and high humidity, the lime solution as a finish is better not to use. The disadvantage of this method of decor also lies in the fact that the ceiling can be painted or glued with wallpaper only after thorough multiple washing. Otherwise, the paint will lie unevenly, and the wallpaper will soon exfoliate.
Painting
Painting the ceiling is also a fairly common way of decor, a great opportunity to design the interior of a room with low ceilings. The cost of materials is low, and a variety of coloristic solutions allows you to design the ceiling in any of the styles.
Much attention is paid to the work on preparing the surface - putty and primer. Large cracks are masked with putty and fixed with a special mesh to prevent further destruction. Small irregularities are smoothed out with a grinder. Then the overlap is primed for better adhesion of the surface with acrylic.
At the final stage, it is possible to apply the image using a stencil. One of the relatively young directions in the ceiling design decoupage. The ornament is fragmented. For fixation, acrylic fixtors in sprays are used. The perfectly even ceiling should be covered with a primer, dried and only then proceed to past the decoupage card.

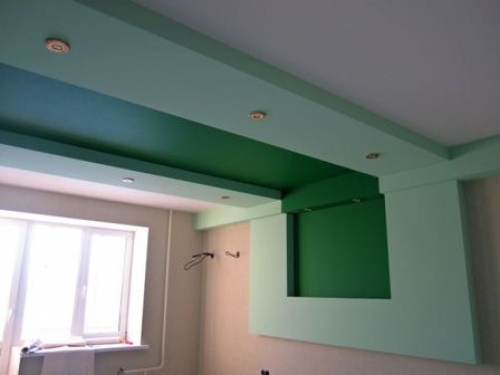
To make the ceiling two -tone and clearly maintain the boundary of the contact of tones, stain the surface in two doses. After drying one of the colors, indicate the contour with a painting tape and proceed to painting with contrast paint.
It is advisable to stain large planes with a large roller, and small foam sponge or small roller.
Grassing with wallpaper
The decoration of the interior of the ceilings with wallpaper will also have to start with aligning work. The process of gluing itself will not be so long and time -consuming if you choose the non -woven wallpaper of light colors.
In the process of work, you can’t do without an assistant. Wet wallpapers are prone to deformation. Therefore, it is almost impossible to independently paste the ceiling independently. Playing starts from the window.
Adhesive ceilings
This type of decor is pasting with rectangular panels or square polystyrene foam or polyurethane plates. The base for trim can be any. The concrete slab, brick masonry or gypsum must be well cleaned and primed so that the glue lies better. The tree must be impregnated with an anti -corrosion and antifungal composition, since moisture can condensate under the tile.
It is better to master the newcomer installation of adhesive ceilings from gluing white tiles. In this case, it is easier to mask the mistakes with putty.
Playing the ceiling with tiles diagonally begins with the center of the room, fixing the first tile at the intersection of mutual transpondicular lines connecting the middles of opposite walls. The first tile should be glued so that its corners coincide with the marked lines. Now glue the tile along the four axes, and then spread the tile, closing the rest of the space. The remaining free space along the walls is past over in parts of the tiles, after cutting pieces of the desired size.
For kitchens and bathrooms, it is advisable to choose laminated tiles resistant to high humidity. Among the advantages of such material, ease of installation, durability, soundproofing properties and low cost. The damaged element is easy to replace with others. A significant disadvantage is the tendency of the material to turn yellow under the influence of direct sunlight.
Dropped ceilings
Installation of suspended structures is a great opportunity to mask irregularities or hide the communication line. The cost of such a finish varies and depends on the shape, color, as well as the textures of the surface and type of material.
Suspended ceilings can be:
- cassette;
- from drywall;
- rack.
Gypsum plasterboard ceiling
The use of drywall allows you to create structures of almost any configuration. Sheets can be simple or moisture -resistant (greenish tint). The basic ceiling is cleaned, cracks are eliminated. It makes no sense to putty or make it perfectly even, since the base will be hidden.
First, we measure the height of the ceiling in the corners of the room. After the lowest angle of the room is found, we make markings, starting from it. Using the leveling, we determine the horizontal. Metal guides are attached along this line. We fix each profile at least in three places. The result is checked by the simplest hydraulic level or laser level.
Now, along the ceiling, we mark the axis of the profiles with an interval of 40 cm, then we fasten the suspensions every 50 cm. After that, you can proceed to the installation of the main profiles. We fix the transverse profiles to the main ones with the help of suspensions.
After installing the frame, we attach drywall to screws. The distance from the joints of the drywall sheets to the corner should be at least 10 cm.
After the work performed, we wait for the dust to settle. We primer the joints of the sheets, then carefully spit them. When the putty dries out, hang the net and put off again. Now we glue special glass chloride to the surface. After puttying, the prepared surface is stained.
The interior of the living room with high ceilings will be decorated with multi -level drywall structures. They make them according to the same principle, using the pattern of the pattern.
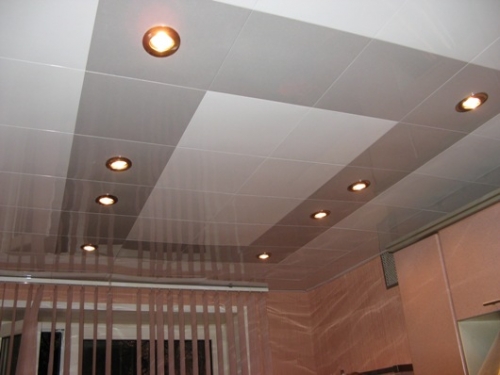
Cassette ceilings
In this case, thin metal cassetones act as material. The front side of aluminum plates is protected by a layer of paint.
Cassetons can be any shade, perforated or not, with or without embossing. They are easy to wash, it is not difficult to disassemble if necessary. Resistance to temperature differences is another advantage of this material.
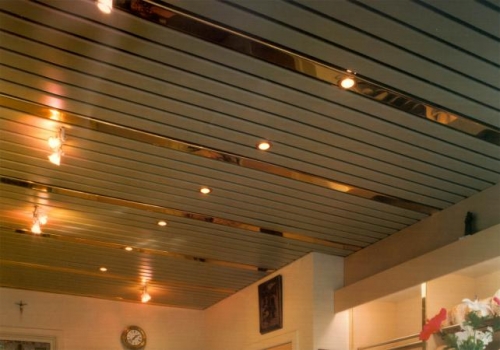
Raise ceilings
The popularity of this type of decor is explained by the durability, ease of installation and moisture resistance of the material. The ceiling coating is made up of plastic, aluminum or steel rails. Strips of rails can be located along or across the room.
Installation of rack ceilings begin by marking. Along the perimeter, we mark the level of the future ceiling. The ceiling is decorated as follows: a traverse (supporting bar) with grooves is mounted, then rails are installed (to a characteristic click). To mask the joints of the rails with the walls, an angular profile is used. The distance from the suspended slats to the basic floor should be 5-10 cm.
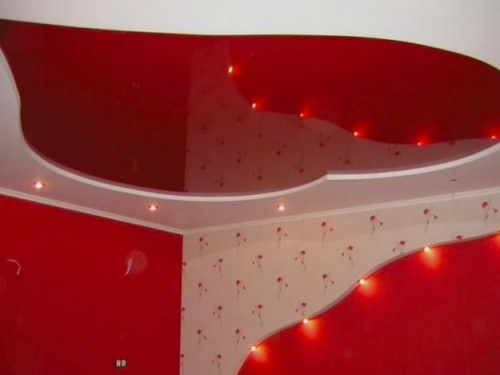
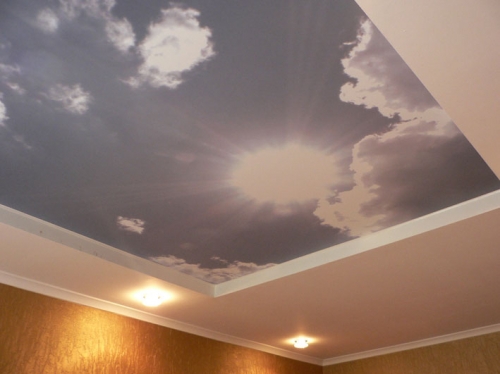
Stretch ceiling
Such an overlap is suitable for any room. The basis is a strong and elastic vinyl film.
Initially, measurements of the premises are carried out. Before installing the film to the basic ceiling at a distance of at least 5 cm from the native ceiling, the frame is attached from the profiles. The room warms up well, and then the film itself is fixed in the grooves. A gradual decrease in temperature contributes to uniform alignment and tension of the film.
Vinyl can be of any color, matte or glossy. Recently, films with a coating that imitating the starry sky have been unusually popular. Such ceilings are durable, not afraid of temperature changes and fumes. But they are not stable to mechanical effects, so before opening a bottle of champagne, direct it to the side, and not to the ceiling.
Sockets, borders, skirting boards and other embossed elements
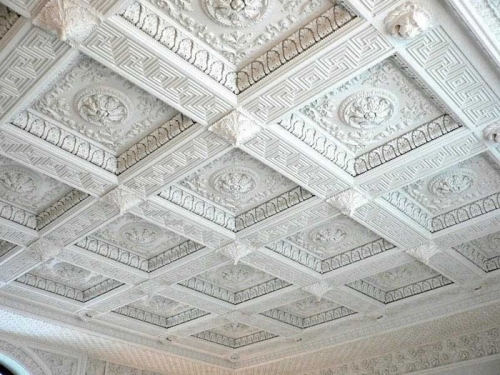
Stucco moldings, moldings and arches become an excellent addition to the classic interior, and go well with wallpaper with heraldic or plant ornaments. Although ceiling borders can often be seen in the interior of many apartments, regardless of the style solution of the room. Previously, these decorative elements were made of gypsum, but recently, polyurethane products have been extremely popular. It does not require frequent care, it can be washed and even painted.
Lovers of extraordinary solutions can try to make stucco molding at home using silicone molds. To do this, you just need to pour a special composition in shape and process the protruding parts of the relief with acrylic paint, when the details are enough dry.
The interior of the ceiling of the bedroom
The choice of materials for the decor depends on the condition of the ceiling and the general design of the room. Thus, design from drywall will help to hide significant irregularities, visually increased space with relief wallpaper with a barely noticeable pattern. Often, staining is also used in the design of the ceiling ceiling.
Ceiling in the kitchen
The correct solution would be the choice of moisture resistant and at the same time washing material for the finish of the kitchen. Moisture -resistant paint is good for these purposes. If it is decided to glue the ceiling of the kitchen with tiles, it is better to opt for laminated samples. Drywall slabs are also a good option, but only for high rooms.
Ceiling interior in the living room
For the living room, it is better to choose more elegant coatings. Again, much depends on the height of the room. Suspended or suspended ceilings reduce the level of ceiling.
With tiles, you can paste the surfaces with minor defects. This method is good to refresh the interior of the hall. The ceiling of the base in this case will not be visible. The tile perfectly disguises the small roughness of the surface. The choice of color depends on the preferences of the home owner. This can be an imitation of a stone or wood structure, white or colored samples.
Do not be afraid to experiment! Try to decorate the ceiling with mirror slabs, decorative plaster or drape it with fabrics. In this case, the interior of your premises will only win.


Hello everyone
Hello all the presented ceilings you can buy in Moscow and the region on the Potolkitorg.ru website at the best prices! The site has a wide selection of hanging ceilings for home and public premises, also if you need consultation, take a call back, call us, call us -Or write e-mail. Let's be glad to help you!