In order for the paving slabs to serve you for a long time and efficiently, you need to ...
|
|
The development of technology annually replenish the construction market with new materials with special ... |
Not always just a perfectly even surface of the ceiling fits into the concept of the room ... |
How to properly glue the ceiling plinth
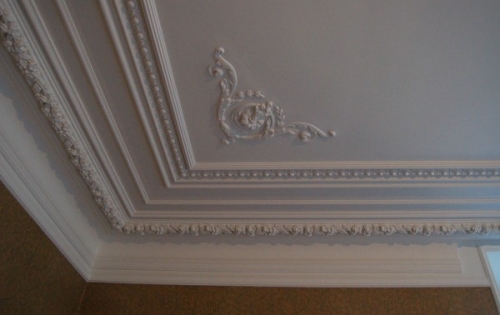
Speaking about skirting boards, we mean most often those that are designed to mask the junction of the walls and floor. However, in urban apartments and country houses in recent years, you can often see such skirting boards that are located under the ceiling and framed the room around the perimeter. This is a ceiling plinth, which combines a lot of advantages, starts from concealing wall defects and ending with giving the ceiling of a special charm. Today we will find out how glue to glue the ceiling baseboard, and how to plant a baguette on it.
Content:
- Buying a ceiling plinth
- Choosing glue for skirting boards
- DIY glue preparation
- Preparation for the installation of baguette
- The procedure for gluing molding
- Jacking joints and coloring
Buying a ceiling plinth
The joint of the walls and ceiling usually requires decorative design. The most common type of decor is the installation of a ceiling skirting board. The ceiling plinth is called a filler, it is a standard length of 2 meters close. Scrolls can be polyurethane, wooden, gypsum and foam, but regardless of this, the principle of their installation remains unchanged, only some nuances in the working process appear.
So, we are starting! The first thing to do is decide on the material of the ceiling skirting board. Foam and polyurethane baguettes are considered the most economical and convenient products in the work. They are similar to each other because they act as polymer compounds. The ceiling skirting boards that are made of polystyrene are not as high -quality as polyurethane.
If you compare polyurethane moldings with foam, then the former are more severe and expensive, but at the same time they are also inherent in sufficient elasticity. But the foam baguettes are not at all flexible, they cannot be bent, since with a high probability they burst. This is all a fairly important point in the installation of the baguette. If the ceiling structure has different bending radii, then the high elasticity of polyurethane will have to be by the way.
Polyurethane is more durable than foam, which is crumble and breaks. Polyurethane skirting boards can be used not only in rooms that have normal humidity, but also in those rooms where humidity is high: in bathrooms, in kitchens. But foam products do not like moisture too much.
The next thing you have to do before sticking a ceiling baseboard is to measure the perimeter of the room to find out what the amount of skirting boards you need. Suppose the overall dimensions of your room are 4 by 6 meters, therefore, its perimeter is 20 meters. Since the average length of the fillets reaches 2 meters, respectively, you will need 10 fillets, but it is better to buy another ceiling plinth in addition just in case.
Now you should decide on the width of the baguette, because wide moldings on low ceilings will not look appropriate, reducing the size of the room. No less important is the combination of skirting boards and walls. The plain walls will look more interesting if you choose a baguette with a pattern or some texture for them. And to the walls, which are decorated with ornaments, absolutely smooth skirting boards without any drawings are suitable.
Choosing glue for skirting boards
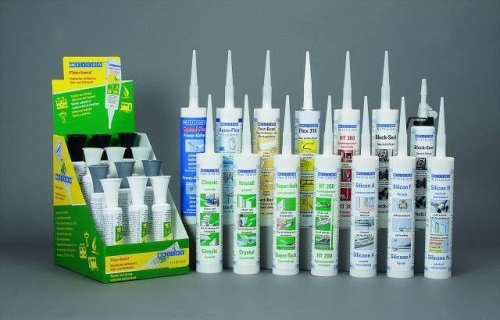
All glue for ceiling skirting boards, which is represented in today's market, is divided into acrylic and polymer. When deciding what glue you will use to attach the baguette, you need to proceed from the functional purpose of the room. If you make repairs in the nursery, then give preference to safe acrylic glue. And for the ceiling in the kitchen in the bathroom, you will have to consider a polymer sample.
Acrylic adhesives are made on a water -based, so they are not characterized by a pronounced smell. But they are not suitable for use in rooms with a high level of humidity. Polymer compounds, on the contrary, are moisture resistant and durable, but contain chemical solvents, which support them in a liquid state. And before the composition dries, which can last up to one week, a specific unpleasant odor will be felt in the room.
However, regardless of significant shortcomings, polymeric adhesives of titanium or moment are most popular in the installation of ceiling skirting boards. Buyers value these substances for reliability and versatility. Different modifications from each other differ in the rate of grasp and the level of resistance to low temperatures.
Also on sale there are samples that are intended for gluing almost wet parts, there are those that are able to grasp in seconds, which is very convenient in case of work under the ceiling. But you can attach wooden fillets not only on the adhesive, but also on screws and nails.
DIY glue preparation
In addition, you can knead glue from improvised materials. It is customary to glue gypsum and foam plinths on a solution of putty, while this solution will also be used to seal the gaps, which is formed when profiles fit together and to the walls with the ceiling.
To prepare this solution, take 1 volume of fine finish putty of any production and 1/4 of the PVA adhesive for 1 volume of water. Mix everything, knead until a homogeneous mass is obtained, which has a creamy consistency without lumps and clots and let it stand a little - a few minutes. Immediately before use, the mass must be mixed thoroughly again.
You can use this composition both as glue and as putty, gluing baguettes and covering the gaps between the walls and skirting boards for two hours. The resulting glue is based on water -based, therefore it has the properties that are inherent in acrylic glue, and is not suitable for rooms with high humidity.
Preparation for the installation of baguette
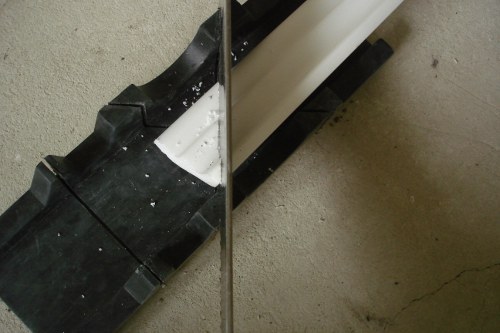
Before installing the ceiling skirting board, remove the material from the package and leave it in the room where installation will be made for a day, only after that you can start work. One of the difficulties that arise when gluing the baguette is the cutting of the fillet from the end. After all, each plinth bar should be cooked in a coal of the room with the other at an angle of 45 degrees.
To cope with such a task, you should stock up on the stupor that is necessary to send a knife or saw at a given angle. The Stubus has several slots at different angles of inclination - 90, 45, 60 and 67.5 degrees. Place the filler in the installation at an angle of 45 degrees and cut the piece with a knife, then soak the ends of the cut. It is very important to first cut the angle of the baseboard and only then adjust it by meter.
But if you cut the angle incorrectly, you will have to cut it again and the length of the bar with this will already be less, which will lead to the formation of a gap in the ceiling. In order not to suffer from cutting down the baseboard and docking the corners, you can always purchase decorative corners and subsequently install them over the baguette at the junction.
Carefully prepare the ceiling surface, it must be dry and clean. If the base is wooden or plastic, then fat spots should not be present on it. The ceiling should be subsided, and the walls are torn where the baseboard will be placed. The use of putty allows the alignment to perform better. And therefore, the connection of the fillets in places where they adjoin the wall and ceiling will be almost imperceptibly. Sometimes to prepare the ceiling you just need to make a couple of movements with a damp sponge!
The procedure for gluing molding
When repairing, as a rule, two methods of installing a ceiling baguette are practiced. The first technique is that the skirting board is glued after pasting the room with wallpaper. In the second method, molding is installed after leveling the ceiling and walls and their priming. More preferable, of course, is the second method, although it is more time -consuming.
Firstly, when changing the wallpaper, a ceiling baguette will not have to be re-changing. Secondly, in the presence of uneven walls, the cracks between the filler and the wall will look very ugly, which is much easier to paste with wallpaper, since there are no fears that you are stained with the walls. Therefore, before gluing a ceiling plinth, do not glue the wallpaper, so you can get a much better result.
Before fastening the plinth, it is necessary to pay attention to the choice of the place of gluing the first bar in the corner, because the neighboring one will stick to it. As glue and the angle will look. It is better to glue the skirting board in this sequence: first, stick segments in the corners and only after that you can glue the baguette around the perimeter. If the stripes in the corners are glued evenly, then no difficulties in straight sections of the wall will occur.
In the case of stretch canvases, it is definitely better to glue the baseboard before pour the surface with wallpaper. It is better to choose a PVC skirting board, which has a low weight. Do not fasten the baguette to the stretch ceiling exclusively to the wall. It is better to protect the panel with polyethylene. Otherwise, the technology of fastening the baseboard is similar to the above, with such a correction that it is better to take a special glue instead of sealant or putty.
If you decide to equip a room for decorative backlighting with a ceiling skirting board, then remember that radical differences between the procedure of plinth sticker without backlight and, in general, do not exist. If you want to decorate your room in this way, then before fastening the ceiling plinth, lay the electric backlight wires.
As a rule, LEDs are used. Next, the wires must be closed with baseboard, while remembering that we glue the ceiling skirting board not to the ceiling, but to the wall. From the ceiling baguette to the ceiling surface should remain a certain distance. That's all the techniques in gluing the plinth in different cases.
For stickers of moldings, you can use finish putty or glue. In the first case, the manufacturing company does not matter much. If you want to hide communication communications under the ceiling baseboard, then attach them to the wall or ceiling. In this case, as with the arrangement of decorative illumination using a ceiling profile, the baguette will be attached only to the wall. If the wire will delay the profile during installation, it will be very difficult to glue it.
Immediately before installation, moisten on the ceiling and wall the place of fastening with a primer or water. So you can prevent rapid drying of the substance and facilitate the attachment procedure. Next, dilute the putty and apply with a thin layer with a small spatula on the entire opposite direction of the filler, so that there are no voids in the corner when fit.
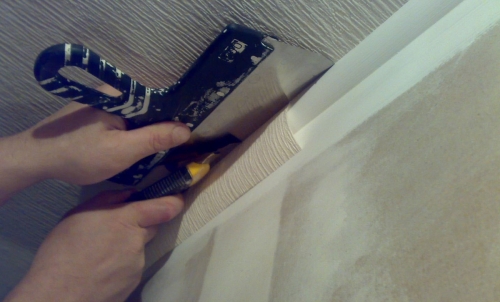
Apply the skirting board on the ceiling with one side, the other on the wall and press it. Remove the crawled putty carefully with your finger or spatula. After that, remove the removal of the putty from the baguette moistened with a rag. Make up the joints of the moldings with putty and beg with a wet rag.
In addition, you can glue the ceiling plinth with glue. The sticker of the ceiling plinth with glue is easier than using putty, but needs to be invested. The putty almost always remains after aligning the ceiling and walls almost, and the glue will have to be bought. For example, for a room for a meter up to 20 square meters, two packages of acrylic sealants will be needed.
Remember that for attaching the skirting board to glue walls and ceiling should have a qualitatively finished surface for adhesion. The glue is customary with a spatula or gun. Sweep the glue with a thin strip on the back of the baseboard, which is intended to fit the ceiling or wall. If you have a stretch ceiling, then the adhesive must only be applied to the lower part of the baguette, which will be directly pressed against the wall.
After the ceiling plinth has been glued, wait a bit, and then tightly press the strip to the gluing place. The glue sets quickly. On the ceiling skirting boards, traces and dirty spots can remain with the hands of hands during fastening. In order to avoid the occurrence of prints on the baguette, you need to wash your hands more often.
The excesses of the composition must be wiped with a dry cloth. To make the angle of the plinth, use a trimmed piece of filter in such a way that it repeats the profile of the already cut off, and glue them together. Repeat the gluing technology until you glue all the bar along the entire border of the ceiling.
Jacking joints and coloring
If, after gluing the ceiling skirting boards, small gaps were between the bar, this is absolutely not scary, because they can be easily eliminated by rubbing white sealant. If you have not yet turned and did not paint the ceiling, then the next option would be the next.
With a light putty, you need to go through all the glued strips, smearing them as a coloring composition, and after drying, excess should be removed with a small skin or a special grinding sponge for plaster work. After such a final decoration, the ceiling and moldings will become one, and you, in turn, will not find a single gap.
After you have glued the ceiling plinth and eliminated all the shortcomings, you can begin to paint the skirting board. The process of staining the skirting board is considered optional, but if you want to give your ceiling an ended and more attractive appearance, then you must still paint the baseboard.
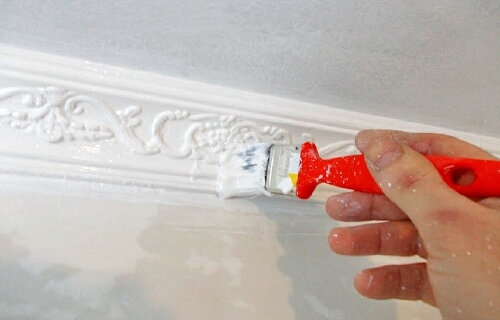
But if the baseboard has white, then it must be painted, otherwise it will begin to acquire a yellowish tint over time. For this purpose, as a rule, water -based, acrylic or latex dyes are used. You can take nitro painting, however, the surface of the baguette should be primed before application.
As a rule, coloring for the best grasping of glue should be done no earlier than a day after the pasting procedure. The most practical coloring composition is acrylic or water -based paint. Gently paint each filler with a brush so that everything around does not paint. It will be the best if you do this before the wallpaper sticker.
We now found out how to properly glue the ceiling skirting board. At the same time, take into account all the subtleties of the installation, be sure to install to the final wall finish, start with the corners, and then fasten the baguette in a straight line. When fastening the molding for decorative backlight or the tensioned sheet, the technology will differ, but not fundamentally, it is important to remember some nuances, and the work will go like clockwork.


