In an effort to effectively use the entire affordable area of \u200b\u200bthe country house many ...
|
|
Not everyone knows that in addition to ordinary doors made of metal and wood on sale there are more ... |
The roof protects the residential building from precipitation. But how to protect the roof? The first thing that comes to ... |
How to glue ceiling slabs correctly

To date, there are a large number of finishing materials for the ceiling. The most affordable option is ceiling plates, which are square panels made of polystyrene. They have a wide variety of textures and wide colors. This makes them a great option for creating a beautiful and practical interior at minimal costs. The article will tell not only how to glue the ceiling tiles, but also how to care for it in the future.
Content:
- Advantages and disadvantages of ceiling plates
- Calculation of the required amount of material
- Preparation of the surface of the ceiling
- How to glue ceiling slabs
- Tips that will help to correctly glue the ceiling tiles
- Ceiling tiles
- Ceiling tile in the interior
Advantages and disadvantages of ceiling plates
Polystyrene from which plates are made is light and environmentally friendly material with good soundproofing properties. Products from it are easily cut by a simple clerical knife and quickly mounted.
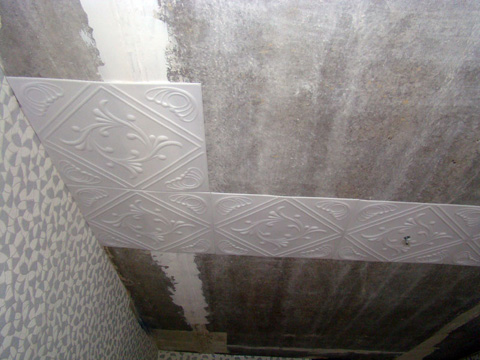
It belongs to difficult to flammable materials, but can melt and deform from a powerful light bulb. Therefore, it is recommended to have chandeliers at a distance of at least 20 cm from the tile.
With the help of foam tiles, a flat surface is easily and quickly created without significant financial costs. But, with all the advantages, the adhesive ceiling is not too durable, subject to the negative effects of moisture and ultraviolet radiation.
Calculation of the required amount of material
The sizes of ceiling plates can be different, but in most cases they are produced by square 50x50 cm. Rectangular tiles are also produced in size 100x16.5 cm, but they are extremely rare on sale.
After the final selection of plates is made, the required amount should be calculated. The simplest option will be the length and width of the ceiling by the length of the side of the plate. For example: the ceiling has a size of 300 cm by 600 cm, and the width of the tile is 50 cm. It turns out that 6 tiles fit in width, and in length 12. We multiply 6 by 12 and get 72 this is the right number of ceiling plates.
In the event that the ceiling is not a multiple of 50, you can draw the location of the panels on paper, observing the exact proportions of the ceiling.
Tip: It is necessary to purchase 15% more material. This is done in case of its breakdown, deformation or incorrect cutting.
Preparation of the surface of the ceiling
Before starting to glue ceiling slabs, you need to clean the ceiling from the old coating and dust. If necessary, it should be leveled with putty. If irregularities exceed 1.5 cm, then first, plastering is placed and only then finish putty. When it dries, a primer is applied to the entire surface.
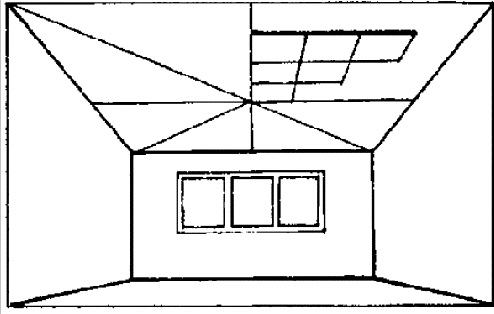
The next step is to mark the laying of the plates. Only evenly distributed panels will give the room the necessary aesthetics. To do this, two diagonal lines are drawn on it, at the point of their intersection there is a center. Then, through the resulting point, perpendicular lines are drawn, dividing the ceiling into 4 equal parts.
How to glue ceiling slabs
Panels made of polystyrene can stick to almost any surface. Tiles are suitable for the kitchen, and an extruded bathroom.
But you need to know how to properly glue ceiling slabs, because even the simplest workflow requires compliance with technology.
First of all, you need to decide on glue. For these purposes, a large number of special compositions are sold. But you can also use PVA or moment. It is applied with a zigzag according to the drawing on the back.

The tile responds to temperature changes and humidity changes, which leads to deformation after installation. To avoid this, it should be left for several hours without packaging in the room in which it will be mounted. The quality of the tile will also affect the aesthetics of glued ceiling. It should have sustained geometric sizes and even sections.
The first tile is installed in such a way that one of it is located at the central point of the ceiling. If the wires are located in this place, they are de -energized, and cut the angle of the panel (in the future it will close a glass of chandelier or a decorative ceiling outlet). Align it along the lines in pre -drawn on the ceiling. The tile, when gluing, must be tightly pressed, but so that there is no dent left on it, and hold for several seconds.
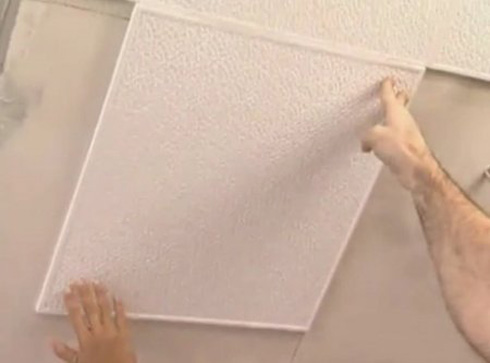
All subsequent rows are located in parallel, without intervals between tiles. As a guideline, triangular arrows on the reverse side are used to be directed in one direction.
The tiles in the last rows, in most cases, have to be cut to the required size. Therefore, first you need to make their fitting and only then apply glue. The remaining gap between the wall and the extreme rows of panels will be closed with a ceiling plinth.
Tip: all the remnants of the glue are immediately removed with a sponge.
The effect of a seamless ceiling is created using silicone sealant. All seams are filled with them and leveled with a trowel. Excesses are easily removed with a damp cloth.
The final stage in the installation of plates will be the installation of a ceiling outlet around the hole for a chandelier and skirting board. Also, the finished ceiling can be covered with any water -based paint.
After completion of the work, the doors and windows in the room are tightly closed to exclude air movement.
Tips that will help to correctly glue the ceiling tiles
It is best to press the stove with a wooden bar, not with your hands. This will prevent a possible appearance on it.
If the ceiling has uneven geometry and the gaps between the tiles are too large, it is recommended to use acrylic sealant, which, after drying, can be painted. But this method is suitable only for white, not laminated coating, tiles.
If the gap between the extreme rows of plates and the wall is less than 1.5 cm, in the future it is decorated with a ceiling baseboard. But if it is larger, then they close it with a strip of a panel cut not only in size, but also taking into account the pattern.
It is impractical to glue the slabs from the center to the edges in small rooms. As a result, they will not create the effect of a continuous surface, but only increase the consumption of the material. The best way will be to install tiles from angle to the center.
Ceiling tiles
- uplaced tiles are cleaned with a dry rag or very neatly with a vacuum cleaner;
- the laminated panel must be wiped with a damp sponge;
- small contaminants are removed using a conventional eraser;
- from direct exposure to rays, polystyrene tiles turn yellow over time;
- complex pollution, from white slabs, can be cleaned with alcohol. But the use of turpentine, acetone or gasoline is unacceptable.
Ceiling tile in the interior
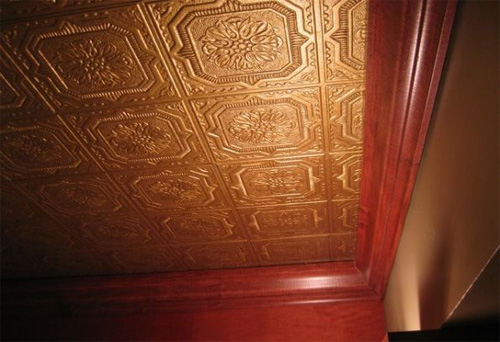
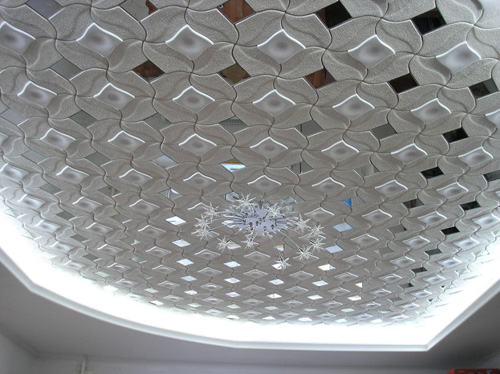
Very often it is associated with simple white slabs that have a straightforward pattern. But today their design has become more perfect, and they are already capable of not only budgetary to finish the ceiling of the room, but also add the interior of luxury.


What is the difference how to glue them
What is the difference how to glue them if it is impossible to find them on the Internet and buy !!!!!!!!!!!!!!!!!!!!!