Frambles and marble floors have always been considered a sign of obvious luxury and refined ...
|
|
Glazing of facades is a fashionable direction of our time. Due to the original ... |
Previously, wooden floor coverings were pretty good quality that there are to this ... |
How to glue ceiling tiles made of polystyrene tiles
If the ceiling in the apartment does not need additional leveling, stretch structures are not affordable, and simple painting and whitewashing are not suitable, then tiles made of polystyrene foam will become the best solution for decoration. A variety of drawings, a large color palette, imitation for various materials leave the right to quickly and inexpensively create a unique ceiling coating behind the buyer.
Content:
- Is the polystyrene foam wrong?
- Ceiling tiles made of polystyrene foam. Which species is better?
- Assortment of ceiling tiles made of polystyrene foam
- Pros and cons of polystyrene foam tiles
- How to glue ceiling tiles made of polystyrene tiles
Is the polystyrene foam wrong?
In relation to any chemical industry products, the consumer usually immediately develops a negative impression, which in fact is erroneous.
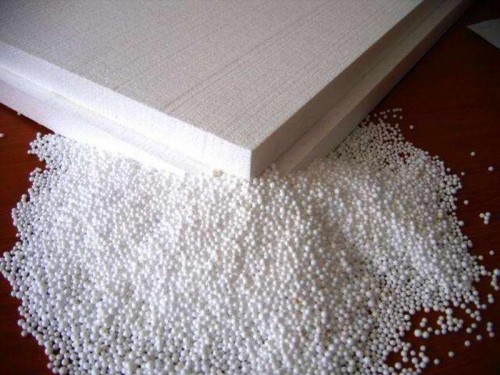
- As for the polystyrene foam, it is based on Stirol. For the first time, this substance managed to get the German pharmacist Edward Simon. He conducted experiments with Storax (a type of resin), and their result was a new substance. It had the ability to change its structure, forming a more dense consistency similar to jelly.
- Then the pharmacist did not continue his research, since he did not see the application of Stirola, as he called it. Years later, the ability to form a jelly -like mass will be called polymerization, and thanks to the development of this process, chemists will learn to receive polymeric materials.
- In the production, sticol granules are mixed with a polymer composition in special forms and heat. As a result, balls are formed in large quantities, which, increasing in volume, stick together and fill the entire shape. The resulting plates are dried and cut. Polistyle blocks produced using this technology are in good account for builders involved in the insulation of the premises.
That is, to use material in residential premises is not prohibited from building and sanitary-hygienic requirements. Polystyrene foam ceiling tiles have positive reviews, especially if it concerns inexpensive and quick cosmetic repairs.
Ceiling tiles made of polystyrene foam. Which species is better?
The method of production of polystyrene tiles affects its characteristics and appearance. It’s easy to distinguish them, this is what will indicate the manufacturing method:
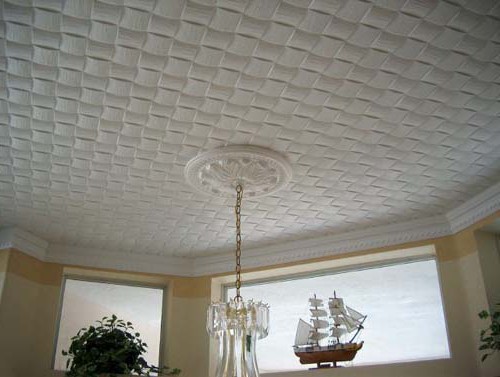
- If on the counter the tile with a thickness of 5 to 8 mm, the pattern has fuzzy shape and the pattern of the pattern is implicitly expressed, then this tile was made by stamping (press). Figure squares are stamped from ready -made polystyrene stoves. The surface of the product is loose and pores are clearly visible on it.
- The main advantage is the low cost, and the disadvantage of the ability to quickly absorb dirt and dust. But such tiles can be painted with acrylic compounds, there is a quickly refresh the ceiling.
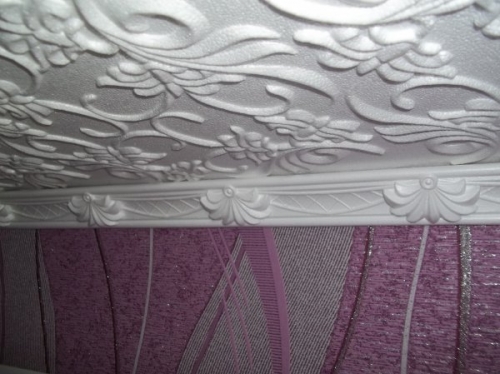
- A smooth surface and a characteristic shine will give out a product made by hot extrusion. The molten mass is poured through the holes in the profile. It does not have such a clear porous structure. Often, this ceiling tile made of polystyrene foam is colored and imitates marble, wood or other materials. Some manufacturers produce laminated extruded tiles. The price of this ceiling tile made of polystyrene foam is low, it is easy to wash with ordinary water.
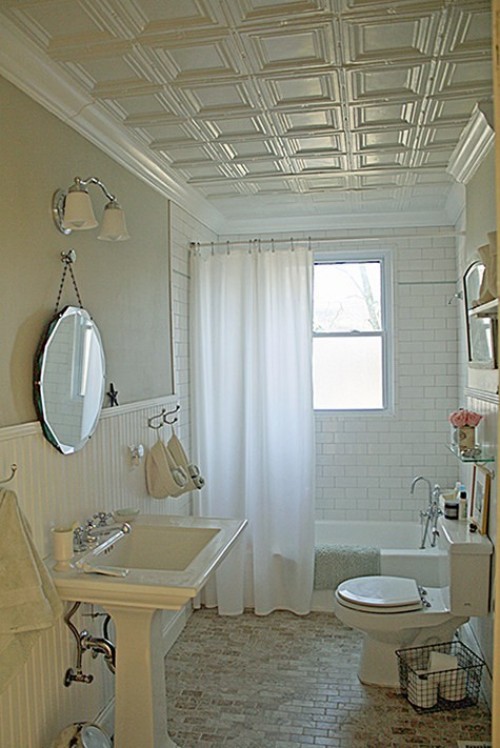
- The thickness of the tile is 10 14 cm allows you to make the pattern deeper and more pronounced. Complex floral patterns or imitation stucco are most often transferred to such material made by the most expensive method. The shape is filled with liquid raw materials and left to harden at high temperatures.
- Injector tiles are easy to distinguish at even edges, to obtain the effect of a seamless ceiling, you need to buy it. Subsequently, it will not work to paint it, and it costs more than other species.
There is no need to talk about the obvious superiority of one tile over another, and there is no golden middle in this case. Even inexpensive stamped products will look good on the ceiling if they are made of high -quality raw materials. To make sure of this, when buying, you need to carry out a number of simple manipulations:
- In the process of visual inspection, it is important not to view dents and scratches on smooth extruded tiles. On the ceiling, any defect will be noticeable immediately, and it is impossible to repair the damaged element. Chips and uneven edges are another reason to buy a coating from another batch (or in another place). This requirement is especially relevant if the tile is not a square shape, but an abstract, with a wavy line of edges.
- If you carefully take the tile for the corner and slightly shake it down, it should not crumble and break. Of course, the strength of the foam at the polystyrene tile foam is minimal, but it should withstand a similar load.
- Right angles is the key to the fact that the process of gluing tiles will not turn into an endless attempt to assemble a puzzle with the missing element. To do such squares so that they fit tightly, without cracks, it will not work, no matter how hard the master tried.
- The decorative properties of colored tiles are undoubtedly high, but sometimes it is worth refraining from its purchase. The fact is that the paint will burn out from UV rays, so it is better to buy a white coating suitable for painting to the room, the windows of which are on the sunny side. If, nevertheless, colored tiles seem the most attractive option, then you should choose products with a uniform shade over the entire area.
Ceiling tiles made of polystyrene foam photo
Assortment of ceiling tiles made of polystyrene foam
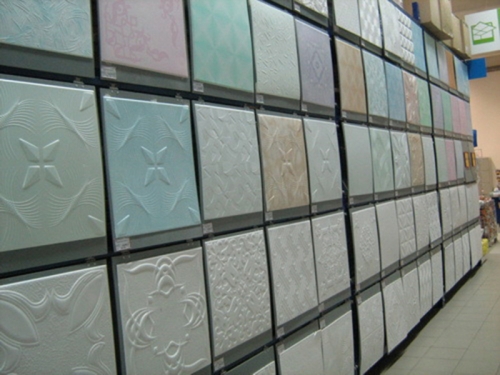
The colors and patterns of polystyrene ceiling tiles are very diverse. You can find a suitable pattern for the classic and modern interior. As for the dimensions, even the basis of curly tiles are two main forms: a rectangle and a square, depending on this, you can find elements of the following sizes:
| Square form (cm) | Rectangular shape (cm) |
| 60 60 | 70 40 |
| 50 50 | 70 30 |
| 40 40 | 60 30 |
There are also many varieties of tiles:
- classical and designer,
- embossed and smooth,
- with a convex or a paved pattern,
- with perforation and a clearly expressed structure.
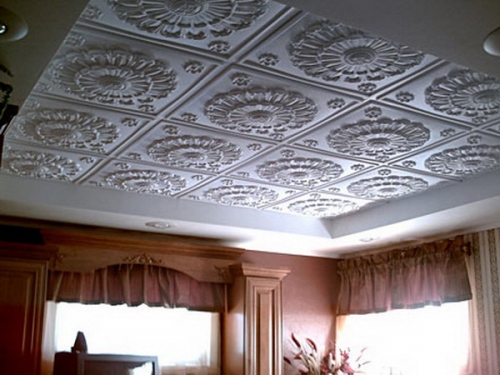
In addition to the ceiling from polystyrene tiles, you can choose various decorative elements: rhomboid, round for decorating a place for a chandelier imitating stucco outlets.
Pros and cons of polystyrene foam tiles
Before you finally choose this particular option for finishing the ceiling, the tile should be evaluated by its advantages and disadvantages. She deserved popularity for a number of reasons:
- The ability to create a ceiling with an original design.
- A good ratio for price and quality.
- Safety. Styroll emits volatile compounds harmful to health only when heated to high temperatures. In everyday life, this is an impossible condition, unless the fire starts. But in this case, no one will remain in a burning room to intentionally inhale toxic pairs.
- If, nevertheless, there are doubts in the safety of polystyrene tiles, then when buying you can ask the seller to present a certificate for products. If all the technological conditions of the production process were observed, the polystyrene is high -quality and with the addition of antipyrene substances (not supporting combustion), then there is no reason for concern.
- You can take care of the tiles in any convenient way: vacuum or wipe with a damp cloth. Depending on the degree of pollution in water, you can dilute soap or any detergent. Stamped products, when they lose their attractive appearance, are painted in their favorite color.
- Even to a small extent, but a thin layer of polystyrene foam on the ceiling will create a heat and soundproof barrier.
Negative features, of course, are also:
- the fragility of plates requires caution during transportation and installation. Dents and scratches are easy to form, but getting rid of them will not work, you will have to use a new element;
- from the light of the chandelier, part of the tile, located closest to the light source may turn yellow. The closed type of ceiling usually eliminates such troubles;
- from sharp and constant temperature changes, ceiling tiles sometimes depart from the base. The problem can be prevented if you take quality glue from a trusted manufacturer;
- persistent pollution: soot, nicotine resins, fat are very quickly eaten into a porous structure. It is extremely difficult to remove them. The advice alone is more likely to arrange moist cleaning of the ceiling. It is not recommended to use a poorly squeezed rag or brush.
But the assertion that polystyrene tiles contributes to the formation of increased humidity in the room, that it does not breathe, is incorrect. The porous structure does not complicate the air exchange, but the glue layer, on the contrary, clogs the smallest holes. That is why the adhesive composition is applied pointwise around the perimeter of the tile and in the center, and not all over the entire surface.
How to glue ceiling tiles made of polystyrene tiles
Calculation of the right amount of material
The price of polystyrene tile foam allows you to buy it with a large margin, but, as practice shows, then these 7-8 remaining pieces lie in a dead load: it is a pity to throw them out and adapt more. Not every store agrees to accept the remains back. Therefore, in order not to buy one or two tiles and not to suffer where to put surplus, it is better to spend some time on calculations.
With the ceiling of the correct shape, you will not have to bother for a long time. The size of the tiles and dimensions of the pasted surface is taken into account.
- For example, the ceiling has dimensions of 4.9 m and 3.8 m. For its design, tiles of a standard square shape with a side length of 0.5 m were selected. We calculate the number of tiles: 4.9 0.5 \u003d 9.8. The final result is the required number of elements. It should be rounded in a large way, it turns out 10 tiles. Now 3.8 0.5 \u003d 7.6, that is, 8 tiles. We change 10 and 8, as a result of the ceiling you will have to buy 80 polystyrene tiles.
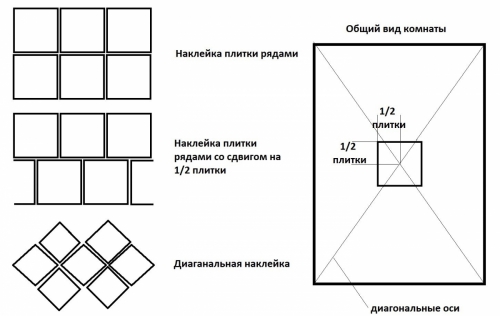
- This method is suitable for calculating the simple method of gluing, when all the tiles are located in the rows horizontally and vertically. Some like it more when the elements are laid diagonally. At the same time, much more material will go into the waste, so the number of pieces of reserve must be increased. If, with a standard version, the increase in the number of tiles is from 15 to 20 % of the required, then when glued diagonally, you need to take 25-30 % more, especially if this is the first experience.
- To find out the amount of material for the ceilings of an unusual shape, it is easiest to make a cardboard template in size of the tiles you like. Applying it to the ceiling, you can find out the numbers of interest.
What else will need to be purchased and prepared for work
- In addition to tools and inventory: ladders, a construction knife, level, pencil and roulette, you will need to buy skirting boards and glue.
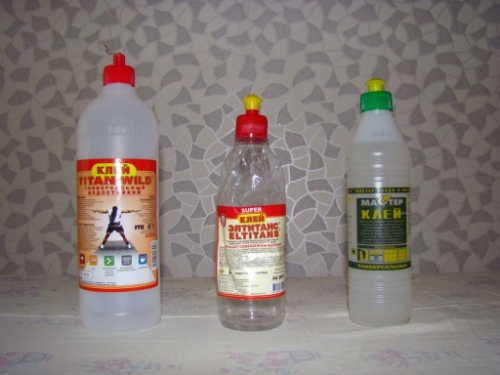
- You can buy liquid nails or a composition based on liquid rubber. The last option is available, well -established and most often offered by sellers. The consumption of such glue, which has a thick and colorless consistency, is indicated on the label. Since it needs to be applied in the form of drops and at a distance from each other, a lot of packages will not be required. An important point when working with rubber -based glue: after applying it, you cannot immediately glue the tile to the ceiling. The pause at 2-3 minutes will provide the best setting up the composition with tiles and the pasted surface.
- The skirting boards are bought at the rate of the perimeter of the room with a small margin, because for the joining in the corners it will be necessary to cut the ends at an angle of 45.
Ceiling marking
- With a horizontal arrangement of the tile, the start of work should be carried out from the center of the room. If a place under the chandelier is already provided on the ceiling, then it should be taken as a starting point. Otherwise, the center is determined as follows:
- From the corner to the corner diagonally, a line should be drawn. Similarly act with two other corners. At the intersection of the lines will be the center of the ceiling.
- You can stretch the rope from the corners of the rope by fixing them on the nails or in another way. At the intersection, again, the departure will be obtained.
- Based on the central point, the ceiling must be divided in half horizontally and vertically, drawing a peculiar axis of coordinates. The first four tiles will be laid one at each in each resulting sector. At the same time, their corners will converge at the central point.
- It is assumed that the marking is applied to an even ceiling, cleaned of whitewashing or wallpaper. Small changes and defects tiles can hide, but it does not mask the very tuberous surface. In addition, to glue the squares of polystyrene foam on an uneven base, it will not allow her to stick to the ceiling.
Sequence of actions when gluing polystyrene tiles
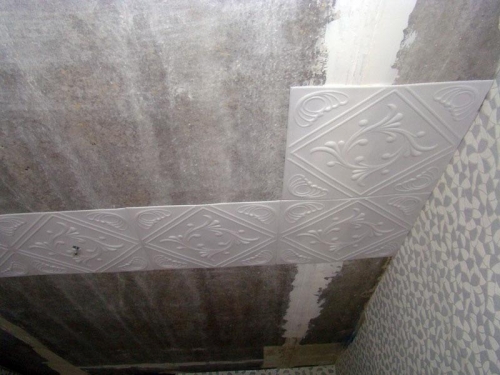
- The first tiles should lie down in the center of the ceiling. They need to apply glue on them and postpone for a while. After a small pause, each element is alternately taken and pressed to the ceiling. No need to tightly press the tile to the base, it is enough to press slightly around the perimeter and in the center. The protruding droplets of glue can be wiped with a dry rag, but this must be done right away, then there will be no traces of polystyrene foam.
- At the location of the chandelier in the tiles, the hole of the desired diameter is easily cut through. A construction knife will cope with this. Then the tiles are glued around the original square. If you mark the trajectory of movement, you will get a spiral. Tiles are easily adjusted in size, cut them with a construction knife. No need to worry, ate along the cut line the edge will turn out a little torn by these defects will hide the skirting board.
- It is convenient to work together: while one applies glue, the second sticks the tiles already prepared in this way.
- Work on gluing should be carried out with closed windows, excluding drafts. If it was not possible to avoid cracks between neighboring tiles, voids can be filled with white sealant on a silicone base.
Ceiling tiles made of polystyrene foam video
- Gluing skirting boards The final stage of the ceiling. It remains to hang the chandelier, wait for the glue to dry and ventilate the room. Pokling polystyrene tiles is the case when the preparatory stage takes much more time than the main work.

