Poster masonry is made of different materials. Some are capable of successful ...
|
|
Personal water supply, a well or an equipped septic tank can not only take sewage ... |
Not so long ago in your apartment you made repairs and proudly showed guests ... |
DIY STARTING AND RECHECH CEARTION
Often the ceiling requires repair or alteration. This is due to its damage, for example, flooding or the need to repair communications hidden behind a stretch or rack ceiling. Most I want to save at least on dismantling the old structure and not order a special brigade. The article will talk about how to dismantle the stretch and rack ceiling with your own hands.
Content:
Types of suspended ceilings
But before starting to disassemble the old ceiling canvas on your own, several important points must be taken into account:
- professionals can remove a stretch or rack ceiling in such a way that building materials will not be damaged and will be suitable for re -use. With independent work, you can damage not only them, but also communications hidden behind the suspension structure;

- for work, not only certain knowledge of the structure of the structure will be needed, but also special tools;
- if an agreement with the construction company is concluded for the dismantling of the ceiling, then in case of damage to when it is removed, a claim for damages can be presented.
I must say that there are several types of stretch ceiling and not in every case it will be possible to remove it without damage. Some, in fact, are unsuitable for re-installation, and some are removed without much difficulty even without involving installers, so we will consider in more detail about the types of fasteners. In the future, this will help not only correctly remove the canvas, but also repair it and install it back.
Fabric stretch ceilings
- They are a synthetic fabric saturated with compounds, which maximize its strength and resistance to mechanical damage.
- In the interior, such ceilings look more harmonious, and their impregnation is safe for humans.
- Unlike PVC paintings, such ceilings are vapor permeable, that is, the material breathes, mold does not form under it.
- The width of the material allows you to make seamless ceilings with a wall length up to 5 m.
- Tissue stretch ceilings are not afraid of a negative temperature, unlike the PVC analogue, it is not covered with cracks and does not compress.
- They are often installed independently, since it is not required to use a heat gun.
- Such ceilings are easy to disassemble, but the cost of the structure is much more expensive than when installing a film canvas.

PVC stretch ceilings
- This is the most popular type of ceiling in recent years. With its low cost, it has a huge number of advantages.
- Without prejudice to himself, he can withstand water pressure up to 100l/m2.
- The canvas is very thin and has a small weight. But at the same time, it has high elasticity, which, when heated by a heat gun, is reduced, and when cooling, all properties are restored.
- Although the rolls are not more than 2 meters, it is easy to make an inconspicuous seam, bringing the canvas to the desired size. Make it in advance and already in the finished form is delivered to the customer. It is mounted on a frame from special aluminum profiles. The film is fixed to it and heats up, after cooling it is pulled, forming an ideal surface that does not require further care.
The dismantling of the stretch ceiling will depend on the method of its fastening, it, in turn, can be:
- using a baguette, the so -called airless method;
- harpoon method.

If a seamless fabric ceiling is mounted, then plastic clips were used, which are easy to remove and then put in place. When installing PVC paintings, two methods could be used: harpoon and graduate (blade). In this case, the fasteners themselves cannot be removed without damage and after dismantling them will have to be replaced with new ones.
DIY stretch ceiling
Dismantling PVC stretch ceiling
Tools that will be needed:
- first you should prepare a spatula. To do this, the usual construction is suitable, but first it is necessary to round the corners. To protect the canvas from a possible cut even more. The entire metal plane of the spatula is recommended to be wrapped with reinforced tape;
- special elongated pliers;
- ladder;
- stationery knife;
- thermal gun;
- large clothespins will help to facilitate the work that can fix the film at the time of work.
Stages of work
- All the superfluous is removed along the perimeter of the room, which can interfere with free movement and installation of a stepladder. All plastic objects are removed from the room, and the windows are covered with fabric to protect the profile.
- Regardless of the mount, dismantling begins with the heating of the room until the elasticity of the stretch ceiling decreases.
- Harpular structure. Work begins to be carried out from the corner. If the ceiling has decorative inserts, they are first removed. Then they begin to stretch the canvas, hooking the pliers by the harpoon. It is very important not to hook the film, but to take up the fasteners only. Otherwise, the film will break and you will have to change the entire canvas.
- The beginning of the process is laid, it was the most crucial moment. Then all the work can already be carried out with your hands. This is only necessary to do this in fabric gloves so that there are no traces of fingers on the preheated PVC. Thus, from the corner they move to the center of the wall. Sometimes this is enough to free that part of the ceiling. Where you need to carry out repair work.

- Briver (graduate) design. The work begins in the same way as described above. Further, work can be performed manually or help yourself with a spatula with which the frame profile of aluminum is bent. Professionals do this with a special screwdriver with a curved end, which is conveniently and quickly to remove the glazing pic.
- The easiest dismantling will be if wedges were used as a mount. Inserts are taken out, the profile is carefully bent with their hands and the canvas and the wedge are immediately weakened. Now moving from the corner to the middle of the wall, you need to remove the film. The success of the event also depends on whether the release of the film was left in several cm during installation. If this was not done, then pulling it back will no longer be impossible.
The average price of dismantling the stretch ceiling is from 300 rubles/m2.
Dismantling of a stretch ceiling video
Dismantling of a fabric stretch ceiling
- The main advantage is not to use an expensive heat gun. Accordingly, you do not need to close the windows and remove plastic items.
- If the fabric ceiling was attached using wedges or graduates, then the entire technology is absolutely identical to the dismantling of the PVC canvas, with the exception of one nuance, you should start not from the corner, but from the middle of the wall.
- As in the first case, for re -using the ceiling, it is necessary that the mounting team leaves the allowance of several centimeters when installing it.
Important: when installing the design of the baguette with clips, you will have to dismantle the entire ceiling completely.
How to drain water
- It often happens that the neighbors flooded from above or flowed a roof in a private house, in this case, before the dismantling, it will be necessary to drain the water.
- First of all, you need to completely turn off the electricity in the entire apartment.
- If you do not completely dismantle the ceiling canvas for drainage, then it is enough to remove one of the lamps and drain the water through the resulting hole.

- It is impossible to do this alone, you need to ask the second person to help. While one is standing with a container for water on the floor, the second, standing on a stepladder, directs the film so that all the water drains to the hole. When the work is over, you need to leave the canvas to dry for several days. As a result, folds will appear on it, but with further installation they will straighten.
- In order to speed up the fabric drying out as much as possible, it is recommended to remove all the lamps and chandeliers, you may even need to partially dismantle the angle, and constantly ventilate the room.
DIY RECHECH CEARTION
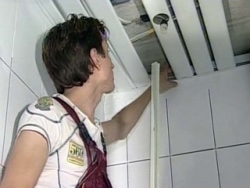
The rack ceiling allows dismantling with the possibility of further operation. This is especially important if it is required to repair the communications hidden behind it or to make a partial replacement of the ceiling elements.
In addition, the river ceiling:
- has an affordable price and attractive appearance;
- safe for health;
- ideal for rooms with high humidity and a sharp temperature difference;
- with it, it is easy to align even the most curve ceiling;
- long service life.
If the moment has come when the rack ceiling requires dismantling or repair, you will have to disassemble the entire structure.
You do not need special tools for work, just cook:
- screwdriver;
- screwdriver;
- chisel or strong knife;
- gloves to protect your hands from random cuts.
Stages of work
- First of all, they turn off the electricity in the entire room and remove the lamps from the ceiling. If there are incandescent lamps, then first you need to twist the lamp itself, then remove the lamp and disconnect the cartridge from the wire. Point lamps with halogen lamps are versed in a different principle. First, the ring is removed, the lamp from the wire is disconnected and the entire luminous body is removed.

- The second step will be the removal of the skirting board. Unlike the ceiling itself, they will have to sacrifice, as it is unlikely to be able to remove it carefully. A strong knife is praised by the edge and tear it off from the surface.
- It is more convenient to disassemble the rails with the extreme. They are fixed with each other thanks to special locks without additional mounts. Therefore, the easiest way is to push them with a screwdriver. But this must be done carefully so as not to damage the panel.
- Rights-tinger tires, to which panels were attached, are immediately dismantled. It is enough just to unclench the clamp and disconnect it from the suspended structure.
- But in order to remove corner profiles, a screwdriver will be required. If the dowels are sitting so tightly that there is no way to twist them, you will have to drill them with a drill.
Tip: All this is done, only if the ceiling must be removed completely. For a partial replacement of rails or repairing communications, it is enough to simply unfasten the right number of panels without analyzing the entire suspension system.
- In order not to mole the elements of the rheck ceiling, when removing them, they are carefully placed in a horizontal position.

What to look for so as not to disassemble the ceiling in vain in vain
- The maintenance of the wiring will be most difficult, since the exact location of the cable is difficult to remember. If you need to clean or fix the exhaust system, then everything is much clearer here, its location is obvious.
- Since the river ceiling is mounted on the suspension system, a hollow space is formed in which rodents can live. Often they create a rather unpleasant noise with garbage, which is pulled into their storage facilities. To avoid this, you need to disconnect several panels closer to the center of the ceiling so that you can visually evaluate the source of noise and remove it.
- In this case, dismantling will not be carried out from the edge of the wall, as was written above, but in an arbitrary place. In order not to damage the panels, for work you need to prepare a pointed wooden stick or rail. It is picked up by a decorative insert (if any) and is removed. Then, slightly squeezing the rack bar with his fingers, it is pulled down until it disconnected.
Dismantling of the river ceiling video
- In order to avoid unnecessary dismantling of the river ceiling, when installing it, it is recommended to start a notebook, where the location of the wiring and other communications will be schematically drawn. The most common problem due to which you have to disassemble the ceiling is the lack of electric power supply of lamps. As a rule, a breakdown occurs at the twisting place of excessively long wires.

- If you plan to re -install the racks, then the work must be done very carefully, since the panels are easy to mall, after which you will have to throw them out. But in most cases, the ceiling is disassembled to replace it with new ones. Then you can significantly accelerate the process using more convenient metal tools.
- Sometimes you only need to replace a couple of panels. This is easy to do when the ceiling is white. But with colored rails, everything is much more complicated. If there are no spare rails after installation, then finding such a color is almost impossible. Even in one manufacturer, different batches may differ in tone. There are two exits here: a complete replacement of the entire ceiling or buying a different color and alternating racks through one. The second method is capable of halving expenses.
- The dismantling of the rack ceiling can be done alone, but only with a room width of up to 3 m. But longer rails can bend and rim, therefore, with a larger size of the room, the assistant must be called.
- Removing the P-shaped profile will not be difficult if it is screwed with self-tapping screws. But when it is attached with nails, you will have to tinker, so as not to bend the bar and not damage its coating. One of the options is to drill a hat, and after its removal, remove the profile and pull out the remaining nail with pliers.

Thus, having completed work yourself, you can save well on the cost of dismantling the stretch and rheck ceiling.
![]()
StrPort construction portal 2011-2018. Articles about repair, construction, building materials.
Copying information from the site is possible only with permission of the editorial office Or indicating a direct link to the source. Legal justification