The sewage system is one of the fundamental engineering systems as in ...
|
|
In snow winters, no construction can do without such protective structures as ... |
We make a solid fuel stove in a private house. Types of solid fuel furnaces and their characteristic
Solid fuel, as the main source of heat, retains its position today ... |
Stacking three -dimensional flooring: step -by -step instructions

Repair cannot be represented without competent flooring. And the desire to bring to the arrangement of housing or at home design solutions is inconceivable without a thorough attitude to this part of the room. Modern construction technologies make it possible to make a functional and reliable floor, as well as an original and attractive coating, which corresponds to the style orientation of the room. A small guide is offered to your attention how to make a bulk 3D floors with your own hands. Check out the information and watch a video about the procedure for arranging a three -dimensional surface. And you will succeed!
Table of contents:
- Pouring 3d floor manufacturing technology
- Preparatory work
- Preparation of a photo for a bulk 3D floor
- Preparation of the base
- Applying the base layer
- Application of the picture
- Applying a transparent finish layer
- Protective varnish
- Barrow 3D care
Pouring 3d floor manufacturing technology
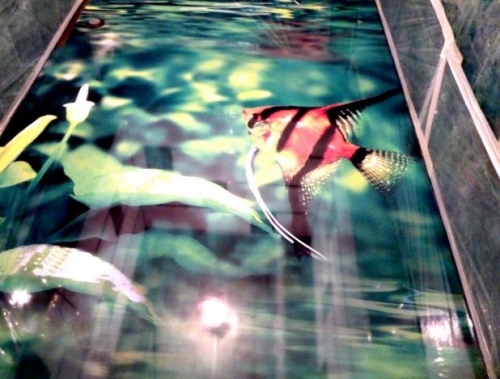
3D technology will look equally impressive in a residential building and in the office, in the country and in the trading floor. Decorative volumetric floors can be decorated in any color scheme and with any pattern, thus, any fantasies can be realized. The usual linoleum or laminate, as a rule, has a standard set of colors. Therefore, we can confidently say that such an approach has exhausted itself. But three -dimensional floors do not limit the imagination of designers. On the market you can buy 3D bulk floors of any color, shade and pattern.
The technology for manufacturing 3d floors is based on creating the effect of a three -dimensional image. In this case, the depth of the picture depends directly on the height of the finish layer. This technology provides for the use for laying the coating of special materials: decorative elements (drawings, photographs, natural and artificial materials, which determine the type of floor) and a two -component polymer mixture (hardener and transparent base, which must be pre -mixed).
Preparatory work
For those developers who want to make 3d floors with their own hands, I would like to make a reservation right away that you will need in this case a lot of patience, perseverance and a certain craving for adventurism, since the three -dimensional floor may not work the first time. Preparatory work for pouring volumetric sex must include the organization of forced ventilation, because the polymer substances that will be used for the floor are very toxic, that even the respirator is not able to save. In addition, the temperature in the room should be no less than plus 10 degrees Celsius, thus, in the unheated room, it will not work to make a 3D floor in winter.
Preparation of a photo for a bulk 3D floor
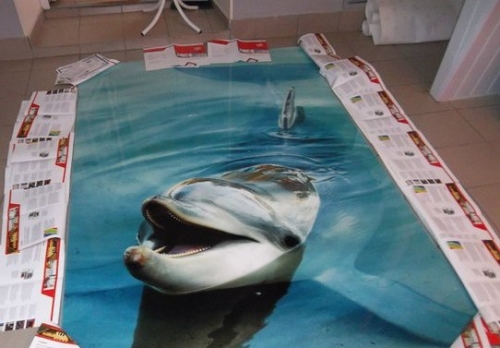
First of all, decide which drawing you would like to see under your feet. Think and select all the little things in advance the presence of shells, glass and pebbles. And then go to the company that specializes in outdoor advertising to make a special canvas in the selected photo, which is called a banner.
Such organizations for the most part have a portfolio with images that are suitable for arranging a voluminous floor. However, the pictures may not like it, so it is better to stock up on your picture. Before ordering a printout of the picture, you should ask what print quality the agency printer provides. Remember, its resolution should be at least 1440 dpi, printing for a bulk 3D floor is recommended to be done on a matte satin.
The manufacture of photographs for a volumetric 3D floor is the main item of expenses in the process of arranging such a floor covering. The price of one square meter of the canvas will cost approximately $ 100. It turns out that making a photo is the most expensive thing.
Preparation of the base
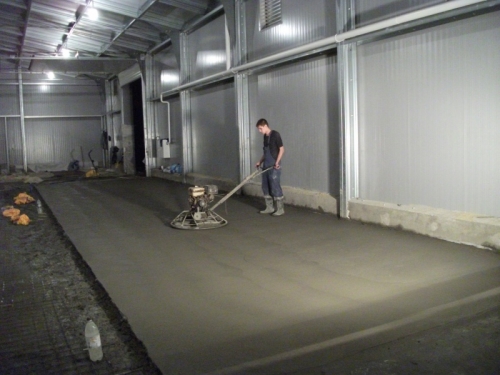
The process of preparing the base begins with the cleaning and leveling of the surface under the bulk 3D floor. It must be cleaned of all kinds of pollution, such as loose materials, sand and fat spots. The base should be dry, the permissible humidity is no more than 4%. If it is planned to settled the bulk floor to the metal surface, it must be thoroughly degreased. Cracks are poured with epoxy resin or sealant, and pits and potholes are sealed with rapidly-drying mixtures made on the basis of quartz-epoxy composition.
Solid surfaces with the aim of opening the porous structure undergo a shot processing, as for the soft surfaces - they are polished. Simultaneously with the leveling, a twist is done. Such a mount is a kind of skirting board from a polymer mixture for a voluminous floor. Next, the surface is exhausted using an industrial vacuum cleaner. Before the primer, you need to sprinkle the base of concrete.
To enhance the adhesion and absorption of the surface, it is recommended to make priming a special primer for bulk floors, which is applied with a roller. The primer will fill the smallest pores, penetrate deep into the thickness of concrete. In this way, it is possible to provide a better connection of a concrete base with the base layer of decorative bulk floor.
And if you think that such a three -dimensional floor will be quite cold for you, then you are deeply mistaken! Paul 3d bulk 3D is quite compatible with technology warm floor. However, a 3D bulk floor with heating is complicated in operation. Although such technologies, despite its high cost, may well become the main source of heat in the house. With a bulk floor, it is quite possible to use both the system of electric warm floor and water heaters.
Applying the base layer
To this stage it is worth moving at least 4 hours after the priming of the surface. A polymer floor or screed can act as a basic layer for a bulk 3D floor. The first option is preferable. It is the polymer gender that is considered the ideal basis for applying the drawing due to its own operational characteristics. If instead of the image you plan to decorate the coating with artificial or natural materials, then the base layer acts as a background, and in this case, the color of its color should be approached especially carefully.

The polymer layer should be applied to the draft base. The main thing is that the resulting base surface is flat. Control the absence of air bubbles in the thickness of the base floor. That is why the base layer must be checked by the construction level.
Application of the picture
After applying the base layer, you can engage in photo or decor. A drawing for a three -dimensional bulk floor can be applied in two methods: using paint or using the pashing of the base layer. Undoubtedly, the use of colors is the most spectacular option, but such pleasure will cost too much. Polymer and acrylic paints are suitable for creating a floor image and resistant to ultraviolet radiation, are expensive.
However, the main part of the expenses will entail the artist’s work. In any case, you should not save money at this stage, because the overall impression of the volumetric sex will ultimately depend on the quality of the image.
Playing the base layer by a pattern is a more common way. The most popular ways for applying the drawing on the substrate are banner fabric with thermal and vinyl tiles. Before applying the image, a primer of the base layer is carried out with a transparent polymers mixed in a proportion of 2 to 1 with a solvent. The primer is applied with a flat brush or roller. The primer consumption is approximately 300 grams per 1 meter square base.
Polymerization of the primer is at least a day. The drawing, which is made on a vinyl self -adhesive film, must be carefully glued to the primed base. When sticked, it is recommended to ensure that air bubbles do not remain between the base and the film. We invite and press the film in the most thorough way.
The drawing, which is made on banner fabric by means of thermal printing, must be glued on the base, as glue using a thin layer of the finish polymer floor. After applying the picture, you can start filling the transparent layer.
Applying a transparent finish layer
According to the technology for the manufacture of a bulk 3D floor before the direct application of the finish layer, the volume of polymer material must be calculated. The consumption of the required amount of material depends on the thickness of the layer that is planned to be done. The thickness is most often at least 3 millimeters. On average, 4 4.5 kilograms of a transparent polymer floor are spent on the processing of 1 meter of square.
The finish layer must be applied in this way:
- In clean containers, mix components of a transparent floor using a drill with a special nozzle.
- A transparent polymer mixture in such a way is to pour a transparent polymer mixture on a coating with the image that is a uniform layer thickness.
- Using the rule, it is recommended to flatter the mixture throughout the floor.
- Then it is worth rolling a layer of a polymer floor with the help of a needle aeration roller for complete removal from the thickness of a layer of all bubbles. Rolling continues until the thickening of the floor components (15 - 30 minutes).
When leaving and rolling the floor, using rollers on the freshly laid floor surface, you can only move in shoes, which has high spikes on the sole. In order for the laid floor to become as strong as possible, according to the technology of bulk floors, 3D in the first days after laying, you can close the floor surface with plastic film or foil. The final hardening time of the volumetric floor depends on the thickness of the coating, as well as on the temperature and humidity in the room.
Protective varnish
After polymerization and final hardening of the finish transparent layer, a protective varnish should be applied, which additionally protects the polymer layer from mechanical or chemical damage and significantly extends the life of the useful operation of your gender. In addition, there are some types of varnishes that can give the flocks anti -slip properties.
Barrow 3D care
Behind the bulk three -dimensional gender treated with protective varnish, it is not so difficult to take care of. The coating has no cracks and gaps where dirt and dust can clog. The bulk floor is able to withstand any load. The voluminous floor will not suffer if you drop a bulky thing on it or put a heavy massive sofa on it.
However, despite the high wear -resistant characteristics and high strength of the bulk 3d floors, scratches appear on them over time. These floors under the influence of time lose their luster. As with any other surfaces behind the bulk floor, you need to regularly take care of.
In order for the floor to retain an attractive appearance for a long time, it is necessary to follow the simple recommendations:
- After pouring, the volumetric floor should be protected with mastic. Repeat this procedure is recommended once every six months.
- If you plan to perform work related to wall painting, water supply or electricity, then you need to protect the coating with plastic, organ or cardboard boxes.
- The legs of chairs, tables and other furniture are recommended to be equipped with felt gaskets.
For daily care for a three -dimensional bulk floor, it is best to take clean water with a small amount of detergent. After that, you should once again wipe the floor with clean water without chemistry. When washing, in no case use the products that contain chlorine, caustic soda, ammonia and acids.
Cleaning the bulk floor implies removal from the surface of dust with a vacuum cleaner or brush, the floor washing with detergents using non -abrasive fabric, as well as applying on the dry and clean floor of the protective layer of wax. With the timely and proper care of the bulk 3D, the floor will retain its qualities for a long time. And if you still damage the coating, it can be repaired in separate sections or completely.
Thus, the uniqueness of the bulk 3d sexes is the possibility of creating any coating design that will correspond to the general style of the apartment, office or public institution. The drawing on the floor can be anything, it all depends solely on your imagination. We hope that with the help of our material, you were able to figure out how to make a 3D bulk floor with your own hands. As you could notice, such a technology for mastering is quite accessible even to non -professionals. And this, in turn, means that you can independently transform your apartment. The floor will look the way you have been dreaming for a long time. The game is worth the candle, isn't it?


