The need for the toilet in the country arises after a few hours of staying on it ....
|
|
Independent installation of suspended ceilings is not always motivated by the desire to save on ... |
Water is the most important source of human life. On the other hand, such ... |
Self -enforcement with your own hands

The bulk floor is a special type of floor screed. Its main feature is that the thickness of the leveling layer can be from 1 mm to 30 50 100 mm. This technology has other names of the flood floor, aligning the screed by a self -leveling mixture and naughty. Another feature of the bulk floor is the ability to make a finished mixture to be self -made, i.e. spread in an even layer, without leaving cracks, gaps, height changes and air bubbles. It is the property of forming an almost perfectly flat surface and determines where a self -enlightening bulk floor is used. Basically, this is the finish leveling of the surface before laying such flooring as ceramic tiles, laminate, linoleum, carpet, parquet board and piece parquet. The flat surface of the floor not only facilitates the laying of finish flooring, then to a large extent determines the strength of their consolidation and durability in use. There are also self -enforcing mixtures that are used to arrange the finish coating. These are the so -called glossy and matte bulk floors, 3D floors that can imitate natural materials, stones, and also have multi -colored drawings. Working with such mixtures is not so complicated, so you can safely make a self -enforcing bulk floor with your own hands.
- Materials and tools for filling the bulk floor with your own hands
- Preparation of the foundation for a self -powerful bulk floor
- Installation of lighthouses
- Self -enhanced bulk floor device
- Self-enforcing bulk floor: video instruction
Self -leveling floors are durable, exceptional strength, wear resistance and resistance to mechanical damage and loads, they are also not afraid of moisture and dust. The assortment of self -enforcing mixtures is huge, they differ in the thickness of the layer, strength, drying time and crack resistance. You can apply a self -enforcing bulk floor on the following grounds:
- Concrete floor, reinforced concrete floor slab;
- Black cement-sand screed;
- Old bulk floor;
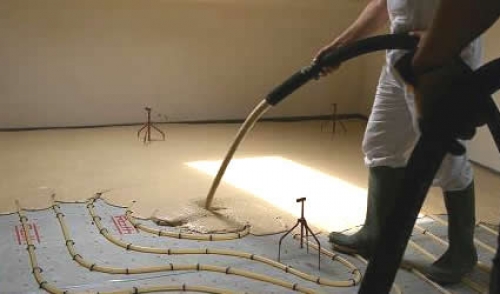
- Warm floor system;
- The wooden floor, chipboard and GVL are used as a basis with some restrictions, like expanded clay.
Working with a self -burning mixture is easier than with a conventional screed solution. It is easier to knead, is easier to apply and level, dry faster, and in the end it turns out a more even and strong coating. It is difficult to make a poor -quality bulk floor, but it is possible. As in any business, there are also nuances in working with self -combating mixtures, the non -compliance of which can lead to cracking of the coating. Next, we will consider the detailed technology of floor filling, paying special attention to the nuances.
Materials and tools for filling the bulk floor with your own hands
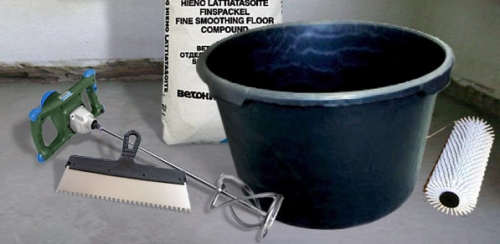
For independent filling the floor with a self -burning mixture, some tools and materials will be needed:
- Bags with a dry mixture. Please note that the price depends on a self -enlightening bulk floor on the composition of the mixture and thickness of the future layer. For example, a self -enlightening floor on a cement -based Boden Zement Final costs about 15 cu For a bag of 25 kg, fast -hardening cement bulk floor costs 10 cu. For a bag of 25 kg, the cheapest is a cement -based moist of up to 7 cu for 25 kg.
- A primer of deep penetration or adhesive primer concrete contact.
- Squirrel on a cement basis or a repair solution for sealing large cracks.
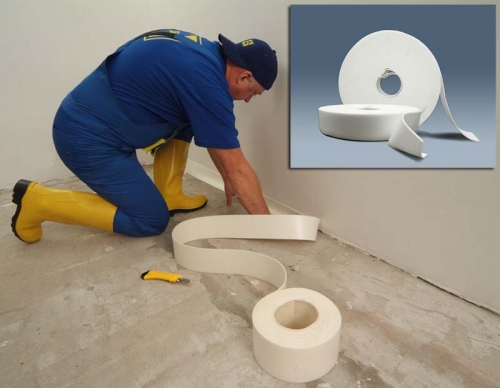
- Carcial dampfer tape.
- Plastic dowels and wood screws.
- Bucket 25 40 l.
- Drill with a mixer nozzle.
- Spatula 15 20 cm wide.
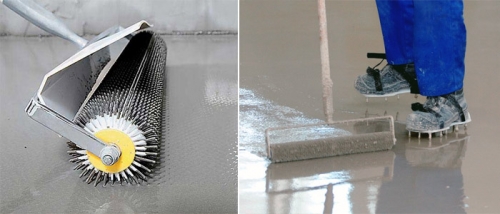
- Needle roller.
- Aluminum rule 2 m long.
- Bubble or laser level.
- Cross screwdriver (for wood screws).
- A wide brush, a roller and a baton for a primer.
All of the above can be bought at any construction store or supermarket. Almost all materials are useful for further repair.
Preparation of the foundation for a self -powerful bulk floor
When arranging a bulk floor, the preparation of the surface for it is the most responsible and important stage. If you do not follow the difference in heights, the level of moisture of the black floor, do not remove oil spots from the surface, then all further efforts can be useless. Therefore, pay close attention to the preparation and observe the technology.
Concrete floor
To prepare the base, which is a concrete floor, a reinforced concrete floor slab or a black concrete screed, the following must be performed:
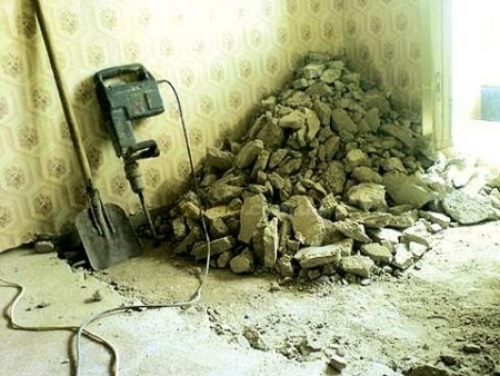
- Old flooring are removed, skirting boards, doors and door platbands are removed. If the surface of the concrete floor was once opened with paint, water-soluble self-leveling mixtures, mastic, or items of glue remained on it, everything must be removed.
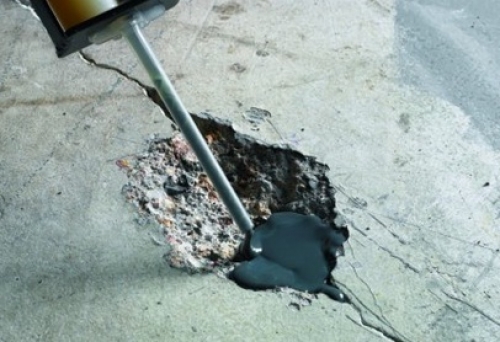
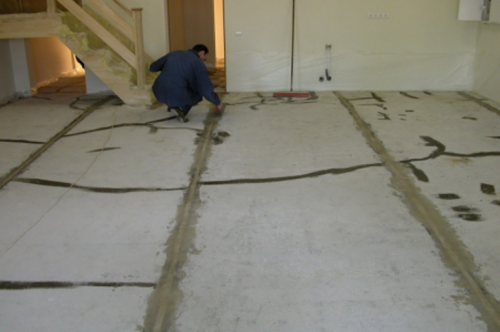
- If there are cracks on the concrete base, they must be opened with a triangular scraper.
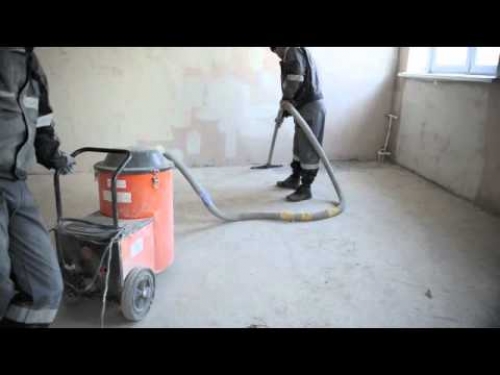
- Then you should clean the floor from the crushed concrete using a metal brush, remove all the garbage, dust and concrete particles with a construction vacuum cleaner or, in extreme cases, with a broom and a damp cloth.
- Next, the horizontal floor level is checked using the rule and level. A two -meter rail or a rule is installed on the floor and so uneven are revealed. The gap between the floor surface and the rule should not exceed 2 mm. Large changes in heights, cracks and potholes must be sealed with a repair solution or putty.
- On the walls of the room there is a level to which a self -leveling bulk floor will be poured. If the walls were previously plastered, it is necessary to remove the plaster to the level of 25 mm above the level of the filling of the mixture.
- The level of humidity of the concrete base is checked. If it is above 4%, you must first dry the base and only then continue to work.
Important! If the black concrete screed or monolithic concrete floor was recently flooded, then you can equip the bulk floor only after a month, when the concrete takes maximum strength and dry enough.
- The floor surface must be degreased and all oil spots that could accidentally appear there.
- At this stage, you can close all the cracks, cracks and potholes. Large height drops are best sealed with a repair solution based on cement, and small cracks and gaps with putty or glue for ceramic tiles.
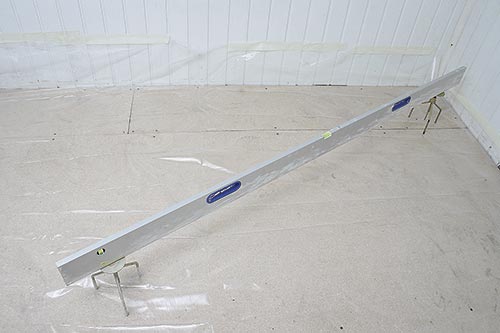
- The last time the horizontal level is checked by a long rail or rule.
- A damper tape is glued along the perimeter of the room, at the level of filling the mixture.
Before starting further work, the surface of the concrete floor should be dry, even and without cracks and potholes.
Wooden floor
The danger of using a wooden floor as a basis for filling the bulk floor is that a liquid mixture can seep through the cracks between the boards. Also, if the wooden floor is faulty, creaks, then after filling the municipal mixture, the problem will not disappear, or may even worsen. That is why the wooden floor must first be carefully checked for serviceability, inspect and repair. Thereafter:
- Remove the baseboard and doors, platbands from the doors.
- Remove all the old covers of the wooden floor varnish, wax, glue or paint using a grinding machine.
- Open all the visible cracks and clean it with a large sandpaper.
- Remove all dust and garbage with an industrial vacuum cleaner or a broom and a wet rag.
- When the floor dries after wet cleaning, it is necessary to check its humidity. It should be no higher than 10 %.
- The next step is to degrease the surface.
- All cracks between wooden strips and cracks are sealed with putty based on glue.
Please note that all repair solutions should dry before filling the self -leveling mixture.
Installation of lighthouses
It seems to many that the use of self -enforcing mixtures does not involve the installation of lighthouses, as if the solution itself is spreading into a flat layer and occupies all the necessary area. In fact, everything, unfortunately, is not so rosy. As reviews are shown to a self-enlightening bulk floor, a solution, although more fluid, in comparison with the usual solution for cement-sand screed, is still not spreading with an even layer without outside help. Well, for example, imagine that you have poured a can of mayonnaise on the floor, because it will not grow up with an even layer, as well as self -combating mixtures. Therefore, if you want a really flat floor, install the beacons.
The room must be marked so that the distance between the lines of the lighthouses does not exceed 1.8 m so that the rule can be easily leveled by installing it by installing it on the beacons. The lighthouse closest to the wall should be located at a distance of 50 cm from the wall.
Self -tapping screws, metal pipes or square profiles guides for plastering can be used as lighthouses, and you can make beacons from a repair cement mortar, then they will not have to be removed. Consider this option:
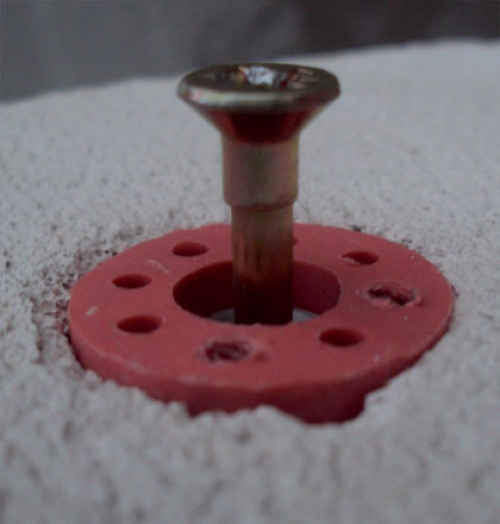
- First, places under the beacons are marked, then holes for the dowel are drilled at a distance of 2 m from each other.
- Self -tapping screws are inserted into the holes. A 2-meter rule or level is installed on top of the screws and an even location is checked. By twisting or twisting self -tapping screws, the location of the rule and the upper level of self -tapping screws are regulated, which should coincide with the level of filling the bulk floor marked on the wall.
- All necessary screws are established in the same way. A pair of screws should easily become a rule.
- After the completion of work related to the drilling of the concrete floor, all dust is swept, or the floor is vacuumed.
- Before you continue to install the beacons, it is necessary to apply a primer that increases adhesion with the base. This stage is described in detail in the next section.
- First you should grease with oil that line of the rule that looks down when it lies on self -tapping screws.
- Then, a repair cement solution or putty is kneaded and it is filled with the entire space between the screws. A flat strip of solution under the rule should be obtained.
- On top of self -tapping screws, a rule is established, which presses the solution and forms an even upper line.
- After solidifying the solution, the rule is removed.
- Self -tapping screws are twisted in dowels.
As a result, smooth paths from the solution that will serve as beacons are obtained. In fact, there are mixtures for which the beacons do not need to be installed, in any case, the manufacturer states. Keep in mind that on the rocking of the room you must put a barrier in the form of a wooden rail so that the mixture does not flow outside the room.
Self -enhanced bulk floor device
After preparing the surface and installation of lighthouses, you can start filling a self -burning bulk floor. The technology of filling and preparing the mixture has a number of nuances that should be paid to.
Applying a primer to the base of the floor
To close all the pores in a concrete or wooden base, improve the spreading of the mixture, increase the adhesion of the solution with the base and reduce the likelihood of the appearance of bubbles, the surface of the floor must be loaded. The temperature in the room in the process of soil work should be constant, in extreme cases, a decrease in temperature is allowed. If the temperature rises, the appearance of bubbles is possible.
Important! For priming highly porous bases, such as wooden, high -skinned primers are used.
Grinding is carried out in two stages (2 layers). You should not save on a primer, otherwise a self -enforcing floor will have irreparable flaws and you will have to remove it:
- First, the primer is stirred until a homogeneous consistency.
- The first portion is poured into the bath.
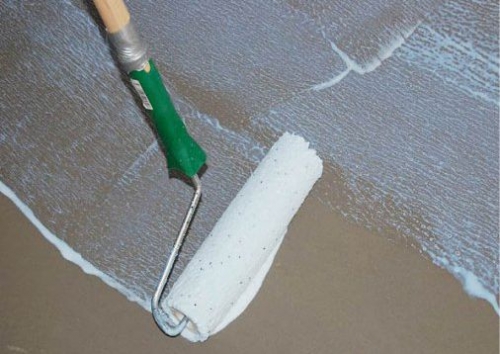
- A roller or brush is applied to the floor surface. If possible, it is better to use an airless spray.
Important! After applying the first layer, it is necessary to observe how the primer behaves. If there are bloating and bubbles, then the floor was not dry enough. In this case, the floor should first be dried and then continue applying the primer.
- When the first layer of soil dries, the second layer is applied.
You can continue work only after the soil dries. Experts recommend not waiting for more than a day, but to continue work after 4,20 hours.
Preparation of a bulk plow mixture
The time of solidification of mixtures for the bulk floor is quite small up to 1 hour, so it is necessary to prepare the solution only before the start of work. The required number of people should also be calculated. For example, one person will cope with the floor filling in the standard bathroom, but for the floor in the room you will need 2 3 people. We take a bag of mixtures, for example, a self -leveling floor of Bergauf Easy Boden. Please note that the instruction for your mixture is a priority compared to the below below. Be sure to read the recommendations of the manufacturer.
Important! The main feature of the self -burning bulk floor is that to prepare the mixture, it is necessary to fill the dry component of the mixture into the water, and not vice versa.
Preparation technology for a self -leveling mixture:
- The required amount of water, which is indicated on the package, is poured into the bucket or other container.
- A dry component from the bag is filled up.
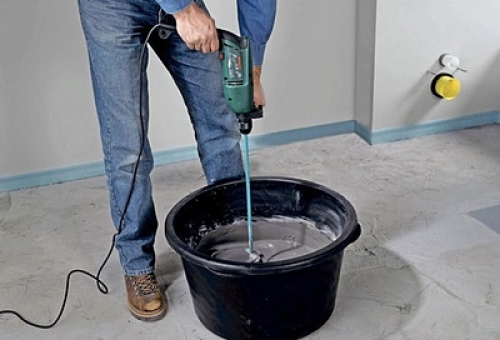
- Using a drill with a mixer nozzle, a solution is placed. The batch time is 10 m with breaks 2 3 minutes. A homogeneous mass should turn out.
Checking the mixture mixture:
- You will need a plastic ring with a diameter of 5 cm. You can use a lid from a deodorant or air freshener. The bottom is cut off from the lid to make a ring.
- The ring is installed on an even smooth surface, better glass.
- The mixture is poured inside the ring, then the ring is removed.
- Based on the results of observations, conclusions are drawn. The mixture should work if a spot is formed 15 16 cm well. If the mixture spreads less, then you need to add water, if there is more dry component.
It is extremely important not to overdo it with the addition of water. If there are too many of it, then cracks or stratification may appear in the bulk floor, and the floor will also slow down.
Applying a bulk mixture
During the application of a self -burning bulk floor, it is necessary to observe the temperature and humid regime. The temperature in the room should be from +5 to +25 C, the temperature is considered optimal +15 - +25 C. The humidity should not exceed 80 %, otherwise it is likely that condensation will appear on the surface of the floor.
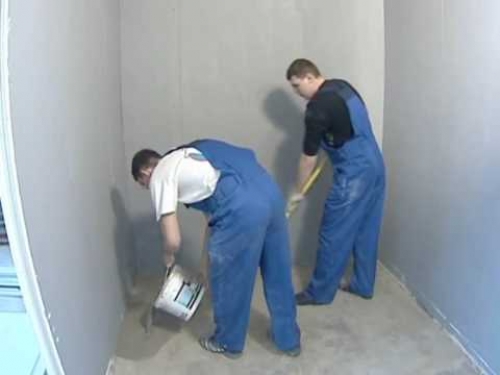
Please note that the mixture begins to harden already 40 minutes after cooking, so the gap between the fills should not exceed 10 minutes. The floor in the entire room must be poured without breaks. So that the prepared mixture does not dry out, it must be kneaded in parts depending on the performance of the workers' brigade. It is advisable for beginners to knead a little.
Filling a bulk floor:
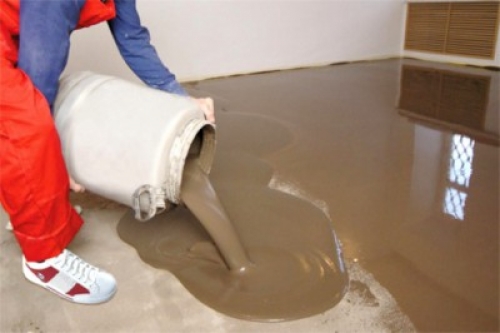
- Pouring starts with a far from the door of the corner. Next, you need to move towards the door. Pouring occurs on cards formed by lighthouses.
- After pouring each portion, the solution is leveled by the rule according to the lighthouses.
- If the beacons are not used, then the solution is leveled with a spatula and stretched out by a rocket.
- The needle roller rolls throughout the bulk floor to remove air bubbles.
- The next strip of filling should be parallel to the previous one. All other work is performed according to the algorithm: filling the mixture, leveling, rolling, removing air with a needle roller.
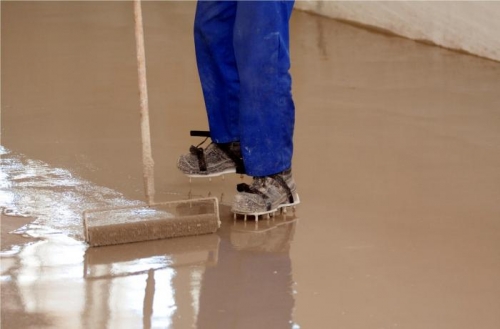
Important! To walk on the floor, flooded with a self -burning mixture, the so -called spikes with spikes, which can be worn on top of ordinary shoes, are used. Walking in paintings also helps to remove air bubbles from the mixture.
After pouring a self -burning bulk floor, it is necessary to wait for its drying. By evening, a slightly frozen floor can be covered with plastic film so that water evaporates more slowly. So less likely to crack the surface. The time of hardening the bulk floor is about 3 days: in a day you can walk on it, but fully used only after 3 6 days. The finish flooring can be laid on top only after 5 6 days, when the mixture completely dries and hardens.
If pipes or profiles were used as beacons, they must be removed 3 4 hours after filling the mixture and fill the voids with a new solution of a self -burning mixture. In the considered case, the beacons are part of the general design of the leveling screed. If a warm floor is equipped on top of the system, then it can be connected no earlier than 7 10 days later. If a self -burning bulk floor was flooded as a finish coating, then its surface can be opened with varnish.

Great article! To me, how
Great article!
As a girl, everything was extremely clearly described to me!
Thank you!
In great detail. Steel became clear
In great detail. Incomprehensible questions became clear.
i learned about the neighbors on
i learned about the neighbors on the next day of the loggia how to wash glass and plastic