In terms of design features, any building consists of several ...
|
|
Keramzit personifies real salvation when choosing a simple and durable ... |
Laying tiles ends with grouting seams that have an attractive appearance and ... |
DIY parquet flooring
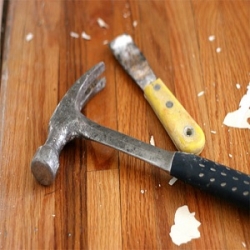
The parquet floor with proper care can maintain its appearance for many decades. However, sooner or later, even the highest quality and strongest wood can dry out or soak, cover with scratches and chips. In addition to these defects, the parquet also sins with a creak, which most often appears due to incorrect laying of the dies or drying them. How to return his former beauty and freshness to the once luxurious parquet? What methods of eliminating defects exist? We will find out right now.
Content:
TOP-4 of the most popular parquet defects
- Examination of dies
- Swelling of the dies
- Creak
- Abrasion of the upper layer
Examption of the dicks from the surface of the base
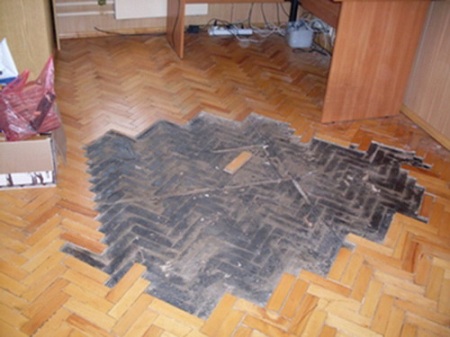
Very often, the parking lot repair may be needed if its individual dies jumped out of their nests. When walking on such a parquet, a knock and creak is heard, which means that the coating is whole and not requiring repair will no longer turn.
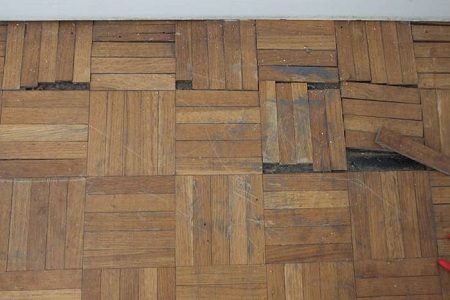
There may be several reasons for the appearance of such a defect:
- high humidity in the room
- poorly -quality parquet glue
- errors made during installation.
To eliminate the shortcomings, the type of base should be determined, because, depending on whether it is concrete or wooden and the repair method will be determined.
Concrete base
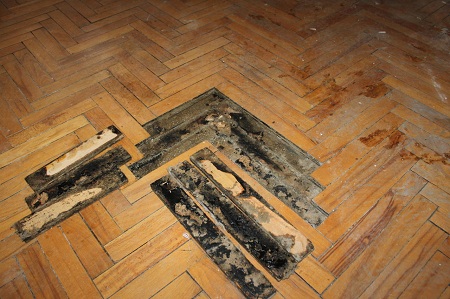
Remove defective dies and carefully clean their nests from garbage, dust and old mastic. The remnants of the glue is best removed with a solvent so it will be faster.
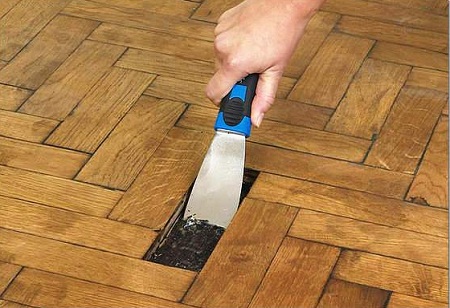
Next, grind the base with a regular primer for concrete and dry it. If the bar has a normal appearance, then apply glue on it and insert into place. If the plank has lost its former attractiveness and you do not want to see it anymore, replace the dick with a new one. By the way, you can glue parquet planks on the old mastic if it is a little warm with a hairdryer or heater until it reaches a viscous state.
Wooden base
The floor repair technology from a parquet board on a wooden basis is similar to a similar procedure on concrete, however, there are also nuances here.
Having taken out the shattered dies, clean the nests of garbage and the remnants of glue. Then smear them with a carpentry or casein glue so the planks will be much more reliable to sit in their places. Put the dies in the nests and, with the help of the hammer, fill them into the edge, and cut the hats of sticking nails with pliers and drown 2-3 mm below the surface of the plank.
Fill the formed seizure with carpentry glue and wood sawdust. By the way, sawdust can also be useful if the cracks formed between the planks. For the manufacture of putty, a solution of sawdust, Portland cement, water and carpentry glue is used. The proportions are as follows: sawdust 5 parts; glue 2 parts; Portland cement 5 parts; Water 14 parts. It is necessary to apply the mixture with a rubber spatula, and after it dries, the surface of the parquet floor is completely cycle and varnished.
Swelling of the dies
A similar flaw can occur due to:
- moisture falling under parquet
- increased level of humidity in the room
- high moisture content of parquet dies
- the mistakes of the master during the installation of the parquet floor (laying the parquet on the raw base, the lack of vapor barrier and the gaps between the walls and the floor plane).
It is possible to eliminate a similar defect in different ways, and the use of a particular method depends on the state of the parquet.
Method 1. Parquet dies swelled in one or two places, their bloating is small.
If there are practically no special visible defects, but there has already been a tendency to their appearance, then the bloating of the dies can be eliminated by drying the moistened area with the simultaneous application of the load in the form of any heavy object with an even base. Do not forget about the gap between the wall and parquet: if it is practically none or it is present, but its width is excessively small, then it is better to cut the extreme rows of parquet.
Method 2. Bloating and warping is too noticeable, the defect is observed everywhere.
When the number of swollen dies exceeds 10 pieces, and their localization is concentrated mainly in one place, the first method here will no longer help too much extensive area of \u200b\u200bthe defeat.
In this case, you will have to disassemble the part of the floor that has been deformed and thoroughly dry it. After that, lay a new parquet, and leave the old dies for further minor repairs, of course, if they have not lost their shape.
Sliding parquet
There are many reasons why the parquet creaks. This is a poor -quality drying of the dies before sale, and drying of the planks due to their age, and violation of the styling technology, and the friction of the dick on the nail, which it was nailed to the base. In general, a creak may even appear on a new parquet, what can we say about the one that has been lying in the room for more than a dozen years.
The very first thing to do to prevent the occurrence of a creak to measure the humidity of the dicks when buying. If this indicator is higher than 7%, then you should immediately refuse to purchase such a parquet is not necessary, which means that there is a high probability of its shrinkage after installation.
And if the creak nevertheless arose and the reason for its appearance is not at all in a low -quality parquet, but in an incorrectly clogged nail, friction of the dies against each other or in the flooring under the finish coating, then you can use the following scheme.
- Find the source of the creak (that dick that makes an annoying sound);
- Fix the rivets with nails, and drown their hats in wood;
- Lay the cracks and potholes with putty for parquet (wood);
- Sub the small cracks and gaps between the dies with a mixture of carpentry glue and sawdust;
- Pull the site and cover it with a fresh layer of varnish.
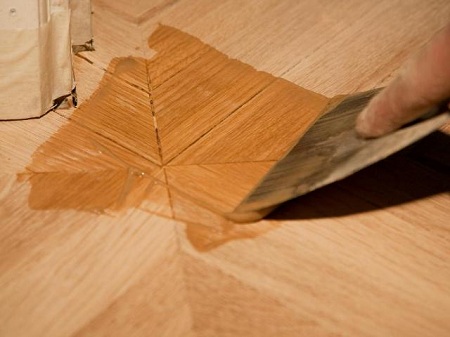
If such an event seems too tedious to you, then you can use a simpler method.
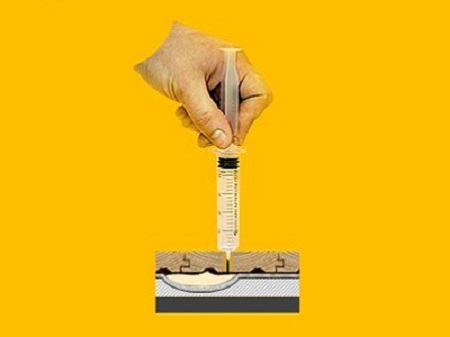
- In the place where, in your opinion, a creak occurs, drill a hole with a diameter of 20-25 mm.
- Using a medical syringe, pour a cement mortar or warmed bitumen into the hole.
- Close the hole with a traffic jam, press it with a heavy object, and then paint over a paint suitable for the color of the parquet.
Another way to eliminate the creaking of the parquet laid on the plywood base implies the use of ordinary cardboard. Having taken out the dick, lay the cardboard in the nest, and already lay the plank on it, smearing it with glue with glue. For greater reliability, fix the structure with nails.
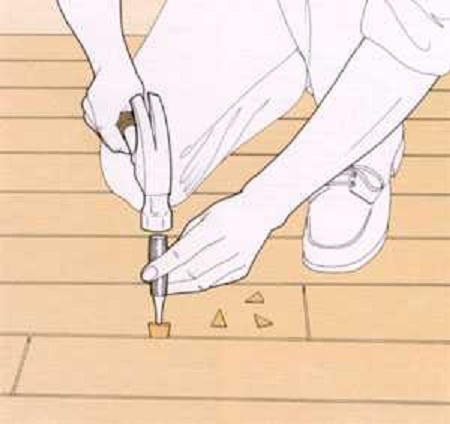
In addition, you can use this method: between the creaking floorboards, drill a hole at an angle of 45 degrees and drive a wooden pin moistened in the carpentry glue into it. Under the pressure of the pin, the dicks will disperse and will no longer come into contact with each other. The creak will stop.
However, there are situations when the parquet creak is caused by more serious reasons, such as the loose fit of the plywood to the concrete base, an uneven screed or violation of the technology of laying a black floor. In these cases, it is impossible to eliminate the creak with simple methods described above. We will have to completely dismantle the parquet, eliminate the base defects and only then lay the finish coating.
Abrasion of a decorative layer
Parquet floor is a fairly capricious coating that requires a respect for itself. However, even the most scrupulous owner will sooner or later encounter the problem of abrasion of the upper lacquer layer or the appearance on the floor of the floor of mechanical damage in the form of scratches and other troubles.
In order to return the parquet to the previous splendor every five to six years, it is necessary to carry out its cycloving and varnishing. True, a few more manipulations need to be performed first.
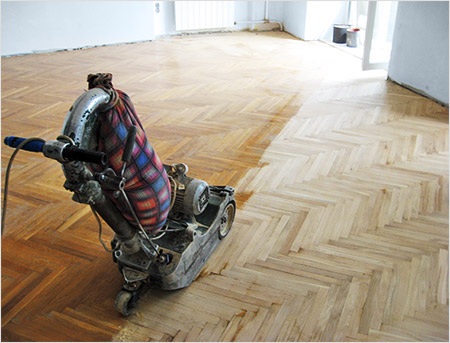
Firstly, you will have to get rid of defective dies and creaking floorboards (these events are already described above).
Secondly, it is necessary to thoroughly subside all the gaps between the dies with a cement-opial solution.
Only after that you can proceed to the parquet cycle, which is best (and easiest) to carry out using a special grinding (cycles) machine. This device is quite expensive, so it’s easier to rent it or use the services of an experienced master who will come to your house with his device.
Cycles It is carried out in four stages:
- Rough grinding using coarse disks. At this stage, the irregularities of the floor are eliminated and the old varnish is removed.
- Putting the gaps. Perhaps, after grinding between the individual dies, the cracks will remain, which will have to be sealed with the same cement-appropriate solution.
- Thin grinding. At this stage, the floor surface is leveled to an ideal state by an electric floor. Having polished the parquet and cleansing it of dirt, a layer of special primer or ordinary nitrolak is applied. After that, the composition must immediately be redrawn with a wide spatula, otherwise it will harden and you will have to carry out the procedure again. A dried primer is polished with sandpaper with small grain paper, and after 20-30 minutes, the second layer is applied. Thus, 3-4 layers of primer with a frequency of half an hour are applied.
- Multilayer varnishing. Before applying the varnish to the parquet, it must be thoroughly mixed, and then give 10-15 minutes to parting (so that air bubbles come out). You need to cover the floor with a varnish with a roller made of microfiber or foam rubber, while trying not to press it much. All intermediate layers are polished by sandpaper. This is done so that each subsequent layer can catch on the previous one. The first walk along the updated parquet is allowed 4-5 days after applying the last layer of varnish.
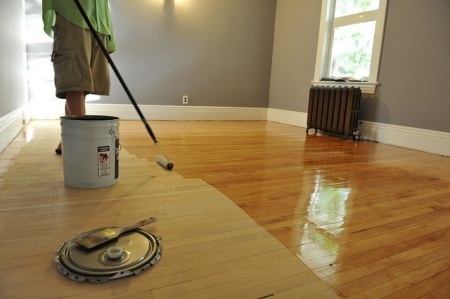
In general, the repair of the parquet floor with your own hands is not so complicated, although it can be called light with a big stretch. Proper care, careful operation, thorough selection of detergents and a great desire to have a cozy natural coating in the house, the key to a long and impeccable service of your parquet. Take care of him!
