The technology for creating a floor hidden hatch includes several stages: choice and ...
|
|
The arrangement of plywood floor is primarily by strength and stability before ... |
The history of porcelain tiles and the dynamics of presence in the market. ... |
How to install floor skirting
In order for the room to acquire a finished aesthetic look, it is important to install a floor plinth. Installation of the skirting board is the final stage of flooring, and this procedure is necessary only after all finishing work is over. You can do such a job with your own hands without resorting to calling specialists from the outside. To do this, you just have to find out how to correctly install a floor skirting board.
Content:
- Types of floor skirting boards
- Purchase of floor skirting boards
- Installation of floor skirting boards
Types of floor skirting boards
To begin with, it is worth remembering that floor skirting boards are wooden and plastic. The most chic version of the skirting board from cherries or oak wood, which is the most worthy frame for expensive parquet. A more economical solution of a spruce massor, which is covered with veneer from noble wood, as well as plastic. Moreover, the very latter gradually displaces an environmentally friendly tree in the finishing materials market.
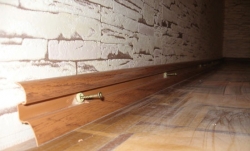
Wooden plinth
By wooden skirting boards should be meant an venerable or massive baseboard. A massive skirting board is made from a whole piece of wood of a valuable breed. A wooden baseboard is characterized by a long service life, the ability to maintain the original appearance and the possibility of restoration for a long time. However, it has a high cost (except for pine products) and requires perfectly even walls when installing.

The veneered plinth is made on the basis of an inexpensive coniferous wood of wood, which is then covered with a thin veneer of more valuable material. The advantages of this product are as follows: low price and the ability to install with special fasteners. However, in this case there are negative moments, for example, strict observance of the temperature and moist regime, since the coniferous rock is unstable. In addition, it is not recommended to install floor skirting boards in a room with a warm floor.
Laminated plinth
Laminated floor plinths are made on the basis of wood-fibrous plates of medium rigidity. A similar product in structure is similar to the structure of the laminate: on top of the MDF, paper with a certain pattern is applied, which in turn is covered with a layer of melamine, which prevents the image of the image and protects from the physical effects of the traces from the blow and scratches.

Such a skirting board is relatively inexpensive, convenient to install, manufacturers offer a huge number of shades to choose from (the corresponding skirting board is made for each type of laminate). True, laminated skirting boards are intended exclusively for a laminate surface, afraid of moisture and have not such high resistance to mechanical damage as wooden skirting boards. This type of skirting board is not too cheap, and the dimensions of floor skirting boards covered with melamine have limitations in height of a maximum of 60 millimeters.
Plastic skirting
Plastic skirting boards is the most economical and easy -to -install variant of the skirting board. Also, one cannot help but recall that this skirting board is suitable for any walls (even very crooked), unlike the two previous options. Under such a plinth, you can conveniently hide the wiring. The plastic plinth is distinguished by an absolutely smooth surface, perfectly tolerates processing with detergents and cleaning products of household chemicals.

However, at the same time, plastic floor skirting boards look simpler and less respectable: explicit monoton is the installation of such a skirting board on an artistic parquet or floor from a massive board. When used, there is a need to install plugs and corners, which in any case will stand out from the total decor. In relation to the size, there are such restrictions: 45 millimeters maximum height.
Purchase of floor skirting boards
This insignificant detail, at first glance, is actually multifunctional. It serves to protect the lower base of the wallpaper on the wall from spray of water during wet cleaning and the formation of stains from contact with a broom, acts as an obstacle from penetration to structural elements that are located under the floor, spilled liquid, does not give dust and garbage to enter the gap between the gap between Wall and floor, may contain special channels for laying wires for various purposes.
To find out how many floor skirting boards are needed, you should measure the size of the room. It is best for this purpose to use the state act for housing, which indicates the size of all rooms. If this document is not, just measure the width and length of the room with a tape measure, subtract the length of the door and heating radiator.
You need to add 1.5 meters for the reserve to the resulting result and round the larger direction. Then you should divide the final number by 2.5, and you will receive the number of planks that need to be purchased. 2.5 must be divided by because there are so many in meters the standard length of the plinth plank.

The height of the baseboard usually needs to be selected based on the area of \u200b\u200bthe room and the height of the ceilings. The higher and larger the room, the higher floor skirting boards need to be purchased. Otherwise, they will simply be lost and will be completely invisible.
The color of the floor skirting board is customary to choose the identical color scheme of the floor. In this case, there will be completely no risk to make a mistake with the choice of tone, since the skirting board is not striking, but simply merges with parquet. There are other methods, for example, the choice of skirting boards by the color of the door platbands, or the middle color between the walls and the floor.
White skirting boards look stylish, which also optically increase the room. However, when choosing the last option, it must be remembered that on a white background all the dirt is clearly visible, and therefore the care of a white skirting board should be careful.

When buying a plinth, you need to pay attention to the number and color of the party, all the strips should relate to one batch. In the store you may not immediately notice the difference in shades of floor skirting boards from different parties, but in the apartment in daylight, a multi -colored skirting board immediately catches your eye. In addition, there is little chance to subsequently find the same party, so we recall once again - take floor skirting boards with a margin.
In the case of buying plastic strips, in addition to the floor plinth itself, you will need connecting elements (every 2.5 meters), end left and right plugs, external (if there is in the room) and internal corners. All accessories for the installation of floor skirting boards should also be from one batch, in extreme cases - from one manufacturer. Necessarily all butt elements must correspond to the color of the skirting board. When choosing a fittings, check the docking of the plinth plank with angles and connectors: there should not be cracks and gaps, the skirting board should be easily included.
Installation of floor skirting boards
Before installing the floor skirting board, prepare the following tools for work: measurements roulette, marker or pencil, drill, screwdriver, saw, hammer, consumables (screws and dowels). Also, you must first remove all the garbage in the room, because even the smallest pebble can provoke an uneven mounted skirting board.
Plintus cutting
Pruning of skirting boards is a very difficult task, which requires a responsible attitude and accuracy in conducting calculations. Skirting boards of a certain size are cut off in accordance with the length of a particular section of the wall. First you need to cut off large details, and only then move on to the small ones. Each workpiece should be cut off with a margin of 5 centimeters.
When cutting the skirting board, take into account the angle to which the walls converge. Typically, the walls condendicular, and this is a right angle, which is ninety degrees. In such a situation, the angle of cut of the floor plinth should be 45 degrees. If the angle between the walls, which is quite rare, should be divided in half with a conventional line the distance between the intersecting walls and the slots of the skirting boards should be made along this line.
It is categorically impossible to cut the baseboard by eye. To cut the floor skirting board, it is customary to use a special device called the stamp, which allows you to cut the product at the required angle.

Put the plinth panel in such a way that the side that will touch after the installation of the floor is pressed against the wall of the tool, and the side, which will be in contact with the wall, was on the basis of the cubble. Then, using a hacksaw, cut the desired part, while you need to focus on the slots on Stusl. Cut the next panel similarly, only in mirror reflection.
Sometimes there is a need to attach the floor plinth to the arched walls. Therefore, you need to think about creating a curved skirting board. Crinoline skirting boards are made by cutting short segments at the required angle. In this case, you need to strictly follow the segments sequence, which allows you to obtain a sensation of the integrity of the baseboard and maintain the natural color of the texture of the product.
The marking of the room
The marking of the room always needs to start from the corner or door. Take the plinth bar and set the plug or angle on it, attach it to the corner of the room, pressing your finger, step back towards the window of 5-6 centimeters: the first hole will be located here, mark this place. If your room has perfectly even walls, the next hole will be at a distance of 40-45 centimeters.
However, often the walls leave much to be desired, so the skirting board should be fixed in the places of gaps. Put a finger at a distance from the first mark of 40 centimeters for this, notice where the gap between the skirting board and the wall will begin, return towards the corner by 5-6 centimeters and apply a new mark. Thus, you can get rid of unwanted gaps. You need to repeat this procedure until you mark the entire room.

If you bought a skirting board with a secret niche intended for a cable, you need to take the plinth in the middle of the plank in the middle of the bar and, starting from the corner, carefully pull it to the side. So you divide the baseboard into a decorative panel and mounting tape. The skirting board, which has at the ends of the elastic band, will close all the gaps, so immediately apply marks only at a distance of 40 centimeters. There are already holes on the mounting tape, so the marks should match them. If there are no holes, they can be pierced with a screw or awl.
Substitution mount to glue
The choice of appropriate glue for gluing floor skirting boards, first of all, depends on what surface you will fix the product on, and what material they are made of. Most often, plinths are glued with mounting glue based on acrylic, polyurethane and silanic polymers. Such adhesives are absolutely safe to use, do not smell and are suitable for work outside and indoors.
Polymers -based adhesives are almost universal, because they differ in high adhesion to most materials, for example, to wood, wood materials, mineral foundations, minerals, stones and various types of metals. Such adhesives and sealants have a large breakdown after hardening, become resistant to mechanical stress, temperature and moisture.
Before work, you should not rush to glue the skirting boards to the walls. First, you need to measure everything and place the strips without glue, as shown in the video about the installation of floor skirting boards. After fitting and trying on, these elements must be glued to the selected places. The advantage of the installation of plastic skirting boards using liquid nails or mounting adhesive is the absence of drilling. This means that after the end of the work, dust and dirty work will be absent to remove it.
Such high -quality compositions will provide durable and strong fixation, so you will not worry about deformation and peeling of skirting boards for many years. The disadvantages of this technique are the one -time use of plastic skirting boards. They will no longer be able to use them again, since the dismantling procedure worsen the appearance of the products. You also need to be able to work with liquid nails or glue and dose its number. At the same time, try not to smear the walls and flooring with glue.
Mounting a skirting board for a Klyaimer
The most common type of installation is the mounting of the skirting board using a Kleimer. Remember that all Kleimer are different. Manufacturers when releasing a floor skirting board make a castle on it for an individual noun, so such products should be bought complete with skirting boards.
The installation of skirting boards on the Kleimer is quite easily carried out. First, the Kleimer is installed using the dowel of the rapid installation. Adhere to the distance from one to the other fasteners of about 40-50 centimeters. When you do this work, the baseboard will easily click on the mounted mount. At the same time, you need to install special strips and corners.

The corners are two internal and external. The internal corner serves to connect the plinth on the internal coal of the room, and the outer corner of the baseboard connects at the outer corners. The connection is also used by means of a plug.
But the installation of a floor skirting board on Kleimer also has its drawbacks. In the apartments and houses of old buildings, the walls are loose and do not really hold the dowel of quick installation, so after snapping the skirting board on the Klyaimer, he may fall off the wall. Kleaymer, with uneven walls, should be set often so that the cracks between the skirting board and the wall are not visible, which makes the workflow make it difficult.
Mounting on the dowel
In order not to fool their heads and speed up the procedure, people refuse to use the Kleimer in favor of the dowel of quick installation. To begin with, a hole is drilled in the wall, a cork is installed in it, and then the installation itself is made.
Put the drill on the floor and drill. It is best to make a marker on the drill so as not to break through the wall. The mark needs to be made more than a couple of millimeters than the length of the dowel. Then remove dust from the drilled holes with a vacuum cleaner and stream into the holes of the dowel. Attach the mounting tape and, starting from the corner, tighten the screws. It is better to use a screwdriver for this, but the screws are not recommended to fully tighten if you do not have sufficient experience in using this tool. Shurovyrt can easily damage the plastic or bolt head, therefore, it is better to squeeze the screws with the help of a conventional screwdriver.
If, after twisting, the gaps occur, you need to loosen the screws on the right and squeeze them on the left. When unscrewing and twisting screws by 0.5-1, you can achieve the necessary density of the fit of the floor skirting board. If you use a whole skirting board, you should use screws with a secret head - a special lid that covers the bolt hat. You can’t tighten the bolts much, otherwise, otherwise dents will appear.

Before twisting the last screw, put the angle or connecting element. The next segment must be fixed in the same way. To close the protective panel, so as not to break it, you need to follow the following instructions: attach the edge of the protective panel at an angle to the edge of the mounting tape, press the thumb to the click, draw it along the protective panel with your hand, pressing it a little and controlled so that it enters the groove evenly . If the plinth panel is not included, you need to carefully see if the cable interferes with it.
But such an installation has one drawback. On skirting boards around the perimeter of the room after installation, the hats of self -tapping screws will be noticeable. Regardless of the fact that the hats are receded during installation, they still stand out on plastic material. If you use a skirting board with a removable bar in which there is a cable canal, the hats of self -tapping screws will be hidden by a cable bar. Such a skirting board is very easy to install, but it costs much more than usual.
Thus, you got acquainted with the procedure on how to fix the floor skirting board. And you always need to fix it, regardless of whether you equipped with a laminate of average price or an expensive artistic parquet in the room. These small planks wear not only a decorative function, but also needed with practical considerations. At the same time, the very type of floor skirting board will differ. Based on this, and select the best methodology for fastening the strips gluing on glue or liquid nails, installation for a bastard or installation on a dowel.
![]()
StrPort construction portal 2011-2018. Articles about repair, construction, building materials.
Copying information from the site is possible only with permission of the editorial office Or indicating a direct link to the source. Legal justification
Hello! Good article.
Hello! Good article.