Wallpaper is one of the most popular materials for interior decoration. They distinguish more ...
|
|
Recently, linoleum has gained more and more popularity. Now it is used ... |
They start choosing a plinth when the flooring is ready, because these products ... |
Hidden hatch in the cellar with your own hands: installation and finishing
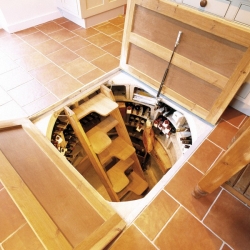
The technology for creating a floor hidden hatch includes several stages: the selection and purchase of materials, the preparation of tools, the drawing up of the drawing and the construction of the structure. The basic requirements for the arrangement of the Lyad and the step -by -step course of the work are described in the article.
- Requirements for hidden hatches in the cellar
- Variants of finished products: features of operation and installation
- The selection of materials for the manufacture of a hidden hatch with your own hands
- Creating a hidden metal design
- How to make a hidden hatch for tiles with your own hands
- An audit hatch with electric drive: installation features
Requirements for hidden hatches in the cellar
The presence of a basement in the country or in a private house has a number of undeniable advantages. The utility room expands the useful area and provides a warm, dry floor covering of the first floor. The disadvantage of the cellar increases the cost of construction. Sometimes the costs of erecting the basement I reach the amount of the total estimate for the construction of the whole house. Some try to save money by making part of the work on their own.
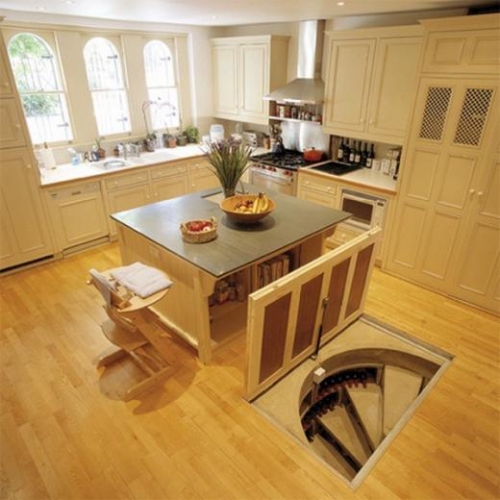
The arrangement of the basement implies the organization of a separate or built -in entrance. It can be an ordinary door or Luke (hatch in the field). If the basement is located in a residential building, then a hidden hatch is placed. In order to do the work yourself, you need to think over everything in advance, given the basic requirements for hidden structures of this type.
- The dimensions of the hatch are selected in accordance with the premises and the main purpose of the cellar. Minimum dimensions 75*75 cm.
- It is better to choose the location of Lyada not next to the wall. The door should open up without any difficulty. It is important that the open cover does not hurt objects on the floor and furniture.
- The cellar must be equipped with a simple and convenient opening mechanism.
- With a weight of a door of more than 10 kg, it is advisable to equip a hatch with an electric drive.
- The dimensions of the hatch should fully correspond to the shaft of the basement, and the joints be sealed.
- You should take care of reliable supports around the perimeter of the hatch. During the day, they will advance on the lid many times, and it should withstand the weight of all households.
- It is advisable to equip the floor hatch with a smooth opening/closing system (gazlift). If there are animals and children in the house, then you will need a fixing device that limits access to the basement.
- The manufacturing material of the cover is selected in accordance with the available or intended flooring. For example, if a wood board or laminate is laid, then the lid is mounted from wood.
Variants of finished products: features of operation and installation
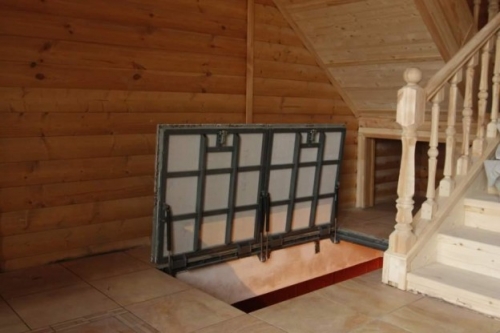
It is easier to choose the finished design of the hatch, and install it yourself. Models of different sizes and types are presented on the market. It will turn out to find an option that is optimally suitable for laminate, tiles or linoleum. Depending on the method of opening the door to the basement, there are three types:
- Swing. They are made by analogy with the front door. On the one hand, 2-4 loops are installed, and on the opposite lock or latch.
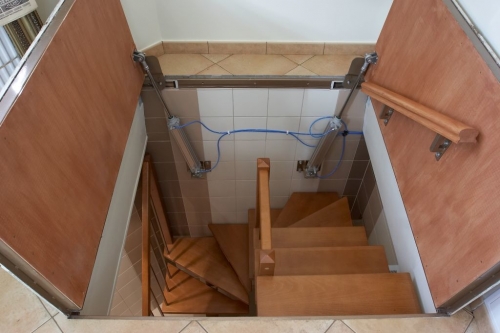
- Removable. Such models are cheapest and lightest in installation. The door is performed by a separate element and applied to the equipped opening.
- Sliding. Railing -type hatches are more often used in the design of street cellars. The door moves along the guides and opens the entrance to the cellar.
If the floor is lined with tiles, laminate or other finishing material, then to create a hidden hatch in the basement with your own hands, you need to choose filled aluminum or steel structures. A similar copy is a shallow rectangular container. After installing, the frame is filled with concrete solution, after completely drying, the surface is faced.
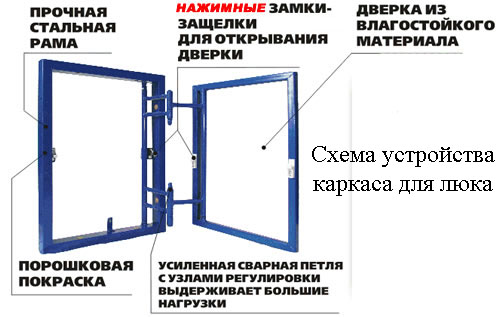
Important! The concrete hatch has significant weight, therefore, it requires the use of massive loops and strong fasteners. A well -designed steel structure can withstand weight above 1 t.
The selection of materials for the manufacture of a hidden hatch with your own hands
To implement the project, you can use wood or metal. In this matter, it is important to observe a reasonable balance between the weight of the structure and its strength. When creating a wood hatch, boards are often used with a thickness of 2.5 mm. The upper finish of the lid is performed with a plywood of 1 cm. Using the transverse rails, the boards are interconnected, forming a whole canvas. To extend the service life, the wooden door must be treated with olifa.
The construction of a durable metal hatch is made of sheets of steel with a thickness of 3-4 mm. As a heater, foam or foamed polystyrene is used.
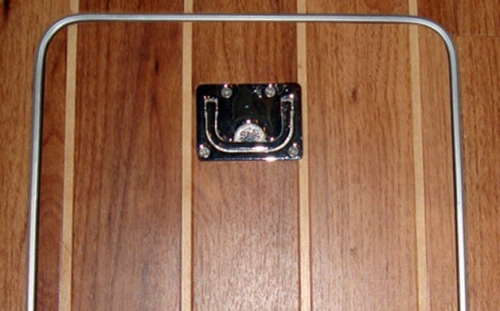
An important aspect of convenient use of a buried hatch is a properly selected handle and loops. An ordinary door handle is not suitable for these purposes, as it will rise above the floor level and cause inconvenience when walking. It is better to use folding handles that can be easily lowered or lifted. If there are young children in the house, it is advisable to install removable models. Some craftsmen in wooden hatches often cut out recesses and place secret handles in them.
In the manufacture of swing covers, loops will be needed. This can be ordinary models of door loops or from the hood of a car. When installing loops for hidden hatches with your own hands, you need to take into account some nuances:
- it is better to use products with springs, this will provide easier opening of heavy covers;
- the loops from the car fix the hatch in the open position, which excludes the probability of slamming the cellar door.
Important! For a hidden hatch, you need to take mortise loops. If the hinged models are lined with laminate or tiles on top, then subsequently this design cannot be repaired.
For an aluminum or steel cover, ordinary loops are not suitable. Here it is necessary to use gas shock absorbers.
Creating a hidden metal design
For the manufacture of metal hidden revision hatches with your own hands, the following materials and tools will be needed:
- sheet metal (steel) with a thickness of 3-4 mm and 1 mm;
- metal corner 4-5 cm;
- door hinges;
- thermal insulation material;
- rubber compressor;
- primer for metal processing;
- bulgarian;
- welding machine, electrodes;
- grinder;
- screwdriver;
- electric drill;
- self -tapping screws.
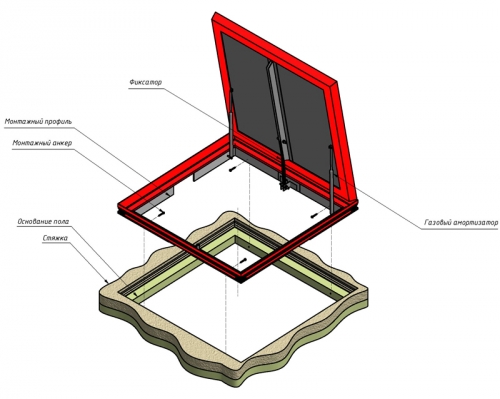
The assembly scheme of the metal hatch is presented below.
General order of work:
- Preparation and insulation of the hatch:
- from steel 3-4 mm cut the desired sheet, for example 75*75 cm;
- on the perimeter of the sheet, weld the corner from the inside;
- weld the stiffeners, dividing the area of \u200b\u200bthe hatch into 4 sectors;
- clean welds;
- place the insulation between the jumpers;
- on the back of the lid, attach thin sheet steel and fix it with self -tapping screws.
- Installation of the frame of the opening of the cellar:
- cut a steel corner according to the size of the hole of the hatch;
- cook a quadrangular frame from the corners;
- fix the frame to concrete with anchors;
- the end of the frame to finish the seal.
- Door fastening:
- to weld reinforced loops to the metal frame;
- reply elements to weld to the lid;
- install gas closers;
- fix the lid;
- cover the steel details of the Oliphi.
Metal floor hatch in the garage: video.
How to make a hidden hatch for tiles with your own hands
Development of a drawing
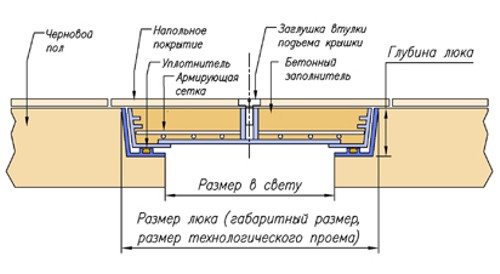
It is necessary to develop a sketch of the future design in advance. The hidden floor hatch (hand drawing) should schematically display the main parameters of the structure:
- gabarits of the box (length, width);
- the thickness of the opening and the frame used;
- placement of loops on the lid and opening of the hatch.
Hidden hatch for tiles with your own hands: drawings
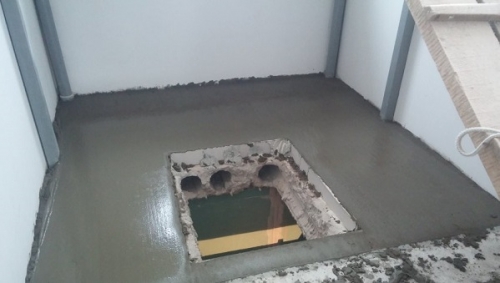
The arrangement of the floor screed
First of all, you should take care of the flatness of the floor in which the hidden hatch will be placed. The entire alignment process is performed in several stages:
- Determine the level of finished flooring. It is necessary to provide the thickness of the tiles (about 8 mm) and glue (4 mm).
- Prepare a cement mortar and set the beach profiles.
- Switch the opening, leaving about 10 cm around the perimeter as a support under the hatch cover.
- Make a floor screed according to standard technology.
Facing tiles
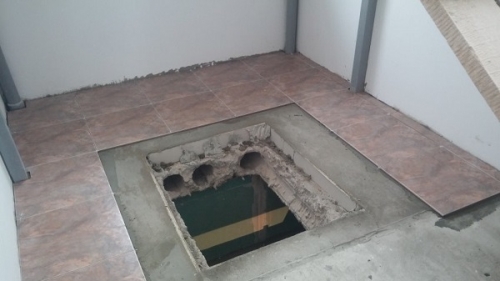
After complete hardening of the concrete solution, you need to try on the hatch, applying it to the opening. At this stage, it is advisable to make a preliminary layout of the tiles. The cladding tile begins from the angle of the wall located in the most prominent place. Cutting and laying tile material during the decoration of the niche is performed only after the final installation of the hatch frame.
Before installing the frame, the location of the hatch should have approximately this type.
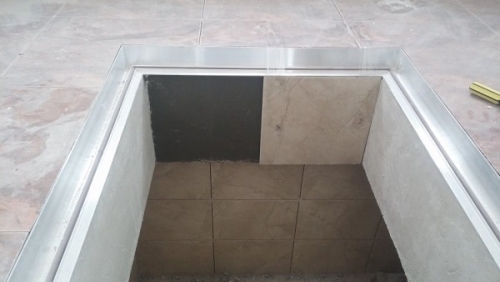
Frame and slopes decoration
The design of the ends of the opening is performed in the following order:
- Attach the frame to the niche, align it in level.
- Fill the cracks between the screed and the metal frame with a cement mortar (it is necessary to use the composition of the M500 brand).
- Let the solution completely harden.
- Perform tile cutting and lining the remaining area around the opening.
- Remove the slopes of the niche to install the lighthouses and stretch the cement mortar.
- Oblue slopes with tiles using glue SM-11.
- Before drying the adhesive composition, it is better to fix the tile with ordinary tape.
- Install delimiting crosses.
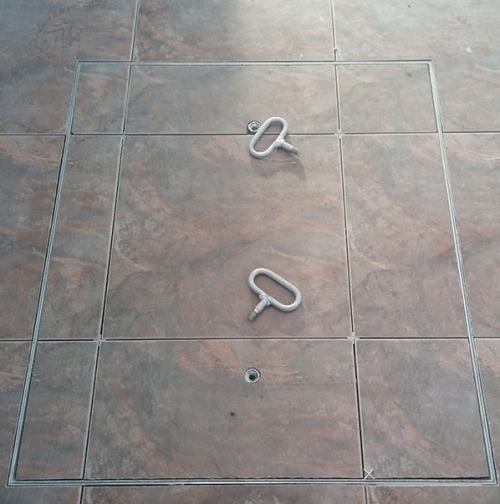
Installation of the cover
For the manufacture of a hidden hatch for tiles with your own hands, a galvanized steel body is used with couplings for installing handles. The reinforcement is laid in the metal box, the frame is filled with concrete, and a flush tile with the ends of the lid is laid on top.
The finish involves grouting of the inter -seams and the installation of removable handles.
Hidden hatch for tiles with your own hands: video.
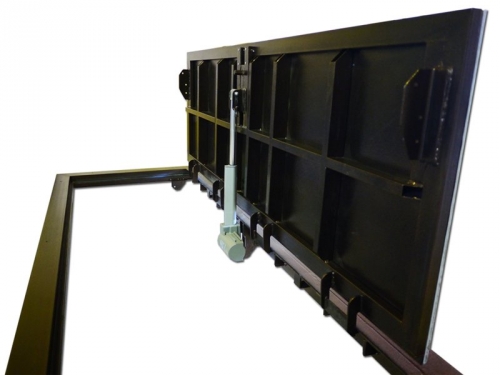
An audit hatch with electric drive: installation features
To facilitate the rise of the heavy door of the hatch and protect the basement from the penetration of thieves, the hatch can be equipped with automation. The easiest way to build a folding mechanism. For its manufacture, you need to prepare:
- electric motor;
- duralumin pipe;
- steel sheet;
- steel rods;
- bulgarian;
- welding device;
- toggle switch (switch) for 3 positions;
- the presence of a current source.
The mechanism is mounted on the finished folding cover, the angle of the hatch will be less than 90. The principle of action is as follows: the signal from the remote control is received on the electric motor, acting in the shaft. The rod rises by 80 and the device fixes the hatch in open state. The second toggle switch gives the pulse through the control panel and launches the reverse traction on the motor. The rod drops and pulls the door behind him.
A hidden hatch is a practical option for arranging a basement entrance. The lid and lifting mechanism should be safe and convenient to operate. Create the hatch with your own hand, without involving expensive equipment and the help of professionals.


Lukes invisible for tiles ›››!
Lukes are invisible for tiles ›› https://goo.gl/ksgntf Huge selection and excellent prices! Free delivery in Russia!