Not always just a perfectly flat ceiling surface fits into the concept of the room ...
|
|
Modern cottage or country house is unthinkable without familiar amenities ... |
High -quality glazing of the balcony helps to solve problems such as sound insulation and ... |
How to raise the floor
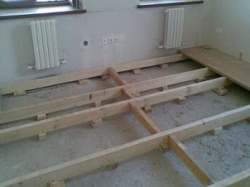
The need to raise the floor level in the apartment may be due to various reasons. This article will consider several options for achieving this task in rooms, bathroom and toilet, in the kitchen and on the balcony. Most importantly, all proposed methods do not contradict the standards established by standards.
Content:
- Raise the floor in the apartment by the method of classic screed
- How to raise the floors in the house from 10 to 20 centimeters and above?
- How to raise the floor in the bathroom
- How to raise the floor level in the kitchen
- How to raise the floor on the balcony
Raise the floor in the apartment by the method of classic screed
- Prepare the surface. Careful cleaning of dirt, dust, and residues of construction waste should be carried out. Large grade can be assembled with a broom, but then it is better to have a spray (well if the device is special, construction). Then apply a layer of primer. This can be a purchased specialized solution or a mixture of PVA and water glue (ratio 1: 2).
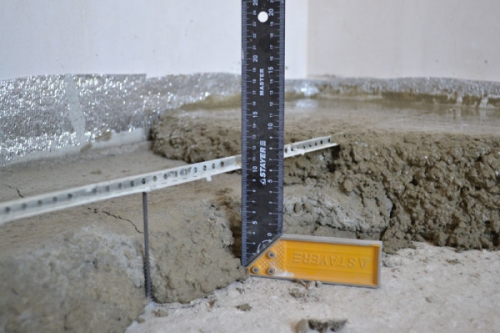
- Put the lighthouses. To do this, you need to find the most protruding point, based on it, using the level, set the tags. For them, it is advisable to use a solution of cement with fragments of Metlakh tile or tile. Next, a crate is assembled from a metal profile. The distance between the longitudinal guides does not need to be made more than 1.5 meters, so it will be much more convenient to work.
- When these works are completed, you can proceed to preparation of the solution and pour it. Pour the solution immediately in large portions, so it is necessary to take care that its number is sufficient and is close to the poured area. Filling a few sections of the crate with a mixture with the help of a fairly long and straight rail, with a slight pressure we glide along the frames, cutting off the excess. This is a very crucial stage of work. If any garbage comes across, it must be carefully removed and repeated by the level of alignment with the rail. Finally, the surface can be smoothed out with a grater or trowel.
How to raise the floors in the house from 10 to 20 centimeters and above?
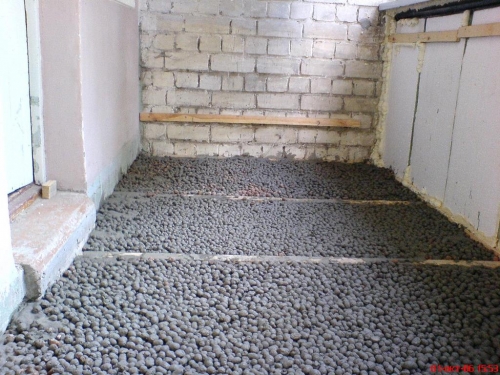
- If you need to raise the floor higher than 10 centimeters, then one screed can not do. You will need the so -called light aggregates. It can be small fractions of pumice or expanded clay, as well as their sand. They are covered on the entire surface of the floor, and a solution is already poured over them. He is thrown in reasonable quantities so that he only closes the frame, otherwise it will be difficult to remove excess. As in the first method, the process of filling and alignment requires thoroughness.
- If the height to which the base is required to raise above 20 centimeters, then the filler layer should first shed with cement milk, and only then make a screed on top.
How to raise the floor in the bathroom
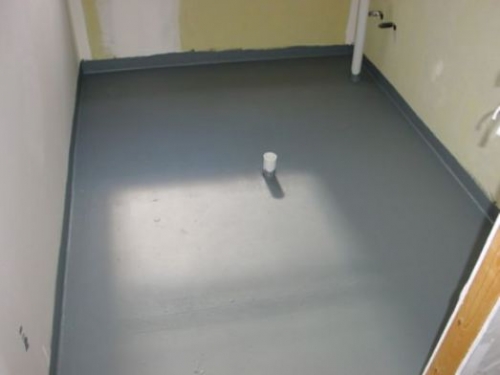
- The bathroom and toilet are places of high humidity, so the main difference will be the need to create a waterproofing layer, the principle of the work itself remains the same.
- As a coating moisture, it can be used by roofing material and a plastic film as preventing the moisture. They will not become salvation in the event of a large flood in these rooms, but several spilled buckets of water will not get to the neighbors from below. That is, the small scale of the disaster can be kept by such a protective layer.
Tip: Raising the floor level in the bathroom, we must not forget that compared to the bases in the corridor and other neighboring rooms, he must still yield to them in height. If there is not a lot of water, then such a difference will allow it to keep it on the site of the flood, and not let it go on a further trip around the house.
Stages of work
- In the stage of preparation, in addition to cleaning the surface, the passage along the entire base with boots is included. The selected waterproofing material will be taken on this layer.
- If these are sheets of roofing material, then they are necessarily overlapped, and along the joint line they are well cooked by budron. The imposition should be at least 15 cm.
- The plastic film should be thick, and the higher this indicator, the better. Places of the pieces of pieces are fastened with construction tape or coated with silicone.
An important point. The main reason for raising the floor level in bathrooms and toilet is the need to increase the level of drain holes for plumbing. Therefore, the installation of all pipes should be completed before the start work. Otherwise, the short -sighted builder risks receiving additional tasks. For example, you will have to stop the recesses for communications in a new basis.
- Concrete also requires small manipulations to comply with the requirement for wet rooms: a ratio of 1: 3 is observed, that is, one part of the cement and three parts of the aggregate.
- Next, the same stages of filling are carried out.
How to raise the floor level in the kitchen
Work in this part of the apartment can be less dirty. Nicks of additional requirements, for example, according to humidity, are not a coating in the kitchen, so the black base can be built from wooden lag.
Using a wooden frame
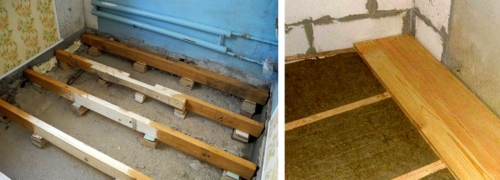
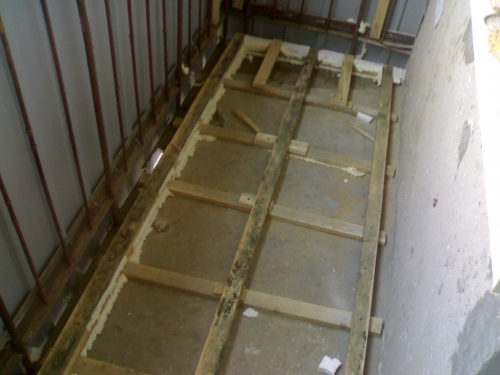
- We collect the frame. As always, the working surface is removed from pollution. After that, the installation of bars begins. They are attached to concrete with anchors. The distance between the lags is observed in 60 or 100 cm. It depends on the width of the bars, subsequently imposed in the transverse direction. We must not forget about the installation of wooden lag in level. The reference point is the highest point on the basis of it, based on it, and the first transverse beam is laid. You can adjust the height by placing blankets or residues from the bars after cutting under the base of the future frame. The landmark code is installed, the following guides are mounted in compliance with the selected step.
- Then there is ahead insulate the floor. For these purposes, they are suitable:
- thermal insulation cotton wool. It is cut into the necessary pieces and is laid in the cavity between the structure;
- styrofoam. Parts of the necessary dimensions that are placed between the elements of the frame are also made from it;
- small -fractional expanded clay falls asleep in the structure section. It is recommended that at least its upper layer be impregnated with cement milk or PVA with emulsion (the necessary proportions have already been given above). Such measures will avoid abundant dusting. In general, expanded clay is good for its porous structure, which provides both heat and ventilation for the floor.
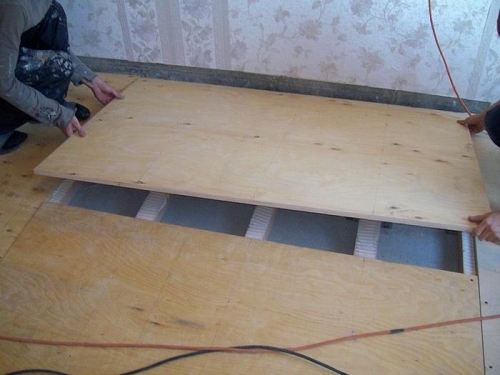
- The crate is ready, and thermal insulation is provided, the turn has come fix the sheets of chipboard. This is done with self -tapping screws, and in order not to miss the process, marks are applied along the wall along the direction of the transverse beam. They and the axis of Brusiev serve as a guideline for screwing the sheets.
An important point. Do not adjust the edges of the chipboard plates close to the wall or to each other. It is necessary to leave gaps from 2 to 5 mm. This method will avoid an unpleasant creaking of the floor under the feet when walking. Such artificially created cracks will not affect the strength of the design, they will even contribute to additional ventilation.
- The gaps around the perimeter of the walls should be filled with mounting foam. Such a trick will prevent dust from entering the room, and due to the porous structure of the foam, ventilation will not be disturbed.
- If it is subsequently planned to cover the surface of the chipboard linoleum, then it is worth making sure that the hats of the screws are well drowned at the base.
- Instead of sheets of chipboard, you can close the crate with a floorboard up to 5 cm thick. You will get a classic wooden floor. When choosing this type of coating, you need to be sure of the quality of the material. The boards should be qualitatively processed and well dried, otherwise, after some time, gaps are formed in them. Laying is carried out using mounting wedges and brackets that provide tight fit. They are clogged on both sides at the same time.
How to raise a video of a video
If the question is about how to raise a wooden floor, then the above method will be an ideal solution.
How to raise the floor on the balcony
In most apartments, the floor level in the room is higher than on the balcony. It is raised to the required level for convenience, so as not to touch the threshold, or not to step into the void. The need for alignment is especially acute if it is planned to combine this room with a common living space. So, how is it done.
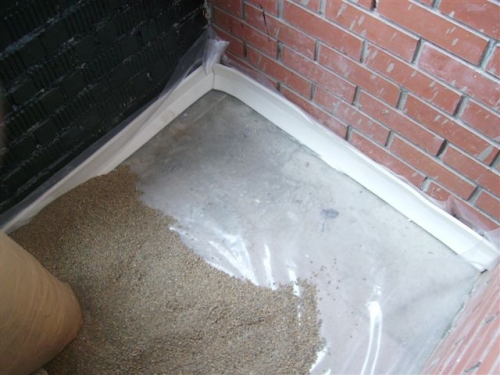
An important point. Before lifting the floor on the loggia, it is important to take care of waterproofing. You can process the entire surface of the floor with mastic on the bitumen basis and cover it with a film or use special compositions that have a high degree of penetration into concrete and protect it. Small cracks are pre -filled and dust and dirt are removed. The composition is applied according to the recommendations on the package.
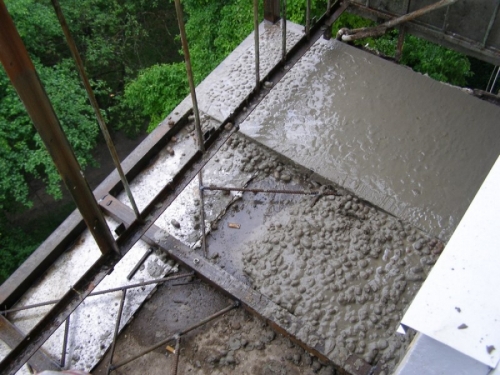
Raising the floor with a cement-sand screed
- This option will not only raise the floor, but also make it even, durable and suitable for any finish coating. It is suitable even for filling the heating cable when arranging a warm floor. You should not choose it only for one reason: if it is planned to increase the level of the base higher than 8-10 cm. This is fraught with the fact that the screed weighs a lot, the excess of the indicated thickness will lead to an increase in the mass, and, as a result, to the collapse of the stove. And one more nuance: you can’t pour fill in the cold season. We'll have to wait for constant heat at least 10c.
- The future floor level is marked with a strictly horizontal line right along the wall. The laying of the heating cable will require a second fill. This must be taken into account when planning the final height.
- If the side of the balcony is not adjacent to the base tightly, then it will be necessary to build the formwork so that the liquid solution does not get through the cracks. On the outside of the railing, the board can be fixed for these purposes, which is dismantled after the screed dries.
- The need for waterproofing has already been mentioned above, the principle of its laying remains the same, only along the walls it should act above the level of future sex. After the work is completed, the excess is cut.
- Lighthouses are set according to general rules.
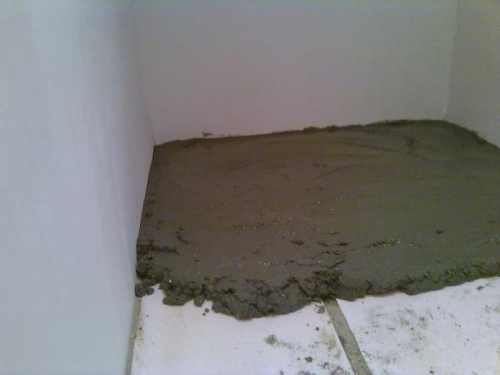
- After the final fixation of the beacons, a cement-sand mortar is poured. Some masters in cases where the area of \u200b\u200bthe balcony is small, pour a mixture by eye, without beacons. And then they are leveled and after drying is added a layer of the mixture, which itself is distributed, forming an even surface.
Tip: Such a screed dries for a long time. In order to avoid cracking, the first two weeks experts advise covering half a film. And a couple of weeks it will go to ensure that the new surface is finally hardened.
Raising the floor with a screed with expanded clay
- If the floor level is planned to be increased by a considerable distance, then the structure can be facilitated by adding expanded clay to a mixture. First, a light layer is poured, which is then covered with a familiar mixture of only 2-3 centimeters. The remaining stages of work are carried out, as described earlier.
Raising the floor with a dry screed
- In order not to subject the base (balcony plate) to be subjected to significant overloads, this method is used.
- The waterproofing layer is laid, which should be fixed with a dumpfer ribbon.
- The layer of dry filler is poured and tightly compacted.
- The film is lined again on top.
- Further, it is advisable to lay the sheets with moisture -resistant plywood in two layers, fastening them with self -tapping screws.
Advice:. All wooden components are pre -processed with an antiseptic against rot and mold.
How to raise the floor with your own hands using lag
A similar method was described above. We say only some subtleties.
- Suppose that lifting the floor is required by 8 centimeters. For this purpose, lags of 6 cm thick are needed. Another 1.2 cm will take a layer of plywood, a gasket made of foamed polyethylene or linoleum is still 0.3 cm, and the finish coating of 5 mm will complete this layered pie.
- To increase the level to 12 cm will help to put down bars on each other 5 cm thick. First, the lags are laid across, and the second row is already longing on them longitudinally.
- If radical changes in the height of up to 20 cm are required, then the desired result can be achieved vertically by installing 4*15 cm on the board.
- In the process of laying the bars, it is not necessary to bring to the wall close. A distance is left about 3 cm.
- As a heater, it is better to prefer polystyrene. He is not afraid of moisture, and heating heats well. And on top of it, a layer of foam (foil up) is usually covered on top of it.
Raising the floor with a welded structure
The option below is available to those who are familiar with the intricacies of welding. The welded design is good for its durability.
- Waterproofing work is carried out
- The size of the floor and the required height are measured.
- A frame corresponding to the size is cooked from the corner profile. To give the necessary stiffness with a step of 20 or 30 cm inside the structure along and across, metal rods with a section of at least 1 cm are welded.
- The length of the legs welded at the corners of the frame is calculated with a deduction for the thickness of the coating from above.
- The design set in level is attached to the walls and floor, insulation is laid inside it.
- The finished product is covered with vapor barrier film and plywood sheets or boards.
- Higher -level floor is ready for finishing final coating!
Summing up, I would like to note that lifting the floor in the room with wooden lag is quite simple and with your own hands. But for a high -quality cement screed, it is better to invite specialists.

I have a question. We can not
I have a question. We can not make a fill in the bathroom. ZhEK SASAL that in an accident they will break everything. I would like to make a wooden lifting the floor, but on your site it is said that it is contraindicated in moist places. Are there all the cracks of the raised floor to completely pour a grometics? We just have no way out because the whole sewer is high. It is not allowed to change it. And because of this, the bathroom is very high. She is somewhere at the abdomen. You have to climb into it from a chair. Below it cannot be omitted because the drain is very high.