Due to the return of the popularity of wooden houses in suburban construction ...
|
|
The attic floor is subjected to large heat loss compared to other parts ... |
Each cottage begins with buildings. Everyone does not want to carry garden equipment with me ... |
Concrete floor in the garage: pouring concrete, painting with your own hands
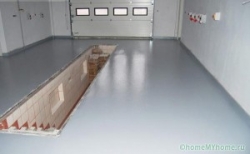
Even at the stage of designing the garage, they think about what kind of floor there will be. Sometimes they leave earthenly or compacted asphalt crumbs. But most often it is made concrete. In this case, the floor is durable, durable and moisture resistant. But all these parameters will only be in the case of the correct technology for filling the screed. The article will talk about how to properly fill the floor in the garage and process it to increase the operational period.
Content:
- Advantages and disadvantages of the concrete floor in the garage
- With your own hands, concrete floor
- How to polish the concrete floor with your own hands
- How to paint a concrete floor
- Which floor covering to choose for a garage
Quite high requirements are always put forward to the garage floor, such as:
- high strength. High loads will constantly be on the floor, the weight of the car itself, racks with spare parts, tools, etc.;
- immunity to chemicals. When repairing a car, situations often arise related to the leakage of brake fluid, oil or gasoline;
- moisture resistance. In the summer, after rain, quite a lot of water flows from the car, but there will be especially a lot of moisture in the garage in winter, when snow sticks to the rapids of the machine and begins to hide in the garage.
Advantages and disadvantages of the concrete floor in the garage
The main advantages are strength, durability and affordable price. It is these three factors that play a decisive role in choosing the foundation of the floor in the garage. He has several drawbacks.
- The floor in the garage is subjected to intensive abrasion, especially if the car delivers it daily into it. Because of what there is an abrasion and formation of gray cement dust, which settles on objects that have been in the garage for a long time.
- The concrete floor unprocessed by the protective coating has a porous structure. If you shed a liquid with a pungent smell on it, it is quickly absorbed and the room cannot be ventilated for a long time.
- The process of concreting the floor itself is very laborious and long. It is impossible to do this qualitatively. But all these shortcomings are corrected, it is enough to find a helping officer and stock up on special means.
With your own hands, concrete floor
Work will be divided into:
- preparatory stage;
- reinforcement;
- concreting;
- finish.
For each stage of work, it is advisable to use only high -quality materials and special equipment that can be rented.
In the pursuit of cheapness, the strength characteristics of the base can be very suffered, which will lead to cracks, abrasion and require repair ahead of time.
Preparatory work
Tip: It is recommended to immediately provide a thermal insulation layer of the floor. Even if the garage is not heated today, such a need may arise at any moment, and there will be no way to insulate the floor. In addition, the insulated floor is not subject to seasonal temperature surges, which means that the coating will last longer.
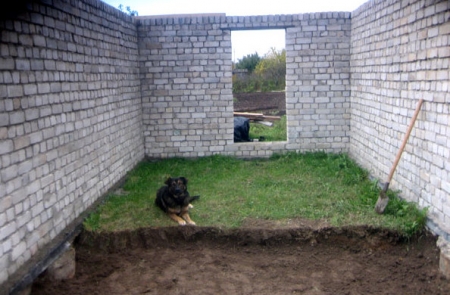
- First of all, they dig a pit over the entire area of \u200b\u200bthe garage to a depth of 0.5-1 m. Crushed stone is poured into it, which acts as a drainage, and leveled. The layer should be at least 40 cm.
- On top there is a sand pillow made of river or career sand with a layer of 20 cm. It must be well leveled and compacted. You can use the water from the spray hose, but it is better to use a vibrating plate. After it, you can walk along the sand like on a hard surface without falling.
- The sand should not only be compacted, but also leveled horizontally using a long rule. If necessary, the surface is given the desired angle of inclination. But we must strive so that the height difference does not exceed 2 cm along the entire length of the floor.
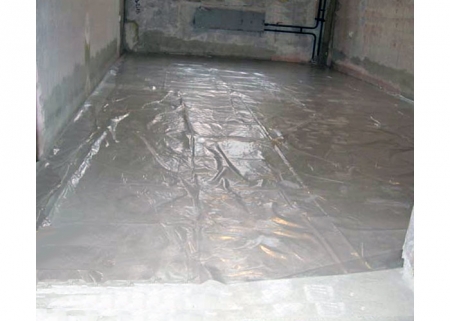
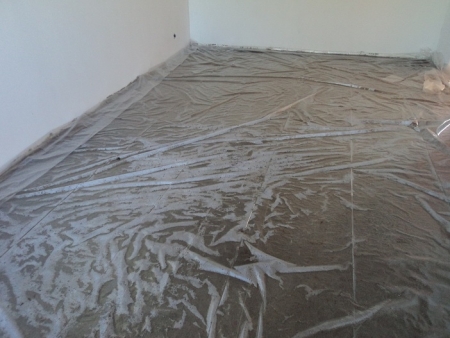
- There is such a thing as the capillary lifting of water. That is, an unprotected concrete base can be damaged by water from below. Therefore, before pouring, you need to make a waterproofing layer. To do this, use polyethylene film, roofing material or any other roll material with absolute moisture resistance. It is laid over the entire surface of the base with lanes of strips on each other at 15 cm and with the same allowance on the walls.
- The waterproofing material is placed carefully, it should lie evenly, I do not form folds or dents. The allowance left along the edge should be higher than the finish height of the concrete floor in the garage. So that it does not interfere with concreting, it is recommended to fix it to the wall.
Tip: Many do not attach importance to garage insulation, as they do not plan to heat it. But there are times when car repair needs to be carried out in the cold season, then it will be very difficult and expensive to warm up the room. Having insulated the walls, roof and floor, the garage can be quickly warm and comfortable to work inside. In addition, even without heating, the car in the winter in the insulated garage does not freeze as on the street and always starts to start.
- Thermal insulation material is laid on top of waterproofing. The cheapest foam, but it can gnaw at mice. It is best to use extruded polystyrene foam, for example, foam -polex with a spike/groove system. Plates 2.5-5 cm thick are laid tightly to each other, but with a gap of 2 cm with walls.
Reinforcement and preparation of a screed solution
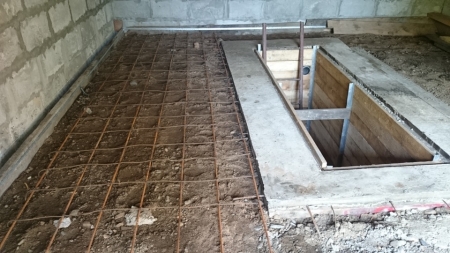
- Even a passenger car has a large weight, so the concrete floor must be reinforced qualitatively. If the concrete floor is made with your own hands, it is better to take a ready -made reinforcing mesh with cells. If there is mitigation of reinforcement, then you can buy fiberglass and tie it yourself.
- The cells of the finished grid should be 10 x 10 cm or 15 x 15 and a wire diameter of at least 6 mm. It must be placed so that when pouring it, it is located in the middle of a concrete thickness. If it drops below, then the strong base will suffer and the probability of cracking will arise. And if above, it may soon be exposed and appear out. For this, special fixing supports are sold, they are allowed to replace them with bricks or pieces of concrete. The reinforcement should lie tight on the supports and not fall during the fill. This requirement is universal and is also advanced when arranging a concrete floor in a private house with your own hands.
- To prepare concrete in the amounts necessary for filling the floor in the garage, a concrete mixer will be required. The process is simple, most importantly, to choose the right proportions. To obtain a mixture of good quality, you need to purchase the cement of the M400 brand, and even better the M500 and mix with the ACD in a proportion of 1: 3. First, cement and ASS are poured into a concrete mixer and mixed, and water is gradually added. Its volume is added individually and can vary for each knead. The solution is mixed for several minutes, if necessary, adding water.
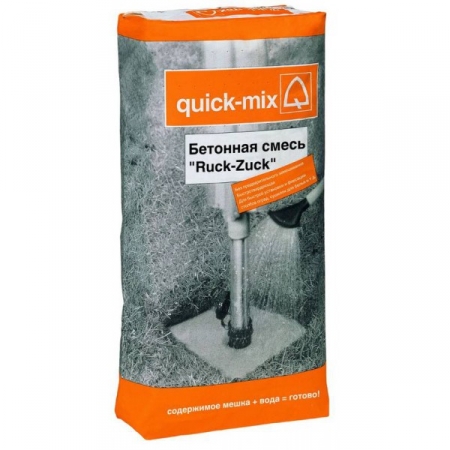
- You can do it easier and buy a finished mixture, the exact amount of water is already indicated on the packaging, which will need to be added. This guarantees obtaining a quality solution and a long service life of the resulting base. This is associated not only with a carefully verified ratio of components, but also with the addition of plasticizers and fiber fiber.
With your own hands
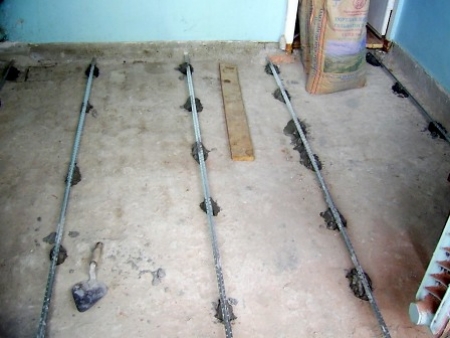
- Next, the guides are installed for pouring the concrete floor in the garage. For this, even wooden bars or metal rectangular pipes are suitable. They are recommended to be located in the direction of the garage exit. For the outflow of excess water from the floor, you need to make a small angle of inclination about 1-2 degrees per 1 m.
- If the base is prepared correctly, has a flat surface and the desired height, then the guides are simply laid. In the future, they are taken out of the screed, and the resulting grooves are filled with a solution and aligned.
- With an uneven or too low base, the guides will have to be additionally exhibited. To raise the height, they put the right amount of cement mortar under them and wait for it to completely harden. In this case, the guides are already in the screed and are not removed during the finish.
Tip: At the stage of laying guides, you should take care of compensation clearances around the perimeter of the floor. It is best to use a foam -polex 5 cm thick, cut into strips, the width of which is equal to the height of the screed.
- Work with ready -made concrete is carried out quickly, since the solution grabs very quickly. They begin to fill the fill from one of the far corners. The solution is poured immediately to the desired height (which depends on the alleged loads and can be from 30 to 80 cm). For greater strength, all air bubbles must be removed, it is most convenient to use a shovel from improvised means, which is stuck into a freshly laid solution with bayoned quick movements.
Aligning the concrete screed
- Before leaving the concrete floor with your own hands, you must make sure that all guides are completely closed by the solution.
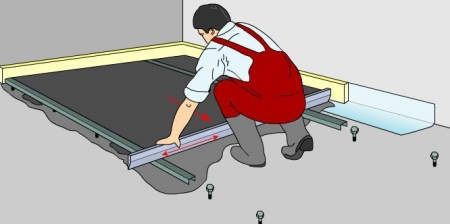
- For alignment, you will need a long rule that will go immediately on 2 or 3 guides. It can be an ordinary wooden rail, the main thing is that it is even. With its help, they begin to make progressive movements from the highest point towards the slope.
- Often, pits are found in the process, they should be immediately filled with a solution and re -aligned. Ideally, it is necessary to achieve absolute monolithing the coating without influx. It will be possible to do this only by completing all the work at a time. Here it should be borne in mind that in 4-5 hours the solution will grasp and further leveling will be impossible. With a large floor area in the garage, it will be more convenient to order a mixer with concrete than to knead the solution yourself
Achieve maximum strength when solidifying concrete
- Moisturize 2 times a day. When the concrete mixture is hardened, moisture evaporates very quickly from the surface, which leads to the appearance of cracks. The water will evaporate especially quickly if the garage has not yet been built and sunlight shines on the floor, or from the wind, which happens with drafts. It is enough in the morning and evening to moisten the surface of the screed with water from the hose or watering can to prevent further cracking.
Do -it -yourself concrete floor video
Tip: It is not always possible to moisturize the floor so often, in this case it is recommended to use special membrane compositions. When applying them to the surface with a roller or sprayer, a thin coating is created, which prevents the intensive evaporation of moisture. It must be used a couple of hours after pouring.
- Protect against direct sunlight and windwind. When the upper layer grabs, it is recommended to cover the entire area with a film. It will not only save the concrete floor from the sun and drafts, but also protect from the accidental getting of dirt. You can remove it in a week.
How to polish the concrete floor with your own hands
Grind not only the old concrete floor, but also a new screed. The alignment of the surface allows you to prepare it for further finish.
- Grinding is achieved by grinding, so chips are less likely to form on it. By acquiring additional strength, concrete floor is more economical in operation, cracks are less common on it. In addition, the moisture resistance of the concrete floor increases, which is especially important for the garage.
Tip: if the concrete floor in the garage was poured for a long time and from the moisture that came into its pores cracked and began to crumble, it should be repaired. In this case, the grinding will remove the damaged upper layer, it will be enough to apply the protective composition on top.
- The concrete screed is especially well -grinding, which contains fine crushed stone. When using sand or PGS, the density can be too large or low. In the first case, it will be difficult to grind, and in the second strength will decrease.
In total, there are two ways to grind the concrete floor - wet and dry. The tools are used the same, but the complexity and cost differ.
- Wet method. Most often, it is used in public places when marble or granite crumb is added to the concrete mixture. This is a great way to create a beautiful mosaic floor. But during work, a lot of dirt is formed, which complicates visual quality control of the resulting surface.
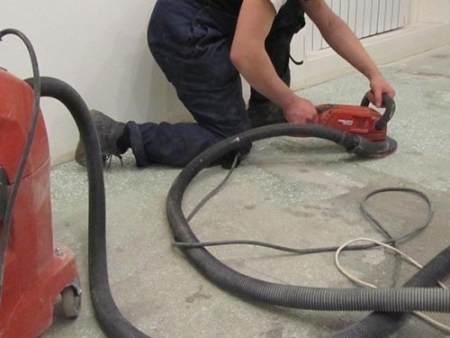
- Dry way. It is most convenient if it is planned to grind the floor in the garage with your own hands. When processing, a lot of cement dust is formed, so special grinding equipment is equipped with a vacuum cleaner. In this case, all possible irregularities are immediately visible.
Tip: In some cases, it is impractical to purchase expensive equipment to work in the garage. If it is not possible to rent it, you can use a regular grinder with a bowl of diamond spraying. The abrasive disk should be small, this will not overload the gearbox.
Stages of grinding work of concrete floor
- Grinding the concrete floor in the garage can begin a week after its filling. First, only one passage is allowed to make, during which the upper layer is removed, in which the largest amount of cement milk. Having removed it, the most durable layers will remain. And the finish grinding is performed only after the complete ripening of concrete after 30 days.
- If the concrete floor in the garage was poured for a long time and plots with elements of erosion were formed on it, it will be necessary to grind it until they are completely disappeared. To do this, it is most convenient to use an abrasive for a grinder of 40 units.
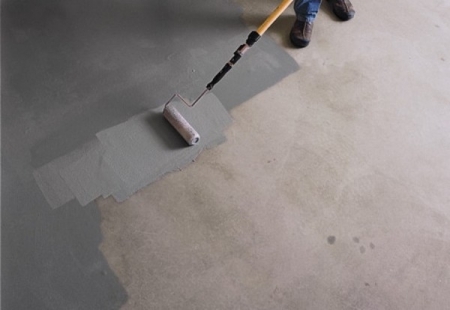
- After the initial grinding, it is recommended to pour the entire area of \u200b\u200bthe floor with a special hardening impregnation. Min increase the wear resistance of the concrete floor, which is especially important for the garage. The composition has a liquid consistency, so it is convenient to pour it and level it on the surface with a roller with a long handle. The porous structure of concrete will absorb it quite actively, so you will have to repeat the procedure several times until the composition forms a film on the surface. The entire floor should be saturated well so that there are no dry areas. It is left to solidify.
- At the end, finish grinding is performed, using an abrasive with granularity up to 300 units. The resulting floor will be smooth and durable.
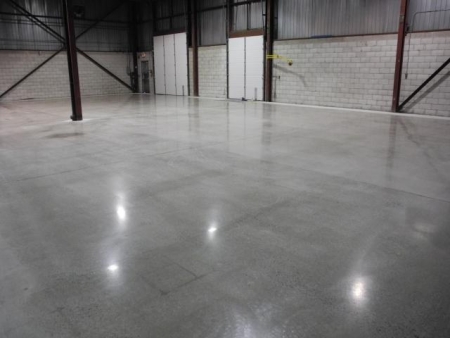
- Most often, in garages the floors are not covered with finishing materials, so you can additionally protect the floor by polishing. For this, the same polishing machine is used, only an abrasive on it is installed from 1,500 and to 3000 units. This is a fairly long work, but it turns out a perfectly smooth, almost glossy surface with high moisture resistant qualities.
- Usually, in this way they polish the concrete floor in the house with their own hands. Since he becomes immune to chemical reagents and is easily washed.
Refusion of concrete floor with grinding
Pouring a new screed in an old garage is often very difficult. It is already forced by a large number of things, cabinets, etc. It will take too much time and effort. Therefore, you can only repair that part of the floor that remains open and requires replacement.
- Most often with long -term operation with heavy equipment, concrete coating cracks, fittings or potholes appear.
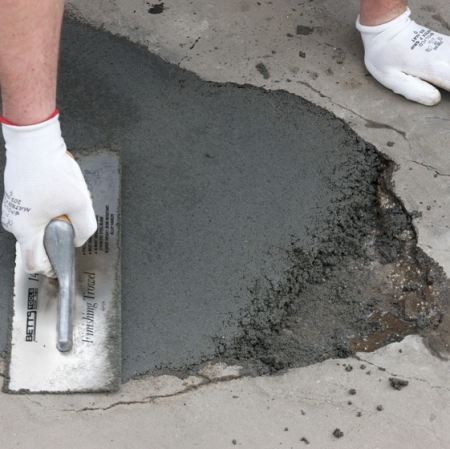
- At the edges of the potholes, cuts are made by a grinder to a depth of 2-3 cm with a special diamond disk designed for cutting natural stone. The pit is cleaned with a perforator, removing all the old concrete to the place of cut.
- Next, carefully remove all the garbage and the dust formed with a damp cloth. After drying, the surface is treated with a penetrating primer. Then a concrete solution is diluted. If the volume of work is small, it is convenient to buy an already packaged mixture for repair, in which you only need to add water. It is filled with the prepared area and leveled with a spatula.
- The ass composition did not grab, the repaired section is leveled by the long rule by the level with the floor so that it does not speak and does not have a deepening. And they leave to harden.
- For such a little work, it makes no sense to use a special grinding machine. It is enough to change the disk on a grinder with the desired size of an abrasive and polish manually.
- In conclusion, it should be covered with the same protective material or composition, which processed the entire floor in the garage.
Tip: even if there is a small crack on the floor, it is important to repair it in time. To do this, it is expanded by a grinder with a diamond disk by a width of 8-10 cm. It is also cleaned of concrete dust and primed with the desired solution. As a repair mixture, it is necessary to choose the composition that includes quartz sand, not river. But with grinding, you should not rush, as a rule, the mixture slightly settles in such cases and after a while you have to add it to the floor level. At the end of the work, grinding and coating with a protective composition is carried out.
How to paint a concrete floor
Painting of the concrete floor is carried out with one purpose of increasing the operational period. Although this also affects the appearance. It will be pleasant to be in a beautiful and modern garage, and, therefore, to follow his condition too. Modern protective paints for concrete surfaces protect them from the effects of chemical reagents and from mechanical wear. Most often use polyurethane, epoxy and alkyd enamels and paints.
- Epoxy paint For a concrete floor in the garage, it is more preferable. It has a two -component composition, so it requires preparation before application. After drying, it forms a very strong thin layer, which has high resistance to aggressive compositions, waterproofing characteristics and high wear resistance.
- Alkyd paints Although they go ready for use and do not require mixing, you need to apply a couple of primer layers before painting. The concrete floor with a alkyd will be moisture -resistant and durable.
- Polyurethane enamel Creates a solid glossy surface that is easy to clean. It is also sold in the form of a two -component composition, which is mixed before use. Its main drawback is considered a very long period of complete drying, which is almost 2 weeks. True, you can walk along it in a few days, but driving on cars is not recommended.
Which floor covering to choose for a garage
The material that is used to finish the floor in the garage should be moisture -resistant, wear -resistant and not enter into reaction with chemical compositions.
- If you want to make the garage beautiful and close the gray concrete floor, then it is best to choose a clinker or porcelain tiles. When buying, it is necessary to pay attention to its surface, it should be rough and nonsense. This is an absolutely frost -resistant material that is not afraid of moisture. In case of cracking of individual elements, they can be replaced without a complex repair of the entire flooring. In addition, if the base is uneven, it is with the help of tiles and glue based on cement that it is easy to align. The disadvantages include only a high price.
- Some owners prefer to lay linoleum DIY on the concrete floor in the garage. To do it easily and quickly even one person. This material, of course, has high moisture resistant qualities and is easily washed, and modern commercial species have high wear resistance.
- But here you have to be careful and consult with sellers. The fact is that even industrial classes of linoleums, such as 41 or 43, can hard and break down at negative temperatures. An alternative can be material based on rubber, for example, Relin.
- It is also a slippery feature of linoleum. During the repair of the car, it may slide, therefore it is recommended in places where the car wheels will be supposed to be located, and non -valid material will be attached.
If you want to convert the old garage into rooms for relaxation, then it is worth laying laminate On the concrete floor with your own hands. It is easy to do this, the main thing is that the surface is absolutely smooth. To do this, it is most convenient to use a bulk floor layer, which does not require directing and reinforcement.
- A substrate is placed on top. Given the specifics of the premises and the absence of a full -fledged foundation with the basement, it is best to use foil isolon for this. It is laid over the entire area of \u200b\u200bthe floor with small retreats from the walls foil up.
- Since the garage, most likely, was unheated, it is easiest to lay a rolled electric warm floor than to conduct central heating.
- If there is confidence that the optimum temperature and humidity will always be maintained in the garage room, then you can choose 31.32 or 33 laminate classes. In case of doubt, it is better to purchase a special moisture -resistant laminate designed for rooms with high humidity.
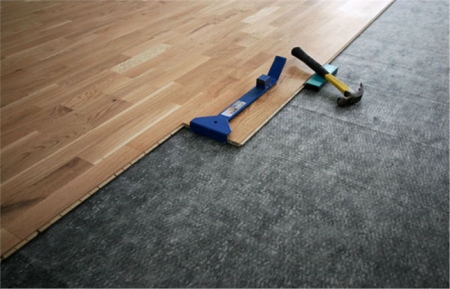
- It is laid on the floor, too, with an indent from the walls of 2 cm and the planks are attached to each other, tightly inserting the spike into the groove. At the end of the perimeter, a skirting board is installed.





aftorr is burning non -expense
a and a and a and after is not at all expenses.
In the garage, laminate, yeah, a room for relaxation, if in a private house it is okay, although it seems like you can use the whole house for this, and in the garage cooperative Epic is simple. So the tiles and linoleum are a rink in the garage, it’s just a miracle, you jump into the garage in the winter, and you put down the part that you drove forward until spring.