To insulate inclined roofs, attic floors or the inner surface of the walls ...
|
|
During the operation of a wooden house, individual structural elements ... |
The choice of building material for the construction of a new house is a responsible step. From... |
How to lay paving slabs
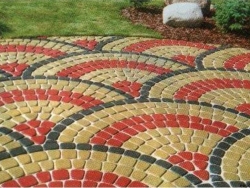
The paths leading from home to other buildings or arbors, a blind area around the house, a car site is an integral part of the landscape design of the entire estate. When choosing how to cover them, one should be guided by several rules. The coating should be durable, durable, environmentally friendly, wear -resistant, and most importantly beautiful. All these advantages are paving slabs. I can’t even believe that until recently, suburban residents had no other choice, except to lay the paths and platforms made of asphalt. But it softens in the heat, releasing volatile oil products into the air, and is deformed under heavy loads. Water accumulates on its surface, under the influence of temperature changes, the asphalt is cracking and deformed. All this is difficult to fix: either to form the fraud that will stand out against the general background, or completely replace the entire coating. There are no such problems with paving slabs. In addition, an accidentally damaged area can be easily replaced.
Content:
- Paving slabs: production and price
- General rules for laying paving slabs
- Pressing tile laying technology
Paving slabs: production and price
Production of paving slabs is carried out in two ways: vibrating and vibration pressing.
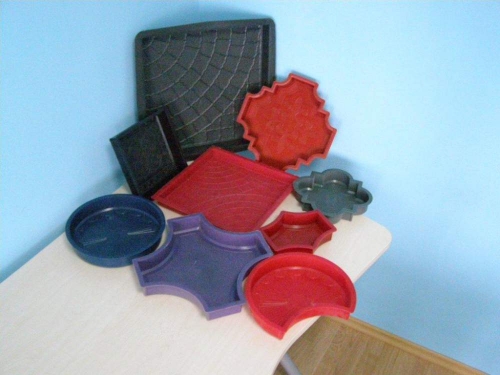
Various forms for paving slabs allow you to make tiles of various shapes, sizes and colors. The vibration method involves the use of special forms, various cement mixtures and plasticizers, as well as colored pigments. Similarly, paving slabs are produced both in factories and in private enterprises on an individual order.
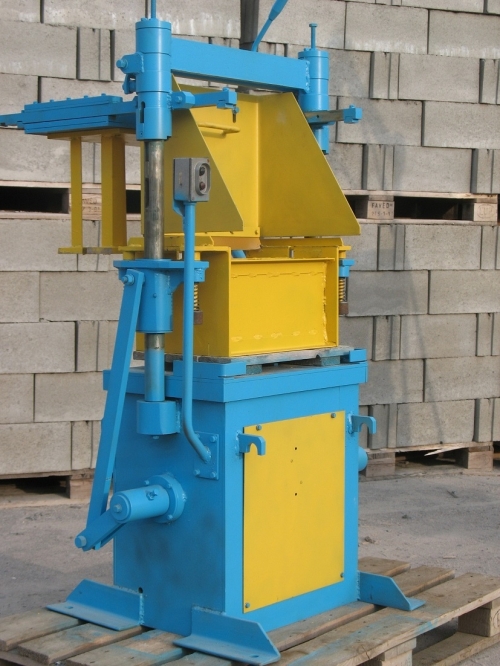
For the manufacture of paving slabs by vibration pressing, a vibration press is required for paving slabs. It can be mechanized, from an electric drive and manual mechanical. It consists of a form-matrix, in which a working mixture consisting of cement, a tooth and sand with a small amount of water is filled up. Then the matrix must be pressed and vibrations that will help to compress the working mixture. Matrices come in various shapes, sizes and drawings, they can be used many times. This method of production is an order of magnitude cheaper than the vibration due to savings on consumables and improvised means, but at the same time there are only a few (9-15) types of matrices for vibration, and there can be hundreds and thousands of forms for vibration for every taste.
For finished factory products under the marking, sidewalk tiles, the price ranges in the range from 10 cu. up to 16 cu per 1 m2. At the same time, the cost directly depends on the complexity of the shape of the tile and its color, as well as on the manufacturer. For example, some types of tiles can reach in price 25 30 cu per 1 m2.
Power paving stones paving slabs are the simplest rectangular shape resembling a brick. A bewildered stone referred to a stone in the form of a beam (rectangular) from the words. To date, the paving stones are the most popular and inexpensive paving slabs.
General rules for laying paving slabs
When choosing material for paving tracks, you can try to save on tiles. But you should not save on its styling. If there is no such experience, but there is a financial opportunity, it is better to contact professionals. Firstly, they have invaluable experience and knowledge. Secondly, the masters probably faced non-standard situations and know how to get out of them.
If you still decide to lay the paving slabs with your own hand, then the information below will be useful to you.
Before we move directly to the styling technology, we should familiarize yourself with the general rules:
- Work on laying paving slabs cannot be done in rainy weather. Otherwise, it is necessary to use a protective awning.
- If the tile has small sizes, it must be laid on concrete or glue for tiles.
- Sand, which is used for a pillow, should not contain impurities (clay, chernozem, organics or others)
- Upon completion of the work, the tiles cannot be sprinkled with sawdust.
- Non -kissed tiles are laid at the very end.
- It is necessary to purchase tiles with a margin of 10 % in case there are spoiled.
- The border can be laid both before the power of the tile and after.
It is also worth noting that the size of the carrier pillow depends on the purpose of the track or site. If it is planned that the car will stop by the site, then the thickness of the crushed stone layer should be larger (15,100 cm). There will be not enough pillow for the arrival of the truck, you will have to pre -concrete the surface.
Pressing tile laying technology
First of all, we are determined with the intended purpose of the site, this is a pedestrian path, a site for a gazebo or car. Then select the size, color and pattern of tiles. To form a figure layout, it would be nice to draw a scheme by hand. Then we purchase paving slabs, borders and filling materials.
Preparatory work and the formation of a pillow
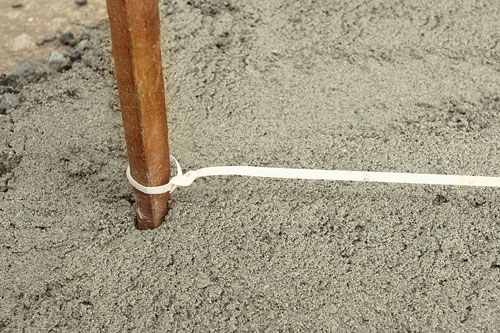
- The site that we are going to bridge with paving slabs are enclosing. To do this, use wooden pegs and twine. We measure the size of the site with a tape measure and apply them to the plan.
Important! We think about how rainwater will drain. Do you need a drainage?
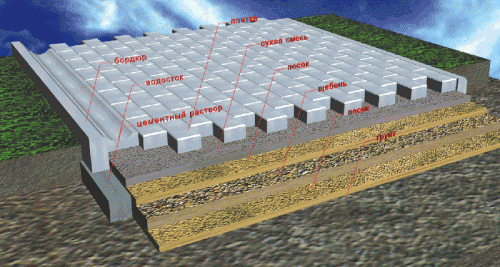
- Then remove the upper layer of soil. We calculate the depths as follows: crushed stone 10 cm, gravel 15 cm, sand 10 cm, cement-sand mixture of 5 cm, paving slabs 5 cm. It turns out only 40 cm. But taking into account the fact that we will trim the surface and the tile should protrude over the general The level of soil by 5 7 cm, then we make a recess to a depth of 25 30 cm.
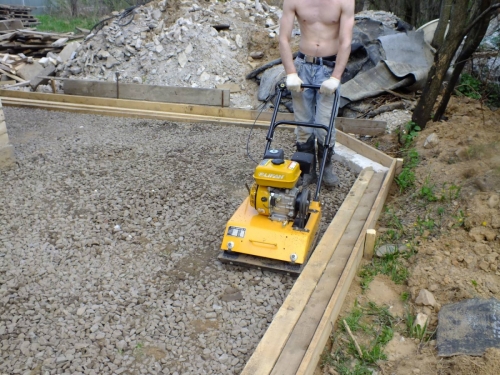
- Pour 10 cm layer of gravel with a fraction of 5 20 mm. It will perform frost -protective functions. We level the surface. Trick thoroughly. For these purposes, it is best to rent a vibrating plate. But for lack of nothing better, you can use a log with a blackboard nailed below (this option is not very good, but there will be enough for garden paths).
- Pour gravel or crushed stone with a fraction of 2 6 cm. This layer is bearing, so its thickness depends on the purpose of the site. The thinnest layer is 15 cm. Large 35 cm. Also defeated and trim with a vibrating plate.
Important! In order for rainwater to flow freely and does not stagnate on the tile, the slope is most often made to the sides of the middle of the site. If this is a path around the house a blind area, then a slope is made from the building.
- At this stage, geotextiles can be spread on top of crushed stone. It will interfere with the washing of the upper layers in the lower ones, but it will pass the water.
- The next layer is sand, necessarily clean, without impurities. If another layer with the addition of cement is planned on top, then 5 cm will be enough sand. We carefully level the sand layer and trim.
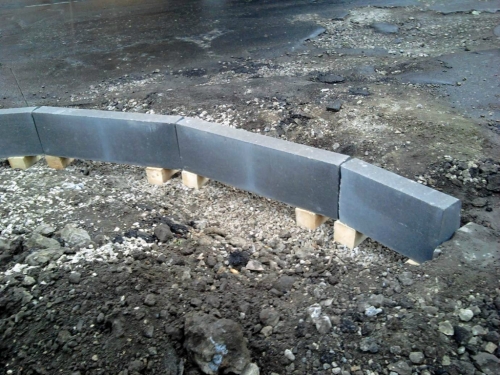
- Install the curbs. To do this, we make the excavation of the soil in the place, pour crushed stone and sand. Then we install the curbs on a sand-cement mortar.
Important! The borders must fit each other tightly so that the sand does not wash off the site in the rain. The border will also hold the tile on the site.
- We water the sand layer from the hose so that puddles begin to appear on the surface. Then let him dry (day).
- The next day, in sunny warm weather, we level the sand to a perfectly even state.
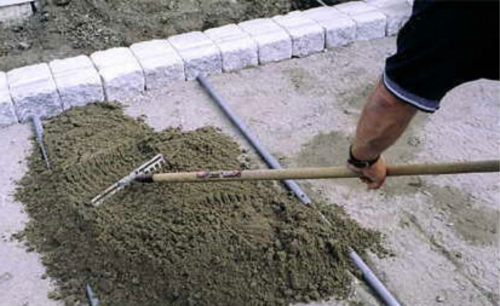
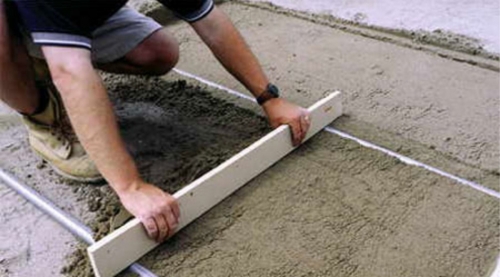
- Now it begins to fill up the finish layer of cement-sand mixture. Its layer should be from 3 to 7 cm, depending on the thickness of the tile and load on the surface. In order to make the layer even, we lay on the site beacons with a distance of 1 1.5 m. For these purposes, you can use purchased beacons or ordinary plastic pipes of the required diameter.
- Prepare a mixture for paving slabs. It can have a different consistency. But we mix 1 part of the cement and 8 parts of sand. The ratio can be others (1: 6, 1: 4).
- We fall asleep the mixture and level it with the rule or board, leaning on beacons or pipes.
The surface is ready to start laying tiles.
Laying paving slabs
The last time we check the presence of the correct slope for drainage.
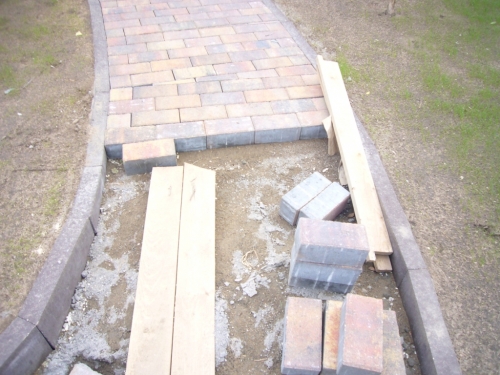
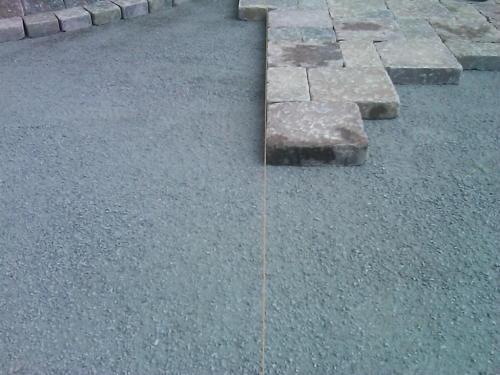
We begin to lay the tile. If there is no complicated pattern, then it is better to start laying from the right corner from the curb. Otherwise, as the drawing requires (it is quite possible that you have to start from the center). We do it from ourselves, i.e. We stand on the tile and lay on the prepared surface.
We press the plates tightly to the base. If they walk, we beat them with a wooden kiyanka. We join the tiles tightly, leaving no gaps. They will appear naturally and will be much smoother than if we do it on purpose.
If any tile does not lie evenly or is lower in level relative to others, then remove it, add sand to it, put again and compact.
Do not forget about laying tiles for drainage of water having a special groove.
Important! We constantly check the correctness of the picture and the horizontal level. The error can be from 5 mm to 1 cm per 2 m2.
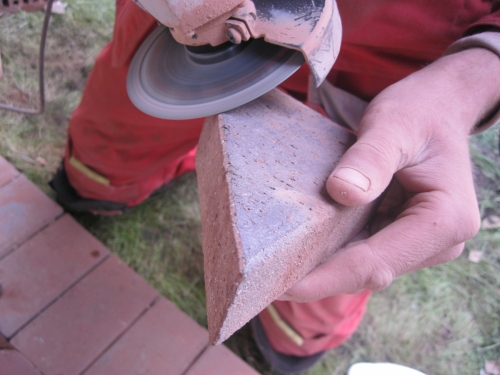
Lastly, we lay unnecessary tiles. To do this, cut them on a special machine with a diamond cutter. You can also use the grinder, although it is heavier and longer. Since a lot of dust will be poured during the cutting process, it is recommended only to slightly cut the tiles, and then break it.
At the end of laying paving slabs, we check its horizontal and even position relative to each other. If some is located unevenly, we finish it with a kiyanka.
Filling seams and tile tamping
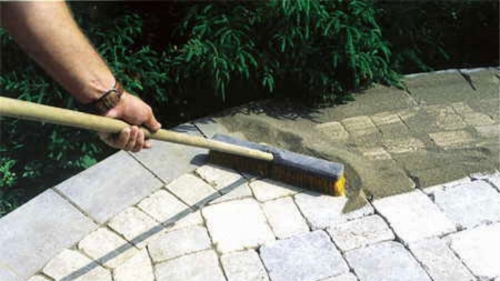
When all the tiles are laid, it was checked that everything is even, then all the seams must be filled with a cement-sand mixture or sand.
Important! It is impossible to add cement to the backfill of colored paving slabs, otherwise its color will change.
Pour the mixture onto the paving slabs. We take a mop with a stiff brush and in the gap in the gap.
Important! You can not give a large load on the tile, for example, to drive in a car, before the sand is sprinkled into the cracks.
When the sand from the surface of the tile was dared, moisten it from the hose. The mixture is laid in the gap. If there is a necessity, we fill up the sand once again and or in the tile. Then moisturize again. The mixture should grasp. It is this fermented technology that allows you to ensure that the tile does not move and does not move.
The last time we thoroughly trim the tile with a vibrating plate or vibration bromachine.
It is possible to fully use a path or a platform laid out paving slabs, only two days later. All the work is completed on this. Do not forget to save on materials for high -quality backfill, over time you will have to change the tile throughout the site. So it’s better to spend money now, but then you will admire the strength and durability of the coating.

Not so long ago decided with my husband
Not so long ago, they decided with her husband to engage in the improvement of their country site, to arrange the paths. The choice was stopped on polymer -sand tiles. But the question arose of how and what to lay it on, having read the reviews and did not receive an unambiguous answer. And there is already an answer on the manufacturer’s website of such tiles, a detailed styling technology, what and how it is better to lay it, as well as manufacturers conducted the styling tests, and all this showed the link http://tetto.ru/polimerpeschanaya-plitka /Tekhnologiya -ukladki, I think that it is useful for those who decided to apply this material.
Pressure tile technology
Trotuar-moskow.ru paving slabs technology