Installation of a terrace board is a rather complicated and painstaking process that ...
|
|
In the modern world, the development of building technologies is so rapidly that ... |
It is well known that Russia has long been famous for the power of the traditions of wooden house building, ... |
How to align the baseboard and wallpaper when gluing with your own hands
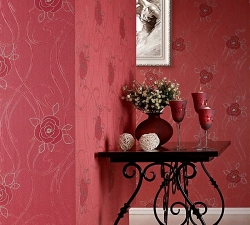
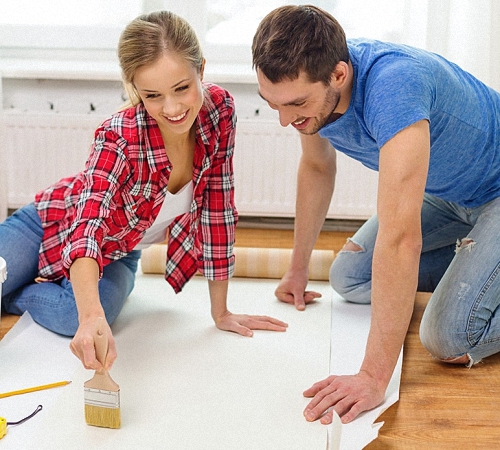
In order to get aesthetically attractive walls after gluing wallpaper, it is necessary to pay special attention to the skirting board. In addition, the joints between the wallpaper should also be qualitatively interconnected otherwise, the appearance of air bubbles under the wallpaper is possible. We learn about how to technologically properly stick wallpaper and align the baseboard.
Table of contents:
- How to align the wall under the baseboard: features of the installation of floor plinths
- Level the ceiling wallpaper: alignment of walls for wallpaper
- How to align the joints of the wallpaper: Features of the work
- How to glue skirting boards on wallpaper with your own hands
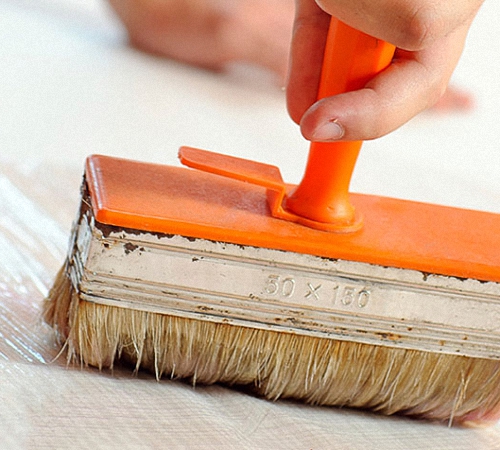
How to align the wall under the baseboard: features of the installation of floor plinths
Before starting wallpaper, it is necessary to align the walls. Only in this case, it will be possible to get aesthetically attractive coating. The final stage of the decoration of the room is the installation of a skirting board - both ceiling and flooring. It is the skirting board that gives the premises of nobleness, and with its help it is possible to get rid of minor shortcomings. Most often, wooden or plastic products are used as a floor skirting board.
There are several options for fixing the skirting board on the floor:
- nails or screws;
- special fasteners;
- Using glue or liquid nails.
In the ratio with the type of wall decoration and its preparation for the installation of the baseboard, one or another method of fastening is selected.
A wooden floor plinth requires a perfectly flat wall to install it. Therefore, such designs are used less and less. The most popular skirting boards are plastic products. They are able to simulate different surface compositions, including wood. The skirting board made from MDF is distinguished by instability to moisture and quickly deteriorate. For the floor on which tiles or natural stone is installed, the marble type of skirting board is suitable.
At the same time, plastic skirting boards are particularly popular, as they are suitable for wooden, laminate, carpet floors.
Before buying a plinth, it is necessary to determine the amount of material for work. Most often, the length of the floor skirting board is 250 cm. To calculate the number of materials, use the formula according to which the perimeter is divided into the length of the baseboard, thus we get the total number of plinth planks.
Upon receipt of the whole number, we recommend that you purchase one more skirting board. This is necessary in order to compensate for the joints between skirting boards. Pay special attention to the color of the baseboard. He must harmoniously fit into the overall interior of the room. When choosing a shade of baseboard, keep in mind such factors as the color of walls and floor, color sources. We recommend that you take a small part of the wallpaper and finishing material for the floor with you to the store, applying the baseboard to these segments, it will be possible to choose the ideal option.
Another advantage of plastic skirting boards is the lack of need for its exact sawing. This version of the baseboard has additional accessories that hides all joints. When calculating the fittings in advance, determine the number of right and left plows for skirting boards. The docking elements also connect two rails among themselves. To fix the angular fragments, the corner overlays are used, providing the same pressing of the corner against the wall.
Before starting work, make sure the evenness of the wall. The skirting board installed on an uneven wall will look aesthetically unattractive. Prepare the workplace, sort all the accessories as intended. It is advisable to use a special box for her.
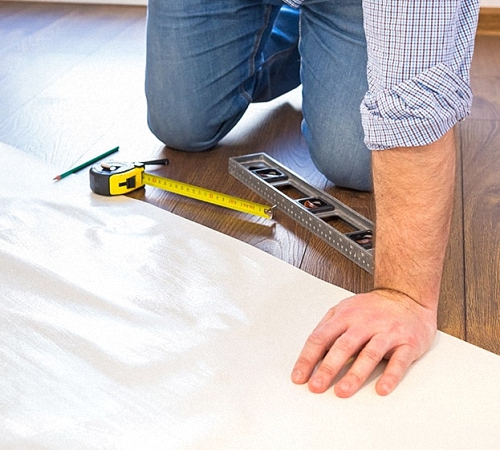
The skirting rails before starting installation work are cut in relation to the size of the room. Initially, those rails that will not be cut are installed. Try to place the junction of furniture or other interior items. Do not overdo it with docking elements, as they are quite expensive and reduce the aesthetic attractiveness of the skirting board. If the length of the wall is less than 250 cm, then using the roulette, measure the length of the wall and add 1 cm to this value. Personally make markings on the skirting board and cut the necessary element.
Cut the plastic skirting board is quite simple, as it is closed with plastic nozzles. All ends are cut off at right angles. However, in the presence of a crooked end of the rail, a skew of the internal angles is possible. Therefore, do this work slowly and with particular accuracy.
For a more accurate and simple cut of the skirting board, a hacksaw for metal is used. The use of a rod for sawing the material allows you to get perfectly straight angles. To remove the resulting burrs from the skirting board, use an ordinary knife.
Next, it is necessary to drill holes for the installation of a skirting board. The accuracy of drilling provides the quality of the installation of the skirting board. Do not rush when performing this process, thoroughly measure and place places for drilling.
To perform this process, the presence of a conductor is required, a punch with a nozzle in the form of a drill. If the walls are particularly flat, then it is enough to fix the skirting board with an interval of 500 mm. Otherwise, the interval between fasteners must be reduced. After drilling holes, take the dirt from the floor with a broom or vacuum cleaner, begin to fix the baseboard on the wall.
Level the ceiling wallpaper: alignment of walls for wallpaper
The type of wallpaper that will be glued to the wall determines the nature of the wall leveling. The first method is easier, it involves visual leveling of walls. That is, after the work, the walls will look even. At the same time, the maximum horizontal drops are 2 mm for every 200 cm.
The second method implies the complete absence of differences. Right angles should be withstanded in full. Also, the walls should be absolutely vertical.
The start of work on the leveling of the walls begins with the installation of the cord or level on the wall, checking their verticality and evenness. To check the geometric parameters of the room, it is enough to pull the diagonals over its area. The ideal option is the complete coincidence of the diagonals. With the deviation of the diagonals of 1 cm, it is enough to align the walls with a thin layer of putty.
To work on the leveling of the walls, it is necessary to purchase an bloodless gypsum putty. It is sold both in a dry form and ready for use. The first option must be diluted with water. In this matter, the main thing is not to overdo it with water, since the composition will not be held on the wall and lose strength. In order to find out the proportions of the mixture, first study the instructions.
In the process, the presence of two spatulas will be required. Using the first spatula, putty is taken from the container and applied to the second spatula. A larger spatula, which is the second designed to align the wall with putty.
Starting putty must be applied in several layers. Before applying the second layer, be sure to wait for the first to dry. In order to prevent the putty of putty, install the painting network between the layers. In order to level the wall in all directions, put putty with mutually perpendicular movements.
Before starting work, apply an antifungal solution to the surface and a primer of deep penetration. With their help, it is possible to improve adhesion between putty and wall. Keep in mind that the thickness of the putty layer, which is applied to the wall, depends on the size of the angle of the spatula.
Next, you should apply a finish putty on the wall, the leveling of which is carried out by a fine -grained skin. Application of finish putting before gluing wallpaper is not necessary. However, some types of wallpaper need a perfectly flat basis. In this case, the finish putty is applied to the wall.
There are wallpaper that levels the irregularities of the walls. In this case, the alignment is not required.

How to align the joints of the wallpaper: Features of the work
Before you get acquainted with the tips to align joints on the wallpaper, we propose to study the cause that cause their appearance. It is not difficult to align the irregularities of the wallpaper, however, it is better to prevent their appearance.
First of all, the joints on the wallpaper appear when the two paintings are divergent. All paper wallpapers or wallpaper that have a textile substrate swell under the influence of moisture. Further, gradually drying out, they begin to diverge. Therefore, when gluing the wallpaper, leave 1-2 mm reserve to compensate for the drying of the wallpaper. If the sheets are too wet in the process, then wait a bit before they are glued.
The presence of a large amount of glue on the wallpaper also leads to further divergence of the seams. Otherwise, in the process of drying the glue, it first grasps, and then the cloth is compressed.
Some wallpaper after the purchase have dark and uneven joints. Therefore, before buying wallpaper, carefully inspect all the rolls. It is also recommended to buy wallpapers from one batch so that there are no visible extensions in color. In this case, joints also become visible.

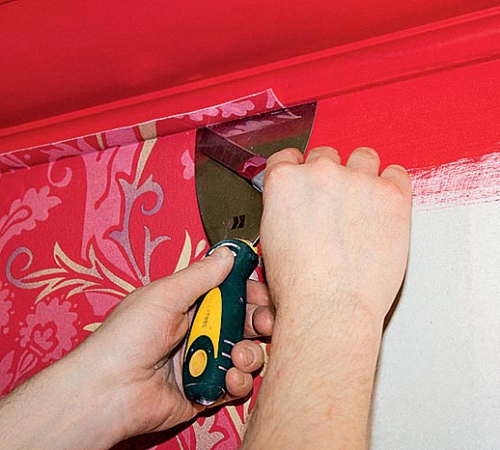
If the wallpaper, after gluing on the wall, can be painted, then fixing the joints will not be difficult. After staining, the wall will acquire the same color and joints will be invisible. Also, a special sealant is used between the wallpaper to close the seams. Next, it is tinted in a ratio with the color of the wall.
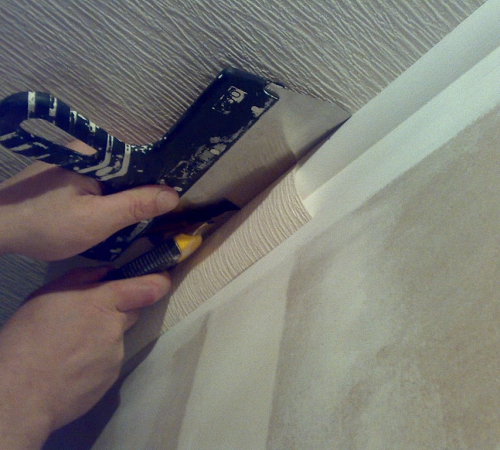
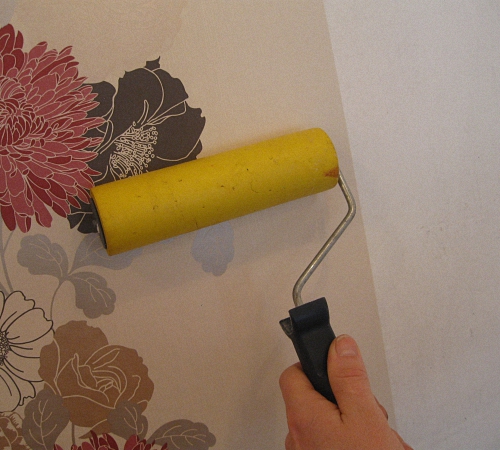
The use of putty to hide the seams between the wallpaper is unacceptable, since after time it will begin to crack and crumble. In some cases, it is necessary to overlap the joints of the wallpaper. This will require the presence of a brush, spray gun, water, sponge, brushes, rubber roller and glue. Initially, soak the edges of the joint with water, using a brush. Press the sheets to each other, then apply glue to the surface of the wallpaper and glue two canvases to each other as close as possible. Next, using a rubber roller, fix the wallpaper in the right position, remove the air and wait for their drying. You should not too moisturize paper wallpaper, as they can break or deform.
If the joints between the wallpaper are too large, then you will need to resort to more radical measures. This will require the presence of a stationery knife, scraps of wallpaper, tinting pastry, sandpaper and kant. Using the sandpaper, rub the crumbs from the trimming of the wallpaper. Combine this powder with glue. This paste is applied to the surface of the wall, if there are discrepancies in color, apply tinting in a ratio with a tone of wallpaper.
If you could not fix the joints on the wallpaper in the above methods, then work with furniture and interior items. With their help, it is possible to visually hide unattractive joints.
How to glue skirting boards on wallpaper with your own hands
Most often, polystyrene options are used as ceiling skirting boards. Paper skirting boards become less popular because of their impracticality. After buying a ceiling skirting board, you need to choose the technology of its installation.
Installation of a skirting board wallpaper of the ceiling after gluing wallpaper. This method of installing the skirting board is less time -consuming and involves the installation of a skirting board already on glued wallpaper. To fix the baseboard on the wall, special glue or putty is used. This method is highly popular due to the simplicity of its implementation and quality result.
Some professionals install a skirting board before gluing wallpaper. In this case, it is not possible to align the walls of the wallpaper. To align the wallpaper under the skirting board is quite difficult and not always manifested to achieve an ideal socket.
With the help of a plinth, it is possible to create the impression of absolutely even, geometrically correct walls. Glor of ceiling skirting boards wallpaper can be of several types:
- glue, which is based on polymers;
- glue installation moment;
- putty, for kneading which a PVA-click is used.
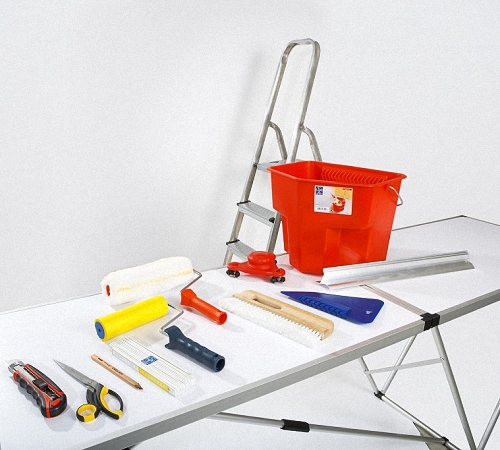
In the process, prepare tools in the form:
- mounting knife;
- struck;
- hacksaw;
- sandpaper;
- hermetic composition;
- putty;
- brushes;
- ruler.
In order to determine the number of ceiling plinths, it is enough to recognize the width and length of the ceiling, summarize them and multiply by two. Further, the resulting value is divided into the length of one skirting board. Add another skirting board to the resulting result to compensate for joints and certain installation moments.
On a paper sheet, make the ceiling design, observing a certain scale. Place entire skirting boards first according to the scheme, and then determine where the scraps will be located. At the same time, try to arrange them for furniture or other interior items.

Choose the side of gluing the skirting board, try to place the wide side of the baseboard at the place of the presence of a large number of flaws. Cut the baseboard in the ratio with certain angles. For these purposes, you will need to have a choser and a hacksaw. Be careful when determining the angle of inclination of the baseboard. Apply glue on the skirting board on both sides, do not overdo it. In the presence of a small number of excess glue, remove them using a dry clean rag. Hold the baseboard for several minutes on the wall so that the glue grabs. By the same principle, dispensation is established. Next, using the sealant, apply it with your hand to the joints between the baseboard and the wall. After drying the sealant, paint the skirting board in the desired color.
![]()
StrPort construction portal 2011-2018. Articles about repair, construction, building materials.
Copying information from the site is possible only with permission of the editorial office Or indicating a direct link to the source. Legal justification