Did you have to pay attention to what the entered into ...
|
|
The conditions of comfortable residence in the rooms of the attic directly depend on correctly ... |
Parquet with proper care and neat operation can last more than one ... |
Pokusa plaster: step -by -step instructions

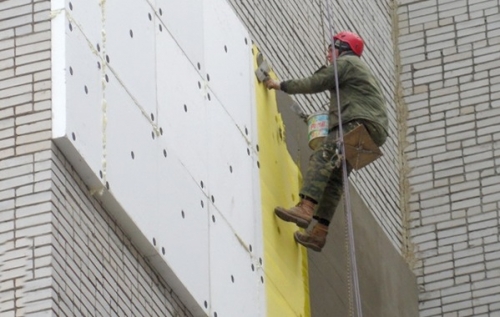
The heat -insulating layer of foam is needed reliable protection against the destructive effects of environmental factors. Stucco will be worthy of this task, the application of which will ensure a long service life of the insulation and improve the thermal insulation of the structure.
The need to plastered polystyrene foam
Polymer materials are distinguished by a long service life. No exception is a foam. Experts conducted tests and subjected to foam conditions that imitate 80 cycles of temperature change. The results justified the expectations of technologists Foam did not lose its technical characteristics.
How is it possible? After all, many assure that foamed insulation is short -lived material. Indeed, with mechanical influence and direct effects of ultraviolet rays, the foam dry and destroy. Using polystyrene as thermal insulation, it is necessary to plastering it this will solve a number of problems:
- Protection against mechanical damage. Foam is fragile material, a hole can form when hit. The plaster will protect the insulation from the formation of dents and other damage.
- The plaster protects the foam from moisture penetration. The insulation does not absorb moisture well and dries for a very long time. A long stay in damp reduces the thermal insulation properties of the material and makes it more fragile.
- Foam plaster protects the surface of the material from sunlight.
- Increasing fire safety. The plaster will become a kind of shield on the path of fire and prevent the fire of foam.
Foam plaster technology: stages of work
To understand the work process, you need to know what stages include the finish of foam plaster:
- Preparatory measures: the choice of materials, tools and the alignment of the foundation.
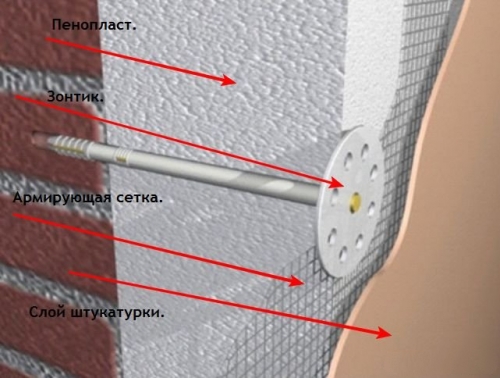
- Preparation of the working solution and fastening the reinforcing mesh.
- Grout plaster on the facade grid.
- Primer and alignment of the layer of plaster.
- Final work: decorative wall decoration.
DIY foam plaster
We will analyze each of the stages in detail, dwell on the features of each workflow and give the recommendations of specialists for the choice of building materials.
Preparation of tools and materials
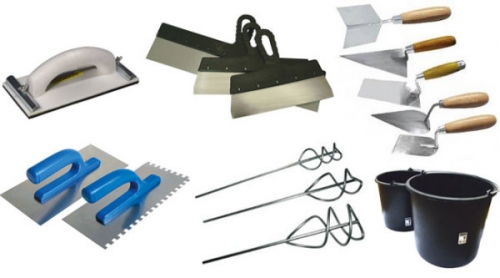
The following tools will be needed to plaster walls on the foam:
- grater for plaster;
- container (bucket or pelvis) for breeding the working solution;
- drill with a mixer;
- painting construction grid;
- sandpaper abrasive paper for grouting;
- master OK;
- putty knife;
- level.
From the materials you need to prepare:
- plaster mixture;
- primer;
- decorative plaster.
For decoration of polystyrene foam, special plaster mixtures have been developed. The quality of work and the service life of thermal insulation will largely depend on the choice of plaster. Facade foam plasters are divided into two main groups:
- Mineral plasters are available. The material is based on cement and sand. Such a coating is short-lived, 2-3 years after repair work, the plastered layer begins to crack.
- Acrylic plaster has a number of advantages:
- high adhesive and protective properties;
- decorative coating;
- wide range of color solutions;
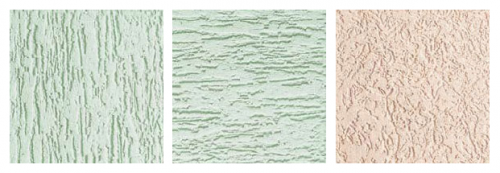
- the possibility of textured finishes (lambs, bark beets, rain).
Acrylic plaster will cost more than mineral, but such expenses are justified by the long term of its operation. The only drawback of acrylic fades under the influence of UV rays.
The alignment of the base
Before applying the plaster to the foam, it is necessary to take care of the evenness of the walls. The joints between adjacent foam panels should be at the same level. This is easy to determine enough to draw a rule or a wide spatula along the wall.
Important! The alignment of the draft surface should not be left for later. To straighten the defect with a layer of plaster it will be almost impossible
Particular attention should be paid to the seams between the foam blocks. All sections should be sealed, excess mounting foams are cut off. After leveling, the base must be cleaned of dirt.
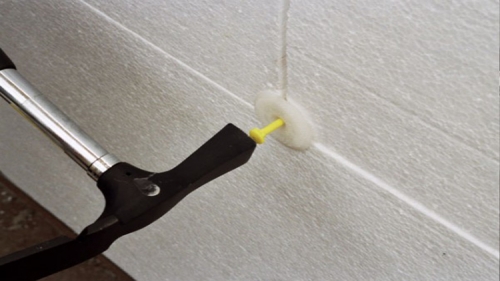
Advice. Polistyle foam is a fairly smooth material to which glue does not stick well. It is advisable to increase the adhesion of materials. To do this, just walk with a needle roller on the surface of the insulation. A working mixture will penetrate into educated small pores
Preparation of the solution
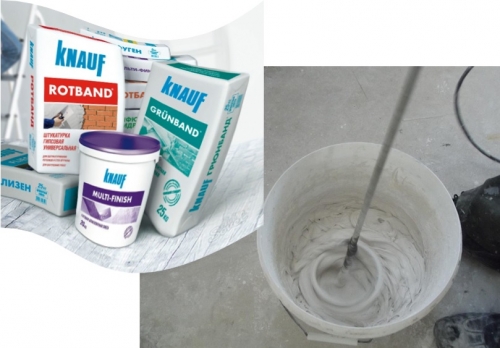
You can purchase ready -made mixtures for plaster foam. The goods of Ecomix and Ceresit companies have proven themselves well. On one section of construction work, it is recommended to use mixes of one company. The best option is to choose a universal solution (glue-tucker for foam), which is suitable for attaching the insulation to the wall and for arranging a protective layer.
Some companies produce two -type mixtures: separately for fastening heat -insulating plates and separately for their protection.
For plastering 1 m2 of the reinforcing mesh, about 4 kg of the mixture will be needed, and for leveling 1 m2 walls 6 kg
The batch of the working solution must be performed in accordance with the instructions indicated on the packaging. Experts advise using the plaster mesh to stick the solution a little slurry, which the manufacturer recommends so the mixture will better penetrate into all pores of the insulation.
Installation of a plaster mesh
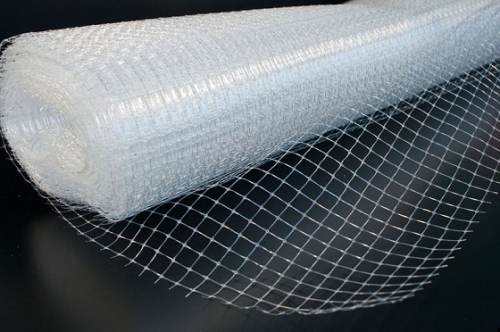
For a strong fixation of the layer of plaster on the foam, it is necessary to install a net. If you apply the plaster immediately to the foam, then it cracked very quickly or even disappears. Strengthening the base with fiberglass mesh will avoid such consequences.
Which grid to choose? When working with an external insulation, it is better to give preference to more dense nets on such a reinforcing layer of plaster to lie better. However, it is more difficult to process corners with a dense net. The optimal mesh for plaster foam has a density of 130-160 g/m2. It is desirable that the selected material is resistant to alkalis, as it will contact the cement.
First of all, they begin to decorate the corners, window and door slopes. The sequence of installation of the grid on the angles:
- The reinforcing mesh for angles strip 30 cm wide. The length of the mesh is determined based on the length of the slopes. For laying on the corners of the house, the grid is cut in strips about 1 meter long.
- In the middle of the grid, make an excess.
- Apply the solution to the wall with a wide spatula. The length of the strip is equal to the cutting of the grid, and the width is 10 cm larger than the size of the piece (you need to leave 5 cm on both sides for overlap).
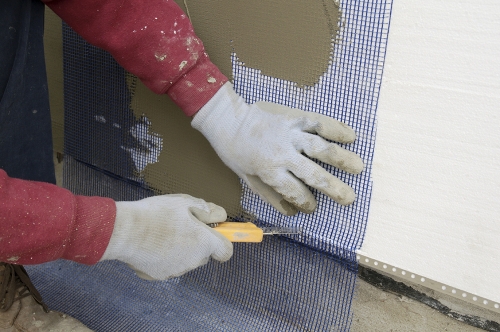
- Apply the grid to the corner and smooth out with a spatula. The direction of movement of the spatula from top to bottom and from the center to the edge. The grid should be completely immersed in the solution.
The installation of the grid on the wall is performed in the following sequence:
- Cut the plaster mesh into pieces. The length of each section is not more than 1 meter.
- The fastening is performed sequentially in small parts, since the mixture dries quickly enough. The dimensions of each site are about 90 cm per 1 meter. The remaining 10 cm will be needed to glue joints.
- Apply the mixture with a spatula to one site.
- Apply the grid to the wall, press and smooth out with a spatula. Smooth movements to fix the net. If the net is not completely immersed in the mixture, then the solution can be applied to the spatula and re -level.
- Such work must be done with each section of the wall, shifting to the side. The installation of the grid is overlapped.
Fabric
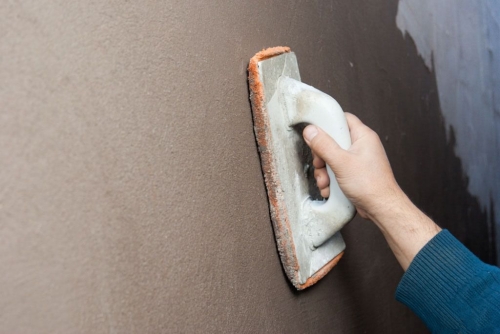
The reinforcing mesh glued into the plaster solution must be wiped with an sandpaper or plastic grater. This process begins after the universal mixture is completely dried. In hot weather, the plaster dries for 2-3 hours, and in cloudy at least a day.
The grout must be performed in circular movements in the direction counterclockwise. If you get into the exhausted plaster on sandpaper, the canvas must be replaced.
Primer and alignment
The next stage of the external plaster in the foam is applied the aligning layer and the primer of the surface.
- A smaller spatula apply the solution on a large spatula (35 cm or more).
- Apply the mixture to the wall with smooth, confident movements. If the grout was made qualitatively, then a 2-millimeter layer of plaster is enough to level the surface.
- The docking line of the leveling layer should not coincide with the place where the joints of the grid pass. With this execution, the seams are less noticeable.

- After drying the plaster, conduct a grout. It is better to perform work no later than the 4th day after applying the leveling layer, otherwise the solution will dry out and you will have to make special efforts.
- Do not neglect one of the stages of plastering of foam, like a primer. The primer incorporates excess materials after grouting and increases the adhesion of the finish and the leveling layer. For processing, you can use an antifungal primer, which prevents mold and wall wetting. Apply soil to the surface with a roller. It can be a short pile or an ordinary foam roller.
- Let the primer dry and start the finish decorative decoration.
Finishing wall decoration
The final stage is decorative decoration. For external work, special facade plasters have been developed, resistant to temperature changes and climate changes. The properties of facade plaster largely depend on the type of binder and the presence of additional components. To work, use mineral, acrylic and silicate plaster.
The sequence of application of decorative plaster:
- Prepare a working solution (mineral mixture). Mix the finished plaster (acrylic composition) thoroughly.
- Application of plaster. At this stage, it is necessary to plan the structure of the future finish on this will depend on the set of tools and the technology used. The thickness of one layer should not exceed 40 mm, and the subsequent should be applied after the previous one dries.
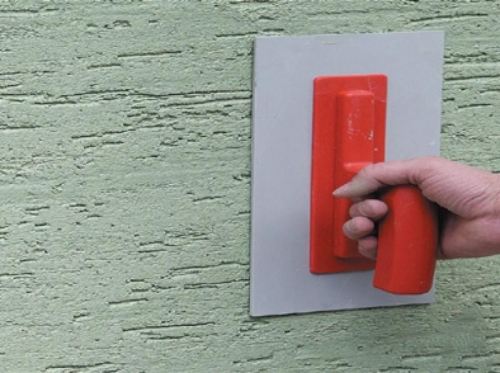
- Grout. They proceed to this stage when a layer of plaster is half dried, amenable to adjustment, and at the same time, already fixed on the surface. The special structure of the facade is formed using a roller of a special configuration.
Important! The application of facade plaster should be performed under favorable weather conditions:
- optimum temperature 5-25s;
- air humidity is not more than 65-70%;
- lack of strong winds.
Bark beetle plaster for foam: application technology
Foam plaster: video

cabbage soup
cabbage soup