When decorating the bedrooms, important attention is paid to the ceiling, which should ...
|
|
Today, the ceiling such as whitewashing is almost no one uses. They came to her ... |
With the help of a ceiling cornice, it is possible to divide the space between the wall and the ceiling ... |
Adjustable floors on the lags
In order to align the draft floor, adjustable floors on the lags are used for further decoration. We will talk about the device, features and installation of the adjustable floor on the lags in this article.
Table of contents:
- Device and advantages of adjustable floors on the lags
- Constructive varieties of a system of adjustable floors
- Installation of adjustable floors on a concrete floor
- Tips for the implementation of sound, waterproofing or insulation work
- Installation of the adjustable floor on the logs on a wooden base
- Installation of an adjustable floor on a wooden base
- How to make an adjustable floor with your own hands
- Installation of adjustable stilettos
- Recommendations for the installation of a adjustable floor on the lags
- Installation of the adjustable floor on the corners
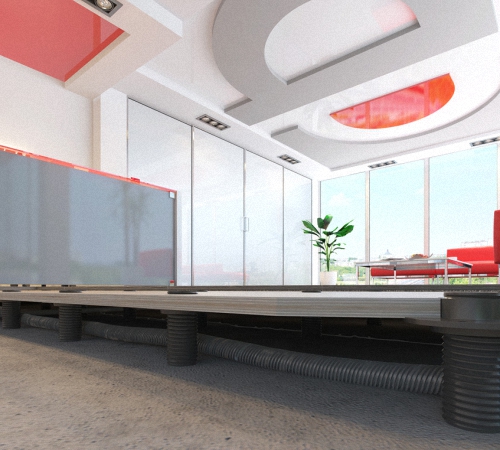
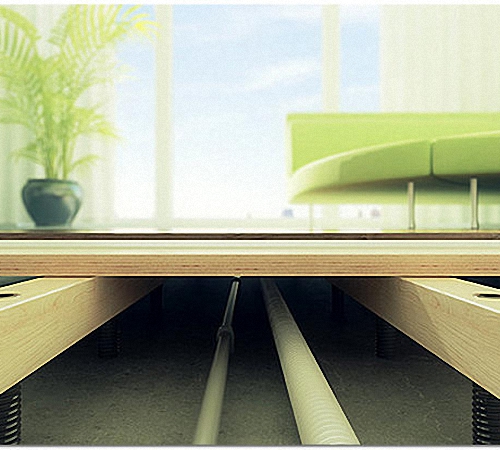
Device and advantages of adjustable floors on the lags
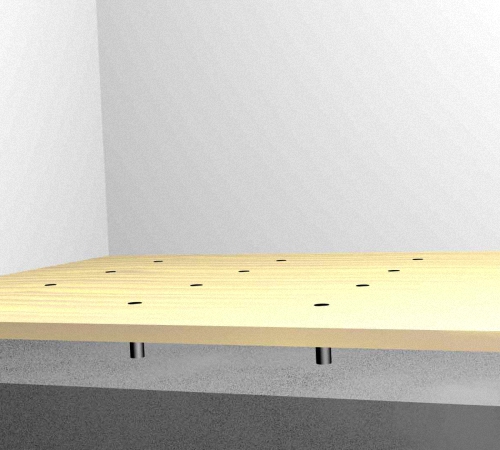
The adjustable floor on the lags involves the installation of the floor on special boards under which the underground space is located. Thus, additional leveling of the surface is not required using a concrete screed.
To the base, which is soil, concrete or wooden, is attached by a threaded anchor fixer, which is able to rotate around its axis and, thus, adjust the height of the floor in a certain area.
Fastening of anchors is carried out depending on the type of black floor:
- to a wooden basis, the anchors are attached with self -tapping screws,
- to a concrete slab using polypropylene needle dowels,
- To the concrete screed with the help of dowel-grooves.
The main functions of the anchor structure are:
- load department,
- ensuring the adjustment of the height of the floor,
- The strength in the connection of the adjustable floor with the draft.
Advantages of installing the adjustable floor on the lags:
- Installation in a wooden house or cottage will not additionally load the construction of the building, since adjustable floors on the lags have a low weight compared to the concrete screed;
- Installation of the adjustable floor on the lags, relatively dry type of work, which will not dirty the walls or other objects of the room;
- Wooden floors do a great job with large differences, which are more than 15 cm;
- The installation of the adjustable floor on the lags does not take much time, and does not require additional expectation to put the floor into operation, thus, immediately after installing the floor is ready for further decoration;
- The presence of an additional space in the underground space will help to hide the wiring, sewer pipes or provide additional ventilation;
- ease of installation, allows you to install the floor on the lags, even a non -professional;
- As experience shows, adjustable floors on the lags have a service life of about fifty years;
- Available cost makes the installation of floors on the lags more popular compared to the concrete screed;
- Modern developments make it possible to make a perfectly even wooden floor, which does not create a creak.
Constructive varieties of a system of adjustable floors
1. In new buildings, adjustable floors on the lags are increasingly installed, which are based on strong chipboard plates and special devices that are made of plastic. Plastic devices provide horizontal floor regulation. This design allows you to raise the floor to a fairly low level of about 4 cm.
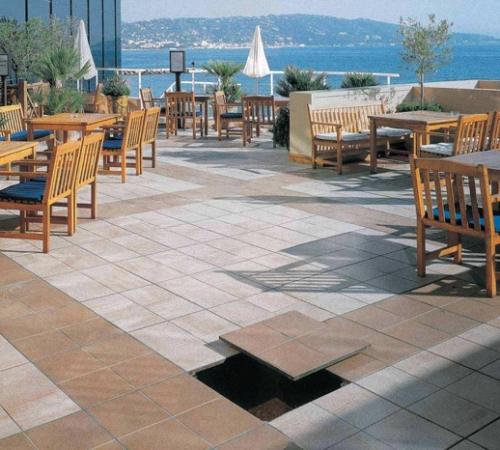
2. Standard adjustable floors on the lags include lags that provide complete floor adjustment, and allow you to arrange a rather spacious underground space. All floor elements are firmly attached to a concrete screed or wood -based. Such floors are installed in old houses that require thoroughly aligning the floor with large differences, or in new houses in which the owners plan to use underground space for certain purposes.
Installation of adjustable floors on a concrete floor
The installation of the floor on the lags begins with marking, which is better to carry out using a thread. The thickness of the base board affects the step between the lags. In the place of the future location of the lag, pull the two threads that will help adjust the desired height of the bars. Using the level, check the correctness and evenness of the installation of threads. Two more threads should be installed perpendicular to these threads.
To install mounts, the distance of which is from 0.3 to 1 m use:
- P-shaped brackets and dowels;
- anchors;
- corners.
Attach the lags to the side of each beam and install the finished structure on the concrete base, which should resemble the web. Using screws, attach the lags to the concrete base.
To align the surface of the floor, install additional lining that mount under the bars. To attach the lining, use a P-shaped bracket or screws.
Tips for the implementation of sound, waterproofing or insulation work
If the adjustable floor is installed on the ground floor of the basement, it is required to carry out a number of works aimed at ensuring sound, heat and waterproofing of the floor.
The first layer is waterproofing, use polyethylene film or permamine as a material for waterproofing. Put the material in the space between the lags.
The next layer is thermal insulation.
To carry out thermal insulation, one of the components is necessary:
- mineral wool;
- polyurethane foam;
- icolon;
- polystyrene;
- Phenopol.
Lay a layer of thermal insulation. Follow the absence of gaps. Lay vapor barrier material.
Materials that are used as additional thermal insulation:
- sawdust granules;
- concrete with sawdust;
- wooden blocks;
- Arbolit.
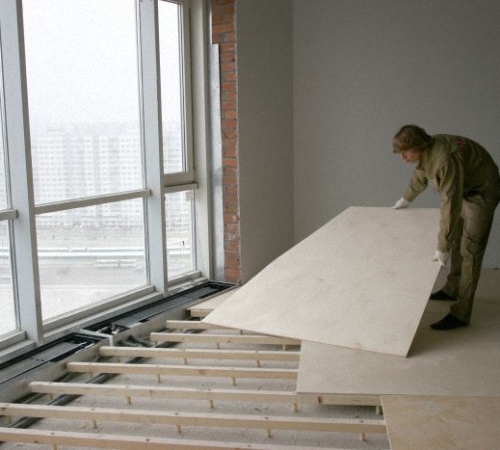
Installation of the adjustable floor on the logs on a wooden base
The wooden floor is installed directly on the design of the lag or on the black floor, which is made from:
- plywood,
- Chipboard,
- any other boards.
An additional base serves as the basis for preventing floor deformation, during operation. The base is attached to the lags with self -tapping screws. The places of the docks should be located on the bars. A trimming board is best suited for the formation of the draft floor, which does not form changes and ensures the flatness of the floor.
The floor regulator is plywood or directly lags. The adjustable floor on the lags differs from the usual in that the lag fixing occurs by twisting the adjusting bolts located in the racks.
When using the flooring, plywood, plywood is attached directly to the bolts. Thus, they receive an adjustable floor.
Installation of the adjustable floor using leveling plywood:
1. On the back of the plywood, drill holes and insert the bushings. The distance between them depends on the constructive properties and the load on the floor.
2. Polymer bolts should be screwed into the holes.
3. Install the structure on the draft floor.
4. Attach the structure to the flooring using bolts.
5. Rotating the racks-bolt adjust the level of inclination and flatness of the floor.
6. The remains of the bolts that create the hills should be cut.
7. Install the next layer of plywood.
8. Roll the floor, depending on the selected coating.

Installation of an adjustable floor on a wooden base
Consider the rules for installing an adjustable floor on the lags. The main purpose of such a sex is to align the surface by raising and lowering the bolts.
Instructions for installing an adjustable floor on the lags:
1. Scroll through the polymer bolts that are located in the lags.
2. Install the structure on the draft floor.
3. Drill the hole through the anchors and forget the dowels into them and screw the screws.
4. Using a building level or laser device, measure the distance and evenness of the installed surface.
5. Cut the excess bolts and install the black floor.
How to make an adjustable floor with your own hands
For the manufacture of an anchor element, the availability of:
- clogging anchor;
- stilettos;
- two nuts and bolts for each anchor element;
- metal plate.
The main function of the hairpin is the maintenance of the bolt, the metal plate is the structural part to ensure the support. The metal plate is attached to the hairpin with a bolt and nut. With the help of a nut, flooring is regulated on the lags. To fix the upper part of the beam, use another bolt.
For other parts of the regulatory floor, you must go to a construction store for the purchase of flooring and material for lags.
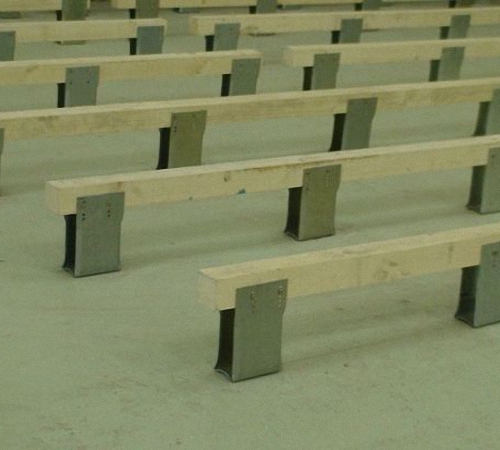
Installation of adjustable stilettos
1. The adjustable floor on the stilettos consists of lag made of a beam with a section of 5x5 cm. The floor adjustment is made with hairpins.
2. The base of the floor is leveled, cleaned of small particles of dust and small cracks are sealed.
3. The next step is to drill holes at the base. Anchors are inserted into the hole and studs are installed.
4. The nuts are wound on stilettos and dressed bolts. At the same time, the hole in the beam should be drilled.
5. Install the beam, having previously put on a hairpin so that the bolt with a nut is at the bottom.
6. One nut is responsible for adjusting the beam, and the second - for fixing.
7. The next stage is waterproofing and insulation.
8. The flooring of the draft floor and the subsequent finish complet the installation of the adjustable floor on the hairpins.
Recommendations for the installation of a adjustable floor on the lags
1. Before installing, process all wooden structures using special impregnations that will protect the tree from the appearance of mold, fungus and other microorganisms, as well as increase the high -quality and fireproof properties of the tree.
2. When sagging the lags, put a piece of wood or plywood under the structure, which is previously moistened with glue.
3. Waterproofing layers should be laid.
4. Between the joints of the boards, leave a gap of 1-2 mm, to expand the tree.
5. When installing a two -layer floor, make sure that the seams on the first layer do not coincide with the seams of the second.
6. As a material for lags, use a wooden beam with a section of 5x5.
7. The optimal distance between the bars is 30 cm. This distance will provide good rigidity of the floor structure.
8. When installing the adjustable floor on the lags, the indentation from the walls should not exceed five centimeters.
9. When drilling a bar, it should be noted that the diameter of the hole should be equal to the diameter of the hairpin.
10. Between the holes on the beam, the interval should not exceed 50 cm.
11. After drilling the beam, a chick should be done, which will help to drown the head of the nut in the future. The diameter of the tsikovka is equal to the diameter of the nut.
12. The most convenient tool for adjusting the floor on the lags is a laser level, in the absence of this device - use the usual, building level.
13. For trimming, an excess of studs is best suited for a grinder or a knife for metal.
Installation of the adjustable floor on the corners
If the base of the floor is unreliable, it is better to use the adjustable floor in which adjustment occurs using metal corners.
Installation instructions:
1. Decide on the level of the surface of the future flooring.
2. Mark the line on which bars will be installed using a thread.
3. According to these lines, attach metal corners to the floor. The distance between them is 50 cm.
4. Choose the size of the corners, depending on the floors of the floor.
5. Perform the installation and fixation of the bars. Using the level, check the smoothness of the surface.
6. To ensure additional stiffness, set the corners on both sides of the lag.
7. Install hydro- and thermal insulation, and lay the black floor.
8. At the edges of the design, the bars are mounted to the wall.
Adjustable floors of video:
![]()
StrPort construction portal 2011-2018. Articles about repair, construction, building materials.
Copying information from the site is possible only with permission of the editorial office Or indicating a direct link to the source. Legal justification
He disassembled the old floor at home.
He disassembled the old floor at home. The height of lifting centimeters 12. I looked at all the options for sand concrete, super floor and lags. The sand concrete threw back right away
Too heavy design is obtained at the output of the cold floor. Then he drew attention to Knauf, I think how everything is well written straight
Really super floor. In fact, not everything is so rosy, the floor at high altitudes is intimidated, sagged, afraid of moisture.
I came to the lags. There are two stilettos and polymer bolts. Metal threw back because different materials. The studs fix the lag on both sides
She refers and plays back. The floor begins to creak. The metal is like a bridge of cold. And when you step on them to your neighbors through the stove
Crossings. Actually, I made myself the floor on polymer bolts. Installed quickly. It turned out a strong floor. I have never regretted it.
He threw the Ministry of plate into the voids. The whole family is happy. In general, I advise you to make the floor on the lags with a hard mount on polymer bolts.
I don't know how everyone else, but I have a screed
I don’t know how everyone else, but I don't like the screed! The floor is cold plus the load on the overlap is large. I disassembled the old floor in Khrushchevka so there is a height in places of 14cm. This is how much bags need to raise the embarrassment of the floating floor in my opinion also so -so option. Yes, expanded clay, but where it was mined a big question (he can fan), in general, after a couple of months of finding a suitable option, I decided not to invent a bicycle and make the floors on the lags the same way, but with normal fastening and height adjustment. There are a lot of options on the market, but opted for plastic bolts and metal studs on 2 options. I read the reviews looked at the constructive. What came to: plastic supports are more fragile, but they transmit less blows to the neighbors from below, a more complex preparatory process associated with cutting threads in the bar and of course the price !!! Dear plastic. On the other hand, metal studs are cheaper than plastic, which is strange! In theory, they will be much better knocking on the neighbors from the bottom on the head (a small child who runs and jumps tirelessly), but the installation seems to be easier, although it is still sadism to cut off extra hairpins with a grinder. And it was also embarrassed that it was almost impossible to find a really dry bar for my needs, as a result of which there was a great doubt that the hard mount with the help of nuts and washers will weaken over time because The bar in any case will dry a little, and the result of this will be a backlash, which means a creak. From my point of view, the plastic supports of this ailment should be avoided The bar will hold a plastic support even more. It was decided to take plastic. With the installation of problems, the apartment did not arise in 42M2 gathered in 3 days, having previously sent the whole family to the cottage))) I was satisfied with its choice, the floors are strong and do not creak.