The garage is not only a shelter for the car, but also acts as a second home ...
|
|
The growing popularity of wooden houses associated with their highest environmental friendliness, ... |
The quantity and quality of the laid reinforcement factor that directly determines ... |
Balcony expansion: step -by -step instructions
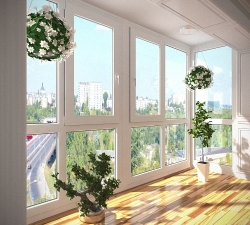
The problem of expanding the area in the apartment can be solved by the issue of increasing the balcony. In this article, we will consider two options for the work: on the outlet of glazing and the base of the stove with step -by -step instructions.
Table of contents:
- Glazing method: Instructions
- The second method of expansion on the base of the stove: step -by -step instructions
- Paul for the balcony
- Fencing for the balcony
- Glazing the balcony
Glazing method: Instructions
Not every person can increase the area in the apartment, but sometimes, in a completely constructive way, an increase in the balcony remains. With the help of some forms of transformation, you can easily do repair work. As a result of expansion, you will receive a cozy and multifunctional area for the whole family. There are two options for expanding the area:
- capital or expansion of the balcony on the base of the stove;
- removing on the windowsill.

Two methods are quite simple and affordable if you pan the object within 30 or 35 cm. With a greater increase in area, you must contact the appropriate authorities in order to obtain permission to carry out work. The expansion of balconies, photos of which helps to evaluate the most acceptable option for increasing the area.
To start work, all that is necessary is the availability of available materials, tools, as well as skills. Welding works can be the only obstacle. At least they require the presence of equipment and the ability to use this device. For those who own these skills, an increase in the balcony is not problematic. Otherwise, it is better to call for the help of specialists who will help to do welding.
This method is also called a sill. The essence of the work is to set the device of the window frame beyond the balcony, using the use of brackets made of durable materials.
So, consider step -by -step instructions for expanding the balcony according to the methodology for ejecting.

Mounting:
The work is started with the installation of metal brackets. They are made of welded corners, which represent the design of steel and stripes. All parts are installed on the parapet. First of all, it is important to secure the brackets securely, and their corner part lies on the parapet, and the slopes support the degree of load on the entire structure.
The process of attaching brackets to the parapet:
1. The brackets are treated with an anti -corrosion agent.
2. They are attached using welded mount, if the entire structure is metal, and if concrete, then it is connected by anchor bolts.
3. The installation of a metal pipe helps to strengthen the brackets among themselves, which determines the stability of the structure. Next, it is used as a profile installation for the base for glazing.
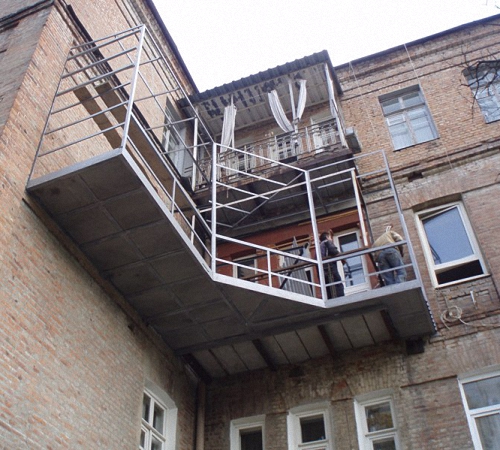
4. If necessary, the design can be enhanced by fastening with metal, in this way:
- instead of an old metal fence, weld steel corners and profiles;
- the formation of the structure, which binds the entire parapet, is attached to the wall.
Do -it -yourself work on expanding the balcony can be done in two ways: the first foresees an increase in the front edge of the balcony, and the second expansion around the perimeter.
Further, on the installed brackets should put a plastic windowsill. It performs a decorative and protective function. In the first case, it is intended to increase the area of \u200b\u200bthe inside, and in the second protects the entire completed structure.
Procedure for the work:
The technology of expanding balconies is complex stages of work to obtain a quality design.
List of working tools:
- bulgarian;
- electric drill with a set of necessary drills;
- a hammer;
- level for construction;
- mount (can be replaced with a sliced);
- anchors are 4 pieces, in size from 20 to 25 cm;
- profile pipe with sizes 40x40;
- primer and brush;
- pencil or chalk for marks and designations.

The following describes the procedure for carrying out all the work:
1. Calculation of the total length of the profile is carried out. To do this, add the length of the side walls to the length of the parapet, as well as the distance between the jumpers and double the calculations.
2. Using a grinder, it is necessary to cut off all the old railing, leaving only the columns. After that, the profile is prepared in accordance with the length of the balcony. If the length is too large, then you can divide the profile into two parts and remove it separately, and then cook them with each other.
3. Further, to the question of how to increase the balcony of this technology, you should turn to the service of the welder if you are not strong in this process.
4. The profile must be put at the end of the plate of the balcony, and it is welded on the marks by welding from one side.
5. Then, with the help of a building level, putting it in a horizontal position, they also grab and weld from the reverse side.
6. It is important that the entire profile is even. For confidence, it is checked by the level, and in the presence of irregularities or bends, the situation is corrected using a mount or hammer.
7. All parts should be professionally welded. This is necessary so that the entire structure can withstand the falling load, and this is determined by the quality of cooked seams.
8. Next, they weld the jumpers according to the technology of VSTOK, before cutting them taking into account the total width of the installed profile.
9. With chalk, you need to indicate the places of attachment of the jumpers.
10. They are welded from all sides: from the side, from below and from above. Before this work, jumpers are also checked for evenness, and if necessary, adjusted.
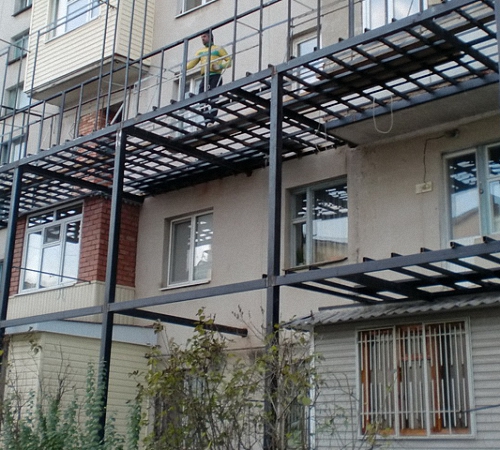
11. To make an external frame, you need another length of the profile. It is located on weight, so the total length should not be long.
12. The profile is attached to the ends of the jumpers.
13. In the jumper on the sides, which are located on the wall, two holes are drilled and attached to the base using anchors.
14. In the absence of side sides, angular supports must be installed at the end of the frame.
15. After welding, the entire slag in the places of welding elements must be left. At the end of the work, the design is primed.
The second method of expansion on the base of the stove: step -by -step instructions
This method is also called the expansion of the balcony on the plate. This technology helps to increase the space by about one and a half times. All work is performed with the help of channel made of ultra -strength metal. Such an extension represents a reliable design that practically does not wear out. In this process, as well as in the previous version, it is necessary to resort to the help of the welder.
Preparation for work:
Metal fences must be cut off with a grinder, and only the base of the stove is left for the workflow. To save, some elements of the old fence can be used to weld certain parts. Some use reinforcement and stripes.
Before starting work, the working space below should be protected with a ribbon, and the fence, which was cut off by a rope. All this is necessary to ensure security measures.
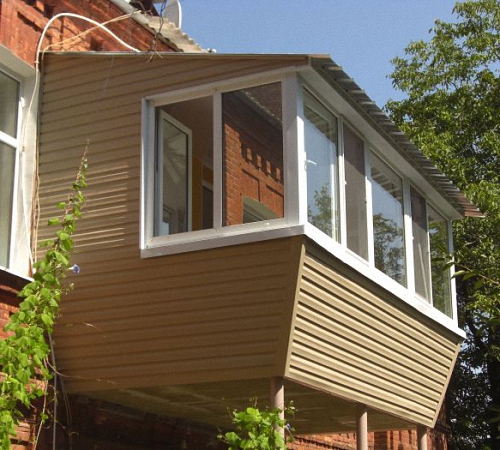
The list of necessary tools remain the same. Only for work it is worth adding new materials:
- corners with dimensions 50x50 and 40x40;
- profile pipe of such sizes: 20x20, 40x20, as well as 100x50;
- galvanized tin;
- band;
- corrugated board.
Step-by-step instruction:
1. It is necessary to make a corner with a size of 50x50 along the perimeter of a concrete base. This design will create an expansion of the base of the balcony for subsequent steps. The most reasonable way will be to increase the area about half a meter from each edge.
2. If an increase in the base involves more retreat, then it is necessary to make support from the bottom of the structure. Another option is to weld the heels on the wall plane, which are attached using anchor dowels. The process of work is carried out by the installation of a beam under the floor through the base of the wall, which is welded with a thickness of 1 cm from sheet iron.
3. Savorns for the structure should be made from a continuous pipe. One edge, which is fixed in a hole in the wall, and the second is welded with a beam. In the general account, a triangular design should be obtained.
4. Next, a profile is installed at the level of an unfinished floor. The profile pipe is screwed to the wall using anchor dowels. Its dimensions should be 100x50.
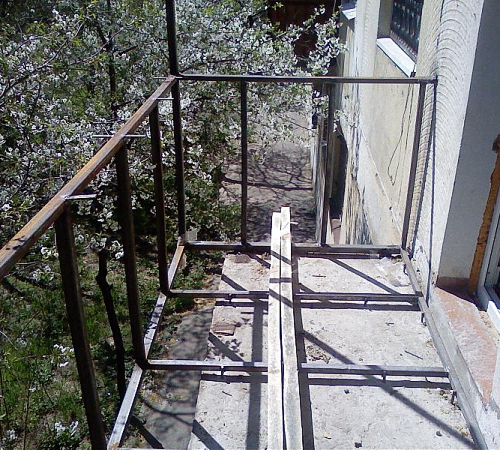
5. The same profile must be welded to the wall from the side parts of the plate. One end is attached to the parietal, the side sides are attached to the corners, and the second end of the pipe should determine the new length.
6. All profiles attached on the sides should be horizontal.
7. The front pipe is 100x50, must correspond to the parietal. It is attached to the side pipes placed on the left and right side of the stove. Such work should be done by two people, which facilitates the task. One person must hold the laid profile with his hands, and the second welds it. The ends of both pipes should coincide with each other, forming the shape of a triangle.
8. Next, the temporary support is installed, which is located on top of the parietal and front profile. The design is fixed using a welding machine, and the support of the side installation is useful.
9. Using a cutter, a hole for a profile is 100 millimeters. The work is carried out on one base with a parietal pipe. The hole must be completed using a chisel, which will allow the side profile to coincide with the preferential and front. In order for the design to be stable, it is necessary to make a hole in the wall at least 30 centimeters in depth. Next, the pipe is clogged into a hole and fastened with welding.
10. It is necessary to harness several profile pipes between the space of parietal and external, which will become as lag. In order for the entire structure to have a rigid support, you can frave parts from the balcony fence, relying on the main stove.
11. To separate the free space and the plate, you can weld the profile with dimensions of 20 by 20 at the ends of the stove.
12. To weld to the profile pipe, in the formed empty rectangular shape.
13. Fix the bottom of the floor, you can attach to the base sheets of stainless steel or galvanized.
14. The entire frame, after the welding work, is covered with a primer in several stages.
Paul for the balcony
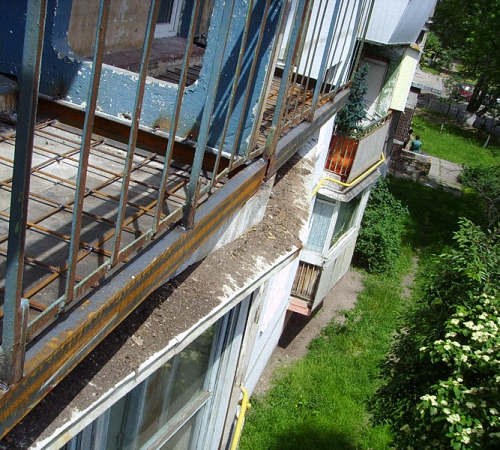
How to expand the balcony on the basis we already found out, it remains only to make fences, the floor and, if desired, glazing the loggia. A simple option for the floor is to process it with a primer. If it is necessary to make the base of the balcony concrete, then you need to harness the supports of the triangular shape, which are located from the structure to the wall. To fill the concrete floor, reinforcement can be used as fixing materials.
Fencing for the balcony
We examined two options for expanding the balcony, the video of which can be seen at the end of the article. The last step is the construction of a fence for the balcony. The following steps should be followed:
1. The fence is constructed from a profile pipe with sizes of 40 by 20. Its height of the dozen is about a meter. It is best to make the entire structure on the floor, and then weld to the floor profile.
2. The side elements of the fence must be attached to the wall, use dowels and pieces of strip.
3. The fence should be located at the same level with the lower part of the profile.
4. The length and perimeter of the floor profile should coincide with the perimeter of the railing in any position.
Glazing the balcony
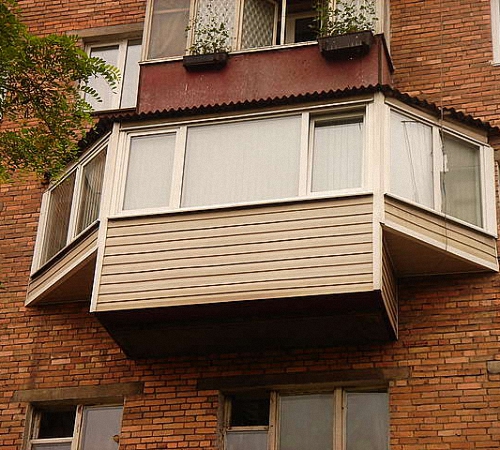
The process of glazing the balcony is not a compulsory element of restructuring the balcony. But if you decide to completely protect the balcony, then you should take care of heating. As a rule, glazing elements are PVC profile - this is affordable material of good quality and acceptable price.
To purchase windows, you need to contact the company to the manufacturer and place an order in accordance with the standards. It is best to invite experts of this area. They will conduct an accurate measurement of the parameters of the window frame, this will avoid difficulties in installing the installation.
Before attaching double -glazed windows, it is important to attach expanders to the base of the frames, made of PVC, which to adjust the dimensions of the entire structure. This will strengthen the frame and give it stiffness. The upper expander can become the basis for upholstery of the roof of the balcony. All frames join the railing and wall of the house. They help to fix the front and lateral part, creating a whole design. Next, you can install a glazed frame on special castings.
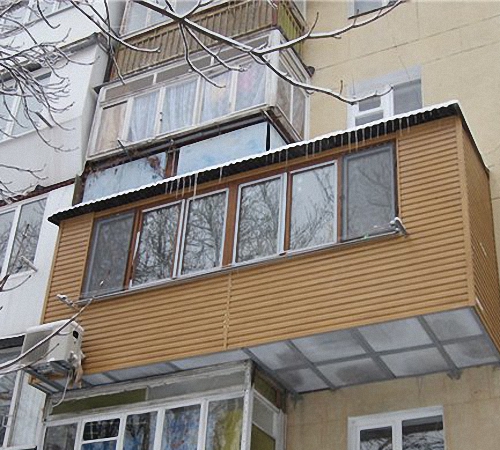
All work to expand the balcony in Khrushchev or in a regular apartment should be carried out taking into account safety regulations. Welding works are best done with specialists in this field, so that the design is stiff and stable.
