Private housing construction has not been complete for several years without arranging a transparent roof ...
|
|
Stretch ceilings are no longer something unusual. Today it is the usual design ... |
If the goals of your repair are reduced to that he can withstand not a year or second, but, by ... |
DIY cellar on the balcony

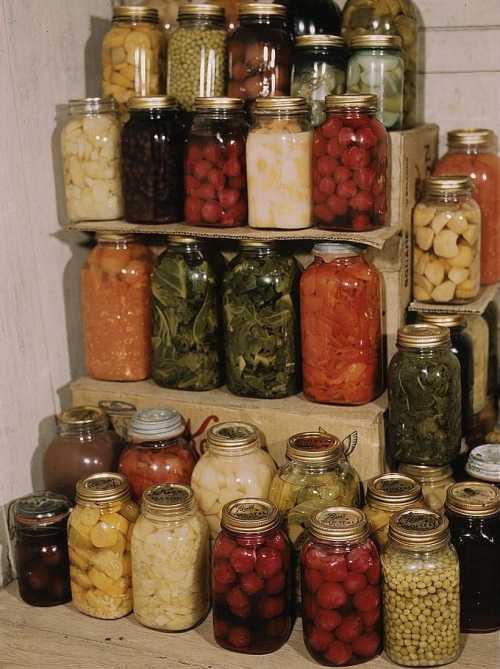
The harsh climate of our country had a huge impact on the mentality of a Russian person and largely formed the cult traditions of our ancestors. A reflection of this relationship is the tradition of making blanks for the winter, thanks to which our predecessors could calmly survive the winter, without the risk of earn vitamin deficiency. Today you can also find admirers of this tradition, which are not only residents of rural areas, but also the inhabitants of urban high -rise buildings, and the latter, using the benefits of civilization, are faced with the problem of the lack of a suitable place that could ensure the preservation of country products. Undoubtedly, some will have doubts the relevance of this issue, since supermarkets provide the opportunity to purchase fresh vegetables and fruits year -round, but many have a desire to grow and maintain the fruits of their labor as long as possible. And if residents of private possessions in whose territory you can equip a cellar in a garage or even at home, then residents of high -rise buildings have fewer such opportunities, but they can find a way out of this situation. If you live in an apartment of a multi -storey building, and you have a question: where to store vegetables and blanks in the winter?, This article will be useful for you, since in it we will offer several options for solving this problem.
Content
- Arrangement of a cellar in an apartment: the relevance of the issue
- How to make a cellar on the balcony: the main solutions
- Varieties of finished cellars: the main features
- Home cellar on the balcony with your own hands: step -by -step guide
Arrangement of a cellar in an apartment: the relevance of the issue
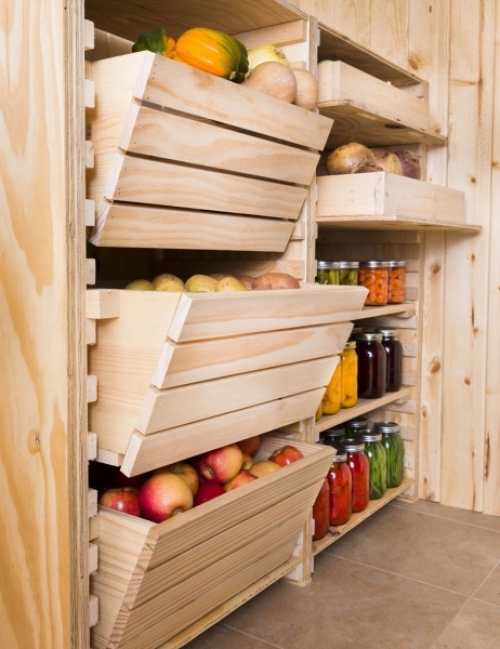
With the advent of autumn, the inhabitants of apartment buildings are thinking about the question of where and how to save the supply of vegetables in the winter, and often nothing but to go to the nearest supermarket for a minimum amount of vegetable products daily. This decision cannot be considered rational, and, moreover, profitable, since the prices of vegetables are at the lowest level after harvesting and, purchasing products for the future, you will save a significant amount of money than you will purchase its small quantities during of the year. The relevance of this problem will be even higher for those who themselves are engaged in the cultivation of vegetables in the country and, for lack of a garage with a cellar or other storage of products of their labor, are faced with a lack of space where you can equip a vegetable store.
But how are things really? To ensure the long -term preservation of vegetables and fruits, their decay or drying out, it is necessary to create an optimal microclimate. If we take into account that most often the owners storage potatoes, carrots and onions, in this case we are talking about a temperature of +1 to +5 degrees and relative humidity not more than 90 %.
Unlike residents of private houses who are more fortunate, and these conditions are automatically created in the cellar of their private house, apartments of apartments often finds at surprise and makes them seriously think about abandoning the idea of \u200b\u200bmaking reserves for the winter. However, they have all the possibilities for the arrangement of a mini-pogreb, which can be placed on the balcony in a small, in most cases, a slammed room, the capabilities of which, due to a small area, are often underestimated.
How to make a cellar on the balcony: the main solutions
The balcony, regardless of the floor on which the apartment is located, provides residents of high -rise buildings with inexhaustible opportunities for installing the cellar on the balcony.
- Firstly, if your apartment is located on the ground floor and it has a loggia or a balcony, you can arrange a real cellar under the balcony of the first floor, which is a redevelopment of the apartment and requires appropriate permission;
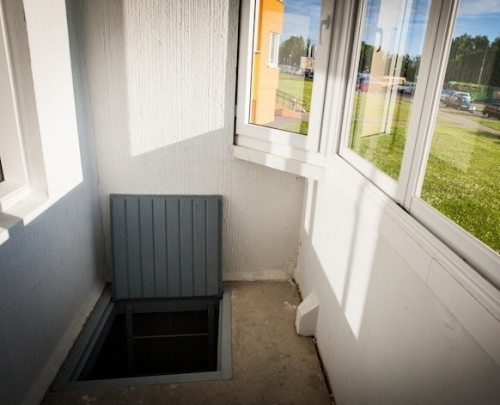
- Secondly, there is another version of the organization of the cellar on the balcony, this time in its underground part, regardless of the floor on which the apartment is located. However, this requires a number of rather difficult measures that can be avoided by installing a small cellar for storing vegetables on a factory -made balcony or making such a thermal container yourself.
As it became clear of the above, the most optimal and, in this regard, the most common option is the installation of balcony codes-containers for storing vegetables. Before proceeding with the installation of a mini-chant on the balcony, we will consider their main types.
There are two main varieties of container cellars:
- Factory -made containers that can be purchased in specialized stores in finished form;
- A cellar on a balcony for vegetables made independently.
Varieties of finished cellars: the main features
General features of ready -made cellars for the balcony:
- If we talk about soft cellars for storing vegetables on the balcony, in most cases, a multi -layer waterproof fabric is used for their manufacture, the effectiveness of which increases due to the thermal insulation layer represented by a synthetic winterizer;
- An integral element of the container is small heating elements that penetrate its woven walls, due to which the temperature inside the cellar is not lowered below the given level;
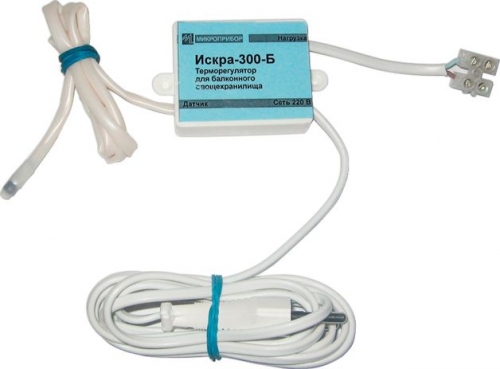
- Ready -made containers are equipped with a thermostat, the screen of which is placed outside. Due to the presence of a sensor, you can set temperature boundaries that are optimal for storing products. If the temperature decreases below the lower border, the heating of the cellar on the balcony is automatically turned on, in the event of its exceeds it is turned off;
- These products are characterized by a fairly low energy consumption, which depends on the volume and specified temperatures and does not exceed 1.5 kW per day;
- During the selection of products, there will be no difficulties, since they are presented in various volumes and color solutions.
Drawing attention to the relevance of the problem associated with the lack of a place for storing winter reserves, domestic industry proposed to the consumer specialized products, which are a thermally insulated capacity with ventilation and heating, which will become a worthy alternative to this cellar. There are several types of finished cellars.
Varieties of ready -made cellars for the balcony:
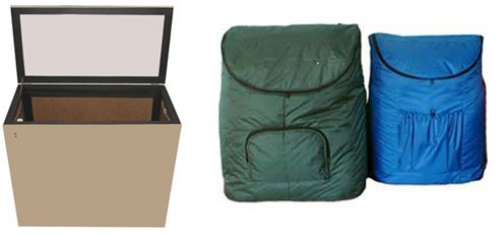
ThermoshkoF cellar
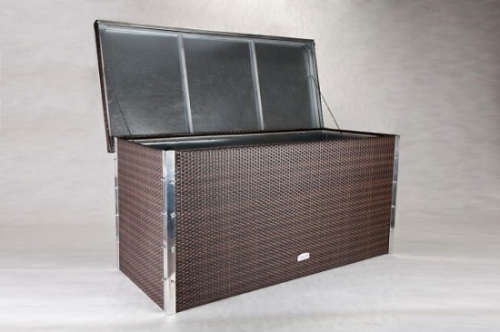
The design in the form of a durable metal box with an insulated case, characterized by stability and the presence of a pallet on metal legs. For the manufacture of the cabinet housing, ordinary steel is used, while boxes for storing products are made of galvanized or stainless steel. The thermoshoshkaf is equipped with an electronic thermostat, which is connected to heating elements, a thermal attewer and a remote thermometer. All these elements are part of a holistic system responsible for maintaining a constant temperature in a mini-chamber, which can be observed using a digital indicator.
Effective thermal insulation helps to prevent thermal losses and promotes electricity. Thanks to the organization of the thermoregulation system, a constant temperature is maintained in the vegetable store in the range from +2 to +7, which is the most favorable for saving products.
To check the functioning of the thermoshoshkaf, it must be loaded and closed with a lid, and then connected to the mains. When the mercury reaches the negative marks, the thermoregulation system is turned on, which maintains a constant temperature inside the cabinet. With the onset of warming, the thermoshoshkaf is disconnected from electricity and dried, thereby preparing it for the next season.
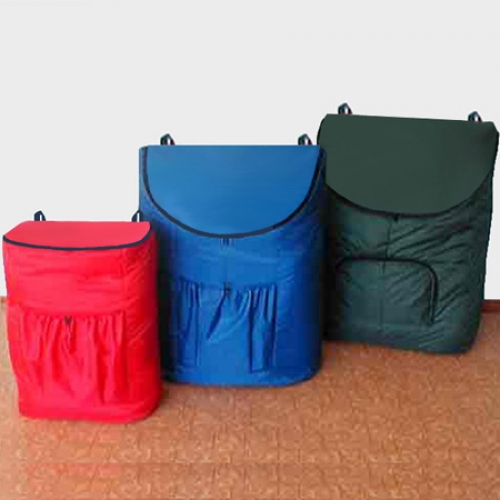
Flexible cellar for storing vegetables on the balcony
Outwardly, a flexible thermal container represents a regular bag or bag, in the upper part, equipped with a loading valve. Unlike thermal shows, they are characterized by the ease of transportation, since in unloaded form they can be folded and easily lifted to the desired floor. Thanks to this, in the summer he will not clutter the balcony. Since the design is made of three -layer moisture -proof material and the heat -insulating layer of synthetic winterizer, it can function smoothly even in the case of a two -hour electricity shutdown and ensure safety at a temperature of -40 to +5 degrees.
Important! Maintaining a temperature optimal for the safety of products is carried out due to a flexible wire cable and a digital thermostat. In accordance with the principle of operation of the thermoregulation system, the maximum accumulation of power reserves occurs until the temperature set by the user is achieved. After that, energy consumption is reduced to a minimum that does not allow the temperature inside the container to fall below the established limits.
Home cellar on the balcony with your own hands: step -by -step guide
DIY thermal container manufacturing
The thermal container installed on the balcony can be either mobile, which can be moved at any time, or stationary, integrated between the walls. Their installation is based on the same principle that we will consider further.
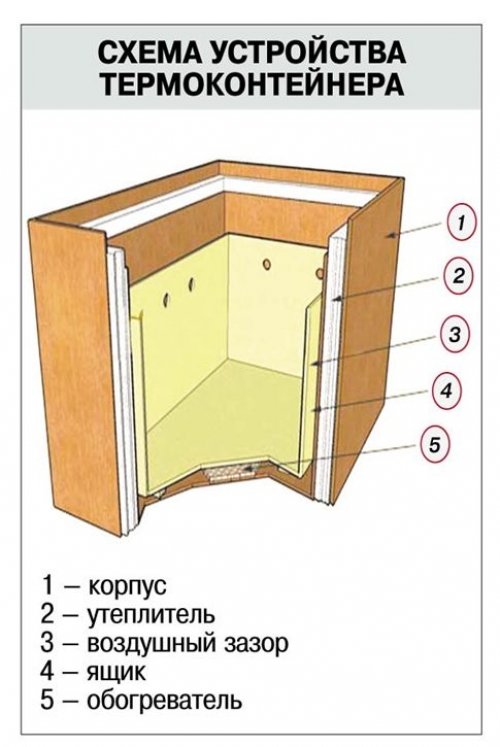
But, first of all, we consider the scheme of the insulated box:
1 case of the box, for the manufacture of which plywood, chipboard or boards can be used;
2 The second layer of the box of insulation represented by polystyrene or foil polyethylene foam, which is laid in several layers;
3 air gap between the insulation and the inner box, which performs the function of additional insulation;
4 box for storing vegetables equipped with ventilation holes;
5 Carefully isolated and safe heater installed between the internal box and the bottom of the case.
The thermal container, the scheme of which is presented above, is designed to store potatoes, carrots and other root crops, most often stored for the winter. The optimum storage temperature ranges from +2 to +7 degrees, which is almost impossible to achieve on an unheated balcony in Russian winter conditions. To do this possible, such thermal containers are equipped with moderate power heaters.
Materials and tools for the manufacture of a thermal container
To make a thermal pooner for storing vegetables, prepare the following materials and tools:
- DSP or thick plywood that will be required for the manufacture of the outer case. If you plan to install a stationary cellar, the material will be needed to install the front wall and the upper cover of the product;
- Boards or thin plywood for the installation of an internal box;
- Wooden bars for the installation of the frame, on which sheathing material will be attached;
- Foam, polyethylene foam and other dense materials that will be used as insulation;
- Electric heater. An infrared film can be used as it, the power of which will be enough to achieve optimum temperature. If you make a small container, as a heater, you can use a conventional bulb with a capacity of 40 to 60 watts, however, it is recommended to install a regulator of its incandescent;
- The thermometer with which you can control the temperature inside the cellar;
- Fasteners of self -tapping screws, nails, loops for fixing the cover, anchor mounts in case of installation of a stationary structure, if necessary, metal corners;
- Installation foam, with which you will fasten the sheets of foam. It can also be used as a heater if with its help fill the space between the sheets of plywood, making a home-made sandwich panel in this way;
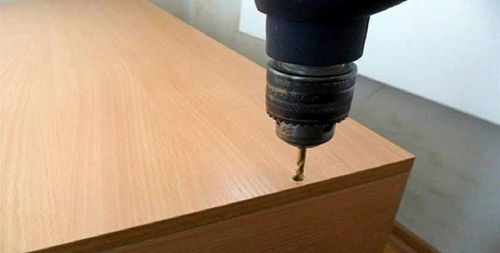
- From the tools, prepare a screwdriver, a hammer, pliers, a drill and a drill for wood and, if necessary for concrete. Also do not forget the jigsaw and screwdriver.
Having prepared all the necessary materials and tools, proceed to assembly of a chamber box for storing vegetables on the balcony.
Thermal container assembly: step -by -step instructions
If you collect a mobile thermal container, be guided by the following instructions:
- The first stage is the assembly of the container frame. To do this, fasten the bars with the help of metal corners;
- In order to slightly raise the bottom of the container above the floor of the balcony and, thereby, create an air cushion, closer to its middle, two bars must be fixed. In addition, they will give the design additional rigidity;
- Next, it is necessary to install insulation. To do this, it is cut in such a way that its size corresponds to the perimeter of the planes located between the bars. The thickness of the insulation should be equal to the thickness of the bar. To prevent the formation of cold bridges between the insulation and bars, the cracks that appear in the process are filled with mounting foam;
- At the bottom of the container, a non -weed plywood is fixed, which should close the insulation. A heating device is installed on top of the plywood, which can be used as an infrared film, the small thickness and power of which will ensure the safety of operating the thermal container. To create a warm pillow, you can use electric bulbs, however, this will help reduce the size of the container, since in this case an additional lattice bottom must be installed on top of them;
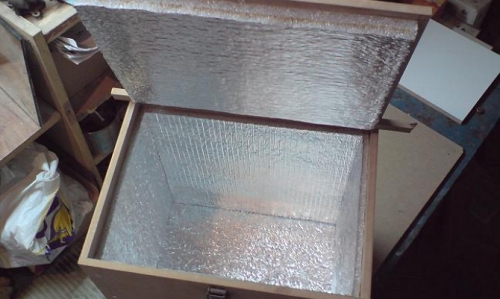
- The internal planes of the thermal container are recommended to be additionally lined with foil polyethylene foam. If a light bulb is used as a heater, an additional dinet is not faced with polyethylene foam;
- Next, pay attention to the gap formed between the frame of the box and the lid. From the side where the loops will be installed, it must be closed with elastic foam polyethylene. After you install the container cover, the insulation material must be attached to both the lid and the box.
Important! The internal box for storage of products, the side walls of which are equipped with ventilation holes, experts recommend that experts are removable, which will simplify the maintenance and operation of the container, since in this case it can be cleaned and dried when there are no reserves in the cellar. This element of the cellar is recommended to be made from boards.
If you plan to make a stationary cellar:
- Mark the walls in those places where you plan to fix the bars. In this case, you can firmly fix the frame of the box between the walls. The following stages of work are similar in the manufacture of a mobile container.
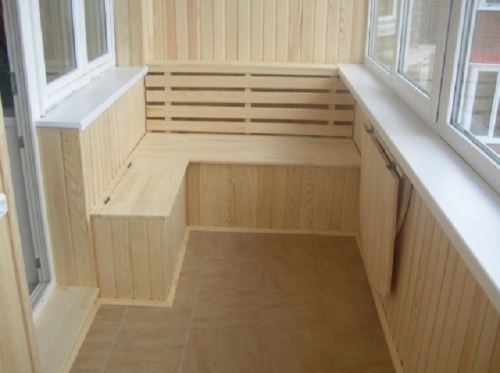
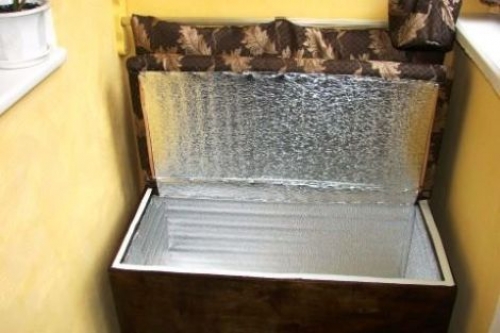
Important! If you have no doubt about the reliability of the design, the top cover of the box in the manufacture of a stationary container can be used as a seat of the balcony sofa. To do this, put a mattress on top of it, sewn taking into account its size.
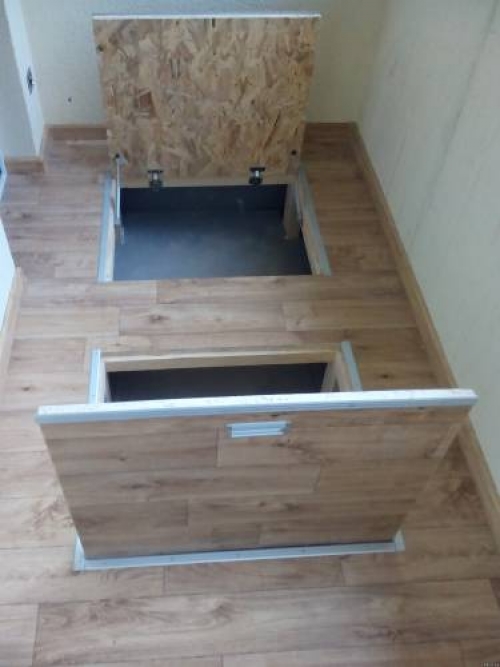
Mini-grain in the underground part of the balcony
Next, consider another option for installing vegetable storage on the balcony.
- If you are the owner of an apartment with a small balcony, do not rush to be upset, you can place not only a greenhouse and cabinets on its area, but also a subfosion-chamber for storing blanks.
- Before proceeding with work, calculate the height to which you can raise the floor on the balcony. Immediately be prepared for the fact that you can hardly place blanks in three -liter banks in such a cellar, but half -liter, liter and one and a half liter banks are easily established there;
- Draw insulation of the concrete base of the balcony. Since every millimeter of height is on the account, the use of thick insulation will not be the best idea. Therefore, give preference to foil polyethylene foam, on top of which lay the infrared film.
Important! If you are sure that the balcony of your neighbors from below is qualitatively insulated, you can do only with insulation.
- If your balcony does not differ in a large width, the flooring can be carried out on the bars fixed on the walls. Otherwise, for the implementation of the flooring between the walls, it is necessary to install bars raised to the desired height using metallic studs. In most cases, the flooring is located at the level of the threshold of the balcony door, its height is not more than 20 cm;
- Since you plan to install jars with canned blanks in the cellar, the floor of the cellar should be hard and not bend, and therefore, for installation it must be used with a thickness of 1.5,20 mm;
- A hatch that provides access to the cellar can be either folding and sliding.
- If your balcony is narrow, but, at the same time, long, in one side under the floor you can install a built -in cabinet, which will significantly expand the capabilities of your cellar on the balcony.


Very informative
Very informative article, thanks
https://media-bridge.ru
https://media-bridge.ru