The process of installing the toilet is quite simple. The main condition for its successful ...
|
|
The problem of expanding the area in the apartment can be solved by the issue of increasing the balcony. AT... |
Since ancient times, and still piece parquet due to the aesthetic qualities for ... |
DIY Garden House finishing
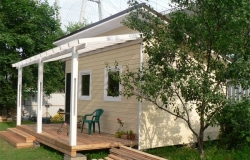
Entering almost every garden house, you can see a copy of the city apartment. Summer residents drag all the furniture in the garden house that has outlived her age in the house. This is precisely the most offensive, since the habitat itself says about giving the summer house of individual appearance. Sometimes I really want to create a habitat, absolutely opposite in the style and spirit of the urban. And in order to achieve this effect, it is worth correctly considering the procedure for finishing the garden house.
Content:
- External decoration of facades
- Flooring and arrangement of stairs
- Finishing and pasting walls
- Ceiling finishing in a garden house
- Functional zoning of a garden house
External decoration of facades
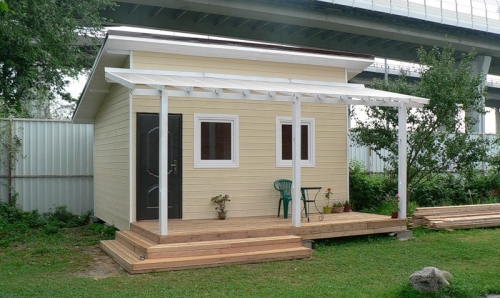
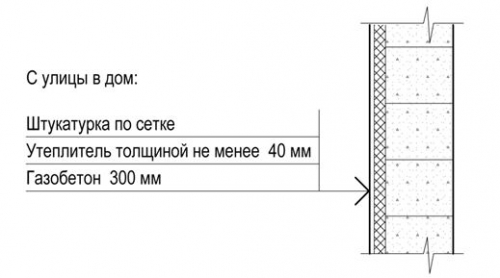
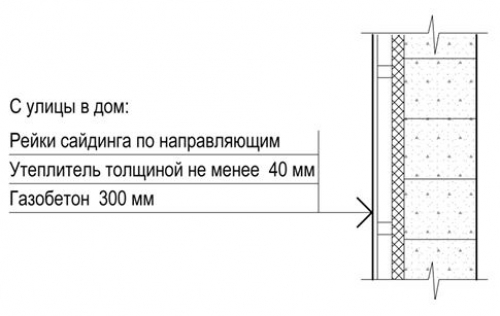
The outer side of the garden house requires special attention, improvement and decoration gives the building an individual appearance. The decoration of the facade part from a technical position is also necessary to maintain heat inside the house. The simplest and most inexpensive decoration method is painting. Also, before painting the facades, all protruding parts (belts, window plums, sandriks) must be covered with iron. The humidity of the plastered surfaces before painting should not be more than 8%, 12%wooden.
If the level of moisture in the surfaces is larger, it is necessary to use only lime paint for painting facades. If humidity is within normal limits, for decorating a garden house, you can use paint of different compositions of oil, lacquer, synthetic, lime, cement.
The outer surface of the construction is pre -dried, cleaned of contaminants, dust, drones and spray of the solution, heights and fat spots, the rough surface of the plaster is smoothed, small cracks are embroidered and putty. Then the surfaces must be bonded and then you can safely apply the paint twice. If you have chosen a lime or cement composition, you do not need to be primed, you should just moisten them with water.
It is recommended to dry the wooden surface before painting, otherwise the paint will begin to peel off in the first year. Cut off the knots and chuckles, embroider cracks, embroidered and cut -out areas with putty, eliminate burrs and the crops. If the facades of the garden house were painted earlier, clean them of the old coloring composition and putty. It is customary to apply paint on a wooden surface in 2 layers, the second layer must only be done after the first dries.
Metal surfaces, if any on the facade of the garden house, can also be painted. Before painting, clean from scale, stains of mineral oils and exfoliating rust. Be sure to smear the folds and crests of steel roofs with a sorikika putty, especially carefully - in gutters and m lands. Metal fences are painted 2 times with enamel and oil paints.
If you are looking for how to sheathe a garden house, then you can use various means: porcelain panels, clinker and glazed tiles. Currently, the facades of the cottages can be finished with thermal panels, placing them on the outer walls. Today in stores in building materials you can choose thermal panels according to the wallet and your taste.
Flooring and arrangement of stairs
The floor in garden houses is most often made with plank or from linoleum. However, it is better to give preference to the plank, as it is more attractive. The plank floor should not be painted with oil paint, it is better to soak it 3 times with hot olifa and maintain the natural color of wood. Doned floors are covered only after all carpentry, cleaning the underground of garbage.
In order to avoid the occurrence of cracks in the seams, it is recommended to use high -quality dry lumber, which has a small width - 90150 millimeters, and protect it from possible moisturizing during operation. For planking floors, you can take boards of soft wood (spruce, pine) with a thickness of about 2545 millimeters. Combine adjacent boards tightly or can be in a quarter, in a spoon or on rails.
It is necessary to start laying the floors from the walls. Bind the first board with nails to the beams. After that, lay 34 more boards without piercing with nails. Then, with wedges and iron brackets that are clogged into the beams, they tightly press the boards to one another, clog the nails, remove the brackets and continue to work in such a sequence. The floors of the floors must be performed after their drying out (usually this is done a year after the floor arrangement), so they are nailed to the beams with the primary flooring of no more than one fourth part of the boards.
You can lay board floors from short boards. To do this, first put on the beams and along the walls long boards, and then between them, place short in a spoon according to the planned pattern, the frizes are obtained as a result. Among other things, the plank floors can be made of pre -harvested shields, which have sizes of 1 by 1 meter and are knocked out of 2 rows of rails.
The upper row is made of boards about 100 millimeters wide, 20 millimeters thick, for the lower row you can use less high -quality rails, which are located perpendicular to the upper ones. Stick the slats with such a calculation to turn out on all 4 sides of the quarter shield. The skirting boards are equipped after the end of the wall surface and the location of the door platbands.
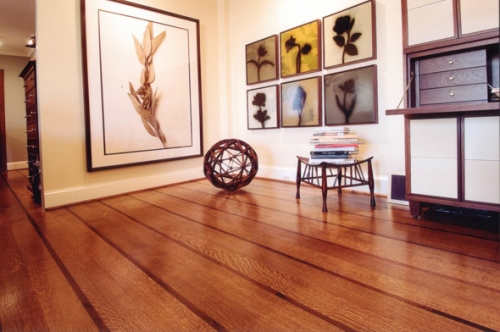
For garden houses, you can create parquet floors that are made of shields and rivets from disassembled buildings. Usually finished shields have a size of 140 by 140 centimeters. Parquet floors must be covered with whole shields along with parts called proven.
You can make shields directly at the construction site itself, using the foundation boards and parquet rivets. Wide mediums must be made so that the shield is cut in half. If the width of the shield meets the distance between the beams, they are mounted without a crate.
The basis for the parquet floor from individual rivets can be a continuous flooring created from boards with a thickness of 3540 millimeters, no more than 12 centimeters wide. Between the boards it is customary to leave a gap of up to 10 millimeters. Between the parquet and the flooring, lay paper or thin construction cardboard. After the flooring, draw a continuous yolk and a cyclist, moisten the parquet with water during the procedure.
Linoleum must be put on a continuous plank floor. The material to the sticker is cut into pieces that correspond to the size of the room, with a small allowance of 510 centimeters. Cut the chopped blanks freely for 56 days, after which you can stick them with special glue and mastic.
In utility rooms, make floors of asphalt, colored concrete, ceramic tiles, brick or polymer material. In the manufacture of asphalt or colored concrete floor, lighthouses are placed, along which the horizontal surface of the floor is riche.
If you built a two -story garden house for communication between the floors you need to equip the stairs. At the dachas, one- or two-march staircase is usually installed. In addition, it is customary to use the staircase of a special design of a screw, with run -in steps. For one or two beams, they are based mostly the stage of the march.
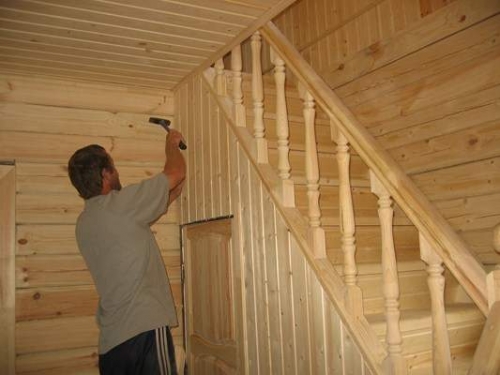
The marches of stationary stairs are most often performed on 2 bowstones from boards, which have a thickness of at least 700 millimeters. In them, grooves are made by depth of 2.53 centimeters, into which the steps and risers made from five -centimeter boards are inserted. The fence of stairs is made of wood. As a fence, a wooden balustrade is sometimes used.
Stairs should be safe and comfortable. Therefore, the height of the step should be at least 15 and no more than 18 centimeters. In one march, provide for at least 5 steps, and the height of the fences of sites and marches is at least 90 centimeters. Make steps and sites with a slope of 11.5% to ensure water drainage during cleaning. To maintain the integrity of the edges of the steps, slightly twist wooden advance or remove the chamfers of 5 millimeters from them.
If you need a staircase to the attic of a garden house, which you will use infrequently, give preference to a close wooden staircase. Such stairs consist of 2 bars that lag behind one another by about 4060 centimeters. Through the gaps of 40 centimeters, crosses are pushed or crashed into them, which will serve as steps.
In exceptional cases, deck stairs are equipped in a garden house, which consist of two steep bowstring, to which they are cut or nailed through vertical gaps of 30 centimeters plank steps. Rifle stairs are made of standard wooden elements. However, such designs are not entirely convenient, although they occupy a small space.
Finishing and pasting walls
The walls in garden houses are often pasted with wallpaper or painted with paints and covered with bronze roll. All this is very economical, but you need to take into account some features of these premises. The main difference between such buildings from permanent space is sharp changes in moisture and temperature. A similar interior decoration of the garden house, if it does not heat up in winter, quickly deteriorates, it has to be often redone, the wallpaper is quickly peeled off with high humidity.
Given this circumstance, the internal skin is prepared for painting with waterproofing compounds. Only in this case you can finish the garden house with wallpaper. For residential premises, ordinary paper wallpaper should be used. The utility rooms (kitchen, corridor) are glued with oilcloth and polymer -based wallpaper. The permissible humidity of the glued surface is no more than 12% for wood and 8% for other materials.
The wooden surface in front of the wallpaper sticks is customary to overtake cardboard and be sure to glue the joints with paper.
The surfaces that are plastered or lined with gypsum fiber or wood -fiber leaves must be dried, cleaned, glued with a clayer and pasted with paper. The surfaces that are faced with sheets of gypsum plaster must be glued with a clayer. Defective places and seams between the sheets are pre -spit and paste it with paper.

For pasting, it is recommended to use a paste. Phenol (up to 0.02%) is introduced into the solution as an antiseptic, as an insecticide technical drill (up to 0.2%). The cloths when pasting the overlap begin to be placed from the window so that the upper panel does not discard the shadow. The ends are launched for platbands and skirting boards. The gaps between them are pushed.
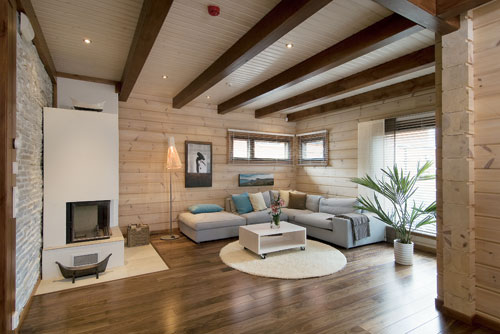
However, it is much more practical and more beautiful to identify natural structural material of the wall. If the house is logged in, there is no need to plaster the walls, glue or clad it, because the tree looks so great. But remember that the walls of logs need the corresponding decorative solution of the interior of the garden house, which involves the presence of simplified furniture, textile products made for folk motives, bright dishes, forged metal, bright dishes.
You can also perform the walls of the garden brick garden house with the seams of the seams or from natural stone. If the walls and interior partitions are made of wood waste, ancient boxes, they will have to be plastered with quality material.
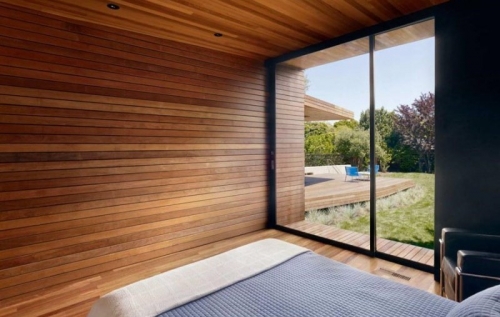
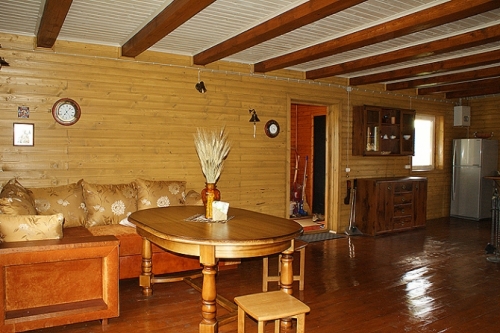
One of the most practical types of wall decoration in the garden house is considered to be cladding from boards, which gives the premises coziness and functionally justified, because it protects the walls from pollution and damage. The common material for decoration is a lining, blockhouse, a bar imitator. In this case, the house will always be a dry and favorable atmosphere, since the tree breathes, removing harmful elements and excess moisture.
It is recommended to sheathe the kitchen not so absorbing vapors and smells with materials, for example, gypsum fiber sheets of GVL. Do not confuse it with drywall. Gypsum fiber sheets are good in that they are strong enough. They can be painted, tiles are often glued to them. They steadfastly withstand moisture and temperature changes, have low thermal conductivity, improving the thermal properties of the cottage. And which is very important, the price of GVL is a little more than a hundred rubles per square meter.
Sometimes, plywood is used to skin the garden house from the inside. It is best to take a thin one - 4-6 millimeters. The use of thicker material is economically unprofitable, because it becomes more expensive than gypsum fiber sheets. And the cheapest facing material for the design of a garden house is MDF in the sheets - a pressed paper fiber, which has a gray -brown color. It can be left in its original form or painted. Light wall cladding will be well combined with light wood furniture.
Ceiling finishing in a garden house
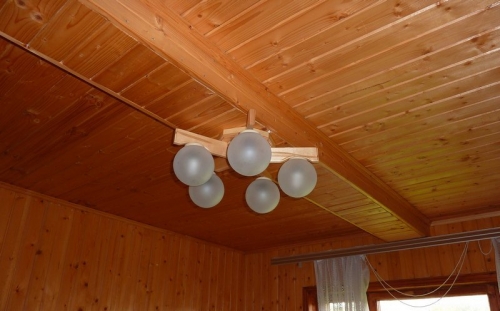
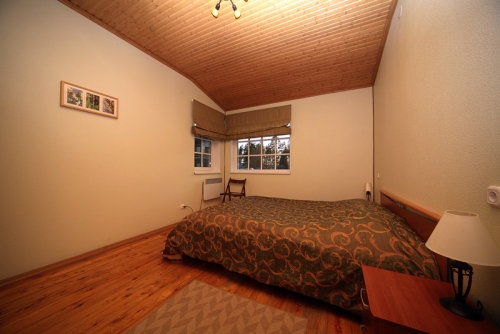
In most cases, a garden house is a wooden structure, on the ceiling of which there are beam floors and protruding areas. Depending on the interior design, such a ceiling can be left as it is by simply processing the surface with a special paintwork. As a result, you will receive a relief ceiling that looks natural, in the style of country.
The ceiling in the garden house can be plastered. The plaster is applied according to brickwork, grid or shingle it is applied with 2 layers, on a metal mesh 3. The surface on which you will apply a plaster solution (except for masonry), you need to overtake with a shot in 2 directions or covered with a metal mesh with cells that have dimensions that have the size 10 millimeters.
According to the first schedule, until he has yet grabbed, in two directions they carry out furrows for better sinking it with the second layer. The composition of the usual solution of cement for plaster is this: 1 part of the cement, 3-5 parts of sifted sand in volume, 0.25 parts of lime lime. Instead of sand, you can use the small fraction of perlite (0.5 cm) or marble in the same volume. Also, the budget option is the whitewashing of the ceiling, but it, nevertheless, is inferior in the previous options in terms of durability and decorativeness.
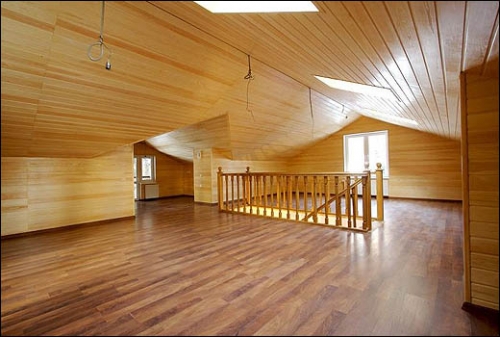
In addition, you can finish the ceiling in the garden house with lining. In this way, it will be possible to divide the ceiling in the construction into several functional zones. If different sections are smash in vertical, then you can make a multi -level ceiling. After determining the design, it is necessary to mark the ceiling with a marker or colored chalk, or you can even use a sharp fragment of red brick.
Use the same lining as boards for the frame. Sort after the purchase and separate possible products with defects with a review, cracks, non -construction and blue. If you bought a high -quality lining, you can use cheaper boards. But necessarily strict and dried. The frame boards are recommended to be treated with an antiseptic. The direction of the frame should be perpendicular to the sheathing boards.
After preliminary painting, start the finish with your own hands of the garden house and its ceiling lining. Make installation, constantly checking the parallelism of the rows. Leave a gap of 15-20 millimeters between the wagon carpet and the wall around the perimeter. Direct to the wall with a comb, clog a nail in a spoon at an angle. Next, insert the crest of a new board into the rogue, also clog the nails into the spoon. After installation of the lining, you need to nail the skirting board, fix the false beam and other decor elements.
In the garden house you can also make a stretch ceiling. Its advantages are that they are able to withstand negative temperatures and do not change their properties under the influence of moisture. This is the most successful option for houses that are not heated in the winter. You can also finish the ceiling with plastic panels, but remember that plastic is a poorly breathing material under which mold can form. Also, the ceiling in the country can be shut up with drywall.
Functional zoning of a garden house
After the construction of the cottage, the question immediately arises of how to arrange a garden house. When forming the interior of such buildings, summer residents try to rationally use it and so small area, while maintaining comfortable living conditions and satisfy aesthetic requests. This is all achievable with a reasonable division of the cottage and into functional areas.
common room
Even a small garden house includes the premises that are necessary for the life of the family, conducting a personal and household. This is a glazed veranda, living rooms and utility rooms. In the country, the living quarters are represented by a bedroom and a common room. The common room is considered the main one and has, as a rule, the largest area. Usually it is placed on the ground floor or in the attic and is intended for relaxation and communication of family members, reception of guests, and in the cold season acts as a dining room.
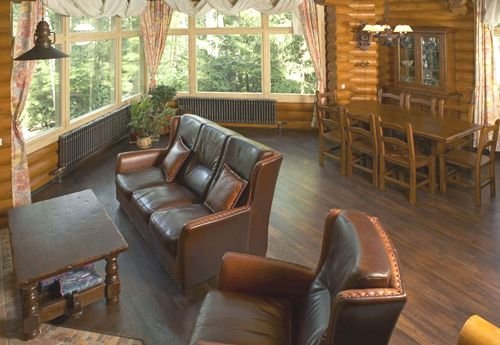
In the common room, a berth is often placed. It is best for this purpose to recreate the alcoves, which is located in the lateral part and depth of the room. It is recommended to illuminate it with direct light. In one sleeping place, the depth of the alcove is at least 1.2 meters, by two 2.1 meters. In this room, it is necessary to allocate a place under the dining table. Through this room you can make an exit to adjacent rooms, but it is better to separate it with a sliding partition so that it is possible to use together or separately.
Bedroom
The bedrooms in garden houses usually have compact dimensions, they are placed on the first floors or in the attic, if it is a two -room house. These rooms are usually elongated, but their depth should not be more double width. When the front door is located on the extended wall, you can conveniently put the beds and at the window a place under the desktop.
The device of built -in wardrobes and cabinets for bedrooms is of particular importance. However, when the cabinet doors will open into the room, it will be difficult to rationally arrange the furniture. Therefore, it is more convenient to display them in the gateways bordering rooms, as in the photo of the interiors of garden houses.
Other rooms
The functions of the living room are often performed by a glazed veranda, which is adapted for rest, meals and work. In rainy or hot, it also becomes common. On its area, it is customary to allocate a place for the dining table.
In garden houses, you can rationally use additional rooms. In the areas of the aisles, make shallow racks, shelves along the walls that are suspended to the ceiling or strengthened above the height of a person. Such devices can give expressiveness and plasticity.
The garden house has an area inconvenient for use, for example, the space under the stairs, the place of adjustment of the ceiling to the floor in the attic. But these meters can be adapted for working purposes, having arranged a mini workshop for different crafts, a place for needlework, reading and sewing, a pantry, a small summer kindergarten with perennial plants or bouquets of flowers.
Furniture and lighting
All the rooms of the garden house, built according to a typical project, can be furnished with traditional furniture. But relatively small areas of rooms, the seasonality of their use cause some inconvenience in the use of sets. It is advisable here to install transforming and built -in furniture, as well as interior partitions.
When arranging a garden house, thoughtful lighting of the premises is of great importance. Unwanted is insufficient or excessive lighting. In garden houses, it is advisable to use portable and spotlights, the backlight of the main elements of the interior, which demonstrates their peculiar appearance and allows you to economically consume electricity. When installing an electric lighting in a garden house, it is necessary to install special protection devices on the branch from the air network.

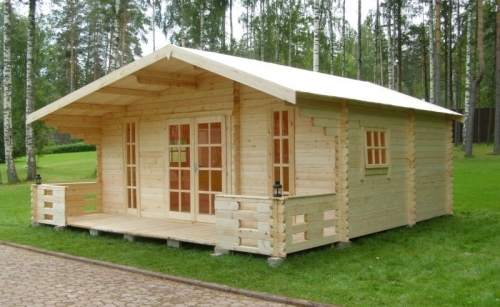
Ceiling in a garden house
"The ceiling in the garden house can be plastered. The plaster is applied by brickwork .."
Who made brick ceilings? The garden temple was built with vaulted ceilings!? Inet, filter information.