You plan to make the attic residential, or just decided to insulate the roof of the house, but do not know ...
|
|
The use of glass -fruits is associated primarily with internal and external ... |
The modern world is very demanding on the characteristics of materials. Everyone is trying ... |
Visor over the balcony: Installation instructions
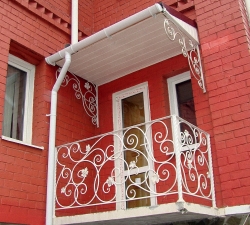
The installation of a visor over the balcony provides protection for its owners from atmospheric influences, thereby prolongs the life of the balcony. For the manufacture of this constructive element, various kinds of materials are used. We will consider the features of the installation of the visor above the balcony and about its varieties.
Table of contents:
- Advantages of installing a visor above the balcony
- Visor over the balcony: features and varieties
- The difference between the roof and the visor for the balcony
- Installation of a visor above the balcony: features of the process
- How to make a visor over a balcony: arranging an autonomous visor
- How to make a visor over a balcony with your own hands: recommendations for manufacturing
- Visor over a polycarbonate balcony: arrangement and installation
Advantages of installing a visor above the balcony
The visor above the balcony is a very useful thing, especially when the balcony is not on the top floor. After all, it is the visor that protects its owners from the negative impact from the neighbors.

In addition, the arrangement of the visor has the following advantages:
1. Ensuring the protection of the balcony and people who are resting on it from direct ultraviolet radiation.
2. Protection against atmospheric precipitation, namely from the accumulation of snow and ice in the winter season, from the destruction of moisture of the balcony decoration.
3. The visor above the balcony significantly reduces the blowing of the entire structure.
4. Installation of the visor is able to protect the balcony from all garbage, dirt, dust, butter, etc.
5. The arrangement of the visor on the top floor makes an apartment more protected from the thieves that can break through the roof into it.
Visor over the balcony: features and varieties
There are a large number of materials used in the process of installation and construction of the visor. We offer to consider their main types and features:
1. Steel sheets.
There are several types of this coating, among them:
- galvanized;
- corrugated board;
- corrugated sheet;
- Metal tiles.
These finishing materials are characterized by cheapness and high level of practicality, therefore, they are in great demand among consumers. The service life of the corrugated board is about thirty years, and the metal tile is more than fifty.

The use of metal is primarily durable. The material is able to withstand a thick layer of snow and other precipitation. But at the same time, this coating is very slippery, so large accumulations of snow or ice are able to injure near passing people.
In addition, the metallic roof is an excellent conductor of any sounds, so during the rain, the inhabitants of the apartment and their neighbors clearly hear the sound of sedimentation with the visor from the balcony.
2. Polymer materials.
The use of ondulin - bitumen slate or similar polymers with it is a rather practical solution. Since this kind of materials are created under the influence of high temperatures, therefore, even during the shrinkage, they are not able to crack or deform. They tightly cover the roof and protect it well.
The cost of such a coating is higher than steel. But it is less heavy, therefore it does not load the overall structure. Among the advantages of the bitumen roof, good protection against extraneous sounds and moisture should be noted. The disadvantages include low fire safety and fragility. This type of roof is best suited for arranging a visor over the balcony of the last floor, since on other floors, a risk of fire of roofing material from cigarette butts is possible.
3. Installation of double -glazed windows or polycarbonate.
The last option is the arrangement of the visor using transparent materials in the form of glass or polycarbonate.
For the manufacture of double -glazed windows, special tempered glass is used - triplex. This method of arranging the balcony is the most expensive, but at the same time, the most aesthetic. Since such a balcony is quite bright, spacious and warm. In addition, the sky is visible through the glass. Although this type of visor requires careful care, which not everyone is capable of providing.
The use of polycarbonate is a cheaper and practical option. This material can be of two types:
- monolithic;
- cellular.
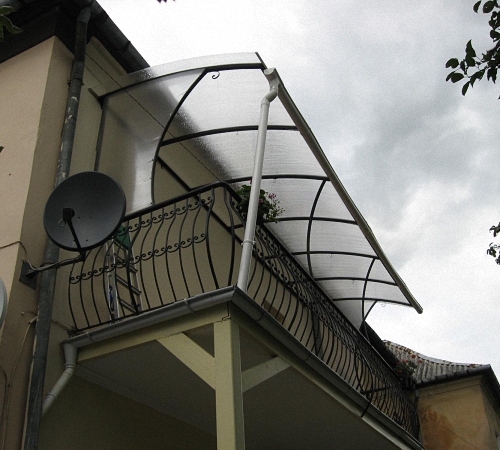
The second option is more durable and warm. In addition, it is easier to install. The cost of a polycarbonate visor is more than ten times cheaper than the price of glass. Polycarbonate, unlike glass, is not able to pass ultraviolet rays that destroy the finish on the balcony.
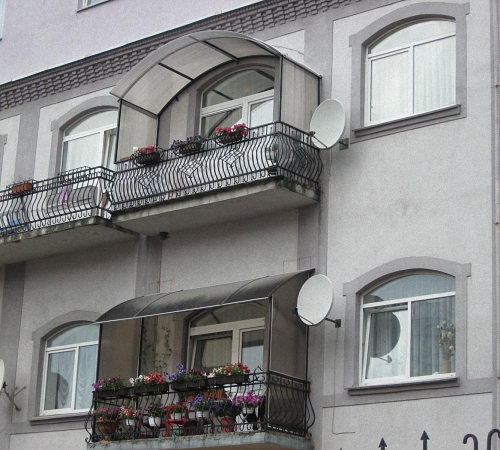
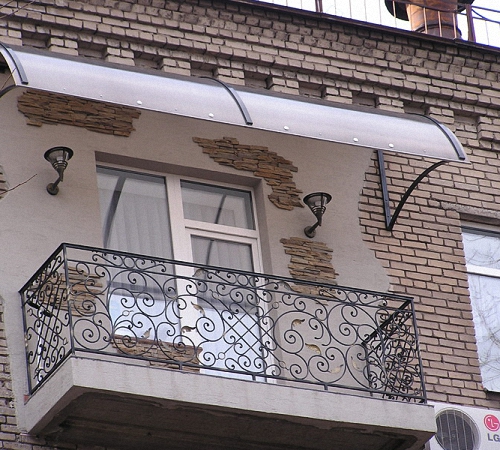
Visors above the balcony photo:
The difference between the roof and the visor for the balcony
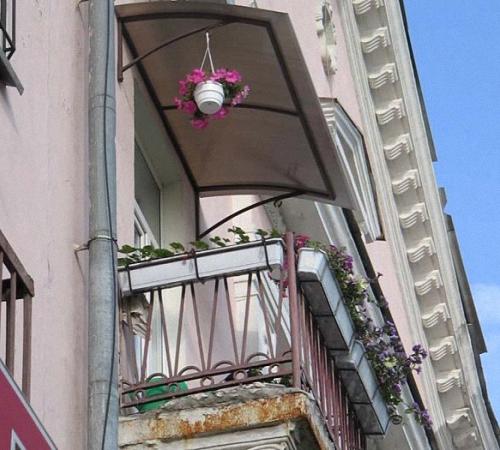
There are roofs and visors installed on the balcony. Their main difference is that the roof is mounted on a glazed balcony, so it is able to lean on the design of the window, and the visor is installed on open balconies, and is kept directly on the wall of the building.
The first type of structure is called dependent, since the roof is connected to the whole balcony and forms one whole with it. The visor is an autonomous structure that holds itself. In order to prevent the fall of the visor and to improve its strength during installation work, steel corners or farms connected to the wall using bolts are installed. It is this design that can improve the quality of the connection of the visor with the balcony.
The option of building the frame on which the visor will be based on is possible. But, it is pointless to spend money on such an event, if windows are not provided on the balcony.
Installation of a visor above the balcony: features of the process
Before proceeding to the direct installation of the visor, a number of works aimed at designing this element of the balcony should be carried out. In addition, it will be necessary to choose the material from which it will be made, and according to this, adhere to the technology of installation work.
We offer to familiarize yourself with the main stages of installing a visor on the balcony:
1. Buying material, for example, metal sheets and farms. Installing them at a distance from each other one meter. Therefore, for calculation, just the area of \u200b\u200bthe visor itself is enough. In addition, you will need to purchase several dozen anchor bolts with 10 cm with a cross section. To arrange the farm frame, it will require the presence of a beam, screws that have a waterproofing lining, an antiseptic, which will continue to be treated with a tree, a scabbard for metal. To close up the joints, do not forget to buy sealant and components included in the cement mortar.
2. Farms are fixed on the wall using anchor bolts. A wooden crate is already equipped on them, which is pre -treated with special compounds that prevent rot.
3. By using a hacksaw for metal, cut the steel sheets in a ratio with the necessary dimensions of the visor. Fix them on a wooden crate, using screws with rubber linings. The use of such fasteners will prevent corrosion on the steel surface.
4. When the visor is almost ready, it remains to take care of the installation of the tide installed on the wall on the top of the roof.
5. To close up all the cracks formed between the wall, tint and the roof, use the sealant and cement mortar.
How to make a visor over a balcony: arranging an autonomous visor
Instructions for making a visor over a balcony with your own hands:
1. The construction of this type of visor is preferable to start with the arrangement of the frame. As a material for its manufacture, choose either steel or wood. Steel structures are more powerful, but heavy. At the same time, wooden are light, but less stable and defeated by atmospheric precipitation.
2. The average height of the frame of this design is 190-210 cm.
3. Using the level, carefully check all the horizontal beams for evenness.
4. When choosing a tilt of a trump card, focus on the individual characteristics of the building. The angle of inclination is from 16 to 75 degrees. With a lower angle of inclination, the consumption of materials is also reduced. The most popular visors have a slope of about 40-50 degrees.
5. If the frame is made of wood, then it will need to be opened with a stain, and then varnish.
6. Teach that the fastening of various kinds of roofing materials to the frame structure is carried out using different technologies. For example, self -tapping screws with rubber linings are used to fix corrugated board. They are installed only on the waves. But, the fixation of the metal tile requires a more frequent crate, since each tile is attached to the frame separately. For installation of ondulin, ordinary nails with rubber linings are needed.
7. In the design process, an important fact should be taken into account, indicating that the roof of the balcony should protrude beyond its limits from all sides by at least 0.2 m.
8. Installation of double -glazed windows is carried out after the arrangement of the visor or roof.
9. If necessary, the roof is insulated, hydro- and vapor barrier are installed.

How to make a visor over a balcony with your own hands: recommendations for manufacturing
As already mentioned, to install the visor requires thorough preparation and thought out all, even small details. Therefore, it is better to start precisely from the choice of material for its construction and design.
In the process of creating a visor project, you should well think through the shape and size of the product. Since the visor should be:
- stable before moisture;
- durable;
- durable.
To carry out an independent installation of the visor, the presence of:
- project or design drawings;
- sealant;
- fasteners;
- drills;
- welding apparatus;
- finishing roofing material.
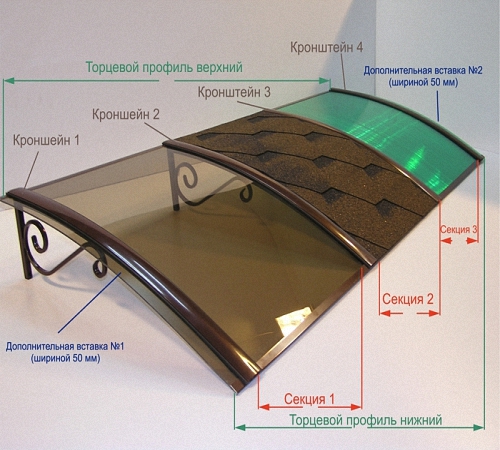
First of all, measurements are made and a drawing is created, according to which the right amount of materials for the construction of the visor is calculated. In order to avoid the accumulation of garbage, leaves or precipitation on its surface, the minimum slope angle should be twenty degrees.
Next, there is a welding of a steel frame that performs the function of a canopy. It is installed directly against the wall, without gaps. To process the seams, use a silicone -based sealant.
Process all metal parts of the frame with an anti -corrosion solution, which will extend their service life several times. If the visor consists not only of the central, but also the lateral parts, then the first thing, they are covered with finishing material. Next, the central part, laying of roofing sheets and their fixation are finished.
When making installation, pay attention to the weather. The humidity should be optimal, since when rain arises between the roof and the balcony, accumulated moisture will occur, which will negatively affect their qualitative characteristics.
In order to avoid the accumulation of moisture between the seams, their reliable sealing is required. It is possible to finish the lower part of the canopy using plastic plates or lines. In addition, the product of the sound insulation of the canopy, which will protect the owners of the apartment from the excessively noisy sounds of the street and make the balcony, will not be superfluous.
Visor over a polycarbonate balcony: arrangement and installation
The main advantage of a polycarbonate canopy is the attractiveness of its appearance. Among the variety of polycarbonate sheets, it is possible to choose the best option that harmonizes with the external decoration of the balcony itself.
It is the design of the visor that is significantly reflected on the type of polycarbonate used in the construction process.
Polycarbonate is highly popular due to relatively small weight and flexibility. Therefore, the canopy is able to take any form conceived by the designers.
We offer to consider the most popular forms of visors made of polycarbonate:
- straight -tocettle hinged visor - is characterized by ease of manufacture;
- higher strength and complexity of manufacture is distinguished by a gable visor;
- Archite canopy is more windproof, but requires special skills in working with polycarbonate, as it has a slightly bent form;
- The shape of a semicircular slope is the most popular, is distinguished by originality and exquisite style, has good operational qualities, since this type of visor does not delay water, garbage or snow.

In order to install a visor over a polycarbonate balcony, you need to pre -build a metal structure in the form of a frame attached to the wall and resting on the balcony fence.
To cover the visor, it is recommended to use the arrangement of plastic flooring, insulated with thermo -haired. In the construction of the canopies, a cellular or monolithic type polycarbonate is used. The first option consists of a hollow sheet with internal jumpers that improve its strength. Monolithic polycarbonate is less durable, but more transparent. Although the cellular type of polycarbonate is not transparent, it is able to skip solar radiation well. If it is planned to build a liking visor, it is better to choose a cellular polycarbonate, since it is more plastic.
Among the advantages of the construction of polycarbonate visors should be distinguished:
- a high level of strength, which is determined by the ability to withstand a large kind of loads;
- The ease of installation - for the work, it will not require the presence of specialized equipment and special skills in working with it, the material is easy and good;
- In addition, polycarbonate is safe, even when it cracked it with fragments, it is almost impossible to get hurt;
- Polycarbonate is resistant before fire, moisture, frost, chemicals, in addition, it is good heat and sound insulator.
