Modern industry offers a membrane to cover the PVC roof, which has ...
|
|
Each of us several times during our lives passes through such an event ... |
Georste - a universal material that is used to strengthen various ... |
How to build a gas concrete cottage
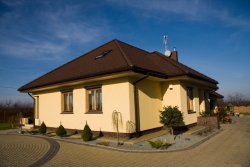
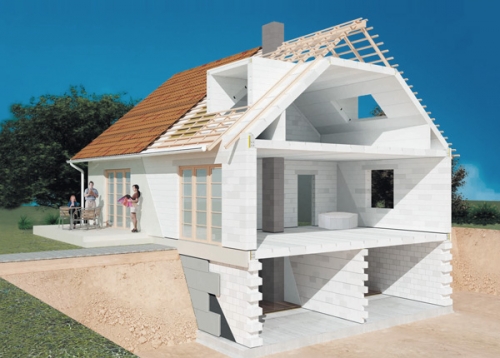
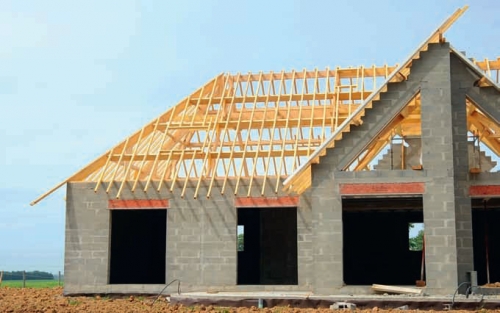
In search of optimal material for the construction of a suburban cottage, it is inevitable to consider not only wood, but also the so -called warm concrete. After all, I would like to save both on the construction of the walls, and on insulation, and on the decoration, and so that it was firmly and warm. Moreover, aerated concrete is now intensively advertised, its advantages are signed so sweetly that it seems that it is better than the material and is not at all. A gas concrete cottage will be relatively strong, warm, environmentally friendly, breathing, it is easily and quickly erected, but do not seduct. If you hope to purchase D300 blocks with the best thermal insulation indicators and build a wall with a thickness of 300 mm, then this cannot be done in any case. Such a wall thickness is not enough to provide bearing strength, and the cellular concrete of the D300 brand is not structural, but is used only for insulation. And even insulation with polystyrene foam will not solve the problem, especially since it is impossible to insulate aerated concrete with a steamed foam foam. Therefore, if your choice nevertheless stopped at aerated concrete, as a material for the future cottage, it will not be superfluous to find out how to correctly calculate the wall thickness for it, what density to use, how to use the walls and how and how to separate them.
- Advantages and disadvantages of aerated concrete blocks
- Features of the technology for the construction of cottages from aerated concrete
- DIY Cottage Cottage
- Aerated concrete cottage: video example
Advantages and disadvantages of aerated concrete blocks
In recent years, construction from aerated concrete blocks has been very popular. In many respects, the assurances of manufacturers in the uniqueness of their products and the reckoning of the mass of virtues, which, unfortunately, were either too inflated or in fact, lead to the shortcomings of the design. As a result, there are a lot of people who believed the advertising, and now every year they make repairs and modify what you can finalize.
However, aerated concrete blocks have undeniable virtues:
- Low thermal conductivity, due to which the building is warm even without additional thermal insulation.
- Easy to build walls.
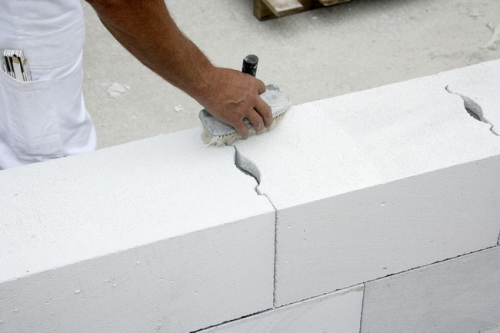
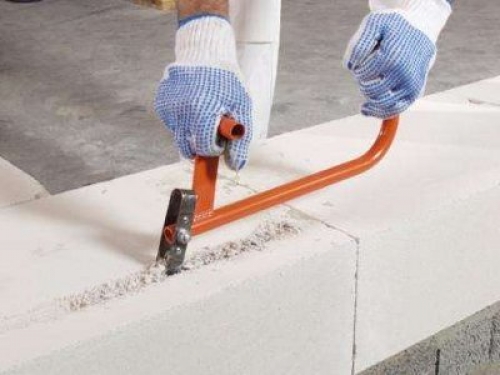
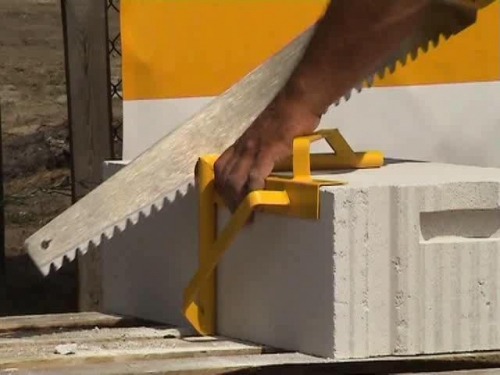
- Easy in processing: cut by a regular saw, stroked with manual barrier, excess is removed with a plaque.
- The blocks have a flat surface and are precisely verified (accurate geometry).
- Quick construction. You can build a cottage from aerated concrete in 8 9 months from beginning to end.
- Relatively high strength (brands D500, D600, brand D400 until recently was considered only thermal insulation).
- Light weight that simplifies and reduces the cost of transporting the material and the construction of structures.
- Good soundproofing properties.
- Available price of blocks.
- Environmental friendliness of the material.
- The vapor permeability of the material, the walls breathe.
- The ability to use thin -layer solutions in the construction of walls. This reduces the amount of wet processes on the construction site.
- The widespread prevalence of the material can be purchased both in large cities, and order delivery to remote areas.
Many people choose aerated concrete for its environmental friendliness and vapor permeability. After all, it is these properties that make the house cozy and breathing, yet at least some alternative to a tree. In addition, a gas concrete cottage is perceived as stone, which means it seems stronger and fireproof.
But aerated concrete has and significant disadvantages, which can lead to partial destruction of the structure, the appearance of cracks, mold and a large number of cold bridges:
- Moisture capacity. Aerated concrete absorbs moisture and is saturated with it, which is why thermal insulation qualities are lost or reduced. And if you do not allow the material to dry completely, mold will appear inside the building.
- The fragility of the material and susceptibility to mechanical damage. Even a random blow by the corner of the block on a solid object can lead to the fact that the block will split. Quite often, aerated concrete blocks are broken during transportation and unloading.
- There are some problems in plastering walls from aerated concrete. Due to the fact that the material absorbs moisture quickly and capaciously, in dry weather with a high atmospheric temperature, it is extremely difficult to apply the plaster solution so that it does not fall off in a few hours. Also, not all plasters are suitable for decoration of aerated concrete.
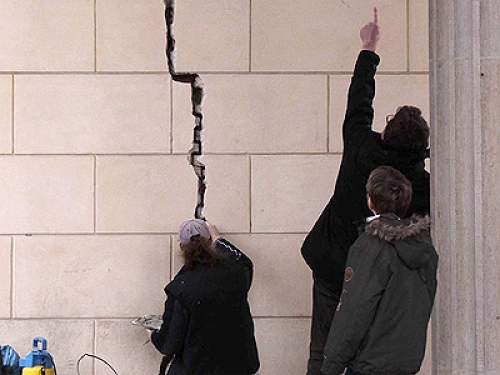
- The appearance of cracks in weak places: under the windowsills, in the corners of window and doorways, under jumpers and in the joints with other materials. This is a very significant drawback that leveles all the benefits of the cheapness of aerated concrete blocks. Due to the fact that aerated concrete is light material, it cracks easily and quickly. And since the technology of laying profiled blocks involves smearing with glue solution of only horizontal surfaces of the blocks, and vertical are simply inserted by the spike-puzza system, it turns out that there are no vertical seams in the masonry. Horizontal seams are not able to withstand the stresses that occur in complex nodes, and the blocks crack and break.
- Blocks have low bending strength.
- So that the blocks do not lose their thermal insulation properties, their must be stored in a dry place On the elevation, taking all measures to protect against atmospheric precipitation.
- Low frost resistance Blocks D400 D600.
- Residual free lime in masonry made of aerated concrete blocks contributes to faster corrosion of metal reinforcing inclusions.
All these shortcomings are not so critical, but significantly complicate the technological process of working with aerated concrete blocks and impose strict restrictions on finishing materials and heaters.
Features of the technology for the construction of cottages from aerated concrete
The very first thing to do is to calculate the thickness of the wall of aerated concrete blocks for a particular construction region. Do not rely on advertising slogans, they say, build 375 mm in one block and you will be happy. Use a special program, formulas or contact the design bureau for this. For calculations, use these thermal conductivity indicators: for the brand blocks D400 \u003d 0.15 W/ms; D500 \u003d 0.20 W/ms; D600 \u003d 0.26 W/ms. These data correspond to the properties of aerated concrete in operating conditions, and not in ideal conditions, as the manufacturer shows.
After the calculations, it turns out that Moscow requires the walls of such a thickness:
- D400 447 mm;
- D500 596 mm;
- D600 775 mm.
Before building a gas concrete cottage, calculate your costs at the same time, perhaps, aerated concrete will not be so cheap pleasure.
If you still decide to build from aerated concrete, you will have to strictly follow technology:
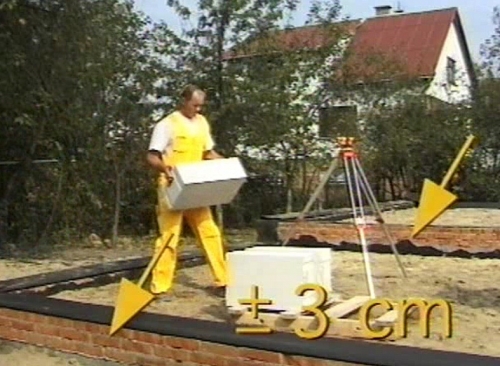
- Due to the fact that the blocks are very fragile and subject to crack formation due to soil movements, it is necessary to make a strong and perfectly even foundation that can withstand the movements and not change the geometry. The monolithic ribbon or monolithic slab. In this case, the error of the foundation tape should be no more than 10 mm.
- The first row of blocks must be laid on a cement-lime solution and perfectly aligned with relative to the horizon.
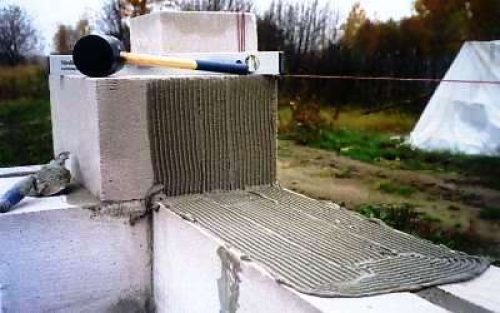
- Lay all subsequent rows on a special glue and strictly observe the thickness of the seam.
- When laying each row, not to be lazy and pull the cord to control the evenness of the masonry.
- Consider the option of using non -filmed smooth -concrete blocks. The technology of their laying involves the smearing with glue and the horizontal and vertical surface of the block, which means that the design will contain vertical seams that increase the masonry resistance to bending loads.
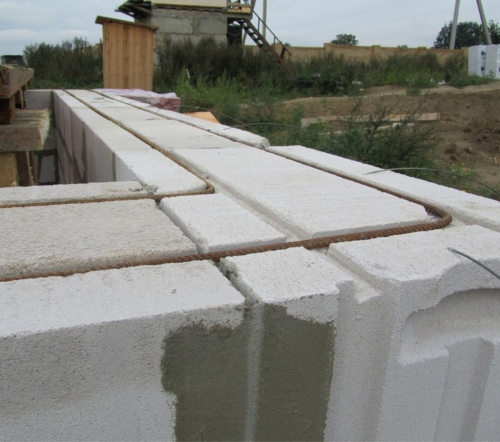
- It is imperative to reinforce 8 mm reinforcement with 2 rods of the 1st row and each 4th, as well as a number under the window opening.
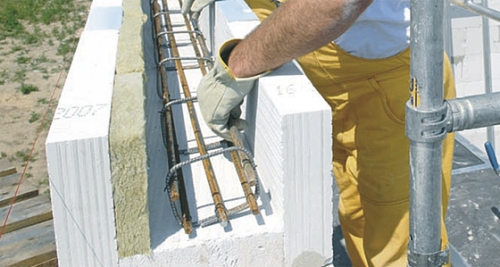
- Be sure to perform armored vehicles on the ceilings and under the roof of the building. To do this, you can use U figurative aerated concrete blocks and a frame of reinforcement (6 8 rods).
- In no case should you burst window and door openings with a metal frame or structures (rheasts) of brick or other material until a complete shrinkage of aerated concrete. By the way, aerated concrete is completely seated for 2 3 years, the shrinkage is 1 2 mm at every 3 m of height.
- Assential walls do not require additional insulation, for this it is necessary to correctly calculate their thickness. If the cottage is already built, and the wall thickness is not enough to ensure heat and comfort inside, then thermal insulation should be taken extremely carefully.
Important! Aerated concrete cannot be insulated with polystyrene foam and extruded polystyrene foam, since they are almost vapor permeable. Aerated concrete of the D400 brand has a vapor permeability of 0.23 mg/(m*h*PA), and brands D600 0.17 mg/(m*h*PA). According to the rules of thermal insulation, each subsequent material from the inside should have a greater vapor permeability to create the right steam and gas exchange, therefore, for thermal insulation of aerated concrete walls, it is necessary to select material with vapor permeability indicators more than the indicated. Otherwise, the steam and moisture contained in the pores of aerated concrete will not be able to go out, the walls will be wet, lose their heat -saving properties, and mold will appear.
- The above rule applies to finishing materials: paints, plasters, etc. They must be steam and gas.
- It is advisable to protect the walls from aerated concrete outside with vapor -permeable waterproofing material so that they do not get wet once under oblique rain.
- All rows in which reinforcement is present must be insulated, since the metal inside is a cold bridge.
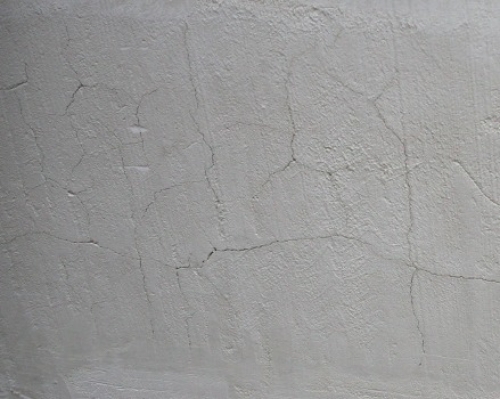
In conclusion, I would like to note that plaster on aerated concrete lives for about 5 8 years. Be prepared for the fact that then cracks will appear, and you will have to completely redo the facade.
You can extend the life of the plaster, if you use special plastic, self -digging compositions.
DIY Cottage Cottage
The maximum ease in working with aerated concrete blocks, as well as its environmental friendliness and the ability to breathe, give food for thought and not to build a gas concrete cottage with your own hands. We will talk about how to do this.
Design and calculations
The very first question that arises after they decide to build, where to get projects of cottages from aerated concrete, taking into account all its features. Do not build by eye, order a project in a design bureau or construction organization so that you are calculated by all the nuances, the bearing capacity, wall thickness, reinforcement, foundation, windows, roof and communication. Also, the manufacturer of aerated concrete provides ready -made projects of gas concrete cottages, provided that you will order material for construction from him. If the finished project has not come up, it can always be finalized and changed.
Only with a finished project in your hands can you start a construction.
Aerated concrete cottage foundation
As we have already found out, a gas concrete cottage will require either a strip foundation or a slab. Consider the variant of the strip foundation:
- Remove the upper layer of soil and dig a trench with a thickness of 600 700 mm, 1.5 m deep (to the depth of freezing of the soil).
- We trim the soil at the bottom of the trench, fall asleep with a layer of sand 10 15 cm, then a layer of crushed stone 10 15 cm and also trim each layer.
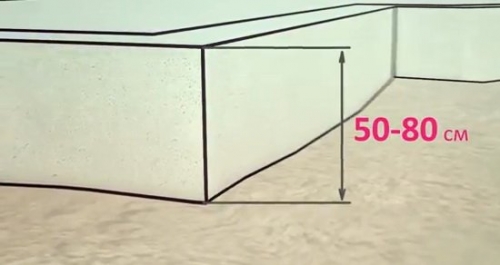
- Then we set the formwork to a height of more than 50 cm above the ground.
Important! Aerated concrete walls should be located above 0.5 0.6 m above the ground.
- Inside the trench we install a reinforcing cage tied with knitting wire.
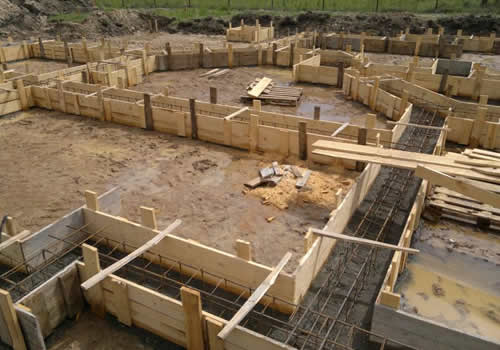
- Pour the formwork with concrete, carefully compact the mixture with the help of deep vibrators.
We leave the foundation for 28 days to dry. After the concrete has completely dried, the foundation must be waterproof. To do this, we spread only on the surface of the foundation, melting and gluing its lower side to the base. You can also use roofing material in 2 3 layers, on top with waterproofing mastic.
Elections of walls from aerated concrete blocks
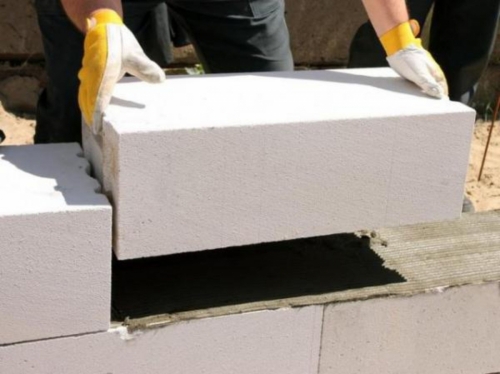
The first row of aerated concrete blocks is laid on a cement-lime solution. If suddenly the surface of the foundation is not strictly horizontal, then we begin laying from the highest corner, check it with leveling.
- We apply the solution to the surface of the foundation where we are going to lay the block, a layer of about 20 mm.
- We lay the aerated concrete block into a corner and check its even location in the longitudinal and transverse direction.
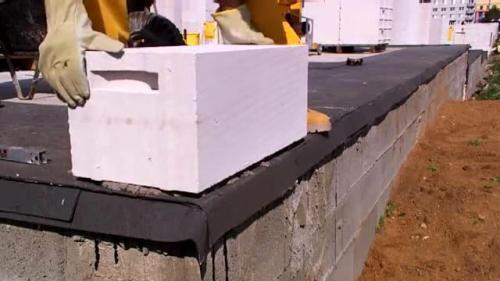
- We lay the rest of the corner blocks, controlling their location relative to each other. The surface of the blocks should be in one plane.
- Between the blocks of each side we pull on the cord, along which we will subsequently control the even location and horizontal of the intermediate blocks.
- Then we lay all the intermediate blocks of the first row. We apply the solution, set the block, align, control its location relative to the control blocks and cord and, if necessary, finish off with a kiyanka.
- In the corners, the blocks are connected using a thin layer of a solution applied to the vertical surface of the corner block.
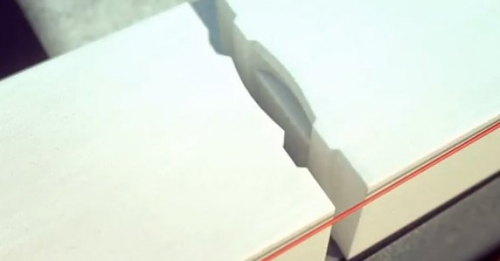
Important! If profiled aerated concrete blocks are used to lay the walls, then their vertical surface is not smeared with solution, the blocks are connected by a spike-puzzle system. If non -lifted blocks are used, then the surface of the applied unit must also be spread with a solution.
- We check the even location of the blocks of the first row. If necessary, the excess can be shut up with an ordinary shirt, and then clean the surface of dust.
- Then the first row must be reinforced. To do this, two longitudinal strobes in the middle of the blocks are cut in it, at a distance of 10 mm from each other.
- You can use a manual or electrical strobes. Then we clean the grooves/strokes of dust, insert the reinforcement with a diameter of 8 mm into them. Pour the solution and remove the excess.
- All subsequent rows of blocks are laid on a glue pantry. We apply the solution immediately on the entire row, start laying with corner blocks.
Important! Since laying the rows begins with corner blocks, and then the gaps are filled with blocks, there will always be a free space for the last block of non -standard size. To fill it, you should cut off the necessary piece from a full -fledged block with a regular saw.
- We carry out the laying of all other rows, do not forget that each 4th row must be reinforced.
- We perform a jumper over the window opening of Armopome. We install wooden supports in the opening. We install U-shaped blocks on top. It is advisable in this series to perform Armopias, i.e. We lay a number of U-shaped blocks. Inside the blocks we insert 50 mm polystyrene foam, closer to the outer wall of the block. In the remaining empty place we insert a reinforcing cage of 6 8 rods. Pour concrete and let it dry.
Important! As a result, we should get the following walls: the 1st and each 4th row are reinforced with two rods, a row and the last row under the roof of Armos.
The construction of the roof for a cottage from aerated concrete
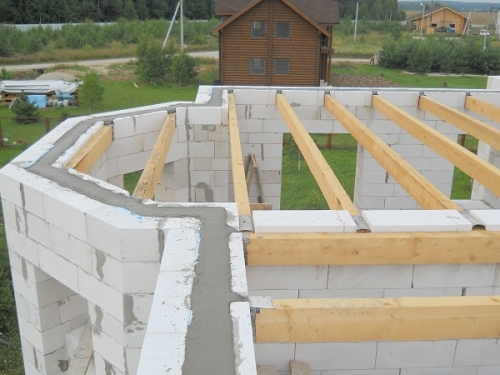
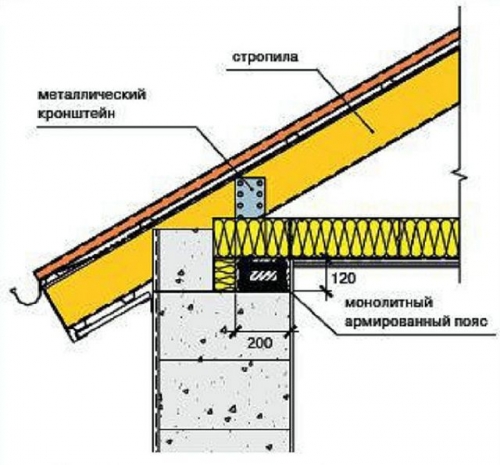
In cottages made of aerated concrete blocks, inter -story floors and the rafter system of the roof should be based only on armopo. More specific solutions of the type of design and the mounting method are determined by the cottage project.
The bearing of a beam with a cross -section of 200x150 mm is fixed to the armopoyas with anchor bolts with a step of 80 100 cm. We fix the rafters to the Mauerlat with nails, while in the upper part inclined boards of the rafters must be connected point blank, and not into the overlap.
Important! Be sure to perform a cornice overhang by increasing rafter legs. This is necessary that the wall of aerated concrete gets wet less.
Then we mount the crate and the counter and lay the roofing material.
Important! It is not allowed to transmit from the rafter structure of the roof to the gas concrete walls of bursting efforts.
Exterior wall decoration of a gas concrete cottage
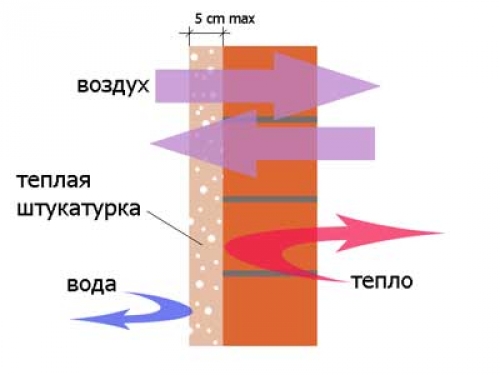
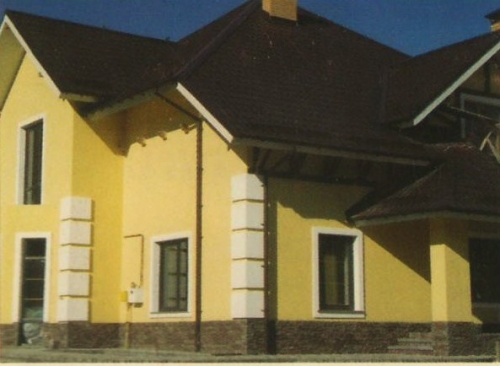
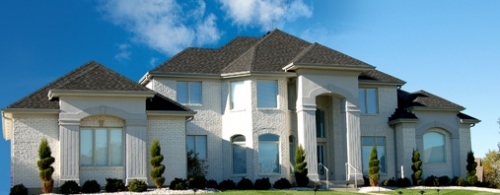
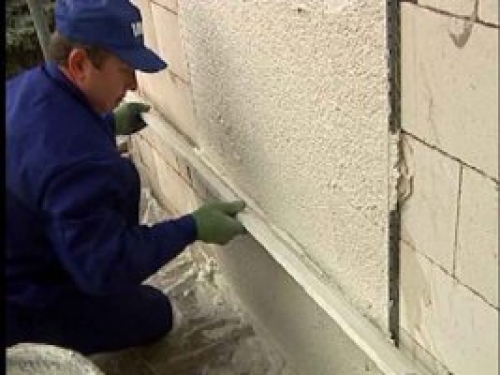
As an outer finish of a cottage from aerated concrete blocks, it is necessary to use plasters with high steam and gas permeability. A great option would be to finish the thermal insulation plaster mixture UB-21 UMKA followed by painting with high-passable paint (lime paint, silicate paint, etc.) or facade decorative plaster UB-21.
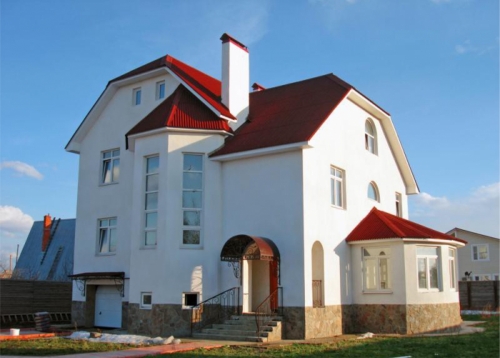
Warm plasters have a thermal conductivity of 0.065 W/(MK) and vapor permeability of 0.34 mg/(MSCUPA). Therefore, their use carries not only a decorative function, but also warming. An example of decoration with decorative warm plaster can be viewed on a demonstrating cottage from aerated concrete photo.
Plaster work is carried out in approximately the same as with ordinary decorative plaster. Prepare the mixture: pour water into the container and fill the contents of the bag, then stir. We install the beacons on the buns from the solution, fill the space between the beacons, and level the rule.
After 4 8 hours, we remove the lighthouses, fill the voids with a solution, level it.
Important! If the ambient temperature is below +15 C, then the main layer of plaster will dry 12 24 hours.
After 2 days, apply a finish layer of 2 5 mm and grind a plastic or foam grater.
During the construction of a cottage from aerated concrete with your own hands, treat with special attention to the miscalculations of the thickness of the walls, compliance with the technology of armored vehicles and reinforcing the intermediate rows, as well as to heat -insulating and finishing materials. This will allow you to build a warm, cozy, durable house without cracks, mold and wet walls.
If you are interested in semi -trailers, then you can see and choose here.

But what about the sandy sand?
But what about the sandy sand? After all, he can cause lung silicosis !!!!
First finished strobes at
First, ready -made strokes when reinforcing masonry are filled with solution, and only then a pre -completed reinforcement is drunk in them. Read at least on the sites of Aerock and Itonga. It is also not written about reinforcing window openings either. And the adhesive solution is incorrectly applied to the vertical of the non -refined block - at the base they must leave 1-2 cm without glue so as not to “clog the angle”. Look at the master class the same result. The article has a lot of shortcomings, I advise the authors to read and fix it.
And that terrible photo
And that terrible photo with an opened crack is a clear, sorry, crap. Even the non -professionalist shows that the masonry is made of brick, and the fact that the authors are imposed for an aerated concrete block is just voluminous plaster. Pieces of construction brick are visible into cracks. I would not have shameful, gentlemen authors ...
But you can reinforce the blocks
Can you reinforce the blocks of the wall thickness 200mm 2 rods or do you need one?
Good afternoon! I sell facade
Good afternoon!
I sell facade foam PSB-C 25 F from the manufacturer!
Thickness from 2 to 15 cm.
There are also the following types of foam:
- PSB - 9 and PSB - 10;
- PSB -15 and PSB - 25;
- PSB - from 25 f;
- PSB-S 35.
With wholesale orders, the price is welded individually!
Delivery. If you are interested in this material, then contact me by phone. 89054574762.
Good afternoon, we offer
Good afternoon, we bring to your attention the warm stucco "Spadar" delivery to all regions of Russia. Wholesale and small wholesale. Insulation of facades of residential, public, industrial and administrative buildings.
Protecting walls from cellular concrete, expanded clay concrete blocks, silicate brick of porous stones from the external environment
Elimination of cold bridges (sealing interpanel seams and joints)
Warming of balconies
Insulation of freezing walls
Finishing raw rooms
Application in the filling of floors
Soundproofing
A layer of a mixture of a spatar 2.5 cm thick according to its thermal insulation characteristics replaces the masonry with a thickness of 500 mm from silicate brick. Due to the low thermal conductivity, the Spadar ensures fuel to heating the building while reducing the thickness of the walls.
The constant heat transfer “Spadar” is 0.086 kcal/mch0s, and in a classic construction solution of 0.87 kcal/mch0s. Modern insulation, such as polystyrene, have a constant heat transfer amount of 0.038 kcal/mch0s, but this value begins to increase five years after installation, or even earlier. The constant value of the heat transfer "Spadar" does not change over time.
Warm stucco spar
Warm plaster "Spadar" http://www.uralbelst.com/