A reliable and durable house is not only strong stable walls and non -flowing ...
|
|
Having bought an apartment in an old house or inherit it, the new owners immediately ... |
Textile wallpaper is an excellent solution for wall decoration, while the joints between the canvases ... |
Aluminum rheal
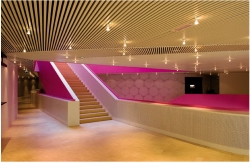
Raedic ceilings firmly occupied their niche in the construction market, squeezing some types of ceiling finishes. Modern aluminum suspension systems have a wide area of \u200b\u200bapplication. Due to their excellent technical and operational qualities, such ceilings are used not only indoors, but also outside. Various forms and textures, a rich color scheme allow you to realize any design fantasy.
Not the last argument in favor of narrow metal panels is the simplicity of their installation. To carry out the installation of a suspended ceiling is within the power of not even an experienced master.
- The ceiling of aluminum: technical characteristics and operational features
- Types of aluminum rack ceilings
- Aluminum rheal
- Calculation of rack aluminum ceilings
- Installation of aluminum rack ceilings: step -by -step instructions
- Rhealenic aluminum ceiling: photo of the ideas of application in the interior
The ceiling of aluminum: technical characteristics and operational features
Suspended ceiling systems are used in the decoration of the premises for 60 years. In Russia, this type of ceiling lining is only gaining popularity. Many experts and consumers have already managed to appreciate the practicality, decorativeness and other advantages of aluminum coatings.
We note the main technical and operational characteristics of the rack ceilings from aluminum:
- Moisture resistance. Aluminum ceilings are not afraid of moisture, so their installation is allowed to be performed in pools, basements, bathrooms and kitchens.
- Fire resistance/fireproof. Thanks to these properties, rack aluminum ceilings are recommended to be installed in tasks with strict fire safety standards.
- High reflective ability. The metal shine of the coating reflects the light from the lamps. This allows you to choose lighting lighting devices and save on electricity.
- Environmental friendliness of the material. Metal slats are completely safe for human health, the material does not emit vitality harmful to human health.
- Resistant to the formation/spread of mold and microbes. The coating is not deceived.
- Easy to maintain. To maintain the initial shine, it is enough to periodically wipe the ceiling with a damp sponge.
- High strength. Metal rails are resistant to mechanical damage. Given the impact resistance of the coating, this material is used for both the internal and external facing of the room.
- Simplicity of installation. The ceiling structure consists of several elements, the installation of which will not cause difficulties even among amaters of construction skill.
- Low weight. The river ceiling does not have a large load on the floor.
- Aesthetics of the set surface. Some designers note the coldness of metal racks and do not recommend installing aluminum ceilings in bedrooms and children's rooms.
- A long service life is about 20-50 years.
- Repairs. The damaged structural element is easy to replace with a new to dismantle the suspension system and the ceiling will not be finished again.
- The dimensions of the ceiling racks: standard thickness 0.3-0.4 mm, length 3, 4 m. Some manufacturers produce a separate series of rack ceilings for large rooms with a length of 6 m.
Most often, aluminum suspension ceilings are mounted in public premises: pools, gyms, offices, medical institutions. Such a cladding looks spectacular in the halls of large administrative buildings, hotels and restaurants. It is advisable to place them in apartments and private houses on loggias, balconies, bathrooms and stairwells.
Types of aluminum rack ceilings
Aluminum rack ceilings differ in the color of the rails, its width, profile and fastening method. Two types of ceilings are distinguished by type of device:
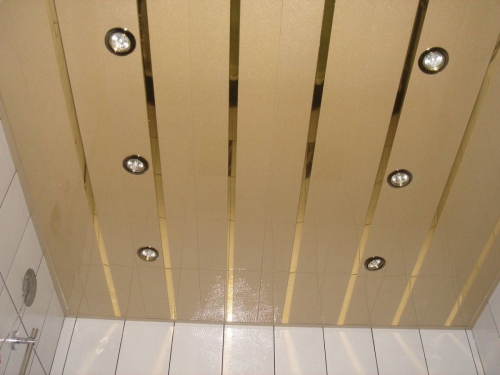
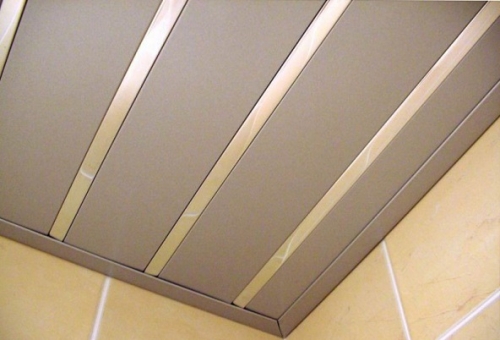
Structures open type. The principle of installing ceilings of this type is the installation of the rails so that there is a small gap between the elements. Subsequently, this gap is closed with interchange inserts.
The main advantages of open ceilings:
- excellent ventilation of the inter -volume space;
- the game of color combining inserts of contrasting or harmonious shades will be able to create an original design of the ceiling.
Dropped ceilings closed type. Reiki are fixed tightly to each other, forming a continuous smooth surface without tears. To avoid monochrome, you can use rugs of various textures and colors.
Aluminum rheal
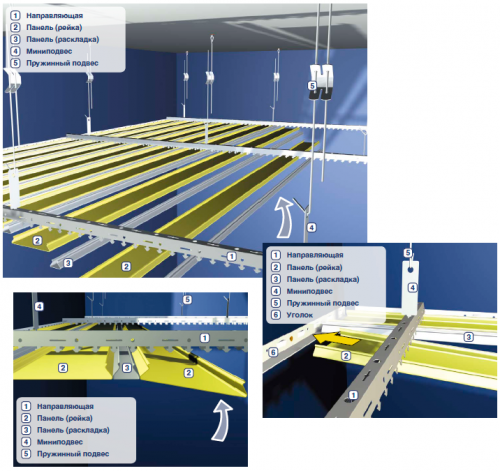
The suspended rack ceiling made of aluminum has a fairly simple design consisting of the following elements:
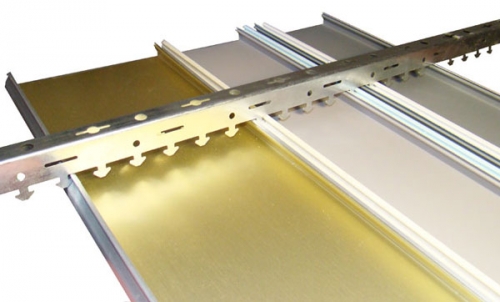
- Stringers (traverses or combs) bearing tires on which facing panels are fixed. The traverses are made in the form of profiles, the upper part of which has cloves for installing suspensions. Material of the manufacture of a comb aluminum alloys or galvanized steel.
- The rack panels are made by cold pressing of thin aluminum. The special shape of the cross -section of the panel makes it strong, not allowing to bend under load. Reiki are treated with special paint or covered with a layer of anti -guided varnish that protects the panel from scratches and chips. The width of aluminum strips is 10-20 cm. The choice of this parameter depends on the dimensions of the room and the design idea. If it is planned to arrange a curved ceiling or two -level structures, then curved rails should be used.
- Adjustable suspensions are used to install ridges and their vertical leveling, providing the smoothness of the horizontal surface. The suspension consists of a rod and brackets. The bracket is attached to the traverses, and the rod directly to the base of the ceiling.
- Settlement inserts narrow panels made of aluminum. These details are used in rack ceilings of the open system.
- The corner perimeter profile is a decorative element, masking the joints of the ceiling with walls.
Important! In order to avoid the errors of fastening and the appearance of cracks during the assembly of the ceiling, rails and stringers should be from one manufacturer.
Thanks to a convenient fastener system, aluminum rails are easily dismantled and installed back if it is necessary to access engineering communications hidden behind the ceiling.
Calculation of rack aluminum ceilings
Before starting installation, it is necessary to correctly perform the calculation of the components. For this, the room is measured determined the area of \u200b\u200bthe room (the length is multiplied by the width). From this value, one should be repulsed when calculating the number of rails.
- Having divided the width of the room into the width of the panel + the width of the insert, we get the required number of rails/decorative inserts. It is advisable to be safe and immediately buy spare 1-2 plates.
- To determine the number of guide profiles, the perimeter of the room should be calculated. The resulting value is increased by 3%. This gap compensates for the consumption of the material on cutting.

- The suspended ceilings of aluminum rack are installed across the length of the room. The total length of the stringers is calculated by the formula: v \u003d (h/0.9)*l, where
- V total stringers length;
- L- the length of the room;
- N the width of the room.
- Knowing the total length of the streamers and the size of one element can be found their number.
- To calculate the number of adjustable suspensions, it is necessary to divide the total length of the streamers by 0.3.
Important! If a fractional number is obtained during calculations, it must be rounded in a larger way.
Installation of aluminum rack ceilings: step -by -step instructions
The following materials and tools will be needed to implement the project:
- a set of aluminum rack ceiling (tire, suspension, baseboard, rails and lamps);
- electric drill;
- construction level and roulette;
- scissors for metal or a grinder;
- screwdriver;
- water or laser level;
- punch;
- dowel/screws.
The first stage of the work is marked. The evenness of the ceiling largely depends on the quality of orientation. For this work, a water/laser level, pencil/ruler, painting broken thread will come in handy.
Important! The level of placement of the suspended ceiling depends on the type of lighting devices. For installation of spotlights, the height of the structure should be lowered by 12 cm (body height). When using a chandelier or overhead lamp, the indentation from the base of the ceiling can be reduced.
Marking procedure:
- From the corner of the room, make a small retreat 15-20 cm. In this place, measure the right distance, for example, 10 cm from the ceiling.
- Apply one end of the water level so that the label strictly corresponds to the level of water in the tube. Returning a short distance and attach the second end to the wall, the water level will show where to put the next mark.
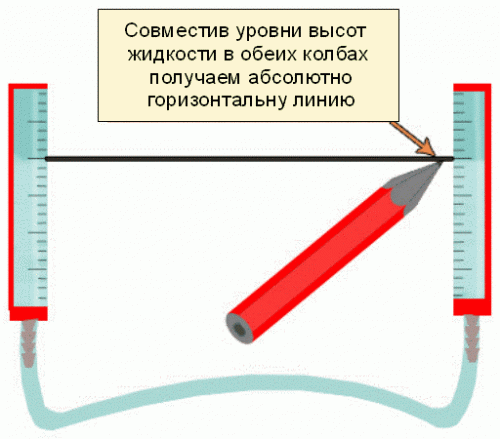
- Repeat such operations, marking the walls of the room around the perimeter. The optimal marking step is 50 cm.
- Combine all points along the perimeter of the room using a painting broken thread.
Subsequent installation of the suspended rack ceiling:
- At the applied mark, measure the length of the wall and cut off a piece of profile of the corresponding size. The standard profile length is 3 meters. Perform a similar procedure for all walls of the room, preparing the guide elements of the ceiling for the entire perimeter.
- Following the markup, fix all the guides with dowels and screws. The recommended step of fastening profiles is about 50 cm.
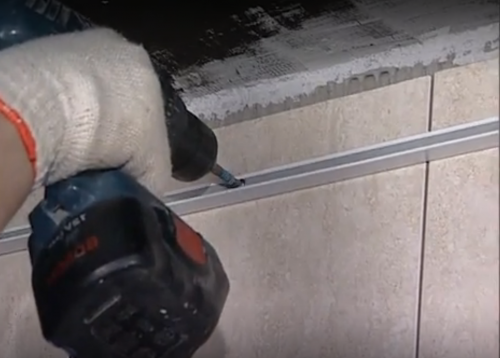
- The fixation of the guides on the inner angles of the room occurs VSTOK, when mounted at the outer angles at an angle of 45 (the profiles are cut).
- Mark the places of fastening of the stringers. To apply the first mark from the wall, it is necessary to retreat 40 cm, subsequent points are applied through each meter.
- The fixation of the suspensions is performed in accordance with the placement of the fasteners of the supporting tire. All suspensions are located strictly at the same level after installation, they can be adjusted. Attach the suspensions with dowels to the ceiling.
- Fix the supporting tires (stringers). They are installed at the same level with the profile perpendicular to aluminum panels (rails). The distance between stringers should not exceed 100-120 cm. Special holes are provided in the tire design for fastening to suspensions. The evenness of the ceiling coating depends on the correctness of the fixation of the stringers.
- If the tire turned out to be insufficient length, then it must be lengthened to fasten the additional segment of the stringer on the first.
The sequence of installation of aluminum ceiling racks:
- Remove the protective film from the panels. To measure the distance between the opposite walls and cut off the rail, 3 cm less than the resulting size.
- The panel is carefully installed in a stringer and fix it over the entire length to snap on the locking tires. Perform alternate installation of adjacent racks. As you install, you can adjust the height of the stringers, changing the length of the suspensions.
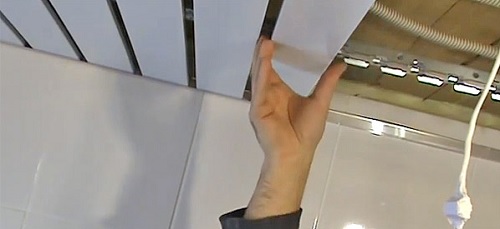
- If the width of the last lamella is too large, then it must be cut. Measure the desired size along the length of the rail, put a ruler or long shed, and gently draw a line along the panel with a construction knife. Five/unbend the rail to its fault alternately.
- It is advisable to cut long rails in parts, having previously completed the transverse incision. After installation, the cut lamel after installation is fixed with wooden spacers in the wall profile, and its second is fixed on the tongue of the tire.
- The decorative baseboard is mounted last. This element masks the gaps and joints against the wall, giving the ceiling a complete look.
At the end of the installation work, you can place spotlights on the ceiling. To install them, you will need to make holes in aluminum rails. In the right place of the panel, you need to draw a circle, and from its center to perform radial incisions towards the outer line (the petals should be obtained). All cuts are conveniently done with scissors for metal. Bend parts of the circle inside the rail. The circle under the lamp will be better if the cuts are performed with a small distance from each other.
Installation of aluminum re -toll: video
Rhealenic aluminum ceiling: photo of the ideas of application in the interior
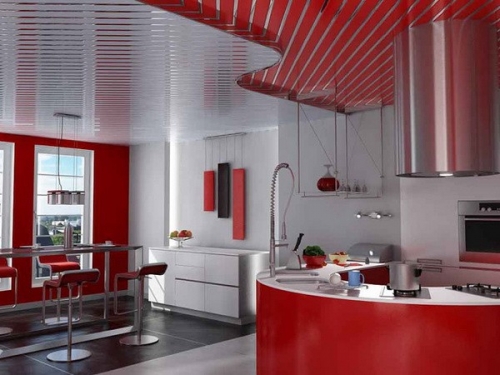
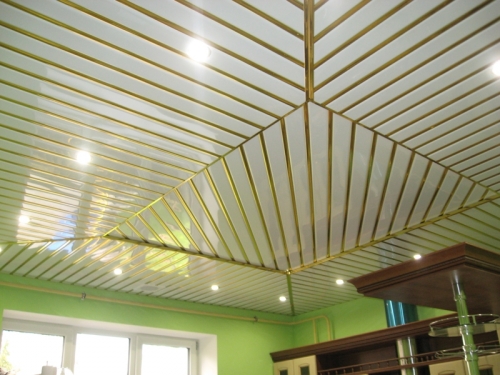
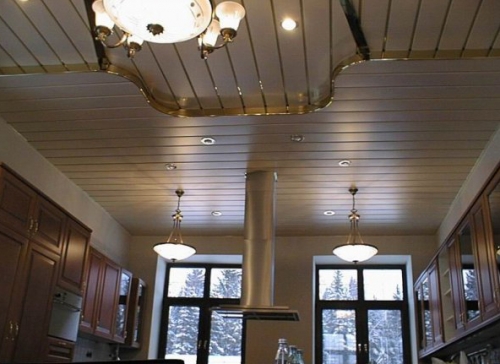
Roet ceiling made of aluminum in the kitchen. The versatile direction of the rails gives volume and visually expands the space of the room.
Two -level ceiling with built -in lamps and chandeliers. The ceiling canvas is made of matte aluminum lamellas.
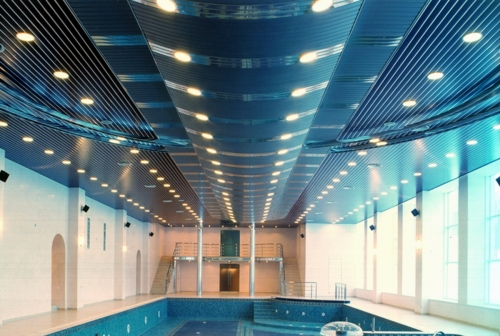
Aluminum suspension ceilings are the best option for pools. A multi -level rack ceiling from straight and curved rails reflects the brilliance of water and resembles an imitation of sea waves.
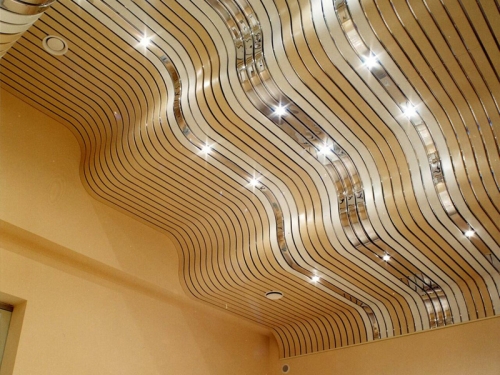
The relief ceiling of aluminum (the price of the issue from 1,500 rubles/sq.m.) With glossy and matte inserts changes the perception of space and room as a whole.
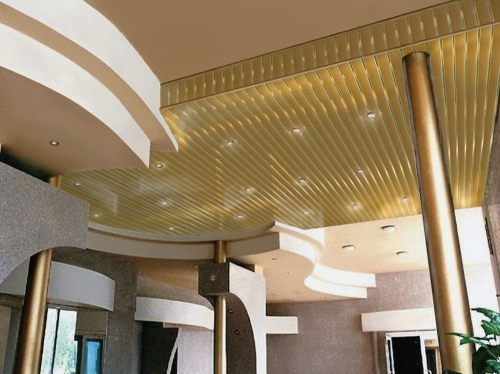
Combining the rack ceiling with plasterboard multi -level structures is an interesting option for office premises and administrative buildings.

