Previously, various objects or crumpled ...
|
|
Many owners do not pay much attention to the final stages of repair, the main goal ... |
The rapid development of building technologies and the lightning -fast filling of the market is large ... |
Do -it -yourself putty with your own hands. Features of alignment with putty
The choice of putty as a finishing material for the ceiling allows you to get a perfectly even surface ready for painting or for other finishing work. This procedure is required from a person who performs it, first of all, attentiveness and observance of all technological moments, which we will talk about later.
Table of contents:
- Ceiling putty - features and advantages
- DIY ceiling putty - choice of materials and tools
- How to align the ceiling with putty - preparatory stage
- The putty of the concrete ceiling - primer, preparation of the solution and leveling
- Starting putting the ceiling for painting
- The finishing of the ceiling - technology for conducting
- Features of putty of drywall ceiling
Ceiling putty - features and advantages
Among the advantages of choosing a putty as a main or additional element in the ceiling finish should be highlighted:
- affordable cost for materials used in the process of work;
- saving on hiring specialists involved in the performance of these work, it is quite possible to do all the processes yourself if you follow all the instructions and buy quality materials;
- A variety of materials and putty mixtures allows you to choose exactly the composition that is ideal for the features of the room;
- the possibility of choosing environmentally friendly materials used in children's and sanatorium and medical institutions;
- Fire safety of the material - since putty refers to the compositions with very low fire;
- An attractive type of flow, ultimately, finishing work is the main advantage of choosing a putty.
Among the disadvantages of putty when finishing the ceiling, it should not be noted the ability to act as a heat and sound insulator. Therefore, before applying it, if necessary, sound insulation and reduction of heat loss are compensated by special materials.
DIY ceiling putty - choice of materials and tools
In order for the coating on the ceiling to be of high quality and durable should be with particular care to approach the process of choosing materials that are used when decorating it.
It will require not only putty, but also paints, as well as materials that help improve adhesion between all the applied layers.
First you should choose a high -quality primer. It will be required to process a previously cleaned ceiling, also after each alignment with a putty mixture.
If necessary, the alignment of the old ceiling requires a special putty mixture on a plastering basis. It differs in the presence of the starting composition of putty. Please note that when choosing materials, one manufacturer should be preferred in order to avoid incompatibility between compounds of different purposes of mixtures.
Next, the presence of starting and finish putty will be required. These compositions are distinguished by the convenience of applying, applying and distributing over the surface. However, the starting mixture has a rude grinding and is used in the process of the initial stage of finishing work. If necessary, it is applied with a layer, the thickness of which exceeds 1 cm. This material is intended exclusively for leveling the surface.
With the help of finish putty, the surface rough to the touch acquires the necessary smoothness to it. This is due to the fact that the material has small grinding. The finish putty is applied with a layer of up to two millimeters. Next, it is grinding and further painting or installation of decorative elements.
When choosing materials, the individual characteristics of the room should be taken into account, such as high humidity, temperature changes, etc. There are special compounds that are designed to use them in a room with high humidity, they have LR +marking.
There are several types of putty mixtures, with which work is done on the ceiling. In relation to the consistency, they distinguish:
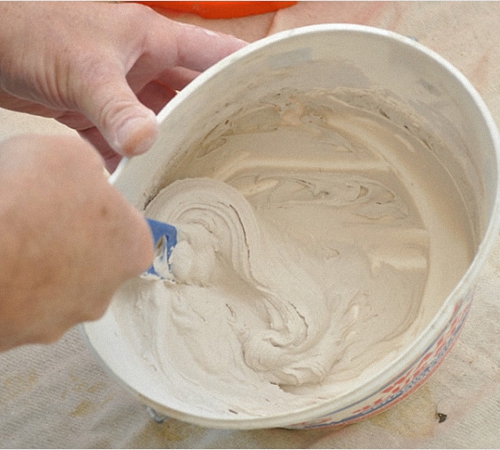
- The putty -made putty are located in a plastic container or bucket, immediately after opening is ready for use, does not require independent kneading;
- Dry compositions - diluted with water, immediately before use.
If you compare these types of putty, it turns out:
- The price of finished compositions is higher than for dry;
- The preparation time for dry mixtures will be required more, since they require their breeding water, special equipment for kneading and bringing the composition to the desired consistency, the finished compositions are suitable for use immediately after the container in which they are stored are open;
- The powders in an undiluted form are stored much longer than the finished mixture.
Keep in mind that the putty is dry, but diluted with water should be fully used for two to three days, while the finished compounds are stored longer, they are fit for use for two months.
To do all the work at the proper level, the availability of:
- an electric drill and nozzle in the form of a mixer, with which a putty mixture will be prepared;
- roller with a long handle - with it, apply a primer and paint, if necessary;
- the main spatula of the working purpose is the width of 400 mm;
- additional spatula, 80-100 mm wide;
- a narrow spatula, the width of which is not more than three centimeters, with its help it will be possible to putty hard -to -reach or corner areas;
- stairs;
- flashlight - with it, defects are found in work;
- rubber spatula;
- kelms;
- graters, abrasive nets or sandpaper with which each of the layers of putty is aligned;
- construction level;
- nylon cord - with it, it is beaten by the beaten of even lines;
- the reservoir in which the solution will be mixed;
- a tray in which there will be a primer or paint;
- brushes that will help tint hard -to -reach areas or perimeter of the ceiling;
- a respirator or a protective mask that will protect a person performing work from unpleasant odors.

How to align the ceiling with putty - preparatory stage
In order to get a perfectly even and, most importantly, strong coating, a number of preparatory work should be carried out to remove old whitewashing, painting or plaster.
If there is a previously whitewashed surface, you should take care of removing this material using simple water. First, the surface is abundantly soaked in it, and then left for half an hour. Next, whitewashing is easily cleaned from the ceiling. If there are problems with the removal of whitewashing, soak the ceiling again. To perform work, you need a spatula or sponge moistened in water.
To remove the paint, you need to make more efforts, so it holds quite tightly on the surface. However, in the presence of paint, its removal is mandatory. Otherwise, putty will simply exfoliate after time. To remove the paint, use the spatula, if you can’t get rid of the coating, you should apply a construction hair dryer, and then clean the surface with sandpaper fixed on a grater.
To remove wallpaper, it is enough to have a wide spatula. To facilitate the procedure for removing old wallpaper, pre -moisten them with water and leave for 10 minutes.
If, upon completion of the process of removing the whitewashing on the ceiling, areas with falling plaster were discovered, then they must also be removed. To carry out this procedure, a spatula medium width is required, made of dense metal.
When the ceiling is cleaned and has a stably healthy look, you should take care of the location of all the cracks available on it. If this is not done, then after time, after putty, they will appear on the ceiling.
For a deeper penetration of the armor material into the inside of the crack, you should take care of its maximum expansion. For these purposes, a spatula or grinding machine with a circle is used. In addition, the option of using a hammer and chisel is possible. Before embarrassing cracks, they are processed using a primer. Thus, their adhesion with angroceric material will improve.
If cracks and openings are quite massive, then the use of mounting foam on a polyurethane basis is recommended. In the presence of small cracks in the size of cracks, the use of sealant or putty on a cement basis is enough. After completely drying the rearmament material, the ceiling is cleaned and aligned.
If the crack was large, then a grid is installed on its surface, which strengthens the ceiling and prevents the appearance of new cracks.
The putty of the concrete ceiling - primer, preparation of the solution and leveling
After filling all the cracks and drying of the solution, the primer is followed, which has an antiseptic effect and increases the adhesion of putty with the surface.
A primer in at least two layers should be applied. Each of the layers should be applied after the previous one is completely dry. In addition, the primer is applied before the implementation of each putty.
The primer is selected in accordance with the type of ceiling, for example, there are compounds for concrete or drywall ceilings. Pour a primer into a special bath, from which it will be conveniently applied with a roller. Use a terry -type roller or a wide brush.
After the final drying of the second or third layer of putty, the putty solution should be prepared for applying the starting layer. If it is planned to use a dry mixture, then first of all you need to read the instructions for its kneading, it must indicate all the necessary proportions of water and putty.
We offer to familiarize yourself with the instructions for independent mixing of dry putty:
- into the tank in which the kneading will be carried out pour water, according to the instructions from the manufacturer;
- Graduate the right amount of dry mixture;
- Prepare an electric drill and a mixer nozzle, mix the mixture at medium speed until it acquires a homogeneous consistency;
- If you plan to align, then the density of the solution should be more dense than when applying the starting and finish layers.

Please note that if putty has a gypsum base, then it should be separated portioned, since the composition dries very quickly and becomes unsuitable for use.
Before buying materials for work, you should carefully inspect the ceiling for flaws and irregularities, if they are not fixed, then after puttying they will still be noticeable.
To determine this parameter, it will be necessary to determine the lowest angle of the room, between the ceiling and the wall and mark it on the wall. Using the level, according to this mark, draw the perimeter of the room. In addition, it is possible to use a painted nylon thread, which is installed on the ceiling, according to the line, the presence or absence of curvature is determined.
If the changes on the ceiling make up no more than one centimeter, then starting putty is used for alignment. Otherwise, you need to use putty with the addition of a plaster solution. If the ceiling has flaws of more than two centimeters, then you will need to install a suspended ceiling made of drywall or glass deck sheets.
Please note that laying putty on a concrete ceiling with a layer of more than 2 cm, will lead to its exfoliation, under the influence of moisture. The most popular method of aligning the ceiling is the use of a traditional plaster composition that has a cement base. After drying, they apply a primer on it and wait until it dries.
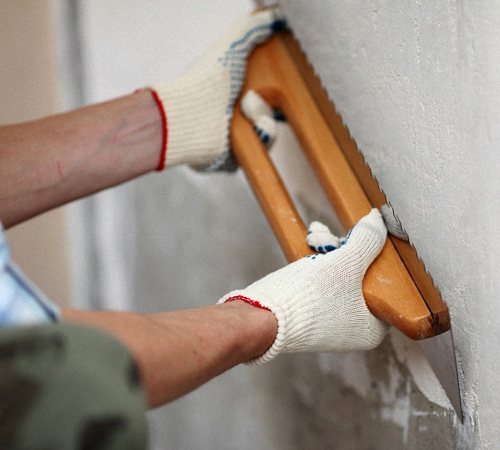
Starting putting the ceiling for painting
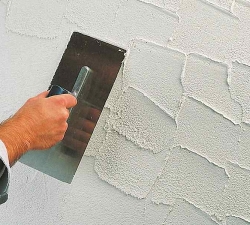
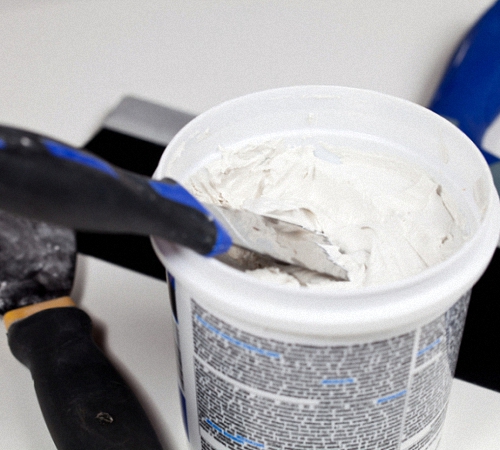
The first layer of starting putty is applied to the aligned and dried base. The solution has a pasty consistency and is in a special container, from which it is typed portioned using a narrow spatula.
Starting from the corner of the ceiling, the mixture is distributed on it with a large spatula or cell. Keep in mind that the spatula should be pressed to the surface as tightly as possible, in order to close all the recesses. The first layer is quite thin, the main part of the ceiling should be seen through it. This layer of putty helps to hide small flaws available on the surface.
Keep in mind that the mass should be well filled on the surface. Take care of the correctness of breeding the joint between the wall and the ceiling.
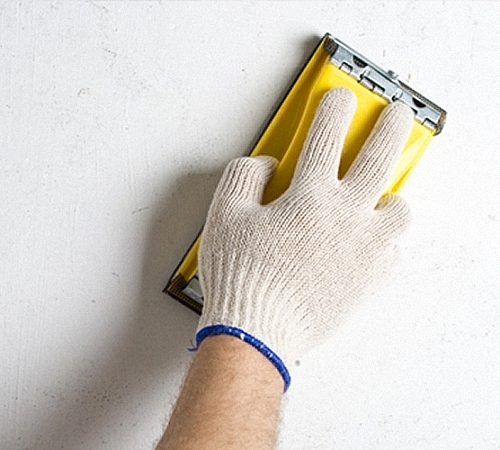
After the first layer of putty dries, it grinds with a grater on which an abrasive mesh is installed. Grind in a circle, counterclockwise.
To verify the evenness of the ceiling, each of its sections shines through with a flashlight or light bulb. If, nevertheless, defects are present, then to eliminate them, it is required to apply a Dean layer of starting putty. The total thickness of two layers should not be more than 1.3 cm.
The second layer also takes time to dry, after which it is wiped with a net. After grout with a clean brush, the ceiling is eliminated from dust and applied a primer.

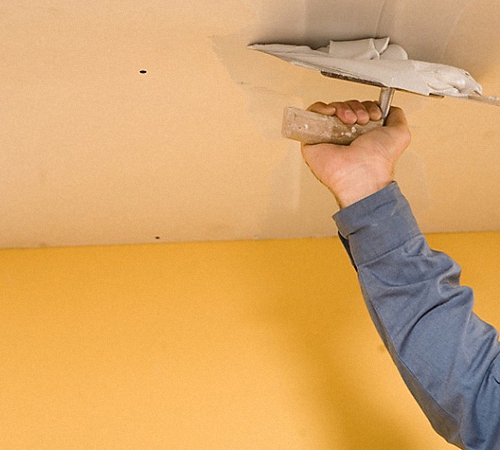
The finishing of the ceiling - technology for conducting
The consistency of the finish putty is more plastic, since the ceiling, after the finish, acquires incredible smoothness. Therefore, this composition should not be too thick.
The putty is applied with a spatula, but not much clinging to the surface. If, after the first layer, small defects remain, then after drying and grouting it is applied to the second layer of finish putty.
Grinding the last layer is carried out by a small fraction with a grid. In order for the ceiling to acquire perfect smoothness, it is recommended to use putty on acrylic, and not on a gypsum basis. This composition is applied with a semicircular spatula, and the thickness of the layer is 1-1.5 mm.
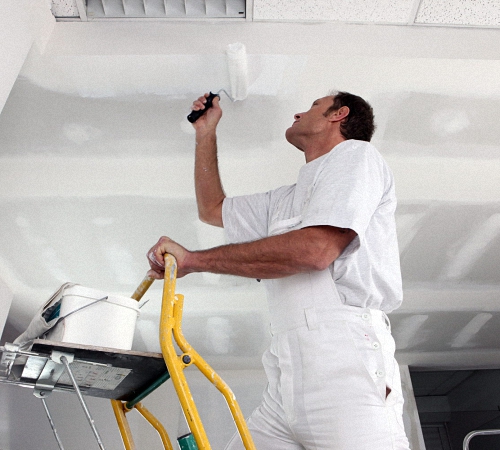
After grinding all the layers and their complete drying, another layer of primer is applied. Next, painting, whitewashing or further ceiling finish is carried out.
Features of putty of drywall ceiling
The procedure for putting put at a drywall ceiling is simpler than on a concrete base. Since, subject to the technology of installation of drywall, the coating has perfect evenness and does not require preliminary leveling.
Although, there are certain nuances, the implementation of these works, about which we will talk further:
1. First, a primer is applied, pay special attention to the surfaces of the seams and joints of drywall sheets.
2. Next, all the fasteners of fasteners are put off, which I fix the drywall on the metal frame. If self -tapping screws protrude, then they are necessarily screwed manually.
3. In the presence of joints, they are slightly deepened and filled with a starting putty.
4. Next, the painting mesh is glued so that it is drowned in the seam.
5. Next, the surface is puttled and aligned.
6. After the putty dries, it is wiped with a grid and applied a finish layer.
7. Next follows the procedure for grouting the finish layer, checking it for the absence of defects and applying a primer.
8. The surface of the ceiling is ready for further decoration.
Do -it -yourself putty with your own hands video:
![]()
StrPort construction portal 2011-2018. Articles about repair, construction, building materials.
Copying information from the site is possible only with permission of the editorial office Or indicating a direct link to the source. Legal justification
And my wife and I bought a house,
And my wife and I bought a house, applied for machine plaster in http://26-shtukatur.ru/.
I always knew that it was faster and cheaper, but I did not think that so. In general, the brigade coped in 3 days, we ordered plaster on the lighthouses, for the subsequent pasting of wallpaper. All the slopes, walls and in some places the ceiling were plastered. It was nice that they even removed it.