With the advent of frosty winter, it is not easy to keep the heat in the house. It is not easy to get cold through ...
|
|
The prototype of modern piece material for lining of buildings of any purpose was ... |
Ward stone was used to build a foundation and base, and in some cases ... |
Putting the ceiling for painting with your own hands

All defects of the plane are clearly visible on the painted surfaces, which means that before painting it is necessary to carry out a special procedure called putty. And, of course, the quality of the painting robot will depend on this process. Therefore, the ceiling plane is always prepared for the finish by performing putting the ceiling for painting. Such an operation will help eliminate irregularities and seams, and it does not matter whether a regular ceiling or a suspension structure from GKL is prepared for decoration.
Content:
- Features of putting the ceiling
- Tools and materials for work
- Preparation of the surface for putty
- The fight against the fungus on the ceiling
- Loading surface for putty
- Application of starting putty
- Application of finish putty
- Grinding and primer before painting
Features of putting the ceiling
Before the finished surface, whether it is a facade or ceiling, apply a final coating, often called the finish or finishing, it is processed by materials and compounds for leveling, which are called putty. For example, to prepare a surface for pasting or painting, putty must be used.
At its core, preparing the ceiling for painting is different and it depends on a specific surface. For example, it can be an old putty or whitewash, a slab of ceilings that requires preliminary putty. As a rule, in the buildings of an old -style clay ceiling that requires an unusual approach can be found. Even a ceiling made of drywall sheets has certain features. The surface of the ceiling, of course, is the most diverse, but we have listed the most common types of surface.
From a wide variety of putty (oil-red, adhesive, acrylic and latex, putty, based on PVA), the necessary substances for certain work are selected. When choosing a putty composition, one should not forget about the primer. It is applied immediately before putting the ceiling.
Putting can also be finished and starting. Typically, the starting compositions are thick, like sour cream, and, accordingly, are applied for aligning large changes, damage in the ceiling and hiding holes. If necessary, these compounds can be applied more than once, with a break for their drying, also using special reinforcing nets that exclude the formation of cracks.
Finish putty are somewhat slopes and they are used on top of starting putty. Their application may be preceded by priming. It is such a finish putty of the ceiling that can bring it to an ideal state. But still, using the finish putty, aligning the ceiling will not give results. Such a composition can only be applied with a rather thin layer. Of course, it will completely repeat the profile of the surface on which it is applied, that is, its purpose is to give the ceiling smoothness.
Tools and materials for work
A large number of manufacturers are made by putty sets, which include soils on a homogeneous basis and putty (finish, starting, facade, universal, etc.). With this approach, a much technology of putting the ceiling and the purchase of compositions are simplified. Also, for the proper performance of putting the ceiling for painting with your own hands, you should not only choose the right compositions, but also take care of choosing the right tool.
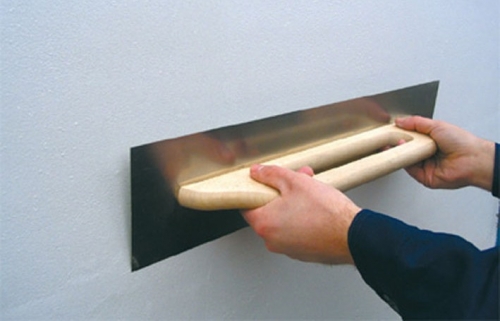
When puttying, you can’t do without a mixer (it is convenient to make mixing with a nozzle for an electric drill), you will also need graters, half terry and steel spatulas (at least two: narrow and wide). A layer of felt should be present on the grater itself, and its length should reach a meter. It is convenient to apply the primer with a wide brush or rollers of different widths.
Preparation of the surface for putty
You need to start work on putting the ceiling with the removal of old coatings. The surface for this is cleaned of old whitewashing, paint, as well as irregularities on plaster. At the same time, carefully chilled dark spots are processed, which occur from damp and occurrence of the fungus, as well as traces of the emerging rust.
It is quite difficult to remove the ceiling tiles, so such places of removal, in extreme cases, can simply be painted. If this is an old putty or plaster that exfoliates, then it can be removed quite simply with a wide spatula. In places where plaster is quite tight, it is necessary to knock with a hammer and, of course, not much. Then this layer will lose all its strength and depart without problems. Layers of colors, a cartoon are removed, the layers of dirt and dust are cleaned.
To remove the old coating of the ceiling, you can use the old grandfather’s way: soak the water -based iodine with a solution of iodine (the proportion should be like this: the iodine bubble per bucket of water), and wind the whitewashing with water. But still it is dirty, long and troublesome work.
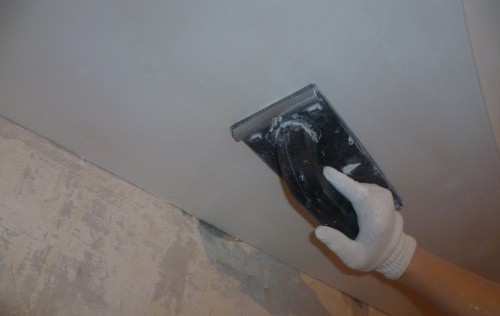
In our time, quite a lot of special flush has appeared, with the help of them you can easily remove any old paint. The washing consumption itself is 0.5 liters per square meter. With the help of a wide brush or roller, washing the ceiling is applied and removed after about 20-30 minutes along with the old paint. Clean and fast!
It also happens that when removing the wallpaper under them, there is an old putty, which is poorly held. It also needs to be removed with a spatula. If we do not remove it, and we will align the ceiling with putty, then the next day our putty will go down. And if not even the next day, then this will certainly happen when painting the ceiling.
If there are cracks on the ceiling, then they are embroidered, and then put up. At the same time, cracks are lengthened and deepened by a spatula or knife along the entire length, then the ceiling is primed and wiped with putty. The protrusions and bumps of up to 2 centimeters are knocked down by a triang, a perforator, a hammer or other tools. If the ceiling is not perfectly even, then it must be plastered. If there are more than 5 centimeters, you need to think about the ceiling of drywall plates, on which it will also be possible to subsequently gain putty experience.
The fight against the fungus on the ceiling
Many are faced with the fact that it is necessary to remove not only the old coloring composition, but also an unpleasant thing called fungus. It looks rather unpleasant, these are spots and mold of brown-green shades, which usually appear in rooms where increased humidity. If a fungus has occurred on your ceiling, then you should not ignore it. It is best to use specially intended molds from mold to combat the fungus.
On sale from mold there are Finnish and German means. The cost of such substances is at the level of $ 5-7. The choice of our means is much poorer, due to the national habit of copper sulfate, which also removes the fungus. Such a tool can be obtained only in specialized stores or in construction companies.
It is quite simple to use a mold from mold: they waited for 30 minutes from the spray can be bombed from the spray can, while looking at how everything was bubbling and hissing, and there is no more fungus. During the process, only a caustic smell of chlorine crawling around the room is unpleasant. While the invasion of the fungus and mold is in the initial stage and has not accepted the size of the disaster, indeed the products from mold help a lot.
It would also be nice to protect yourself in advance from the appearance of the fungus in the future. For such a goal, it is necessary to take preventive measures. There are various antifungal additives to paint. The fungal foci, which differ in large size, are burned with plasma welding, propane, or concrete is extracted. After that, it is again embedded and sipros is primed. Although many claim that it is useless to fight the fungus.
Loading surface for putty
After you cleared the ceiling, you can start work. But still, before that, it is necessary to find out how horizontal the ceiling is. A simple way is to measure the distance from the ceiling to the floor in the corners of the room using a plumb line. You can also use the water level. If it turns out that there is a tilt of the ceiling, then you need to return the ceiling horizontal position during the performing primer.
Next, the ceiling should be carefully loaded. The ceiling surface is covered with a primer layer for creating with the basis of durable adhesion. The need for application is explained by the fact that the putty compositions themselves cannot provide sufficient reliability of the clutch. The primer is applied to a previously leveled surface.
For those who want to put the ceiling, we strongly advise watching a video about putting the ceiling for painting and using a primer with deep penetration, which is applied using painting rollers. For these purposes, long telescopic handles can be used for these purposes, this makes it possible to save energy. You can primer in hard -to -reach places with a narrow brush. At the same time, the joints and angles are very carefully. The use of these primers protects the surface from mold and fungal formations.
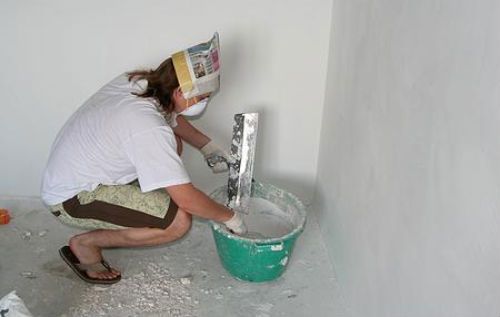
For such purposes, acrylic primer is quite well suited. And do not save, since with an insufficient layer of primer, the risk of peeling paint and putty increases. After complete drying, it would be nice to compare another layer of primer.
After the primer dries, it is necessary to put the voids and seams, as well as possible cracks and chips. At the same time, it is worth using a special mesh, which is designed to reinforce the joints for the best effect. You will prevent the occurrence of cracks in the future. After everything dries, it is necessary to polish the scorched places with a carefully rather rough skin and also treat with a primer.
Application of starting putty
After the primer has dried up, you can start putting your ceiling for smooth painting with a special starting putty. For this purpose, a clean container, a spatula of 40 millimeters, a spatula of 100 millimeters, a spatula are 250 millimeters, a spatula of 450 millimeters, a drill with a nozzle or a construction mixer. You will also need a nylon grid that has 2 on 2 cells, with which the putty will become stronger and will not give even small cracks. Not even an experienced person with the help of such a grid is quite easy to level the ceiling.
Now it's time to properly dilute the starting putty. As already mentioned, it should be like a thick sour cream. At first this mass, all holes, cracks, holes are laid with a narrow spatula. Such a composition should become completely dry. With the help of a half, the entire area is covered with a special starting putty.
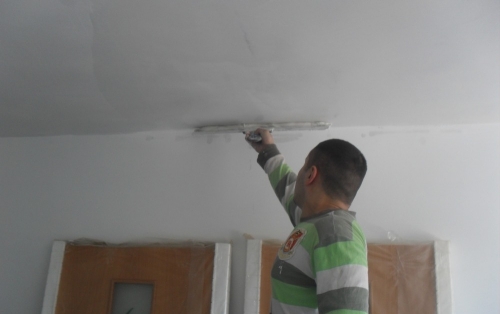
We type putty from the container. Next, with the help of a mixer, beat it to a state of soft oil. After the putty is ready, you take a spatula of 100 millimeters, then dial the putty from the container, then apply evenly on the spatula of 450 millimeters with a thin layer and put the strip, which is equal to the width of the mesh on the ceiling.
After that, it is recommended to cut off the strip of the grid, which is equal to the width of the ceiling, as shown in the photo putting the ceiling for painting. Next, this strip of the grid should be applied to the applied putty and drown in the applied putty. Gently level it with a wide spatula and, in order to completely close the net, again apply a layer of putty.
Gently spread the mixture with a layer up to a centimeter. It makes no sense to smear thicker, it is best to allow to dry, and if after drying you need to smear somewhere, then do it. You also need to leave a non -spaced strip of 5 centimeters to block the next row of nets. Next, we put the next strip of the grid on the first, more precisely on the short -legged five centimeters and, like the first, also cover with putty.
Depending on the conditions, the starting layer dries for at least 8 hours. After the first layer dries, the second layer of starting putty is applied. Its thickness should be no more than 2 millimeters. It will be good to stretch the putty on the surface, while you need to try not to leave stains from the spatula. After starting putty, you must wait until it completely dries (more than 24 hours).
In this case, the resulting influxes, lumps, irregularities are removed with sandpaper or grinding grid. If you are unsatisfied with the result of the second layer of starting putty you received, repeat the procedure again, followed by drying and grinding. In order for the dust from the ceiling to get into the lungs and eyes when grinding, you need to wear a gauze respirator and protective glasses.
Application of finish putty
Since the finish putty is applied over the starting, of course, it should be thinner than the previous one. For such purposes, a large spatula is suitable, which needs to be pressed to the ceiling with effort and apply a fairly wide layer. On the packaging of the finish putty, we read the instructions and after that, according to the instructions, prepare the putty. Such a putty should be like a thick sour cream.
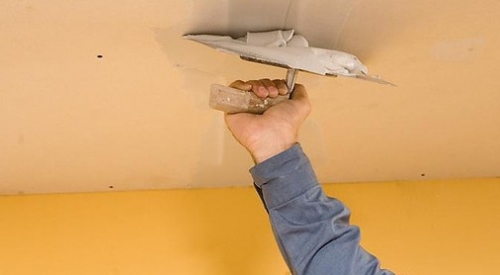
From the container we type putty with a spatula of 100 millimeters, evenly apply it to a 250-mm spatula and then apply a thin layer of 1-2 millimeters to the ceiling. And you put the putty for 40 millimeters with a putty 40 millimeters behind the gas pipe, as well as in other poorly accessible places.
In this case, the spatula must be kept at an angle of 70 degrees. The larger the angle approaches 90 degrees, the thinner the layer will be applied, also the spatula does not leave the stripes. After that, we remove the excess mass with a spatula. After the putty dries, grind with sandpaper or abrasive net.
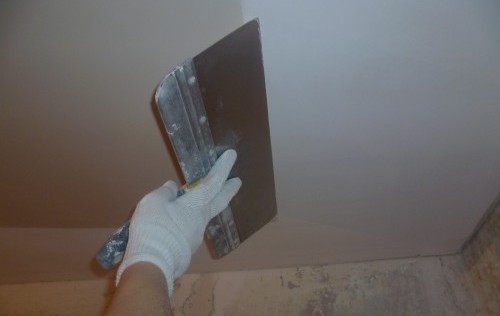
Immediately after the first layer, we make a second and also remove the remains, healing small scratches and roughness. To put the ceiling under the smooth painting, you must sparkle the ceiling with the finished acrylic putty. Such putty is sold in buckets of plastic. Acrylic putty should be applied to the ceiling with a thickness of not more than 1 millimeter.
For such purposes, it is necessary that a putty that applies a putty to the ceiling goes with a small angle of 70-80 degrees. With this method of putty, there are no lanes. In order not to dry out the mixture on the edges, it is necessary to do all the movements quite quickly. If necessary, you can apply the next layer, but only after the previous one dries. As a result, the surface becomes perfectly even and smooth, and almost does not require grinding.
A flat surface of drywall plates allows you to follow a less time -consuming path. In addition, the price of putting the ceiling for painting in this case will be much less. And putty processing is only in the seams between the sheets. After the surface dries, it must be sanded, and then apply the paint directly to the sheets. One of the main tasks is a well -loaded surface. Of course, the result is somewhat different from the first option, however, in general, it comes out quite well.
Grinding and primer before painting
After completely drying the ceiling, we thoroughly grind it. It is better to do this with trimmed windows or in a darkened room in the evening. We take a flashlight, a table lamp or a attached cartridge with a lamp to the rail, in order to keep it more convenient, and then we direct the beam of light to the ceiling at an angle - in this position all the flaws that can be eliminated by grinding are clearly visible.
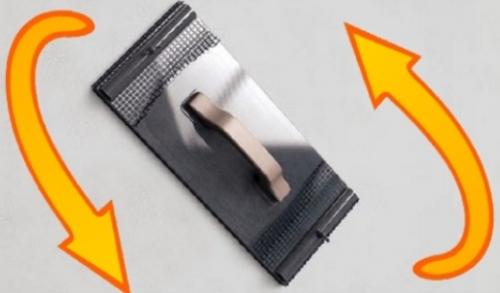
We use waterproof fine sandpaper, fixed on a grater or wooden bar, in the process of clutching. The entire ceiling is processed in this way. After grinding, all dust is removed by a vacuum cleaner.

Grunning is the final stage of the ceiling putty. We apply the primer only with a roller, and we work with a narrow brush in hard -to -reach places. On the roller there should be fur from the velor with a small pile. After the first layer of the primer has been put on the ceiling, the subsequent one is applied perpendicular. Regardless of the purpose of the primer, the application of each of the layers is done only after complete drying of the previous layer. Remember that there should not be surpluses of the primer in the process in the process in the process.

