Almost every overhaul is not complete without the arrangement of the floor screed ...
|
|
Modern landscape design often includes such a component as forged ... |
The popularity of tiles is due to a sufficient speed of cladding and ideal ... |
Do -it -yourself ceiling
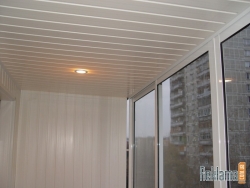
The ceiling is filled with siding is an inexpensive and practical option for its repair. In addition, you can do this yourself without hiring a team of builders. Sometimes, independent repairs are even more quality, and serves the owners all their lives. And the pride of a well -assembled ceiling will overfill for more than a month. Siding is the best option for those who want to repair the ceiling once and for all without repainting it every 3 years. Perhaps, having trained on the ceiling, you will want to sheathed with siding the inner walls or even the facade of your home.
Content:
Advantages and disadvantages of siding for ceiling lining
Why siding? This material has a lot of advantages:
- Thermal and moisture resistance. It is perfect for the kitchen and bathroom.
- Color resistance. Even after 20 years, the material does not fade, maintaining the initial shade.
- Not subjected to corrosion
- Fire safety (in polyvinyl chloride from which siding is made, fire -resistant agents are added)
- Environmental friendliness (material is chemically inert and does not emit toxic vapors)
- Easy to wash once a year
- Cheapness
- Easy installation
- Resistance to atmospheric phenomena. No wonder the siding is also used for lining of the facades. You can also pick them a ceiling on an open veranda or balcony.
- Wide colors in 12 shades. Choosing the desired color of the coating will not be difficult. The lighter it is, the more the ceilings seem to be higher.
- Masks significant changes in the height of the ceiling

The disadvantages of vinyl siding include only a large expansion coefficient under the influence of thermal factors, which can lead to some protrusion of the panels. But, if when installing the ceiling, leave a spare centimeter for this case, this phenomenon will not be noticeable. You also need to be prepared for the fact that after installing any suspended ceiling, its height will seem to decrease, i.e. In rooms with a height of less than 2.5 m, it is better to choose another type of facing. In appearance, vinyl siding is also possibly inferior to multi -level gypsum plasters or mirror stretch fabrics, but in terms of functionality and durability, it is significantly ahead of them. For example, in wet rooms, the plasterboard ceiling will simply swell.
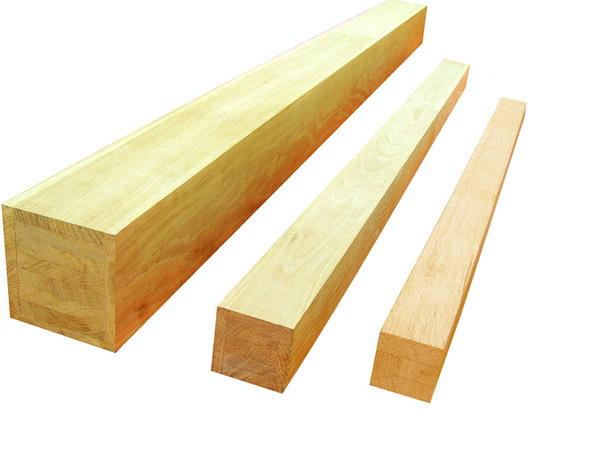
Necessary materials and tools
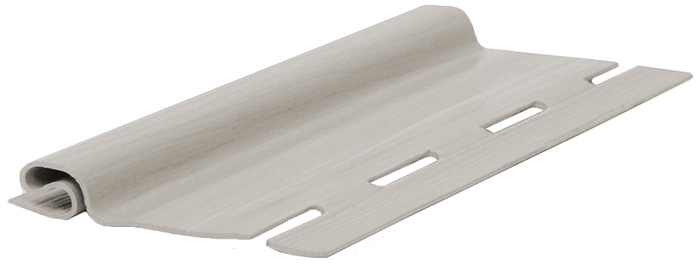
Consider the consumable materials for the ceiling. We will need vinyl siding, starting profiles (corners) for its attachment and wooden beams, on which the ceiling will hold on. The price of consumables will be about 5 cu For sq.m. If you intend to mount an additional built -in ceiling lighting, conduct wiring and purchase lamps in advance.
The following tools will be needed for installation:
- Perforator
- Scissors for metal
- Kryazuovka for wood
- Dowels and screwdrivers
- Building level
- Hammer and pliers
- Roulette and pencil
Stages of installation of a suspended ceiling from siding
DIY siding sewing with siding begins with determining the area and amount of material. The size of the vinyl panels is most often 0.25 m per 3 m. The number of corners and wooden beams is calculated around the perimeter of the room. Before installing, the bars are processed with special varnish for resistance to fire and moisture. Let's start direct installation:
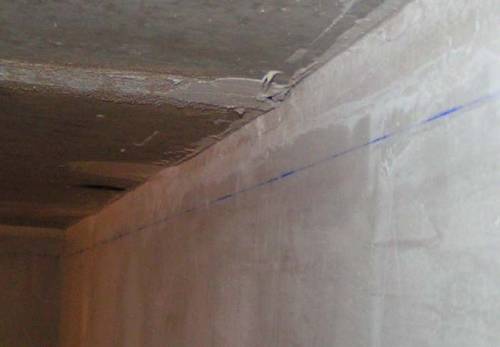
- We measure the distance from the ceiling overlap to the level of the future ceiling along the wall. This distance depends on the height of the lamps that will be mounted in siding. If the lighting is point, then a minimum retreat is 4 cm. Putting a mark with a pencil, take a level and take a horizontal line around the entire perimeter of the walls. This is necessary in order to even attach a wooden beam.
- We measure the desired length with a roulette on the beam, and cut off with a hacksaw. Using the perforator, make holes in the beam at a distance of 40 cm from each other. Accordingly, the resulting holes are perforated with the walls under the dowel.
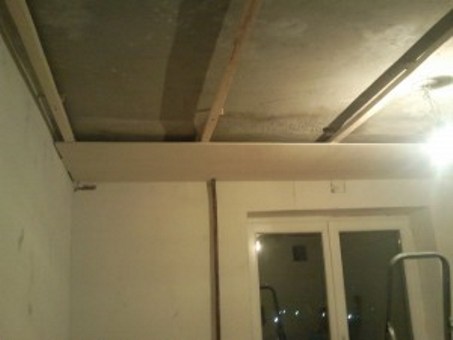
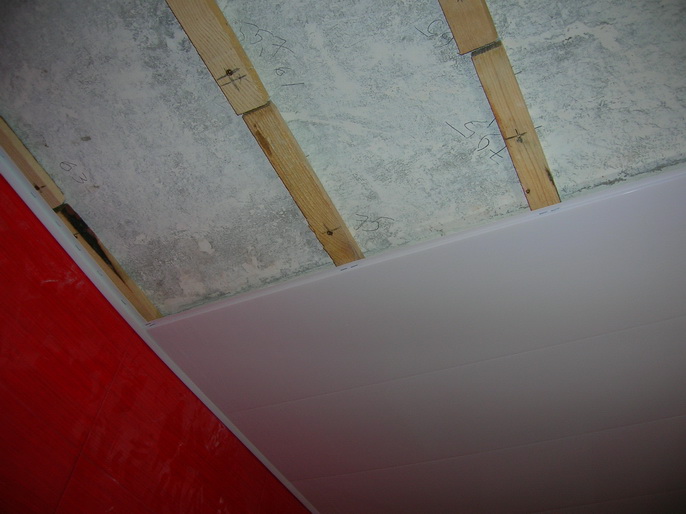
- The dowels are inserted into the holes in the walls, the beam is dressed on them and fixed with self -tapping screws. Thus, a whole wooden frame is created for the future suspended ceiling. Even if the corners of the bars were incorrect, this will not be noticeably under the siding.
- The most important stage is the installation of the starting profile (corners). This profile contains grooves in which vinyl panels are inserted, and therefore the beauty of the ceiling directly depends on the correct attachment of the corners. To fix them on the beams, you can use nails or screws. The starting profile is attached not only along the length of the room, but also in width. It is very important to correctly dock it in the corners, for more confidence, practice unnecessary pieces.
- Prepare the panels for ceiling lighting. To do this, measure the dimensions of the lamps and cut out their configuration in the siding with scissors for metal. Then we insert the panels into the grooves of the starting profile. We measure each subsequent panel separately, applying to the ceiling, no matter how much time it takes. If all the panels are made of one length in individual sections of the ceiling, they simply will not fit into the profile, or vice versa will be too short. Remember, there are no perfectly even walls, and therefore it is better to measure ten times before cutting off. The last panel, most likely, will have to be trimmed not only in width, but also along.
- Having collected the ceiling completely, they begin to attach the lamps.
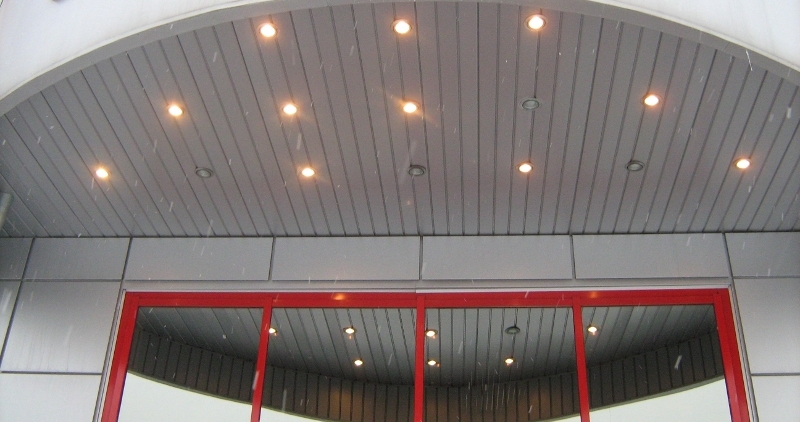
- The ceiling is wiped with a damp cloth to remove construction debris and dust. In the final form, he pleases with his purity and brilliance.
We examined the option of hearing with siding the ceiling, the maximum width of which is 3 m, i.e. equal to the length of the vinyl panel. If your room is wider than 3 meters, you need to nail an additional beam in the center of the ceiling perpendicular to the direction of the panels. Siding is attached to it with nails, screws or with the help of a steppe. This beam additionally enhances the structure, protecting the ceiling from sagging.
Caring for the ceiling from siding is very simple: it can easily be washed with water or even a detergent without fear of damaging the coating.
![]()
StrPort construction portal 2011-2018. Articles about repair, construction, building materials.
Copying information from the site is possible only with permission of the editorial office Or indicating a direct link to the source. Legal justification