Like any other serious construction technology, frame construction of the building ...
|
|
Once, preparing a foundation for a foundation for a foundation for a foundation, you found that the soil is getting weaker in ... |
Today, painting the ceiling is still popular. It is simple and ... |
Preparation of the ceiling for painting

Today, painting the ceiling is still popular. This is a simple and fairly cheap version of the ceiling, which can be performed in a short time and without special construction skills. The only thing that can ruin the impression of a freshly painted ceiling is its uneven surface. Therefore, preliminary preparation of the ceiling for painting is necessary. The work itself occupies the lion's share from the entire ceiling. But if the preparation of the ceiling for painting is poorly performed, then the result of the finish can upset. To prevent this from happening, you must be patient and carefully perform all work on preparing the ceiling for painting.
- Cleaning the ceiling
- Ceiling repair
- Plot of the ceiling
- Surface strengthening
- Putting the ceiling
- Grinding the ceiling
- Preparation of the ceiling for painting: video
Preparing the ceiling before painting takes place in several stages. Each of them is necessary to create an even and reliable surface for further application. To carry out the preparation of the surface, a certain tool:

- wide and narrow spatulas;
- roller and brush;
- trough for paint;
- capacity for kneading putty;
- drill and a special mixer nozzle;
- stationery knife;
- grater with a grinder or special grinding machine with zero sandpaper;
- protective glasses and respirator.
From materials you will need:
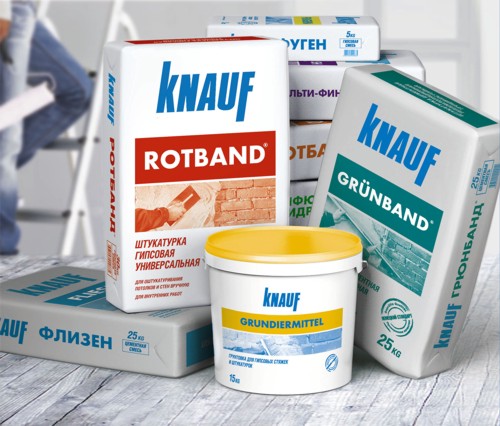
- a primer of deep penetration, for example, Ceresit ST 17;
- gypsum putty Knauf multi-finish or other;
- maular glassolt web;
- glue for glass wallpaper;
- strenger, and preferably a table or a goat.
Getting up with everything necessary, you can begin to prepare the ceiling for painting.
Cleaning the ceiling
When performing finishing from scratch in a newly built house, you can immediately move on to the second stage of work. But if the overhaul is carried out, then you will first have to clean the ceiling from the old finish. There are several options for what to do.
- If the ceiling was covered with wallpaperThen, with the help of a regular spray or roller, we moisten the surface with warm water and let it soak. After a while, the glue will soak, and the wallpaper can be carefully removed with a conventional spatula. It is enough to push them out, they will easily lag behind. As a result, not a single piece of paper on the ceiling should remain. To top it off, wash the remnants of the glue. This can be done with an ordinary sponge moistened in warm water. You may have to change water several times. The main thing is that as a result, the surface of the ceiling is clean.
- If the ceiling was previously painted with water -based paint or white, you have to do the same as with the wallpaper. First, slightly wet, and then scrap the old finish with a spatula. But unlike wallpaper, which are removed almost with a whole canvas, paint or whitewashing is not so easy to scrap. Ideally, the old coating will be removed with small flakes. Otherwise, you need to work hard. To facilitate the process, the surface will have to moisten a little from time to time. Some craftsmen remove the whitewashing on dry. This approach has a place to be, but it has one significant drawback of too much dust. Upon completion of work on the removal of whitewashing or water emulsion, the ceiling must be thoroughly washed. We'll have to change water several times.

- In the case when the ceiling was painted with acrylic paint, you can go in two ways. The first to moisten the surface with special washing, and then carefully remove the paint with a spatula. This method is the easiest, but also the most harmful to health. The second option with the help of a hammer beat off old paint. What way to choose, to solve directly to the masters. The ceiling after cleaning from acrylic paints is enough to scrape the metal with a brush.
- If the ceiling was pasted with plastic orceramic tiles, you will have to stock up on, as the work on removal will not be easy. And if with plastic panels everything is relatively simply torn to tear off all the panels and then remove the remaining glue. Then, in the case of ceramic tiles, you will have to tinker, repulsing the solution with a hammer.
- For suspended drywall ceilings Things are somewhat different. The thing is that it is quite difficult to remove the old coating and not to damage the drywall sheet. Therefore, the option of complete or partial replacement of sheets is possible. And these are additional costs. But in contrast to this, to prepare the surface of the suspended ceiling made of drywall for painting, less effort will be spent.
Ceiling repair

After cleaning the ceiling from the old coating, you should carefully examine its surface for cracks, potholes or other damage. If there are one, you will have to subtract a little and close them up. To do this, we impregnate the damaged areas with a primer penetration. It is most convenient to do this with a brush. We give it completely to dry the primer and then, using a narrow spatula, fill in the multi-finish putty. A feature of the moloty-finish putty is the ability to perform both the finish and the black, applying a layer of putty up to 10 mm. If the depth of damage is more than 10 mm, then putty on a cement basis should be used. After completely drying, some unevenness of the blurred area is possible due to the shrinkage of putty. This is quite natural and will be eliminated with further leveling of the surface.
Important! The putty dries quickly enough, so a small knead should be made to carry out a black ceiling repair. After completing the work, the remains can be safely thrown away, and the container should be thoroughly washed.
Plot of the ceiling

After the repaired areas completely dry out, you can proceed to the primer of the ceiling. Applying a primer layer will ensure a better adhesion of putty with the surface of the ceiling. To do this, with the help of the roller, evenly roll out the primer over the entire surface. You can apply a primer in two layers, which will only increase adhesion. The work itself should be performed in the goggles.

For convenience, the roller can be put on a telescopic handle. This will allow you to quickly and without any difficulty to soak the entire ceiling. We smear the corners and inaccessible places with a brush. Here you will have to sweat, getting to difficult places with the help of a stepladder. If in the future it is planned to put down the walls, then we will immediately primer 15,100 cm from the ceiling. Upon completion of the work, we leave the primer to dry. The drying time is indicated on the packaging, and it should be followed.
Surface strengthening

To give the ceiling additional strength, sealing cracks and partial alignment, the surface is glued with a glass -chick of the web. The first thing to do is to spread a area equal to the size of the canvas with special glue for glass wallpaper. Apply the glue with a roller, then apply the canvas and press it so that it sticks to the ceiling. We carry out full alignment with a wide spatula, which is at a small angle, we are carried out first along, and then across the canvas. Having spread another site, we glue the next canvas. At the same time, we make a small batch of 2 3 cm for the previous one. Now we take a stationery knife and under a metal ruler or a wide spatula we cut through both canvases along the entire length of the ass. As a result, there will be cuts on both canvases that are ideal for each other. Having removed the cut pieces, we reduce and glue the edges. This method of reducing the edges is necessary that the surface of the ceiling after gluing of the glass and the chill be even, without protrusions or cracks. Pouring the entire surface in this way, we apply another layer of glue, which will strengthen already glued canvases. By giving the glue to dry completely, you can proceed to putty the ceiling.
Putting the ceiling
Work on putting the ceiling is quite a laborious process. The reason is the inconvenience of applying materials. Of course, after some time the skill is worked out, and the work is quite quickly. But for a beginner, preparing a drywall ceiling for painting or even preparing an ordinary concrete ceiling may seem like a very difficult task.

In order for putting the ceiling to go relatively easily, you should ensure the convenience of movement. And for this, a goat is perfectly suitable. If this is not, you can put a couple of tables nearby. The main thing is that when performing work, you can freely move 1.5 2 m forward and backward. Also, for convenience, it is necessary to ensure that there is a supply of a height of 10 15 cm above the head. This will allow you to see all the flaws and at the same time do not strain the neck.

Having arranged the workplace, we perform putty. Everything is simple here. According to the instructions on the packaging, add a dry mixture and water to a large container in the right proportion. At first, having mixed a little manually, connect the drill with a mixer nozzle and knead to a thick sour cream to a state. If the result is too liquid consistency, you can add a little mixture and reinstall it again. If thick water. We make a knead based on production for 40 50 minutes. For beginners, it is recommended to make small kneels and trace what period of time it is produced. And only then make a full -fledged knead.
Important! Adding a mixture and water to the old knead is extremely not recommended. Such a batch will not have the necessary characteristics in strength.

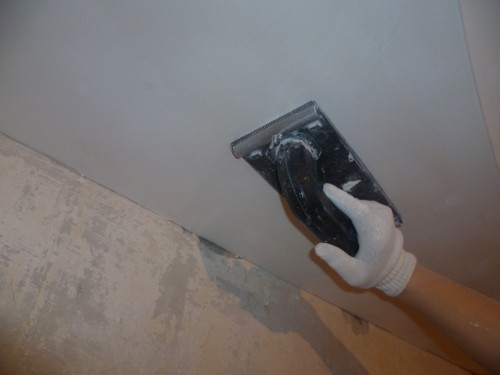
Now we take the usual wide or with cloves a spatula and put the finished putty on it. This is done using a narrow spatula. Next, putting the spatula at an angle to the ceiling, we pull it to you. We repeat such movements over the entire surface of the ceiling until we develop the entire putty from the spatula. At the same time, we make sure that there are no large clots of putty left on the surface of the ceiling. And the surface itself was even and without differences. If necessary, we carry out a spatula and align. After putting the entire surface of the ceiling, we leave it until it dries completely, after which we go to grinding.
Grinding the ceiling
Preparing the ceiling for painting with snowballs, auro, tickuril or any other paint requires a perfectly flat surface. Otherwise, in a certain light, all the shortcomings will be visible. Therefore, at the last stage of preparation, grinding the ceiling is performed. It can be done manually or using special grinding machines.
The ceiling is grinded manually under the light bulb. To do this, an ordinary incandescent lamp is taken, fixed at the end of the holder. Holding it near the ceiling and highlighting it, you can see all the shortcomings after putty. You can align them with a grater with a net. To do this, performing circular movements with a grater, we move in a straight line from the wall to the wall. From time to time departing a certain distance, we check the work. The mechanical method of grinding is much easier, requires less effort and time, and there is almost no dust. But the principle of work itself is the same circular wiping when moving in a straight line.

Important! With manual grinding, it is necessary to protect the eyes and respiratory organs from gypsum dust.
After grinding the ceiling, it remains to go through a primer again, let it dry and the surface is ready for painting. All work on preparing the ceiling can be safely performed alone, since there are no particular difficulties in this. When working, the main thing is to carefully ensure that the surface is flat during putty and grinding. In extreme cases, you can once again go with putty and grind again.
Preparation of the ceiling for painting: video
![]()
StrPort construction portal 2011-2018. Articles about repair, construction, building materials.
Copying information from the site is possible only with permission of the editorial office Or indicating a direct link to the source. Legal justification
article about the preparation of the ceiling for
article about the preparation of the ceiling for decoration
very affordable
very affordable
i am like a girl myself
i, as a girl, making the repair itself in my apartment, I understood everything tomorrow (current is heavy) thank you very much