How to build a chicken coop in the country is a question that sooner or later begins ...
|
|
The endless summer is an unattainable childhood dream, which becomes a reality ... |
Seeking to make their house comfortable and beautiful, the owners are looking for a heating system, ... |
Ceiling with panels and drywall with your own hands
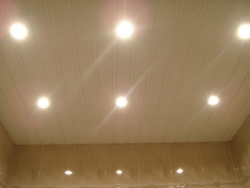
Today, the popularity of the designs of suspended ceilings is undeniable. Such ceilings have many positive characteristics, which makes them so attractive. But plastic and drywall still have their disadvantages that affect their application. The heating of the ceiling itself with plastic panels or sheets itself is relatively simple. It will require skills in working with the tool, understanding of the work performed, as well as one or two partners.
Choosing between plastic panels and drywall sheets, it is difficult to make a definite decision. Each of these materials is good in its own way. Gypsum cardboard is environmentally friendly, allows you to perform different finish and more durable, unlike plastic. At the same time, plastic panels are not exposed to moisture, light and somewhat simpler in installation. Perhaps the most important criterion that determines the choice of a particular material is the place of its application. Based on the strengths of plastic panels and drywall sheets, you can easily decide. So PVC panels good for rooms such as kitchen, bathroom, basil, loggia or balconywhere the high level of humidity. But drywall Most suitable for bedroom, children's, the hallway and corridor. But, despite all the differences, GCL and plastic panels have one common one: both are attached to the crate.
Ceiling sheathing with plastic panels
Creating a ceiling from plastic panels passes in several stages and includes the creation of a drawing, calculation of the necessary materials and installation of the structure. DIY panels with panels can be performed both alone and with a partner, there are no particular difficulties in this.
Ceiling design drawing of plastic panels
Like any construction work, the creation of a suspended ceiling from plastic panels begins with a drawing. There are no particular difficulties in this. The drawing itself can be made by hand and in any architectural program.
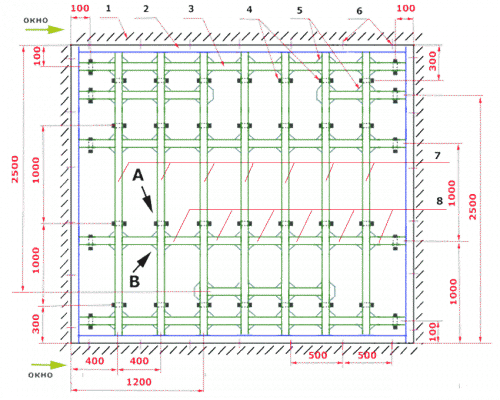
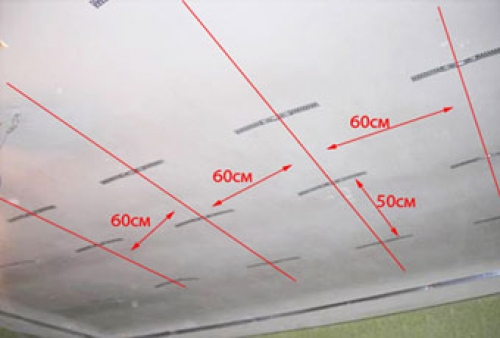
To create the drawing, you will need to measure the room and transfer its dimensions to the drawing, measure the perimeter and remove the size of the length and width of the room. The length of the perimeter will correspond to the length of the guides. The guides themselves are located at a certain height from the ceiling and will be attached to the wall. Typically, the height for guides is from 5 to 20 cm. Now we apply to the drawing of the location of the supporting planks, which will be several. They are located 50 cm in steps, starting from the wall. Their number is calculated as the width of the room, divided one step between the strips. For example, 240/50 \u003d 4.8 pcs. If, as in the example, the number will not be whole, then we round it in the smaller way. And the indentation from the wall for the first and last load-bearing bar we calculate this way 240- (4x50)/2 \u003d 20 cm. For the additional strength of the frame, it is necessary to add transverse strips. They will be located between the main bearing. A step for them can be left 40 cm, or you can increase to 50 cm. Their number is calculated similarly, in which case the length of the room is taken as a basis. The next that should be noted on the drawing, the installation points of suspensions or a place of direct mount for the supporting planks of the frame. The step for fastening will be 60 cm. At the same time, the first and last fasteners are at a distance of 30 cm from the wall. Finally, we mark the installation sites of lighting devices, ventilation and the place of laying of communications. Since the ceiling will be suspended, all communications can be hidden directly in the design itself.
Calculation of materials
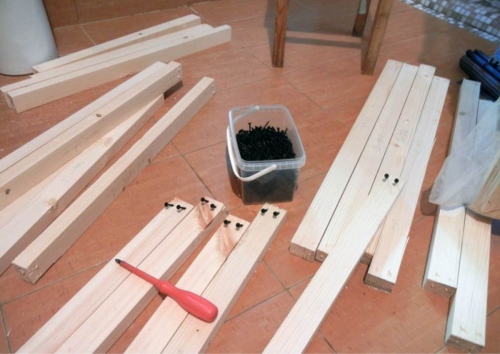
Now that there are all sizes and the finished drawing, you can start calculating all the necessary materials. For the supporting frame, wooden bars of 150x25 mm and 40x50 mm will be used. But it is worth considering that for wooden bars you will have to purchase funds for protection from fungi and mold. For guides, a block of 150x25 mm is used. Its length is equal to the perimeter of the room.
Important! For a wooden frame, the size of the load -bearing strips and guides is taken based on the height of the suspended ceiling, if it is not planned to create a free space between the frame and the overlap.
For carrier bargainsa block of 150x25 mm is used. The calculation is carried out by multiplying the required number of planks by the length of the room. For example, 300x4 \u003d 1200 cm, the total length of the supporting planks. Typically, the sizes of bars are standardized, and you can buy them 4 m long and dissolve. In a similar way, we calculate the necessary length of the bars for crossbars. In our case, it is 240x6 \u003d 1440 cm.
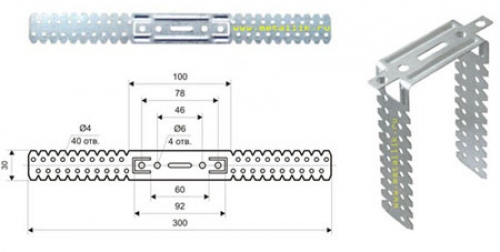
As for the fastening, then everything is quite simple. For fastening the frame, you can use suspensions. Their number is determined so (300/60) x4 \u003d 20 pcs. You can also use ordinary dowels and screws that simply pull the bar to the ceiling. The step for dowels is the same as for suspensions.
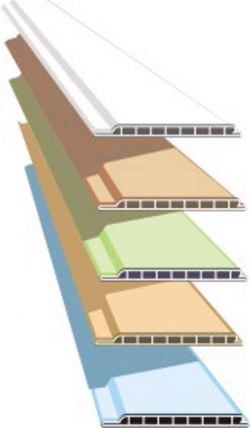
It remains to calculate the necessary the number of plastic panels. To do this, first of all, we calculate the area of \u200b\u200bthe room: 2.4x3 \u003d 7.2 m2. Now it remains to buy the right number of panels. Their standard length is from 2.3 to 3 m, and width from 20 to 37 cm, thickness 5 10 mm. By simple calculations, you can calculate the number of panels. To do this, we divide the area of \u200b\u200bthe room into an area of \u200b\u200bone panel and round the larger direction.
Important! When purchasing, add 15,20% to the number of all materials in case of rejection or damage during installation. Also, when buying panels, you should be careful and choose high -quality PVC panels from one batch and in the same color and tonality. Depending on the size of the panel and the quality of the material, their cost can be different.
Installation of the ceiling from plastic panels
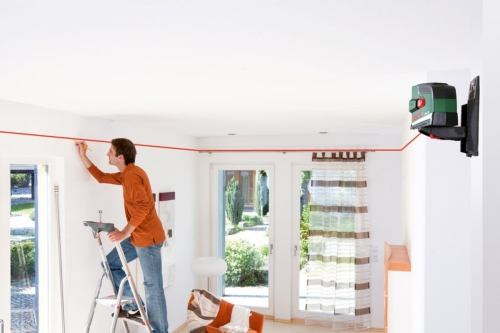
Ceiling the ceiling with PVC panels begins with markings. The first thing to apply will be zero level of the entire ceiling. This line is applied to the walls and is a mark of the height of the entire ceiling without taking into account the thickness of the panel. For example, the planned ceiling height is 15 cm, the thickness of the panel is 7 mm. Accordingly, the zero mark will be 143 mm from the floor. Also, this line will be a mark for the guide frame. For marking in compliance with the exact horizon, it is most convenient to use the laser level.
Now we apply marking for bearing planks. Using the roulette, we measure the required distance from the walls and put 2 3 marks, which we subsequently connect in one line. It remains to apply tags for suspensions. First, we simply mark their installation sites, and then, by applying the suspension, we outline the mounting places, while we make sure that the suspension is placed strictly perpendicular to the main line for the supporting bar.
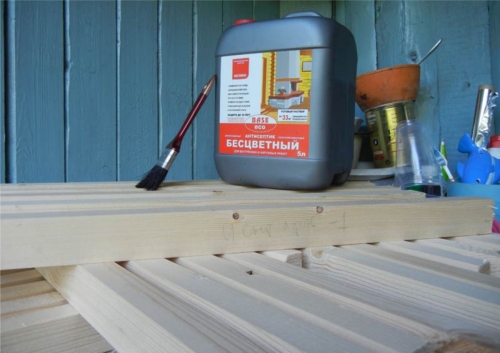
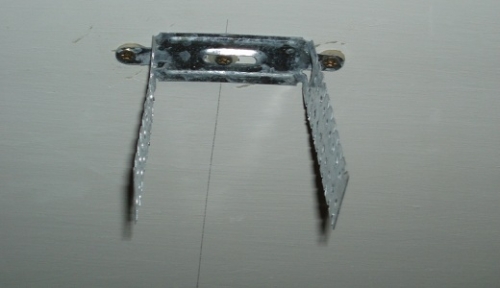
Having completed the marking, we proceed to the installation of the frame. First, we process the tree with means of fungi and mold. Then we put the holes for attaching the suspensions and install them in place. Having set the suspensions, bend their ends down like the letter P. At the same time, we make sure that the distance between the ends is the width of the bar for the bearing bar.
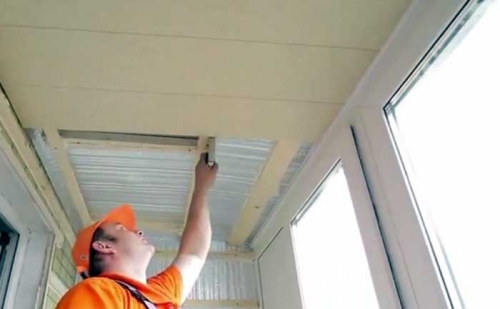
Next, go to the guiding frame. To fix it, we first apply the bar to the wall so that the mark line passes under it. Then, holding the bar itself tightly, wean the holes for fasteners. It is most convenient to do this on both ends of the bar in order to immediately fix it, and then drill all other points for fastening. In a similar way we consolidate all the planks of the guide profile.
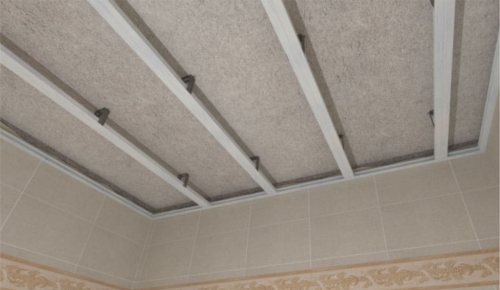
Now we are starting to consolidation of the struts of the supporting profile. To do this, we first adjust them in length so that they can freely enter and stand inside the guide frame. Then we start the bar inside the suspensions. While the partner holds the bar, it is necessary to fix it from both ends. To do this, we use ordinary corners that we fix with the help of screws. It remains only to fix the suspensions with small wood screws.
Important! When installing and fixing the supporting and guide bars, it is necessary to monitor their horizontal location using the level in order to avoid sagging and distortions. If there is a clear bias, then the marking for the guide frame was incorrectly made.
The next step will be fixing the transverse planks. Having cut the required amount, proceed to marking and installation. To do this, using a roulette, we plan the installation sites of the planks. Then we fix each bar. As a fastener we use corners and screws. Since crossbars are needed for the rigidity of the frame, you can only be attached to two corners. One from the opposite sides at the ends of the bar. Having completed the installation of the frame, we proceed to laying communications, ventilation and other things. Only after that we begin to install PVC panels.
Installation of panels It begins with fitting them along the length. If the width of the room is greater than the length of one panel, then the panel will have to be combined. In short, cut off the excess. There will be no special problems with this, since the PVC panel is very easily cut by a hacksaw with small teeth or a grinder with a circle for concrete. The main thing is not to damage the panel itself. Consider the option when it is necessary to adjust two panels.
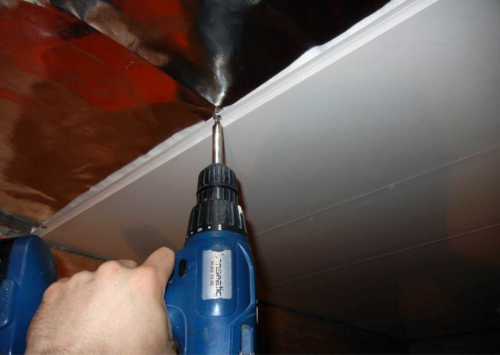
We take the first panel and apply to the frame so that it is tightly adjacent to the wall and is perpendicular to oriented relative to the strips of the supporting frame. Then, with the help of small screws with a wide hat, fix the panel to the frame. We screw the screws into the protruding spike of the panel. Now we cut the second panel, install and fix it as a continuation of the first.
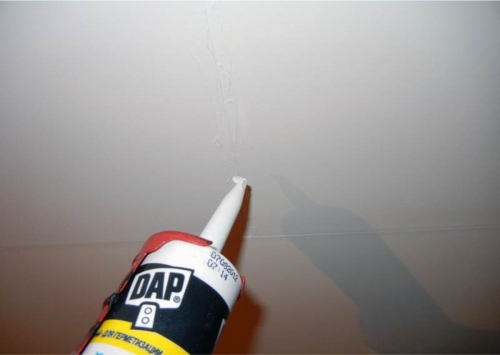
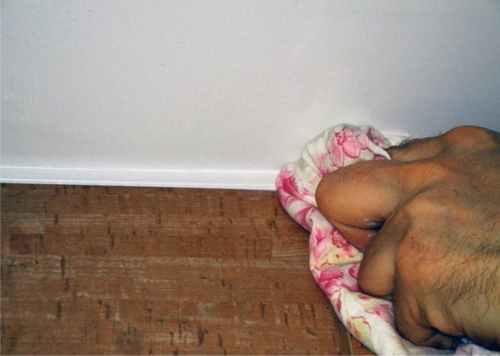
The seam that remains at the junction is masked by an ordinary transparent silicone sealant. Now we go to the second row of panels. They are installed with a displacement. First there is a short panel, and then a long panel is added to it. As a result, you will get a checkerboard pattern. All other plastic panels are installed in this way. At the end of the installation in the joint of the panels and walls, a plastic skirting board is fixed.
Important! When installing the panels, it is necessary to cut holes in them in advance for lighting devices, hoods and so on. This is done immediately before installing the panel, where there will be a lamp or an opening for ventilation.
Ceiling sheathing with plastic panels: video
The ceiling sheathing with drywall
As in the case of plastic panels with plastic panels, the arrangement of the ceiling made of drywall is performed in several stages. In fact, these two ceilings are largely similar, but with a gypsum plasterboard, the ceiling with your own hands is somewhat complicated due to the weight of the sheets. And if with plastic panels it was easy to manage alone, then when working with GKL, the help of a partner will be needed anyway.
Drawing of the ceiling from GKL
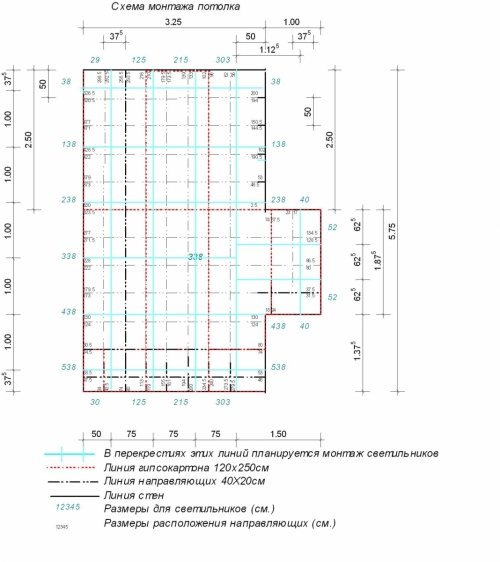
The design of the ceiling made of drywall is similar to the plastic ceiling project. Here, the size of the room is also removed and transferred to the drawing. Similarly, the location of the supporting, guides, jumpers, suspensions and other things is indicated. The difference from the drawing for the plastic ceiling is in the distance between the strips of the supporting frame. If for a plastic ceiling these values \u200b\u200bwere 40 50 cm, then for a gypsum plate ceiling, the step of the supporting strips is strictly defined and is 60 cm, and the step for jumpers is 50 cm. This restriction is due to the size of the drywall sheets, which have standard sizes of 600 or 1200 mm The width and length of 2.5 m or 4 m. And taking into account the large enough sheet weight, to securely fix it, the edges should lie down on the profile of the frame.
Ceiling clamping with plasterboard the frame scheme:
Calculation of materials
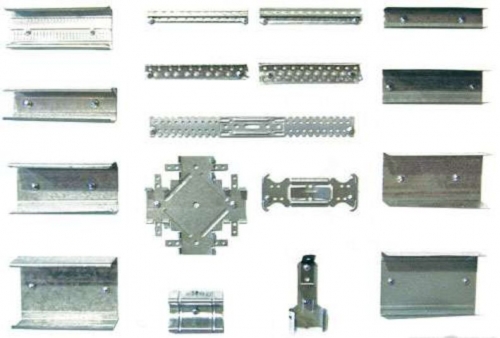
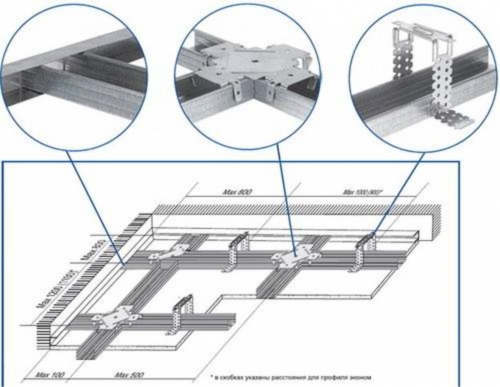
If we used wooden bars for a ceiling from plastic panels, then for a drywall ceiling, the best option would be to use a metal profile. Again, this is due to the weight of the sheets. The tree simply cannot provide the required level of reliability. For the frame, two types of metal profile CD 60/27 and UD 28/27 are required. Profile UD 28/27 Used for the guide frame. Its length is equal to the perimeter of the room. Profile CD 60/27used for a supporting frame and jumpers. Its length is calculated as the sum of all load -bearing planks and jumpers of the frame. How to do this, we considered the example of calculations for a plastic ceiling. The number of suspensionsfor the frame, it is calculated as the width of the room, divided one step between the supporting strips and multiplied by the number of strips. Another important element of the metal frame is a crab. This is a connector for the profile. The calculation of the required amount is quite simple. It is necessary to calculate the number of points of intersection of the strips of the supporting profile with jumpers.
Finally, we produce calculation of the required drywall sheets. We divide the total area of \u200b\u200bthe room into the area of \u200b\u200bone sheet and round the larger direction. But there is one important point. Firstly, for lining the ceiling with drywall, you should choose sheets in size 600x1500 mm or 1200x2500 mm. Secondly, for ceilings it is necessary to choose sheets with the least weight, and these are sheets with a thickness of 8 mm or 9.5 mm. Another important point is the possibility of creating a multi -level gypsum cardboard ceiling. For lining the ceiling with a plasterboard, the device of a multi -level frame may require an increase in the number of profile and sheets. Also, the price of the ceiling with drywall will depend primarily on the area of \u200b\u200bthe room and the manufacturer of the GCL, as well as on the design of the ceiling.
Installation of the ceiling from GKL
Hypsum plasterboard ceiling begins with marking the ceiling and walls. Actually, all work is not much different from those described for a plastic ceiling. First, marking is applied for the supporting profile without taking into account the thickness of the GCL. Then, markings are applied to the ceiling for load -bearing planks and suspensions. All sizes and indentation from the walls are pre -calculated and indicated in the drawing. Therefore, there will be no particular difficulties with this.
Further work will be consist in the installation of suspensions and profiles. We start with suspensions. They are installed on the marked places, strictly perpendicular to the line for the supporting profile. They are fixed with dowels, and the ends are bent in the form of the letter P, while it is necessary to ensure that the distance between the ends corresponds to the width of the CD profile 60 mm.
Next, go to installation of the guide profile UD. Everything is quite simple here. In the wall and in the profile, holes with a step of 50 cm are sprinkled. At the same time, the first and last hole are made with an indentation from the wall of 10 cm. Then the profile is installed in place and fixed.
Important! During the installation of the frame, it is necessary to constantly monitor the horizontal profiles. We will not allow the bias.
The next step will be installation of the CD supporting profile. If necessary, the profile is cut to the desired length or vice versa is spent using a special insert. Then the ends are turned into the guide profile and fixed there with metal screws. Next, the profile is fixed inside the suspensions using all the same metal screws.
Now we go to installation and fixation of jumperswhich will give the design of stiffness. We cut the CD profile into pieces of the required length of 54 cm. Then, in the places indicated in the drawing, we start a profile between the supporting strips and fix it with a crab. It just dresses on top, tightly pressed to the snapping. For reliability, the crab is fixed with self -tapping screws. We repeat this procedure for the entire frame. At this stage of work, wiring for lighting and other communications is also laid.
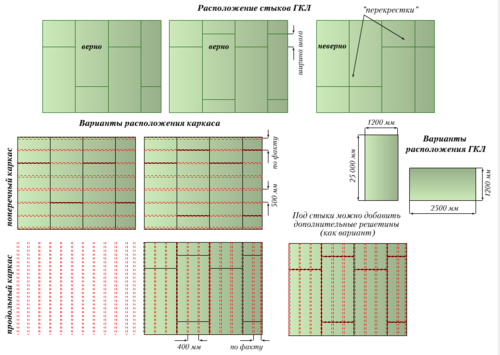
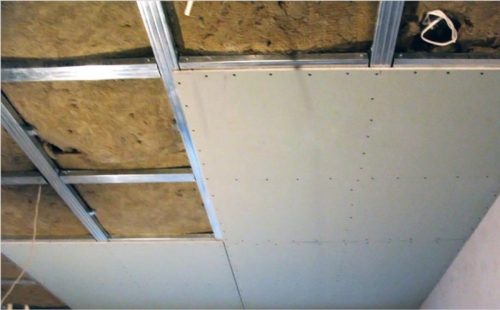
Upon completion of the installation of the frame remains sheathe it with drywall sheets. At this stage, you can’t do without two partners. When lifting, the sheet can be broken and, moreover, it is inconvenient to hold the sheet and screw the screws. If the room is large, then the sheets are carried out in a checkerboard pattern. This means that first we install a whole sheet, and then we attach a short one to it. We begin the second row of sheets with the installation of the short and end with a whole. The sheet itself is attached with special screws with a step of 25 cm. The hats should be drowned a little so that after the finish they do not protrude and do not spoil the general view. After the sheathing sheets, the fasteners are put off in order to partially level the surface, then the glass chlorver is primed and glued, after which it puts it down again. At the end, lighting devices are installed in place, and finishing is applied.
Hypsum plasterboard ceiling sheathing: video
The creation of suspended ceilings is one of the most time -consuming processes. But, despite this, such ceilings are very popular. In addition to drywall and plastic, the suspended ceiling can be sheathed with other materials, for example, lining. But here it all depends on the preferences of the owners. The designs of suspended ceilings allow you to realize many unusual ideas of designers and are limited only to their imagination.

