A rich selection of materials and technological solutions for the ceiling do not contribute to ...
|
|
Nowadays, the building materials market continues to improve. And if... |
Laminate is quite popular finishing material. This is due primarily to him ... |
DIY gypsum cardboard on the ceiling
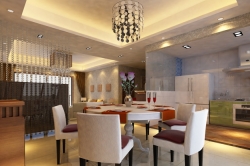
When designing the interior of the room, special attention should be paid to the ceilings. It is they who are striking at the entrance to the room and emphasize the originality of the design. The traditional white ceiling has lost its relevance, and they were replaced by stretch fabrics and drywall structures.
To create original compositions today, hinged niches and boxes are massively used, the appearance of which has expanded the possibilities of repair work. How to competently create a gvl box on the ceiling with your own hands is described in the article.
- The advantages of multi -level ceilings from hyspoletes
- Chipcardon selection
- The design of the gypsum cardboard box: the main components
- Hypsum cardboard mount to the ceiling: Important points
- Phased technology for attaching drywall to the ceiling
- Gypsum plasterboard box on the ceiling: photo ideas of interior solutions
The advantages of multi -level ceilings from hyspoletes
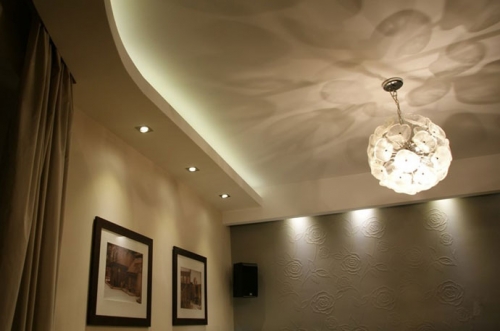
The issue of choosing the ceiling decoration always arises during the repair. The arrangement of a drywall box was a very popular solution. Using the GCL, it will be possible to embody the most unusual projects of designers of the gypsum canvas are convenient to process and easy to install. The box on the ceiling performs not only aesthetic, but also a practical function.
The construction of a drywall box has a number of significant advantages:
- the possibility of placing a large number of main and secondary lights on the ceiling;
- with the help of the box, you will be able to hide the irregularities and defects on the ceiling;
- inside the plasterboard structure, it will be possible to hide the ventilation channels, pipes and other communications;
- creation of an original relief of all kinds of shape and size;
- using a box for visual division of the room into functional areas.
Gypsum plasters itself are environmentally friendly material, flexible and suppressed. The surface of the GCL can be treated with plaster, putty, lined with tiles or poured with wallpaper.
Chipcardon selection
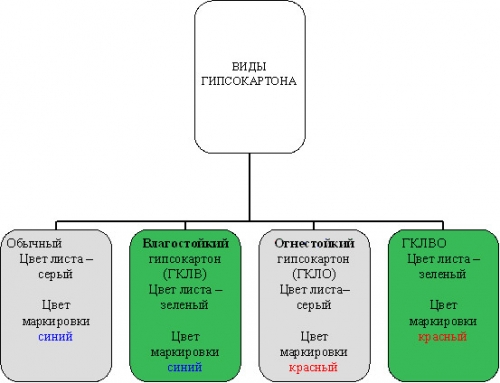
To implement the project, it is necessary to choose the right drywall. Gypsum -based finishing material is divided into four types:
- GCL standard drywall used in the repair of office and household premises. This type of drywall is permissible to use if the temperature and humidity comply with the norms. For living rooms, the optimal humidity level is not more than 70%. Gray gypsum sheets have blue markings.
- GLLO material resistant to fire. The composition of the gypsum adds reinforcing components that increase the resistance of the finish to the open flame. GCLO is optimally suitable for arranging ventilation shafts, electrical shields and attics. Gray sheets with red marking.
- GKLV moisture -resistant finishing material containing silicone granules and antifungal substances. Gypsum on both sides is covered with impregnated cardboard, neutral to high humidity. GKLV must be used in the decoration of bathrooms, pools, kitchens, etc. Waterproof green sheets have blue inscriptions.
- GKLVO universal drywall, combining the qualitative characteristics of GKLV and GCLO. As a rule, such material is used to build structures in industrial buildings. The panels are green with red marking.
In addition to the type of GKL, when buying, you must pay attention to the size of the material. The standard sheet length is 2.5 m or 3 m, width 1.2 m, thickness 6 mm, 9 mm or 12.5 mm. Thin sheets are suitable for dry surface leveling. For trinket lining, thicker drywall sheets are used.
The design of the gypsum cardboard box: the main components
The optimal basis for fastening drywall to the wall, the ceiling is a metal crate. The design has a simplicity of assembly and lightness. Hypartone fastening to the ceiling on wooden rails is permissible, but this option is not strong enough. Wood is prone to decay and, under the influence of temperature fluctuations, the frame can lead.
The assembly of the structure is best performed from metal profiles. Tined galvanized material is characterized by reliability, rigidity and resistance to corrosion. The profiles are divided into two types:
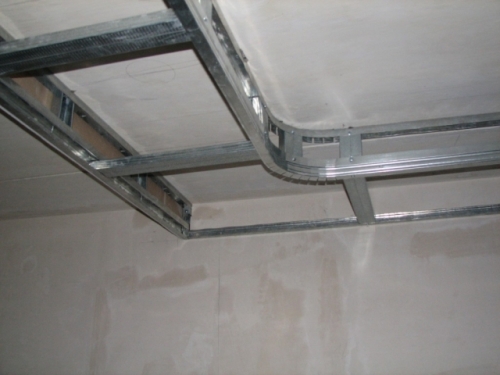
- the main (CW/CD) are used as the basis for fixing drywall panels, C-shaped elements with bent edges;
- guides (UD/UV) horizontal guides, the main profiles are installed in them; have a P-shaped form.
To create the suspension structure frame, the main CD profile is 28*27 mm in size, 3 m or 4 m long. The role of the CD profile is used in the horizontal UD profile.
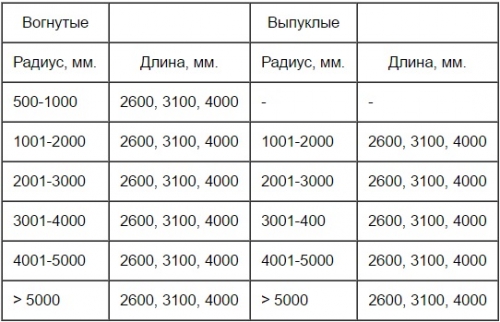
When arranging an arched or curved structure, curved profiles are used. Standard dimensions of arched elements are given in the table.
In addition to profiles, components will be needed to create a box:
- two -level connector for the CD profile for fixing perpendicularly directed elements;
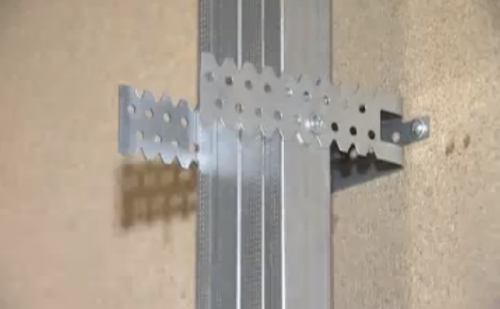
- single-level connector of the CD profile, the so-called crab for connecting elements at the same level; fixation using latches or screws;
- a straight suspension module is attached to the ceiling with two self -tapping screws; the bearing capacity of the suspension is about 40 kg;
- anchor suspension for connecting the supporting base and CD profile; The module is equipped with a spring and is suitable for situations when the length of the usual suspension is not enough; the bearing capacity of the suspension is 25 kg, the length of the stretching is 25-100 cm;
- longitudinal connector for lengthening the profile;
- the corner connector replacing the crab module.
Hypsum cardboard mount to the ceiling: Important points
The arrangement of the box on the ceiling is not a complicated process. The work will be done independently if you pre -understand the technology and take into account some nuances.
- The base surface of the ceiling before installing the box must be leveled and prepared (plastered and treated with putty).
- For the manufacture of the frame, only factory profiles of high quality must be used. A quality module is evenly galvanized over the entire surface, there are no white spots on it.
- If the guide profiles are located near the water pipes, then the distance between them should be increased. This measure will protect the frame from excessive heating and expansion of metal elements.
- When placing a box, it is important to provide access to communications.
- If in the future it is planned to clad the box with tiles, then the screws are attached closer to the base of the wall. Fasteners do not need to be laid with tiles, it is better to close the remaining gap with a removable baseboard.
- The mounting of drywall to the wooden ceiling is unacceptable using glue. Moisture, penetrating into wood, expands the structure of the material. After drying, the tree returns to the original sizes. Such differences will lead to the appearance of cracks on the surface of the drywall box.
- The fastening of drywall to the ceiling without a frame is permissible if the main goal is to align the surface, and not the creation of a box or a multi -level structure. A frameless method involves the use of glue, mastic or screws. The main condition for the successful performance of the work is a perfectly smooth surface of the base.
Phased technology for attaching drywall to the ceiling
Tools and components
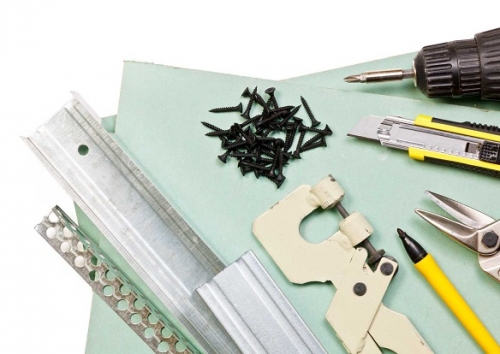
For the construction of a gypsum cardboard box, you must prepare:
- drywall sheets are selected taking into account the type of room and operating conditions;
- guides/supporting profiles;
- crab connectors, brackets;
- elements for fixation: dowels and screws;
- grid for strengthening seams;
- passatigi, scissors for cutting metal, construction knife;
- primer, gypsum putty.
Important! Hypsum plasterboard sheets are recommended to be purchased with a small margin plus 3-5%.
Preparatory events
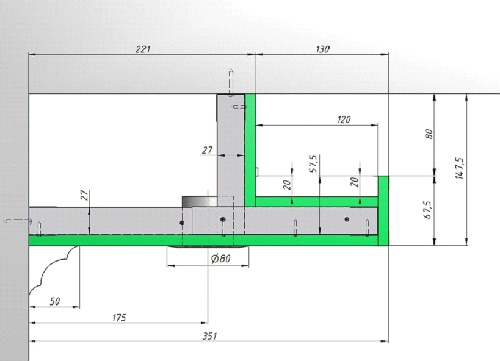
Previously, it is necessary to develop a layout of drywall to the ceiling. It is advisable to create a drawing and display graphically the main parameters of the box:
- drywall thickness;
- the height and width of the box;
- step of fastening sheets of drywall;
- the depth of the box, etc.
The procedure for preparing the ceiling surface depends on the type of future finish. If the box is mounted to install the stretch fabric, then there is no need to align the base. In the case when it is planned to paint the ceiling, you will have to make maximum efforts and perform a number of mandatory measures:
- Remove the old coating. Moorly whitewashing is well moistened, and then remove with a spatula. Wipe the remains of the material with a damp cloth. It is enough to pick up the finishes of polystyrene stoves with a knife and tear it off. Remove the remaining glue with a spatula.
- Inspect the surface and check the condition of the plaster. If necessary, remove the old plaster.
- Grind the ceiling with a water or alkyd basis. It is necessary to apply at least two layers.
- Glue large cracks with a reinforcing grid and apply a layer of starting putty. Leave the surface until completely dry.
- Repeat the processing of black putty.
- After drying, walk on the ceiling with coarse -grained sandpaper.
- Apply deep penetration to the surface.
- Cover the ceiling with finish putty, wait for complete drying and wipe with a fine -grained skin.
- Check the smoothness of the surface under good lighting.
Before starting cutting profiles and fastening the box, mark the ceiling and walls.
Installation of the frame
- Installation of guide profiles along the marking lines.
- Previously, it is advisable to put the design on the floor, and then transfer the necessary marks to the ceiling. Lay the metal profile according to the sketch and fasten individual elements with screws.
- Transfer the structure to the ceiling with a perforator to drill holes and score dowels.
- Check the compliance of the installed marking mounts.
- Perform suspensions.
- Prepared elements are fixed on the installed guides with self -tapping screws.
- The next step is to create the bottom of the box. Attach the guide profile to the suspensions. It is important to control that all the suspensions are one length, and the guide is located strictly horizontally without any excesses.
- At this stage, the placement of the electrical wiring for lamps should be provided, lay and fix the cable.
- Cross the crossbars and fix them on the installed frame perpendicular to the wall. The maximum permissible distance between the crossbars 60 cm. Fix the crossbars with self -tapping screws.
Hypsum plasterboard structure
Cut the drywall sheets to the size of the box. First, the horizontal plane is made, and then vertical. Fix the first segment using screws in the corner of the wall. The hats of fasteners must be screwed so that they do not protrude above the surface of the drywall.
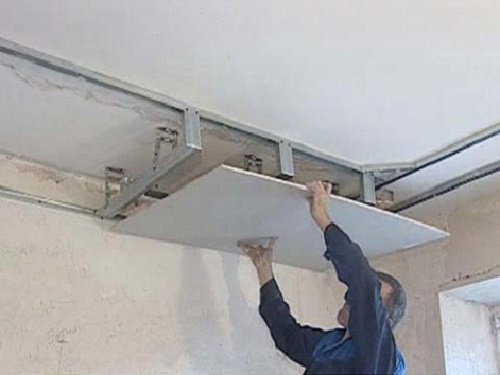
Subsequent sheets are attached with a small interval from each other within 2-3 mm. At the end of the cladding of the lower part of the box, you can begin to finish the sides.
Important! The step of fastening drywall to the ceiling is not more than 170 mm. When lining the wall is permissible, the distance between self -tapping screws is 250 mm.
The finish finish
At the end of the installation work, the box must be primed and subsided. Procedure:
- Carefully treat the drywall with a primer with a primer, this will significantly increase the surface of the surface.
- Put the corners, ends, hats of screws and seams with putty.
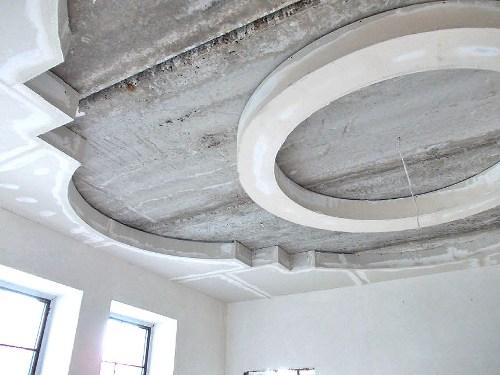
- To the joints of sheets of drywall, stick a self -adhesive tape and re -packet the box. As a result of the work, a smooth surface should be obtained without docking strips.
- Wipe the putty with fine -grained sandpaper.
- Remove the dust from the surface with a vacuum cleaner and brush again.
The final stage of the construction of the box is the installation of lighting and the decorative finish.
Gypsum plasterboard on the ceiling: photo ideas
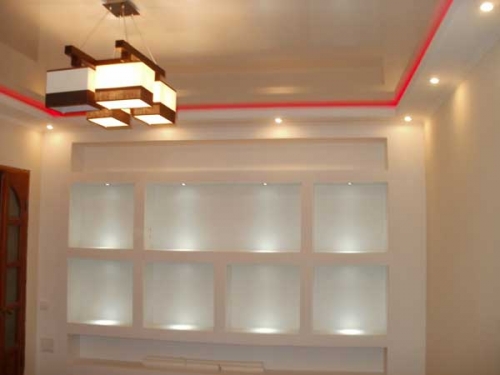
The box with backlight on the ceiling along the perimeter of the room is a continuation of the wall niche. The designer allocated the main emphasis of the red line on a milky-white background.
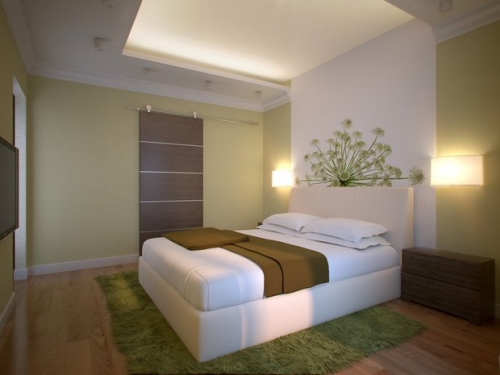
P-shaped niche under the placement of additional lighting. An unusual form will change the perception of space, and visually increases the room. The soft light makes the bedroom cozy and comfortable.
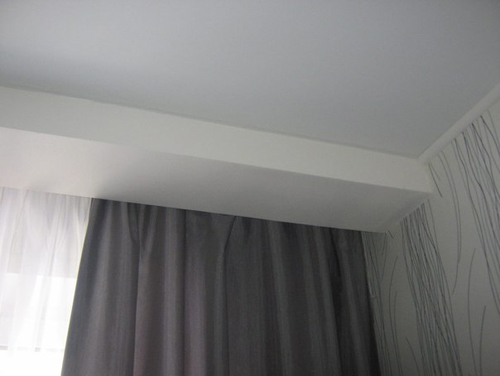
The fastening of drywall to the ceiling on the profile allows you to interestingly beat a niche under the cornice. This option is optimal for rooms with a large window.
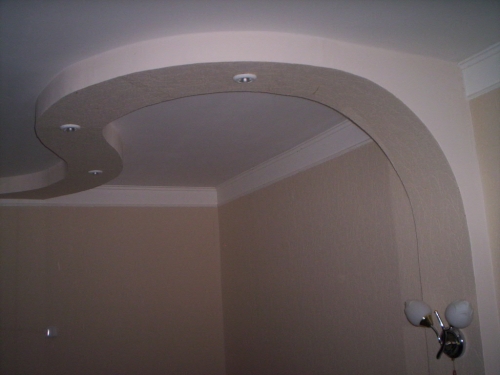
The radius box smoothly passing from the vertical plane of the wall to the horizontal of the ceiling. The line lines divide the room into different functional zones.
Hypsum cardboard mount to the ceiling: video

