Fiberglass wallpaper differ in many advantages, among which, first of all ...
|
|
Sometimes in the process of internal cosmetic repair of an apartment or a suburban cottage ... |
Of great importance in the construction or decoration of the house is the choice of external coating ... |
How to make a rack ceiling with your own hands: instructions, installation tips
The device of the suspended rack ceiling is quite simple, as well as the technology of its installation. In most cases, the installation will turn out to be independently. For work, you do not have to purchase expensive equipment or involve specialists. The main thing is to deal with the design of the ceiling system, calculate the consumption of materials and clearly adhere to the installation instructions.
- The design of the river ceiling
- Types of suspended systems of rack type
- Do -it -yourself rhecking ceiling instructions
- River ceiling
The design of the river ceiling
REMENT CEALS SYSTEMS is used in the design of apartments, private houses and public premises. Design elements are made of aluminum, so they are not exposed to moisture and corrosion. The use of rack ceilings is especially relevant in rooms with high humidity: pools, kitchens and bathrooms.

Among the main advantages of the suspension system include:
- simplicity of installation and unpretentiousness in care;
- high level of fire resistance;
- strength, reliability and, as a result, a long period of service;
- good sound -absorbing and reflective qualities;
- environmental friendliness and hygiene of the structure;
- widespread possibilities of design design.
Installation of the river ceiling allows you to hide defects of the base base, electrical wiring and ventilation. However, it is important to remember the suspension system will reduce the ceiling level by 5-10 cm.

The design of the design provides for the presence of the following elements:
- Reiki. Lamelian configuration depends on the type of ceiling. In shape, the rheck profiles are rectangular, rounded or V-shaped. The first two options are most popular, and V-shaped profiles are used as decorative inserts to implement unusual design ideas.
- Steel or aluminum guides (combs, stringers). The standard length of components is 4 m, thickness up to 1 m. It is important that the rails and guides are selected from one manufacturer, then the details will clearly enter the grooves and take their places, and the cracks will not arise on the finished suspended canvas.
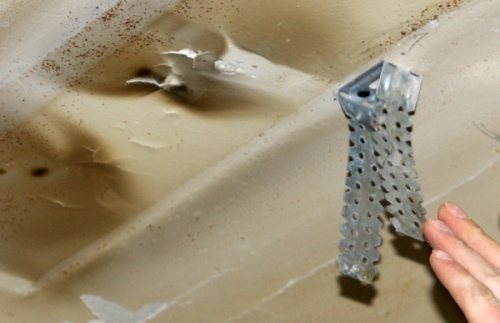
- Adjustable mini-suspension.
- Waste corners and P-profiles elements are used to hide the joints between the walls and the ceiling.
Types of suspended systems of rack type
When choosing a rack suspension ceiling, attention is paid to the main parameters:
- installation method;
- manufacturing material;
- lamelian texture.
Based on the technology of installation of the rack ceiling, two types of systems are distinguished: open and closed.
Open structures Provide the presence of cracks up to 1.5 cm between the rails. Subsequently, they are filled with interior inserts or left open. This technology is suitable for rooms with high ceilings, where the cracks are not particularly noticeable. The advantage of open systems is good ventilation, thanks to which condensation does not accumulate on the back wall of the lamella.

Reed structures of closed modification They are placed tightly due to the presence of the so -called reeds. These elements allow you to fix for the neighboring lamel.
The material of the panels is selected based on the installation site of the hinged ceiling:
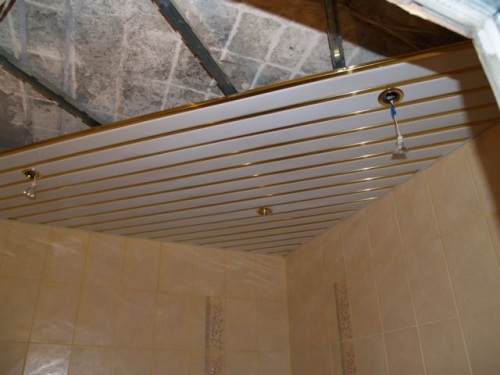
- Aluminum rails are moisture -resistant and tolerate temperature fluctuations well, practically do not corrode. Aluminum panels combine the properties of light non -suffering plastic and durable metal. Such a ceiling system is most in demand when arranging a bathroom and kitchen.
- The steel river ceiling is usually installed in storage rooms. Steel provides sound insulation and is a good reflector. However, the material is subject to corrosion, therefore it is recommended for use only in dry rooms.
- Plastic panels Universal finish, which is widely used. PVC rack ceilings are installed in the bathroom, in the kitchen, in commercial rooms and in warehouses. Such ceilings are not susceptible to dampness and are not demanding in care.
The texture of the rails is selected in accordance with the design and style of the room. According to the texture of the lamella, there are glossy, matte, perforated and with imitation of wood, stone, skin and other natural materials.
Do -it -yourself rhecking ceiling instructions
Calculation of materials and preparation of tools
To perform accurate measurements and calculations, you will need a tape measure, a simple pencil, a sheet of paper (preferably a millimeter) and a calculator. First you should accurately measure the area of \u200b\u200bthe ceiling. As a rule, the dimensions of the floor and ceiling coincide, so the measurements can be carried out below.
- The calculation of the area of \u200b\u200bthe rectangular room is carried out by multiplying the length of the room by its width.
- If the room is supplemented with niches, then their area is plusive to the main value.
- Find out the area of \u200b\u200bthe room of irregular shape is somewhat more difficult. This value can be viewed in the registration certificate for the apartment or calculated independently, breaking the entire area into separate sectors. The following formulas will be needed for calculations:
- The area of \u200b\u200bthe triangle: S \u003d (p (p-a)*(p-b)*(p-C)), where P is a half-perimeter of the triangle; A, B, from the side of the triangle;
- The area of \u200b\u200bthe circle sector: S \u003d 1/2PR, where P is the radius of the sector, r the length of the arc.
- To calculate the perimeter, it is necessary to measure and summarize the lengths of all its sides.

The procedure for calculating components for the rack ceiling:
- The number of corner profiles of the perimeter of the room is divided into the length of one profile. For cutting, you need to lay plus two profiles.
- The number of fasteners is the perimeter of the ceiling to divide one step fixing the corner profiles.
- The number of load -bearing tires:
- make a scheme of the ceiling of the room;
- mark the location of the supporting tires in the image, providing for the installation step 1 meter.
- The number of adjustable suspensions per 1 bus will require 4 suspensions.
- The number of decorative strips:
- calculate the area of \u200b\u200bthe rail used (standard dimensions of panels 3 m per 0.1 m);
- divide the area of \u200b\u200bthe room into the resulting area of \u200b\u200bthe lamella.
Important! Settlement data on rails is an absolute minimum. When buying, the resulting value should be increased by 10-15%.
Preparation and marking of the ceiling
To install the rack ceiling in the kitchen or in another room you will need:

- electric drill;
- punch;
- scissors for cutting metal;
- building level;
- hacksaw on gypsum;
- pliers and side sides;
- knife with interchangeable blades;
- roulette;
- dowels, screws;
- protective glasses.
First of all, a horizontal line should be made for fastening the end profile. Procedure:
- Choose the depth of the suspension system.
- Put a mark on the wall and, using the level, move the point to each of the corners of the room.
- If a tile is laid in the room, then you can adhere to an inter -seam.
- Combine marks and get a control line. For convenience, you can use a painting cord.
At this stage, it is advisable to take care of the wiring. Its wiring should be performed before installation work. The cable is laid in a corrugated pipe, which is securely fixed to the walls or the base of the ceiling.

Suspended frame installation technology
Further installation of the rack ceiling in the bathroom is performed in the following sequence:
- Installation of guides:
- measure the desired length and prepare the corresponding segment of the profile;
- attach the part to the line and drill a hole;
- fix the profile with a screw with dowels;
- similarly, mount the guides around the entire perimeter of the ceiling, a fixation step of about 50 cm;
- inside the corners of the profile are connected to the vest, and trimmed outside at an angle of 45.
- Suspension installation:
- apply the placement points of load -bearing tires;
- the first mark is about 40 cm from the wall, each next after one meter;
- suspensions must be installed in parallel;
- drill holes in the wall and fix the suspensions with screws;
- level to control the horizontal location of the suspensions.
- Fixation of supporting tires:
- the optimal distance between traverses is 100-120 cm;
- the tires are mounted at the same distance from the base of the ceiling in a single plane with the guides;
- screw the tires to the suspensions, controlling the evenness of the entire structure;
- between the corner profile and tires, a gap of 1 cm is provided.

Ceiling with panels
When the frame operation of the rack ceiling is completed, they begin to fasten the lamellas:
- To adjust the rails under the length of the ceiling structure and remove the protective film from them. The size of the lamella should be 5 mm less than the distance between the walls.
- Installation begins with the far end of the room most viewed. It is enough to insert the rail into the corner guides and fix it along the entire length on the traverses.
- At the stage of placement of rails, you can change the height of the tires.
- If necessary, the width of the last rail can be reduced by cutting the excess with a construction knife. Pass the straight line and bend/unbend the lamella until it breaks.
- To obtain a completed species around the perimeter of the ceiling, skirting boards can be installed.

Installation of spotlights
To arrange a rack ceiling in the bathroom, as in the photo below, it is necessary to install lamps. If the wiring is brought to the place of the lighting device, then it is enough to make a neat hole for the ceiling lamp. This work must be performed before installing the rails. As an option, the right rail can be removed for a while.
Measure the diameter of the lamp and prepare the circle template, cutting it out of cardboard. Apply a stencil to the rake and circle with a pencil. In the center of the circle, make a hole, insert scissors into it and cut the circle into small sectors. Then gently bend every slide to the edge, shake and break off. The result should be an even hole.

River ceiling
As a rule, when ensuring normal operating conditions, difficulties with caring for the ceiling do not arise. To extend the service life and the initial type of rail in the room, it is necessary to provide for good ventilation. In addition, the aesthetics of the coating largely depends on the quality of the lamellas used. Preference should be given to modern products, the old specimens with a film coating is unrealistic to wash.
Mirror ceiling surfaces are more picky in departure. When caring for them, you should adhere to the following recommendations:

- To preserve the shine, you need to use special household chemistry without abrasive substances.
- If the ceiling is installed in the bathroom, it is advisable to mount forced ventilation. The pairs from hot water immediately rise up and settled on mirror rails. In order not to constantly wipe the ceiling from divorces, it can be wiped dry. However, with a powerful fan, this issue will be resolved by itself.
- Working with chemistry, it is necessary to put on protective glasses so that drops of funds do not get into the eyes.
Installation of the rack ceiling is a simple process that the master amateur will deal with. The main thing is to complete the correct calculation of the material and follow the installation instructions.
Installation of the river ceiling: video
![]()
StrPort construction portal 2011-2018. Articles about repair, construction, building materials.
Copying information from the site is possible only with permission of the editorial office Or indicating a direct link to the source. Legal justification