Enough part in the process of flooring, such a material as chipboard is used. Among...
|
|
Screw piles are becoming increasingly popular in the construction of various types ... |
The worthy design of the central entrance to the house sometimes creates a more favorable ... |
How to make a drywall ceiling with backlight
Many different solutions are used to design the ceiling. Each option has both advantages and disadvantages. Due to the simplicity of installation and the variety of designer projects, gypsum plasters with built -in backlight gained wide popularity.
Consider how the installation of such ceilings is carried out, as well as give practical recommendations for choosing lamps and arranging a suspended structure.
- Backlight ceiling: general advice and warnings
- Types of lamps for the ceiling
- LED ribbons: selection criteria
- Hypsum cardboard ceiling design with backlighting
- DIY gypsum plasterboard ceiling: step -by -step installation
- Hypsum cardboard ceiling with backlight: photo ideas
Backlight ceiling: general advice and warnings
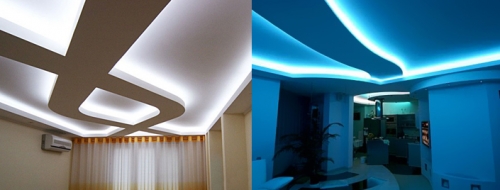
Plasterboard ceiling with backlighting a sought -after designer technique. This is a very stylish and practical version of the finish that allows you to arrange different types of lamps, adjust the lighting power and change the spatial perception of the room.
Installation of the ceiling made of drywall has a number of advantages:
- the ability to leve a flower coating;
- the base does not need to be prepared before installing the ceiling;
- under the design it is easy to hide communications (ventilation ducts, wires, etc.);
- implementation of the most unusual multi -level projects and lighting game.
Despite the above advantages, this design has several disadvantages:
- the ceiling level will have to be reduced by at least 10 cm;
- the installation procedure is not complicated, but it will require the skills of working with electrical wiring.
Important! The incorrectly executed connection and connection of lighting devices may be dangerous. Properly performed installation will protect the ceiling with a short circuit lighting, and the entire room from the occurrence of a fire
When planning the arrangement of the ceiling with backlight, you should pay attention to the following points:
- Lighting is best installed for individual zones. For vision, the presence of different light sources is useful, instead of one, but quite bright.
- The dashboard must be thought out in advance:
- in the kitchen, you can highlight a separate working surface and dining table;
- it is better to use the contour backlight placed above the bed for the bedroom; Additionally, you can install lamps above the cabinet, book shelves and desk;
- lighting can be zoned and a couple of sofits can be mounted in hangers, mirrors, and the rest around the perimeter of the ceiling.
- The backlight that emphasizes the design and style of the room can simulate the glare of the sun, the northern lights or starry sky.
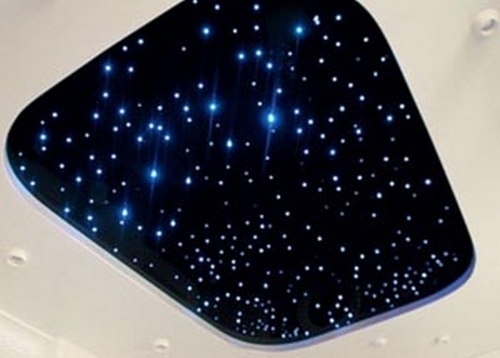
- It is important to take care of the right direction of lighting from the lights from the lamps should not shine in the eyes.
- Proper placement of lighting will help adjust the proportions of the room. The light directed at the walls visually expands the room, makes it more spacious.
- For lighting devices installed in different functional areas of the room, individual switches must be mounted.
- For small rooms, it is better not to choose multi -level ceiling structures.
- Before performing installation work, it is necessary to develop a detailed drawing of the future structure indicating all sizes, type and location of lamps.
Types of lamps for the ceiling
Several types of lamps are widely used to illuminate the ceiling:
- spotlights;
- the chandelier is ordinary/LED chandelier;
- daylight lamps;
- fibrous lamps;
- lED ribbons.
Spotlightsused as night lighting, emergency lighting, zoning space, lighting the working area, etc. This option is budgetary and applies to the ceilings of any configuration.
The ceiling with illumination of spotlights is easy to install and it can be performed independently. In order for the finished design to look aesthetically pleasing, it is necessary to carefully cut the holes in the ceiling corresponding to the diameter of the lamp.
Point lights are usually used as an addition to the main lighting of a chandelier or diode backlight.
Ordinary chandelier You can choose any size, shape and color. This lighting option does not require a wiring. Falled and suspended lamps are not always suitable for gypsum plasterboard ceilings take over a few more centimeters of the height of the room.
Daylight lamps More often used in non -residential premises. The price of the lamps is quite affordable, and the installation is quite simple. Additional advantages: efficiency of operation and long service life (subject to stable voltage).
Fibrous lamps The novelty in the market of lighting devices. With the help of such lamps, unusual effects of star landscapes are created. Installation of ceilings with fiber lamps is laborious and expensive. This option is applicable only for rooms with high ceilings.
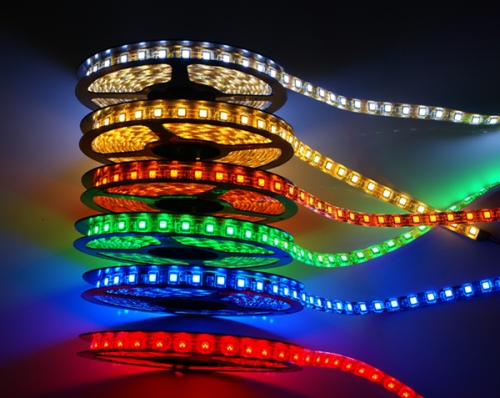
Most often, to create a multi -level ceiling made of drywall with backlight, use lED ribbons, with such advantages:
- affordable cost;
- uniform scattered lighting tape laid around the perimeter of the room shines brighter than a regular 200W lamp;
- simplicity of installation of the tape is fixed on drywall with the sticky side;
- high energy efficiency;
- it is possible to remotely control the lighting to change the shade of light, set up modes;
- long life.
LED ribbons: selection criteria
LED LED (LED) tape is a narrow strip about 9 mm wide, made of flexible material. On the surface of the tape are conductive tracks, diodes and resistors. LED tape is selected based on several main parameters:
- Type of diode. The most common are the SMD3528 and SMD50550 diodes. Diodes with a numerical value of 3528 are single -color, and 5050 can be white or multi -color. The composition of the SMD5050 tapes includes three crystals, so they are more durable and cost more. The service life of the SMD3528 ribbons is shorter, since the phosphor is burning over time, and the glow becomes blue.
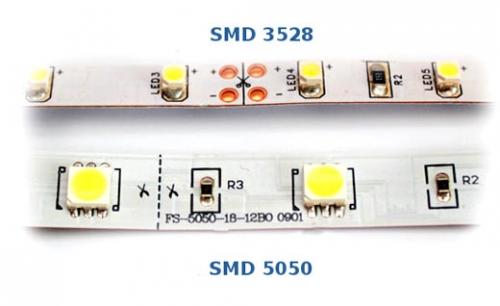
- The density of the LEDs per 1 meter of the tape. Tapes with a density of 30.60.120 bulbs per meter are usually used. The higher the density, the brighter the lighting. For contour backlighting, the SMD3528 tape is enough with a density of 30 or 60 diodes. If you need to light a stretch glossy ceiling, partially illuminating the room, then you need to use the SMD5050 tape with a density of at least 60 diodes.
- Colors. For multi -colored lighting, you need to choose 5050 tapes on the same basis 3 diodes: blue, red and green.
- The level of security. The ribbons are moisture -proof and ordinary. It is better to choose the first option such tapes are covered with silicone insulation and protected from wet surprises from neighbors from above.
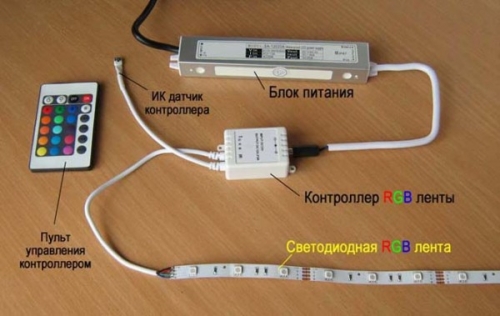
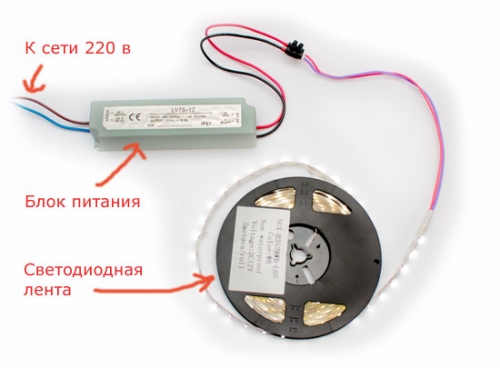
Important! There should be a power supply with LED tape. In addition to the SMD5050 tape, you can buy a remote control and a controller
Hypsum cardboard ceiling design with backlighting
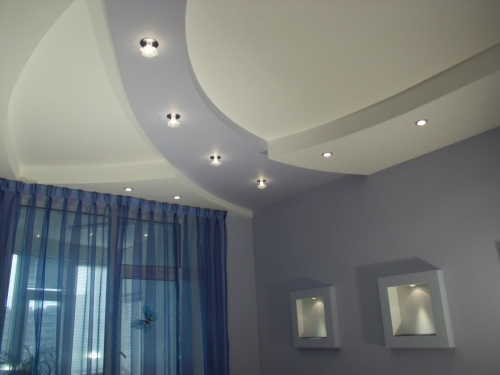
The backlight on the drywall ceiling can be performed in an open and hidden way. The first option is quite simple to execute. In a suspended ceiling made of drywall, a hole is made into which the lamp is inserted.
When arranging a suspended ceiling with open illumination, the weight of the lamps should not exceed 10 kg. This is due to the not high bearing capacity of the frame and the ceiling.
The second method of designing the ceiling (hidden backlight) involves the placement of lighting devices in a specially created niche between two layers of drywall. With this performance, the flow of light is directed at the ceiling, not down. Light is reflected from the ceiling, creating an irresistible effect. Hidden backlighting looks best with a glass or stretch glossy ceiling.
DIY gypsum plasterboard ceiling: step -by -step installation
Consider how to make a drywall ceiling with a hidden backlight. The LED tape will be used as lamps.
Tools and materials
An approximate list of tools and materials:
- drywall (moisture resistant or ordinary);
- guides and wall profiles;
- ceiling straight suspensions;
- elements for fixing (dowels for attaching the frame to the ceiling, screws for drywall and profile);
- grid for strengthening joints;
- scissors for metal, pliers and mounting knife;
- screwdrivers;
- screwdriver and punch;
- pencil, level, chopping thread;
- spatula, putty;
- lED tape with a power supply, wires for connecting to a power grid (a section of the electric wire of at least 0.75 mm).
Top -level frame device
The first stage of work when arranging a multi -level ceiling installation of the upper level frame:
- From the ceiling level, retreat 10 cm and draw a horizontal line around the perimeter of the entire room.
- Fix the starting profile along the marked line.
- Insert the main profile into the starting and fix it to the ceiling using suspensions. The distance between the fasteners is about 40 cm.
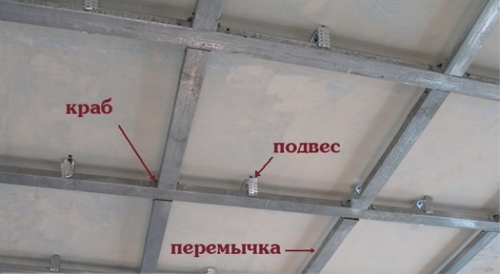
- Between the main profiles, install jumpers made of the same profile. This will give the design of additional stiffness.
Suture the finished frame with sheets of drywall, fixing the canvas with self -tapping screws. The basic, upper level of the ceiling is ready.
Installation of the frame of the backlight box
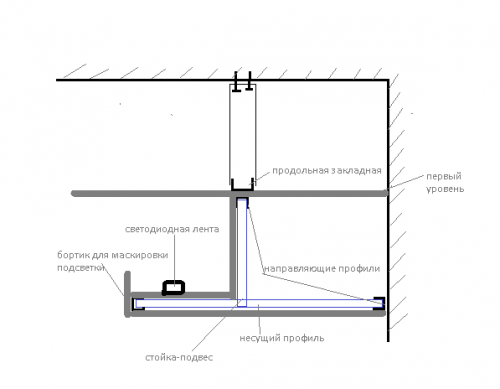
The next stage is the construction of a niche for placing hidden backlight:
- At the upper level of the ceiling, draw the border of the second.
- By the marking made, fix the guide profile.
- The profile, fixed on the ceiling, looks down with shelves, and fixed on the wall towards the wall opposite. The guide on the ceiling is fixed to the profile of the main frame.
- From the main profile, prepare racks-suspension:
- the profile is cut into segments, the length of which is equal to the height of the ceiling of the second level;
- on one side of the suspension along the bends, make cuts (4-5 cm) and bend the back wall inward;
- calculate the number of suspension based on the size of the ceiling (one suspension on every 50-60 cm).
- Prepared racks insert into the guide profile with the untrained side and fix them with self -tapping screws.
- Make blanks from the ceiling profile, the length of the segments is equal to the length of the lower part of the box. There should be as many such blanks as the racks-suspensions.
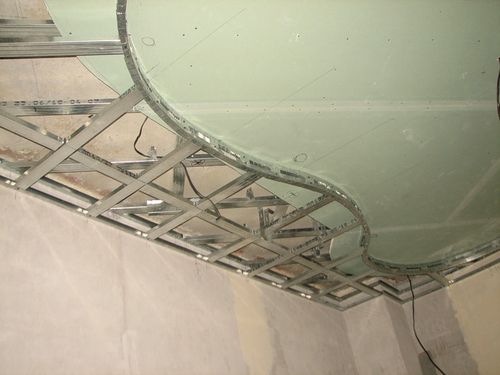
- Insert the blanks into the guide profile located on the wall (shelves to the top) and fix with screws. Combine the second end of the workpiece with a stand-suspension at a right angle.
- As a result of the work done, you get a niche frame with protruding profiles. The protruding segments must be drowned out to cut the ceiling profile and insert it inside. It turns out the basis for fastening the band of drywall for the installation of the backlight.
- Close the protruding ends of the frame, putting the guide profile on them and fix them with self -tapping screws.
Hypsum plasterboard
Facing the frame must be performed with narrow stripes of drywall. The alternity of the mounting of the drywall:
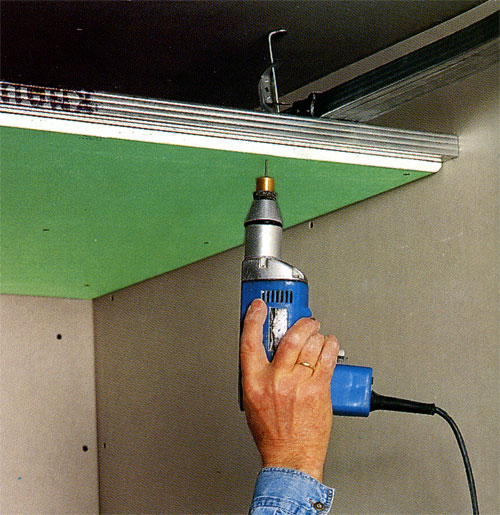
- The strip of drywall is screwed to the niche shelf.
- To sheathe the vertical part of the box, attaching the cladding to the strokes and the ceiling guide.
- Open the horizontal part of the niche.
- Flow the band of drywall to the end part of the box, behind which the backlight will be hidden. The distance between the ceiling of the first level and the upper edge is at least 5 cm.
Installation and connection of backlight
During the installation of LEDs, you should adhere to such rules:
- Cut the LED tape only in the marked places.
- You can connect different tapes using a soldering iron or special LED connectors.
- The power supply must have a power supply of about 20-30%.
- Fixation to metal areas should be carried out strictly for insulating material.
- The installation of the backlight cannot be carried out.
Backlight connection diagram:
- one end of the wire from the power supply goes to the LED tape, and the second to the network is 220 volts;
- by connecting multicolor (RGB) tape, it is necessary to observe polarity: blue and black wires minus, red plus;
- the performance of the LEDs must be checked in advance; If everything works, then you can fix the tape in a permanent place.
Important! In long areas of the tape during a sequential connection, the glow in different areas differs. Therefore, it is safer to combine areas more than 5 meters with a parallel connection using a wire with a cross section of 1.5 mm. For such a connection, you need a power supply unit
The final stage is the finishing of the ceiling. The joints of the sheets of drywall are sparkled, wait for drying and treat the ceiling with a primer. The plasterboard ceiling can be painted, covered with wallpaper or covered with decorative plaster.
Installation of the ceiling made of drywall with backlight: video
Hypsum cardboard ceiling with backlight: photo ideas
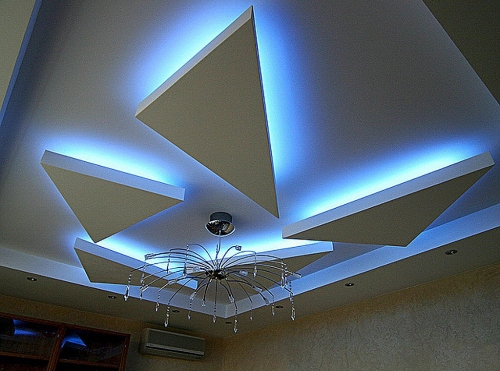
Multi -level ceiling: drywall, LED backlighting hidden type and open spotlights.
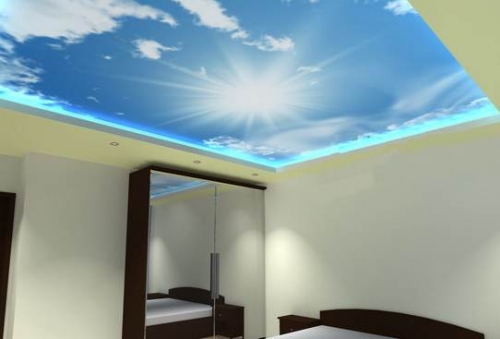
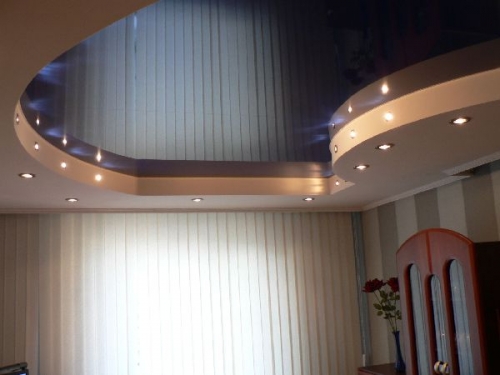
Glossy stretch ceiling sky and hidden monochrome lighting.
Suspended ceiling made of drywall. The room uses several light sources: central chandelier, spotlights and LED tape.
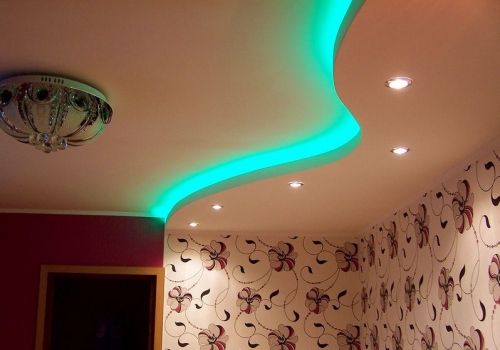
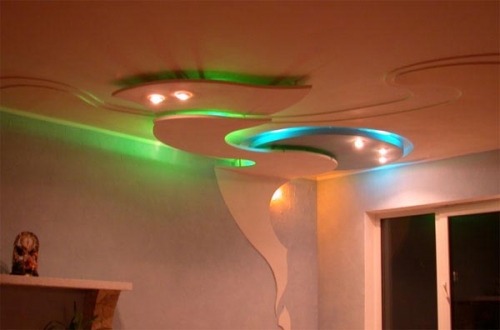
Spectacular solution: a smooth transition of the design of the drywall flow to the wall walls. Multi -colored lighting adds the depth and structurality of the composition.
A harmonious connection of the dark gloss of a stretch ceiling with a light stretch ceiling. External backlight has two directions: down the rooms and on the ceiling.

