In order to align the surfaces of the ceilings and hide the laid on it ...
|
|
The construction of a strip foundation is a rather complicated process, the correct implementation ... |
Frambles and marble floors have always been considered a sign of obvious luxury and refined ... |
How to glue foam ceilings
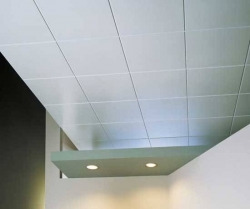
If we talk about the arrangement of the ceiling plane, then at the moment there are many options in this regard. The tension and suspension systems, as well as the designs made of wood, have gained particular popularity. But, perhaps, the most massive spread behind the ceiling tiles of foam. Such material is relatively inexpensive. And if you still add the possibility of arranging such a ceiling with your own hands to this, then you can confidently say that there is no price to the foam ceiling! In addition, you can glue the tile straight or diagonally. Yes, and the design decisions that exist today cannot be counted on the fingers!
Content:
- Features of ceiling tiles
- Making polystyrene plates
- Advantages and disadvantages of the material
- Surface calculation for tiles
- Choosing a foam glue
- Necessary tools
- Glue to the surface
- Playing the ceiling with panels
- Seaming between tiles
- Sticking foam friezes
Features of ceiling tiles
The easiest method to make your ceiling modern is to stick foam tiles on it. Ceiling tiles are universally used in residential premises, even when more and more consumers choose stretch ceilings.
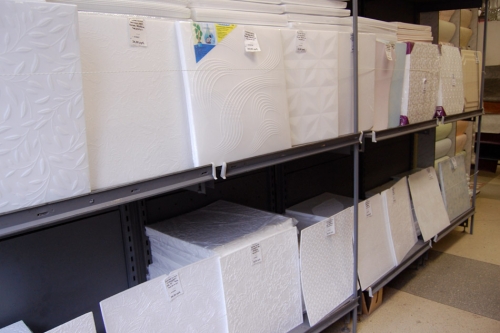
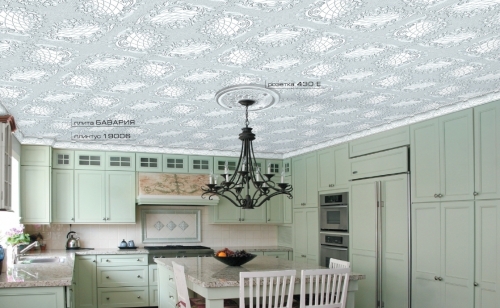
There are different types of foam ceiling tiles, each of them has advantages over the rest. In their shape, tiles are rectangular, square, rhomboat and hexagonal. But the most popular products of traditional square shape. Their front surface is laminated or simple, smooth or embossed, painted under the wood texture, stone, fabric that imitates wood or stucco threads. It is advisable to use laminated tiles in the kitchen, and it is better to choose waterproof panels for the bathroom and other wet rooms.
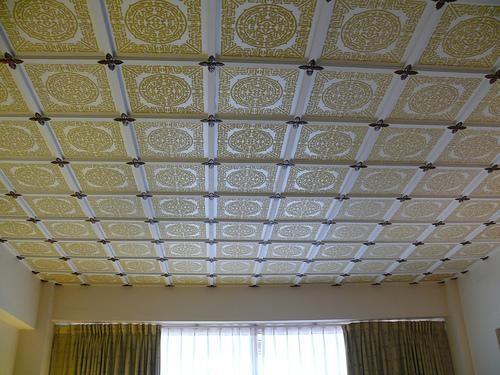
There are also three types of foam ceiling tiles: injective, with a thickness of 9-14 millimeters, which is made by casting and sintering of raw materials in a press form, pressed (stamped), which has a thickness of 67 millimeters, and extruded, compressed from extruded strip and painted or painted or painted or painted or painted or painted or painted or painted Coated film with standard dimensions of 50 by 50 centimeters for square tiles and 100 by 16.5 centimeters for rectangular.
As for the care of foam tiles for the ceiling, it is not whimsical in principle. You will need for this an ordinary sponge, which you are used to washing dishes every day, as well as soap and water. But remember that this technique is suitable exclusively for laminated tiles, but ordinary foam panels on the ceiling should be wiped with a dry cloth or simply vacuumed. Do not wipe such a ceiling with solutions in which there is gasoline or solvent, since in this way the pile of pelioplast can be ruined.
Making polystyrene plates
The technology for the production of foam panels provides for two different methods for obtaining this material: stamping and extruding. The first solution implies the manufacture of panels using special stamps, the source for this purpose is a foam blank.
Similar materials have high granularity and are usually produced in white. But such tiles, if necessary, can cover with special water -dispersion paints or lamination, which gives the material a more refined look and significantly improves its consumer properties.
The material in the second case is also a foam, but molten pre -melted. Tiles are made of molten matter through vacuum-termic molding. The materials that are obtained in this way differ in less porosity, so they are more resistant to mechanical load and are able to extend their useful service.
In addition, at the stage of the production of tiles in this way, it is customary to add different dyes to the working composition to produce products of any color scheme. But it should be noted that the production of tiles with this methodology requires high accuracy for the manufacture of products with the correct geometric characteristics.
When choosing tiles, it should be borne in mind that extruded material has a more pronounced glossy structure, it is easy to wash, it can be used in almost any room. But such tiles, due to the glossy structure, cannot be subjected to staining, and their installation seams are more noticeable.
Stamped ceiling foam tiles are characterized by higher noise and heat-insulating properties, which is explained by greater porosity and thickness of the material, and also differ in the correct geometric dimensions. This allows you to make a ceiling with almost imperceptible mounting seams. But the type of such products is inferior to the first solution.
Advantages and disadvantages of the material
The advantages of plates for creating foam ceilings are as follows:
- Foam ceiling tiles can be glued to almost any surface, ranging from bare concrete and ending with boots made of wood chips.
- Since the temperature of the batteries or radiators in apartments is not more than 80 degrees, you can install such tiles without problems near them.
- Under normal conditions, the useful life of foam tiles for the ceiling is calculated for years and decades, because this material is not afraid of dampness.
- Ceiling plates are quite dense, so they have excellent thermal insulation and soundproofing properties.
- The light weight of the material allows for these purposes to use adhesives that do not differ in great strength, and therefore high cost.
- The ceiling panels are cut well, so their installation does not take much time.
- Foam is a light and environmentally friendly material.
- The price of foam tiles for the ceiling is extremely small, you can also save money without resorting to the service of finishes.
- Ceiling plates give the room a more aesthetic look and in some cases can visually increase it.
With all the advantages, foam ceilings have many disadvantages. The cheapest tiles are not too durable, they turn yellow over time from sunlight, and some of them do not tolerate dampness. However, this drawback can be easily corrected by turning into dignity, because foam tiles are painted with ordinary water -based paint.
But the most important drawback of foam ceilings is the foam vapor permeability is able to create a thermos effect in the room, depriving the wall of the ability to absorb excess humidity. When combining such a ceiling, for example, with vinyl wallpaper, the risk that the fungus will live in the room will increase several times.
Polistyle foam is difficult to have, but it melts easily. With water heating pipes, such a material can be glued closely. But the contact of the panels with lamps, especially with powerful bulbs and an open top, is extremely undesirable. It is better to safe and place the lamps at a distance of at least 20-30 centimeters from the surface of the foam ceiling.
In addition, it should be remembered that foam tiles are easily injured, this applies even to stupid objects. Consider this fact when transporting the material from the store and when performing work on pashing the ceiling tiles. It will also be difficult for you to achieve the impression of the integrity of the surface due to the formation of a large number of seams and joints.
Surface calculation for tiles
First of all, before gluing a foam ceiling, you should stock up on the necessary materials. For this purpose, it is necessary to measure the area of \u200b\u200bthe ceiling base and buy materials with a reserve adjustment. The calculation of the surface on which you will glue the squares of foam is carried out in the following way.
If there is a room with sizes of 3 by 2 meters, then the glued surface is 6 square meters. For the formation of one square meter, 4 tiles are required in size 50 by 50 centimeters. The result is 24 pieces. But it is strongly recommended to add two more tiles to the resulting number of tiles, since the room does not always differ in the correct shape and exact dimensions.
It often turns out that after the sticker procedure, the space can remain on some sides, which you will fill with the material purchased in the reserve. And then I don’t want to go to the store to buy one or two tiles. Consider this upon receipt of the calculated number.
Choosing a foam glue
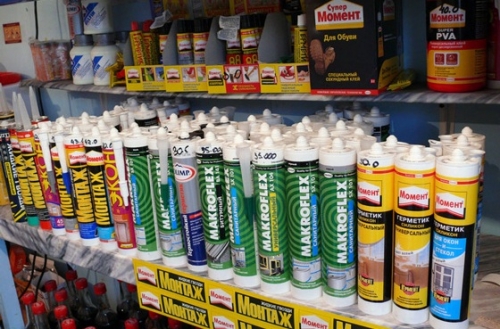
In addition to the foam tiles themselves, you need to stock up on adhesive compositions that are necessary to fix the material to the ceiling. For pasting squares, you can use moment liquid nails because it has a thick consistency and freezes for 15-25 minutes. It is not recommended to use glue from Chinese Dragon manufacturers, since it is excessively liquid, its sticky properties are very low, and the squares will need to be kept on extended hands for a long time a real mockery of oneself.
For 24 squares of the ceiling, you will need approximately 350-400 milliliters of glue. If you buy the composition in a package for a gun in a container of 450 ml, then it will also be quite enough for a ceiling baseboard. Yes, and it turns out cheaper than 2 tubes of 250 milliliters.
For an uneven ceiling, the final putty is considered the best glue precisely with its help at the same time can simultaneously glue foam tiles and level the ceiling without resorting to the use of all kinds of spaces and supports.
Professional masters always do this. To make glue for ceiling tiles with your own hands, it is necessary to stir the ordinary dry finish putty in water, and then add the construction glue of the PVA to the resulting mass. This glue is required in proportions of 200 grams per 1 kilogram of putty.
Necessary tools
In view of the simplicity of finishing work for independent installation of foam tiles on the ceiling, you will need the minimum volume of tools: a painting cord for drawing the ceiling axis, ordinary scissors or a mounting knife for cutting tiles, a spatula for applying finishing putting, measuring tools, a tile and rags for wiping tiles and a tile rags and a tile rags and a tile rags and a tile removal of excess glue.
Surface preparation
The next step is to prepare the surface of the ceiling for the work. Keep in mind that the foam tile can be glued to almost any even surface, which is previously cleaned of garbage and dirt, as well as from the old finish (wallpaper, tiles, whitewashing).
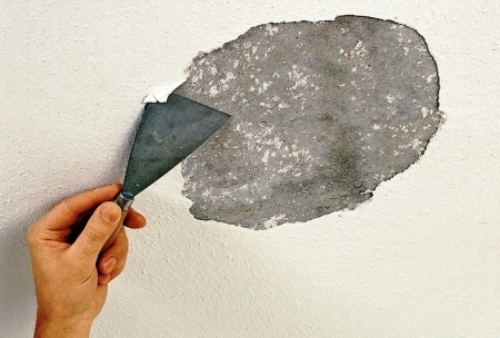
However, before the work itself, it is necessary to subject the basic surface to primer using the composition of a deep penetration. This procedure is required to prevent the spread of harmful pathogens in the foam panels cavity and to improve materials adhesion. Pay special attention to large cavities and bumps, if any.
Ceiling marking
Next, mark the ceiling, which will accurately indicate the location of the tiles on the plane. For marking, you will need an ordinary cord an ordinary rope made of natural material, which is tinted with a powder type with a dye. The dye and cord can be bought in the market or in the nearest construction supermarket.
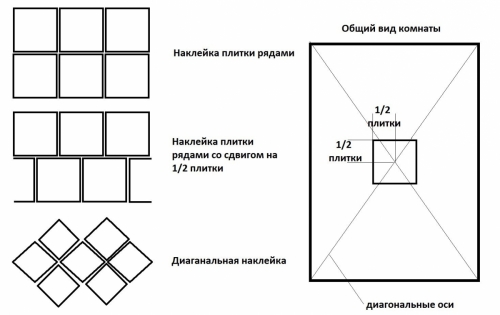
When performing markings, it is recommended to take into account the type of panel location on the ceiling with longitudinal or diagonal rows. Moreover, in the latter version, the operation will be more time -consuming, but they will visually increase the ceiling surface.
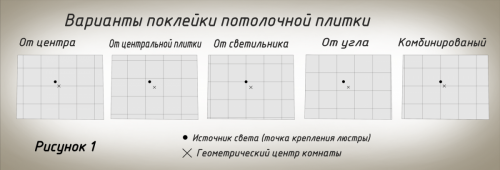
To mark the ceiling, attract a comrade. Tighten the cord with a slight effort from one corner of the room diagonally to the other. Pull the cord a little from the ceiling and release, thereby gets one of the diagonals. The same thing must be done to obtain a second diagonal. After these operations, you will receive two diagonals that intersect in the middle, this will be the center of the room.
Then, using a roulette, measure the same distance from the resulting center along the four lines going to the corners. For example, one and a half meters from the center to the corners, then make marks. Next, take the marching cord and beat off the line labels so that a rectangle or square is obtained on the ceiling. After that, measure the resulting sides of this figure, the opposite lines should be equal in length (an error of 1-4 millimeters is allowed).
If the opposite sides of the geometric figure differ by more than 6 millimeters, then you should again measure the segments from the center so that they are the same. After all, using a tape measure, it is necessary to find the middle of the sides at the resulting rectangle or square. Make lines through the center with a marginal cord according to the marks. Along these axes, you need to glue the tile.
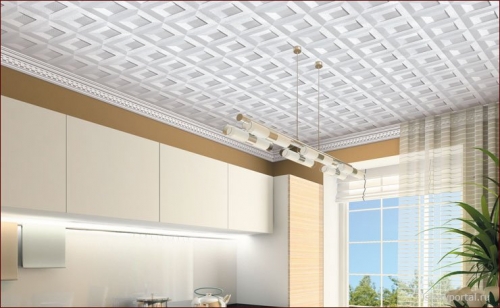
Many developers prefer foam ceiling cards to stick diagonally, as shown in the photo of the foam ceiling. In this case, you need to place the axes a little differently, they should pass from one corner to another and are relatively placed relative to each other at an angle of 90 degrees. If the angle is fuzzy, then at one moment the cards may occur.
Glue to the surface
The rules for gluing polystyrene plates may vary slightly, depending on the glue used. Glue must be applied completely or dashed to the protrusions, which are available on the back of the panel or in the corners and in the middle.
In order not to close the marked axes, putty or glue is best applied directly to the tiles, this is done using a comb, which is used to facing surfaces with tiles. If there are irregularities on the ceiling to a centimeter, give preference to a tool with a large tooth, at least 12 millimeters. If this is not enough, then additionally smear it and the ceiling must be done carefully so that the axes are not erased. The ceiling and tiles should be spread in the opposite direction.
If you use a special glue of the type Eltitan, then before laying the tiles you need to withstand for 10-15 minutes. It is convenient to apply glue immediately by 3-4 panels so that by the time of applying glue to the next batch of tiles, you can already glue the first of them. It is advisable for a porous ceiling to apply a thick layer of mastic.
Playing the ceiling with panels
After marking the ceiling, you can go to the pasting of the squares to the surface. If the squares have a relief, you need to see if the same picture is present on all squares. If the same, you will need to glue the panels in a certain pattern, and if the image is different, then you can glue products without such a pattern.
So, you need to start pasting with the resulting center of the room, since often in the process of gluing tiles, many are faced with a failure of the joints between individual tiles. Gradually fill the entire surface. Installation of the foam ceiling is recommended for de -energized electrical wiring and always in gloves so as not to stain the panels. Glue the first tile so that one of it is placed exactly at the central point where 4 central tiles will converge.
At this point there may be fasteners for the lamp, in this case the corners of the tiles must be cut off. The place of cuts is covered in the future plate of a chandelier or a ceiling outlet. The edges of the panel must be leveled along the previously planned perpendicular lines. Press the tile tightly when gluing to the ceiling, but make sure that there is no dent left.
The following tiles need to be placed in parallel rows, do not allow the formation between the edges of the gaps. You should focus on triangular arrows that are available on the back of the panels, they should look in one direction.
The last rows of panels, most often it is necessary to cut with a knife to the desired size, and after the fitting, apply glue. After filling this space, small cracks remained on the ceiling on the ceiling, to fill them, you will need a spare square that you purchased. Measure how width the strip is required, cut and glue it like an ordinary square.
Do not seal the entire surface at once. The glue dries quickly, so it needs to be washed, otherwise you have to scrap the glue along with pieces of foam tile. It is necessary to gradually seal a small area, fill the seams and wipe the remains of the glue with a damp cloth. The gap between the extreme panels and the wall must be covered with ceiling plinths.
Seaming between tiles
Most failures in the seams of foam tiles are obtained due to their different sizes to prevent this, it is better to stick the panels not of a small distance among themselves 1-2 millimeters. Subsequently, fill these seams with the same putty. The glued ceiling tiles with neatly covered seams immediately after drying is recommended to be painted with water -based paint in order to finally hide all the flaws in the work. Foam can be repainted to 5-7 times.
In principle, ceiling tiles without seams are possible. In order for the coating to look like a whole, and water does not penetrate between the seams, it is recommended to fill all the gaps between the panels with sealant. Silicone sealant is resistant to temperature and water. After filling the seams, it is recommended to smooth it with your fingers or a trowel, and remove the excess with a damp cloth.
Sticking foam friezes
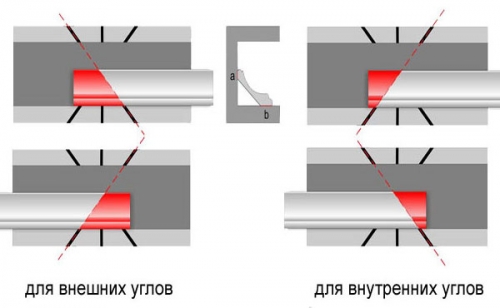
The final stroke of gluing foam tiles on the ceiling is a sticker of polystyrene fries. They, like tiles, have a wide variety of shapes, textures and colors. For small rooms, it is recommended to choose narrow skirting boards with a small discreet image. For large rooms, it is better to take massive. Frizes must be glued from the corners, adjusting along the length of the wall and making the insert between the previous strip and already glued from the corner.
You can stick frieze before or after pasting with wallpaper. In the first case, high accuracy is required in the procedure for fitting the wallpaper themselves, or the use of a wallpaper decorative frieze. Now you can glue the ceiling outlet by cutting a hole for a chandelier in the middle.
It is also possible to cover the foam ceiling with paint. Light tones will look best. At the same time, you can paint the ceiling baseboard. At the end of the work, close the doors and windows tightly in the room to eliminate the movement of air flows.
We told you about the features, advantages and price of plastic tiles on the ceiling. There are many foam panels for the ceiling: rectangular and square, thin and thick, with and without seams, white and multi -colored. They do not count all, but they are united by a fairly simple installation procedure.



good
good
Thank you. Very useful
Thank you. Very useful instruction. Otherwise I would have pasted it right now ... :)
It's a pity that they underestimate
It is a pity that foam tiles are underestimated! But with them a dream will turn off the even modern ceiling without aligning http: //remontiruuruysnami.ru/mechta-o-rovnom-sovremennom-potolke-ispolnima -... Although many people think that it is no longer fashionable, but it is cheap and possible Find beautiful, even, white tiles, as after an expensive putty and alignment ..)